
Creating and managing local users on an OVHcloud account
Learn about the privileges a user can hold, as well as the methods for adding and managing users and groups through the OVHcloud Control Panel.
With OVHcloud, you can create additional users with read or write access to your customer account. This means that you can grant other members of your company access to your OVHcloud services, without having to resort to risky practices like sharing passwords or two-factor authentication details.
- User management is different from contact management. A user will have access to all sections of the OVHcloud Control Panel according to the level of rights he's granted.
- The purpose of contact management is to delegate full management of the administrative, technical, and billing aspects of one or more services on your OVHcloud account.
Requirements
- An active OVHcloud account
- Access to the OVHcloud Control Panel
Instructions
Understanding identities
Local users are one of the types of identities that can be set up on your OVHcloud account. Other account types are described in the related documentation.
User management
Add a user
From the OVHcloud Control Panel, navigate to the Identities section via the Identity, Security & Operation menu.
In the Local users tab, click the Add user button.
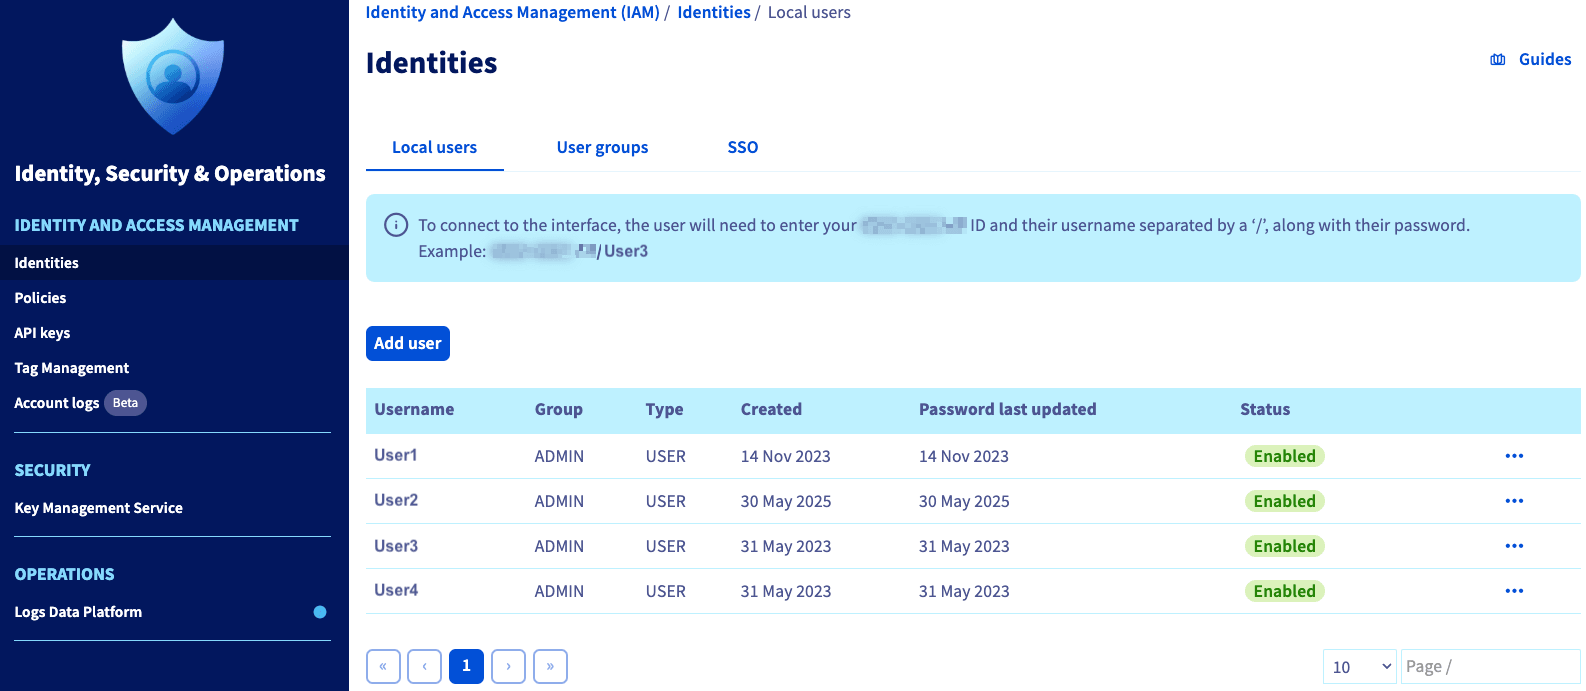
In the pop-up window, fill in the fields and select a Group. Click Confirm to add your new user.
WARNING: Any user with an "ADMIN" role has complete control over your account and services, including:
- Creating services for which you will be charged,
- Deleting services, which is sometimes irreversible,
- Adding or deleting other users with an ADMIN role, and
- Changing the account's contact, billing, and payment information.
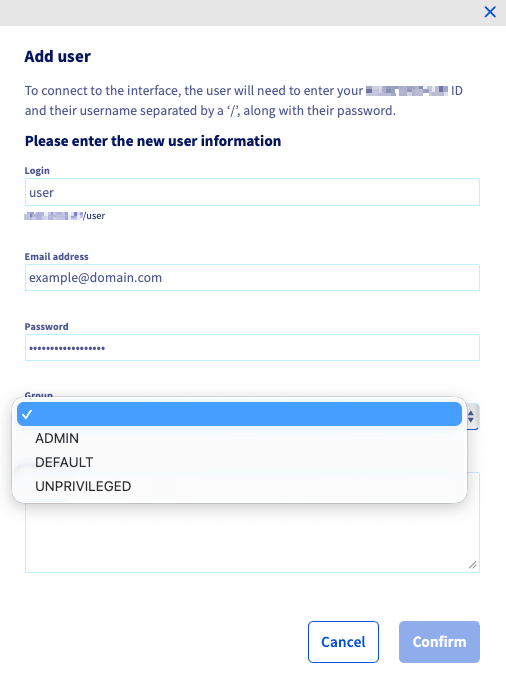
The user then gets their own ID made up of your account’s numeric ID (which is listed in the “Local users” tab) and their username, with the two values separated by a “/”.
Example: 1234-567-89/user.
The user you have created can then log in to the OVHcloud Control Panel using this ID.
They can also change their password and secure their own access to your account by enabling two-factor authentication (this is only for their access as a user). To find out how to enable two-factor authentication, you can refer to this guide.
Manage users
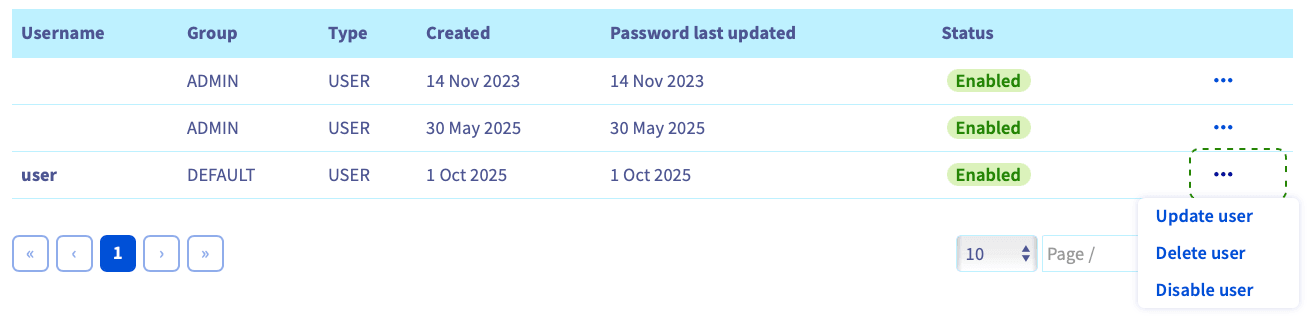
You can update, delete, or disable a user by clicking on the more options ... button to the right of the user’s name.
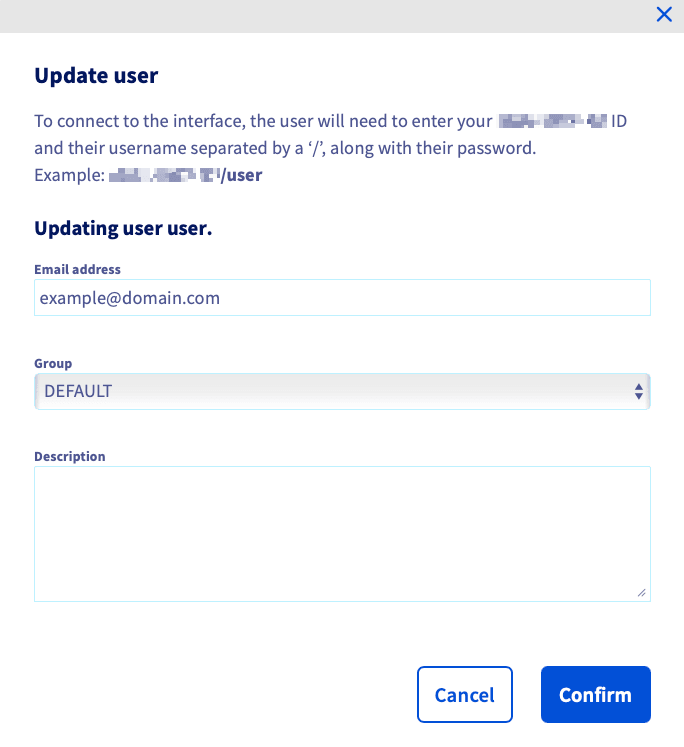
When you update a user you can update their email address, group, and description.
NOTE: After the creation of a new group, you will have to update the Group field for any users you wish to add to it.
Group management
Add a group
Switch to the User groups tab, click Declare a group.
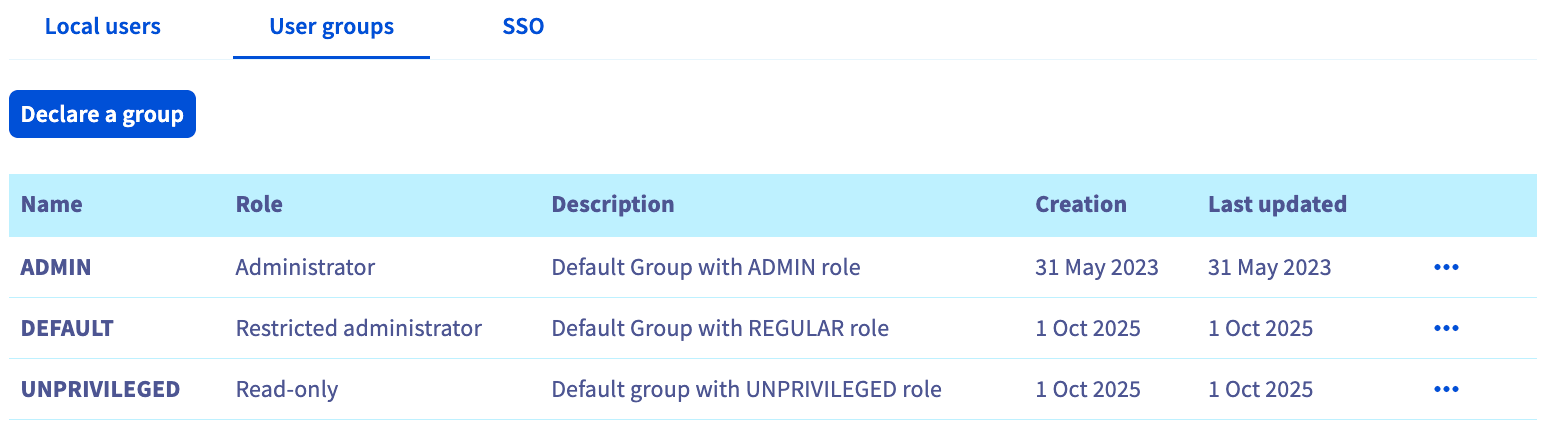
A window will pop up and you will need to complete the required fields.
Groups give a default privilege level for the users they contain, according to the role you choose:
WARNING: Any user with an "ADMIN" role has complete control over your account and services, including:
- Creating services for which you will be charged,
- Deleting services, which is sometimes irreversible,
- Adding or deleting other users with an ADMIN role, and
- Changing the account's contact, billing, and payment information.
Click Confirm to create the user.
NOTE: After the creation of a new group, you will have to update the Group field for any users you wish to add to it. See the Manage users section of this article for more information.
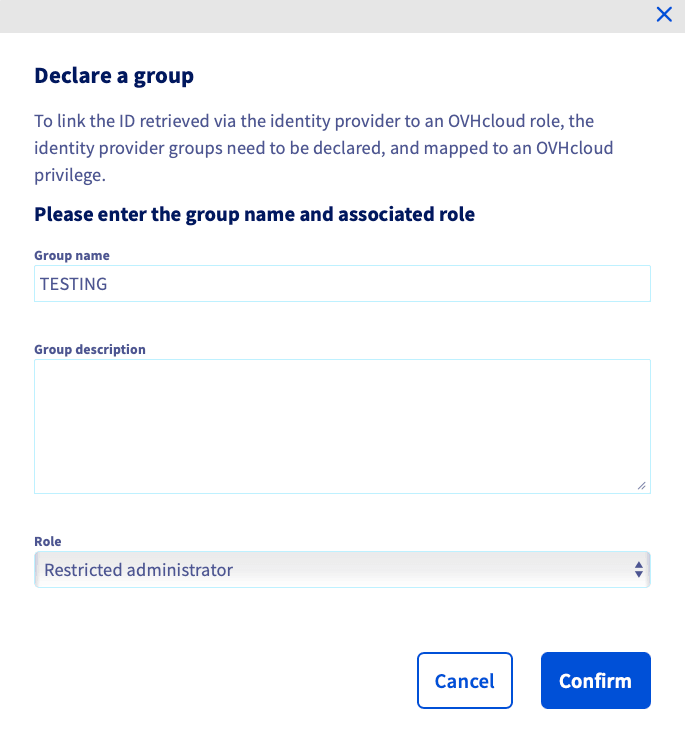
Manage groups
You can update or remove a group by clicking on the more options ... button to the right of the group name.
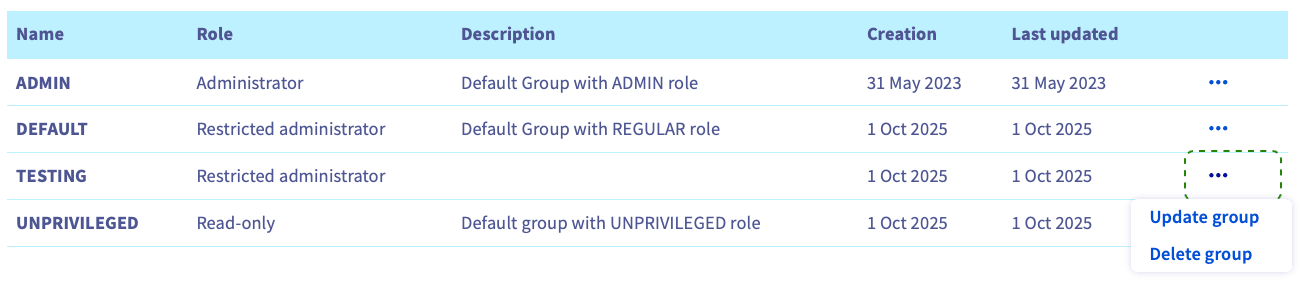
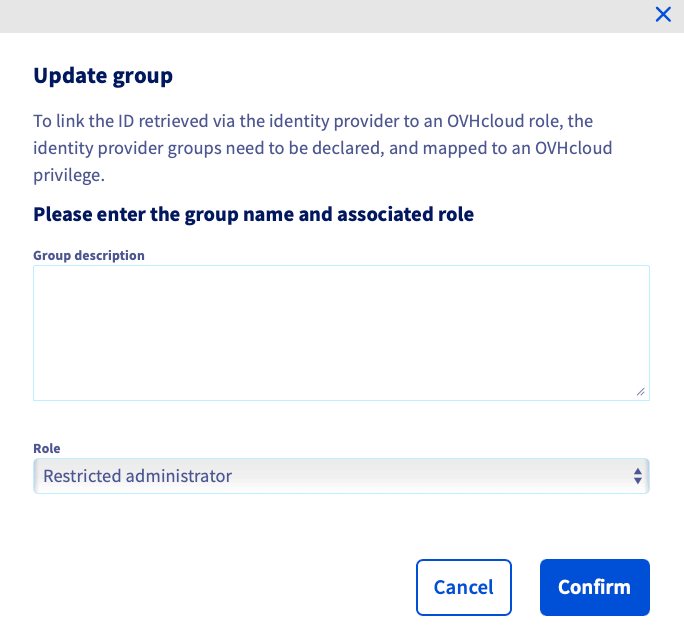
When you update a group you can update its description and role.
Rights management
On top of the role assigned to user groups, you can fine-tune access privileges using OVHcloud IAM. OVHcloud IAM policies management is covered by the dedicated guide.
Go further
Browse all the Account information guides.
Browse the rest of the OVHcloud US documentation for guides on our other products and services.