
Replacing OVHgateway
NOTE: OVHcloud provides services for which you are responsible for their configuration and management. You are therefore responsible for their proper functioning.
This tutorial is designed to help you as much as possible with common tasks. If you are having difficulty performing these actions, please contact a specialized service provider. OVHcloud cannot provide you with technical support in this regard.
Requirements
- One Nutanix cluster provided by OVHcloud
- Access to the OVHcloud Control Panel
- Access to your clusters via Prism Central
Instructions
The OVHgateway uses two network cards by default:
- One on VLAN 0 (base) connected to the internet with an additional OVHcloud IP address.
- One on VLAN 1 (infra) connected to the local administration network with a range of IP addresses, in this example in 192.168.10.0/24.
In our guide, we will replace this gateway with the network operating system pfSense Community edition without software support.
It is entirely possible to use this guide to install other network operating systems compatible with AHV.
Download sources for pfSense installation
Download an ISO image for the pfSense installation from this link: Downloading pfSense.
Using this documentation, add the pfSense ISO image to your Nutanix cluster.
Create the GW-PFSENSE virtual machine
In Prism Central, navigate to Infrastructure > Compute > VMs > Create VM.
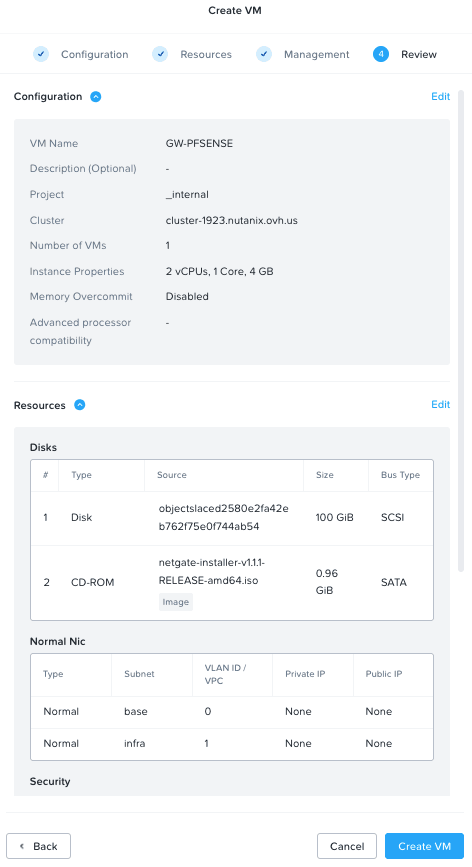
Click here for the full VM specifications.
Create a virtual machine with these settings:
-
Name:
GW-PFSENSE -
vCPU(s):
2 -
Number Of Cores Per vCPU:
1 -
Memory:
4 GB -
Boot Configuration:
Legacy BIOS -
Disk (1)
- Type:
CD-ROM - Operation:
Clone from image- Image: Your pfSense ISO file
- Bus Type:
SATA
- Type:
-
Disk (2)
- Type:
DISK - Operation:
Allocate on Storage Container - Bus Type:
SCSI - Storage Container: Select an Object Storage container with at least 100 GB of storage space.
- Type:
-
Network: two network cards
VLAN 0 (base)VLAN 1 (infra)
You can use our guide on virtual machine management to create this virtual machine.
Shut down the OVHgateway virtual machine
To avoid duplicate IP addresses on the network, stop the OVHgateway virtual machine before starting the new virtual machine on pfSense.
Click here for full instructions.
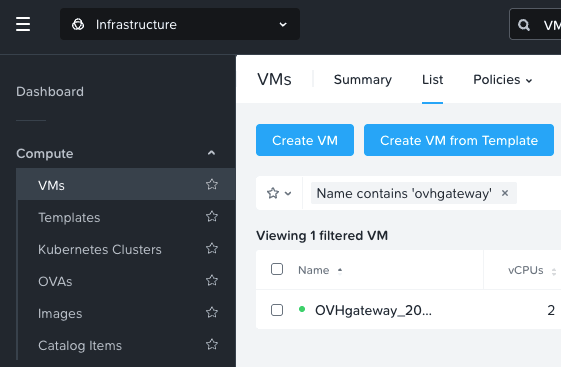
In Prism Central, navigate to Infrastructure > Compute > VMs.
Click on the OVHgateway virtual machine.
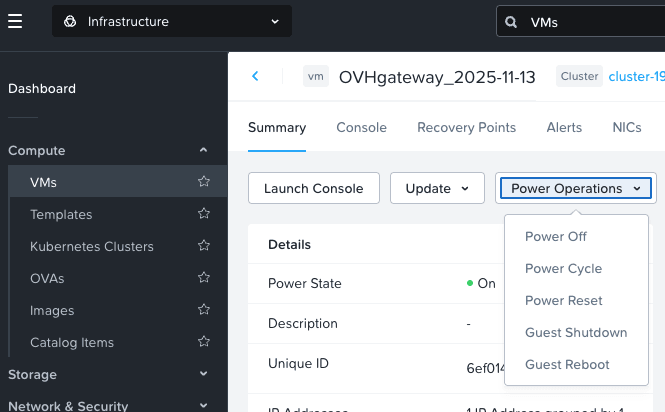
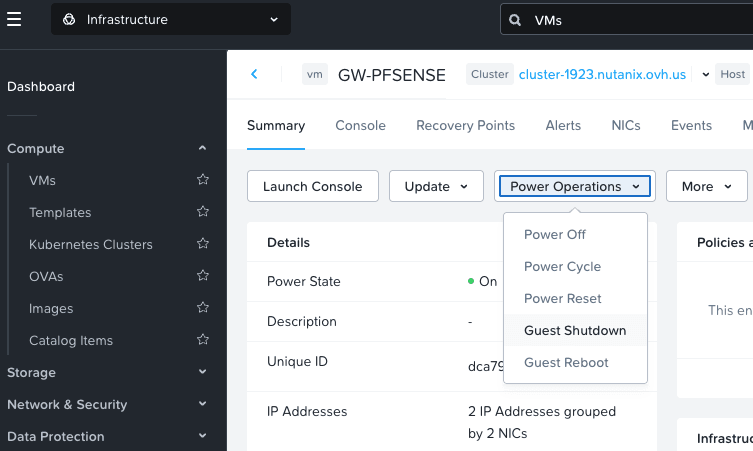
From the Power Operations menu, select Guest Shutdown.
Retrieve the public address in the OVHcloud Control Panel
Retrieve information about the OVHcloud gateway network settings.
Log in to the OVHcloud Control Panel, select your Nutanix cluster, and find the information in the IPFO field.
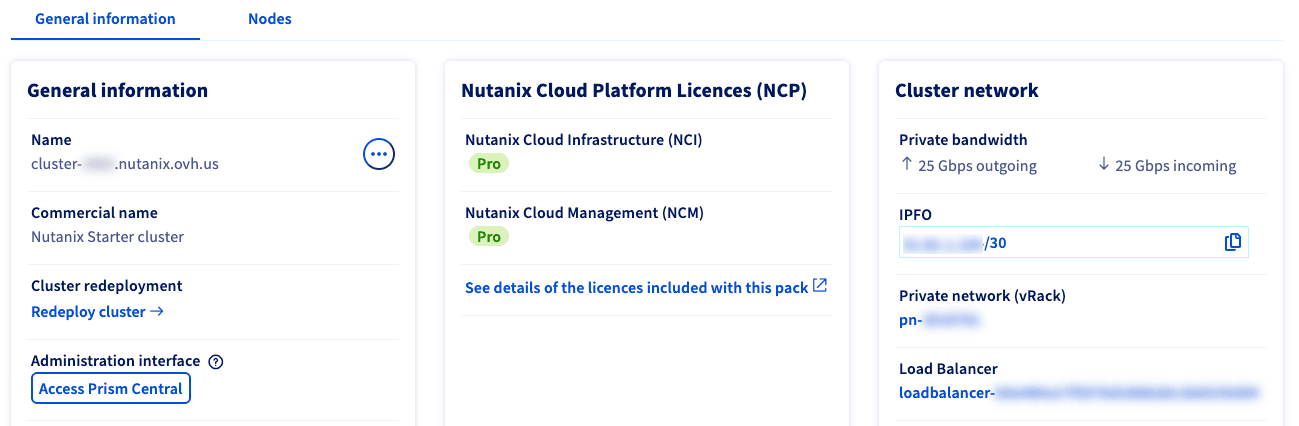
IPFO is a range of four addresses. The first and last are reserved, the third is on OVHcloud hardware and serves as an Internet gateway. The only usable IP address is the second address in the range.
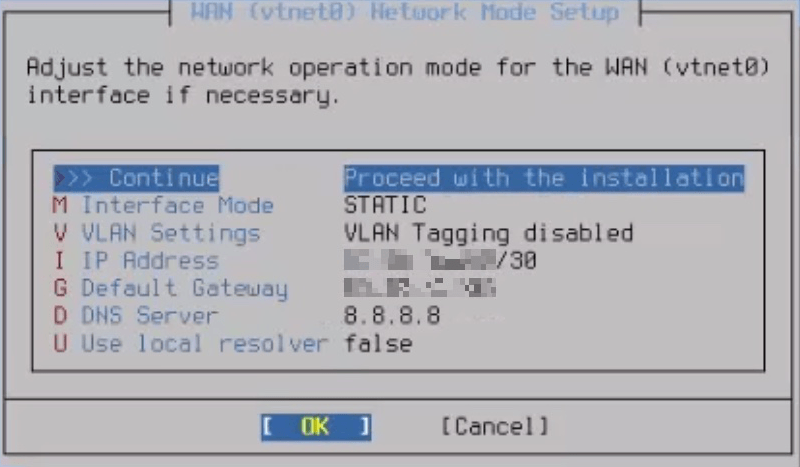
During installation, we will reuse this information to assign it to the new GW-PFSENSE virtual machine.
For example, if the IPFO address displayed on the client site is 198.51.100.0/30, use:
- 198.51.100.1 for the WAN interface address.
- 198.51.100.2 for the gateway on the WAN interface.
Start the GW-PFSENSE virtual machine
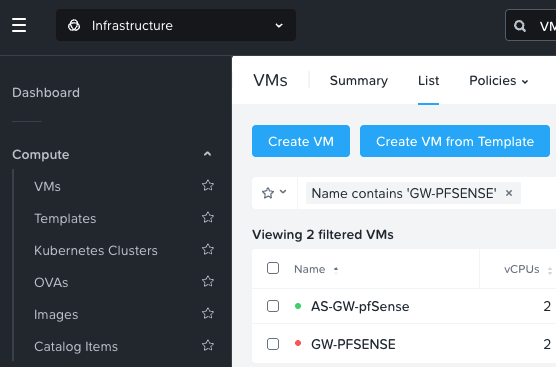
Power on the GW-PFSENSE VM and launch the console.
Click here for full instructions.
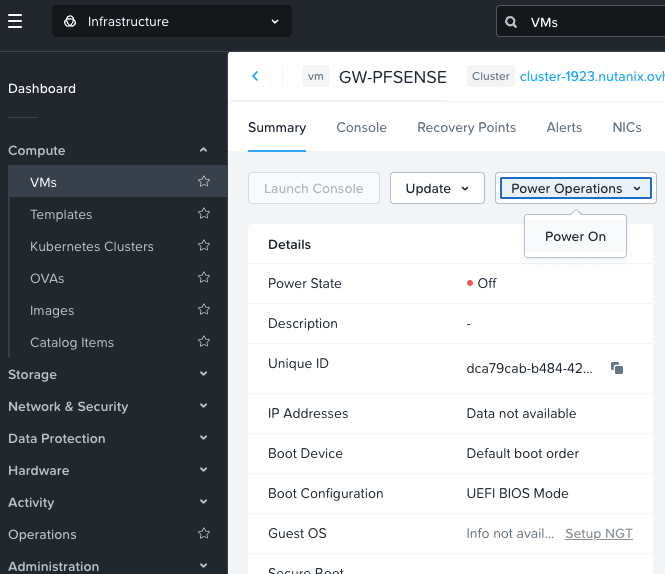
Go back to virtual machine management in Prism Central and click on GW-PFSENSE.
From the Power Operations menu, select Power On.
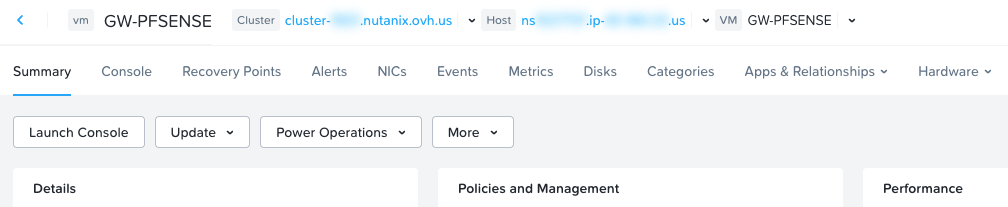
Once the VM is powered on, click Launch Console.
Install pfSense
NOTE: These images and instructions are specific to the pfSense ISO. See the pfSense official documentation for more information.
Click here for full installation instructions.
Accept the license information
Review the pfSense license information and press the Enter key to accept it.
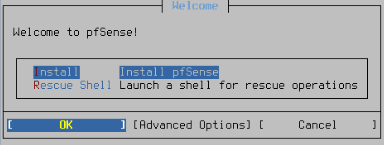
Welcome
Choose Install, switch to OK with the Tab key, and press Enter.
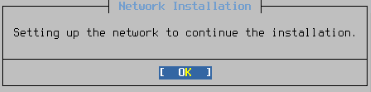
Network Installation
Choose OK by pressing Enter.
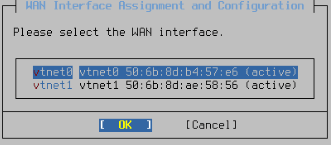
WAN Interface Assignment and Configuration
Leave vtnet0 selected, and press OK.
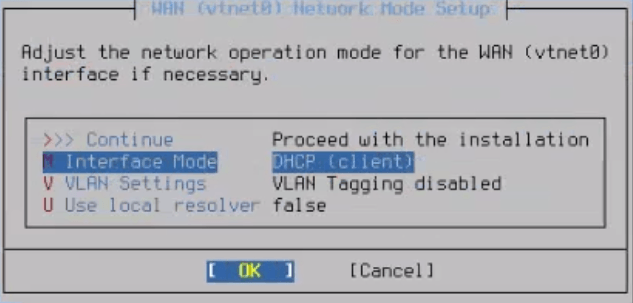
WAN (vtnet0) Network Mode Setup
Change the Interface Mode to Static by pressing OK.
Modify the following areas with the correct configuration settings:
Choose Continue and select OK.
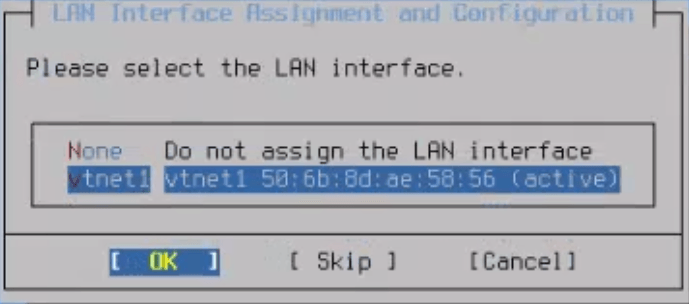
LAN Interface Assignment and Configuration
Choose vtnet1 and select OK.
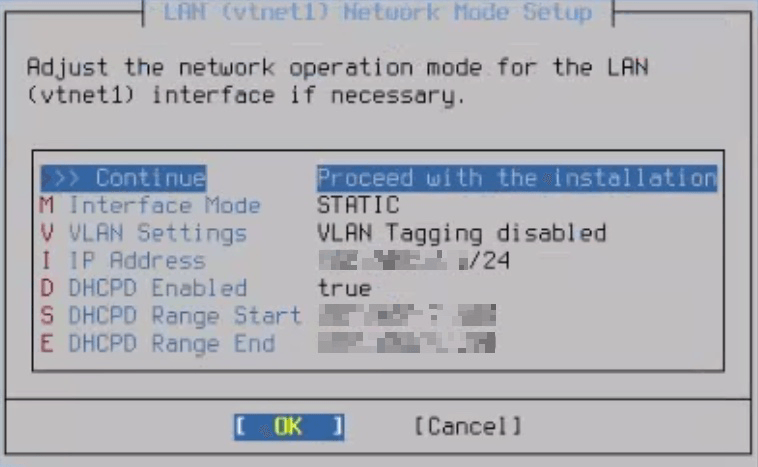
Choose Continue and select OK.
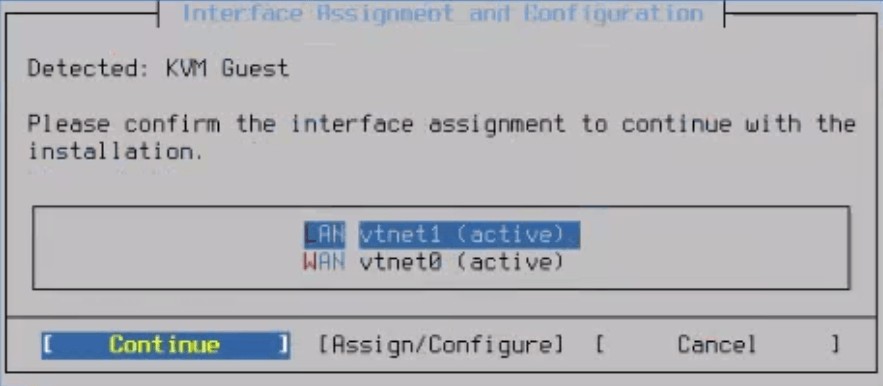
Leave LAN selected, and press Continue.
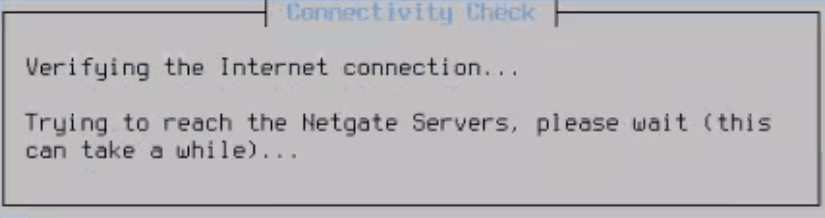
A connectivity check will run.
Final installation steps
Choose Install CE.
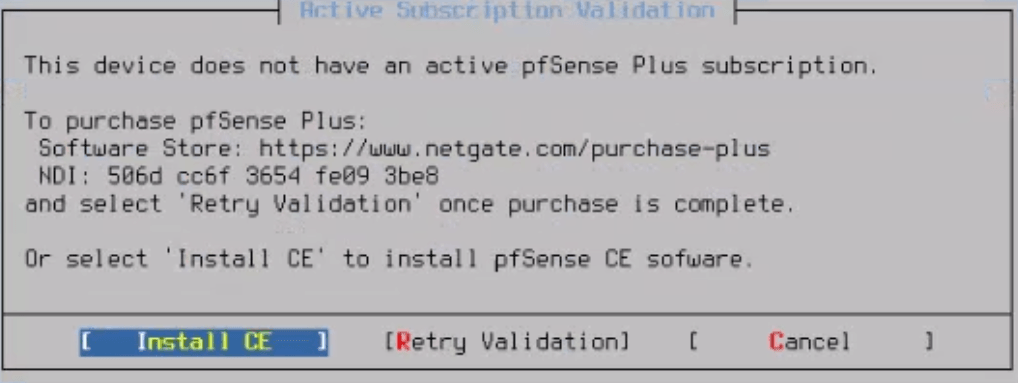
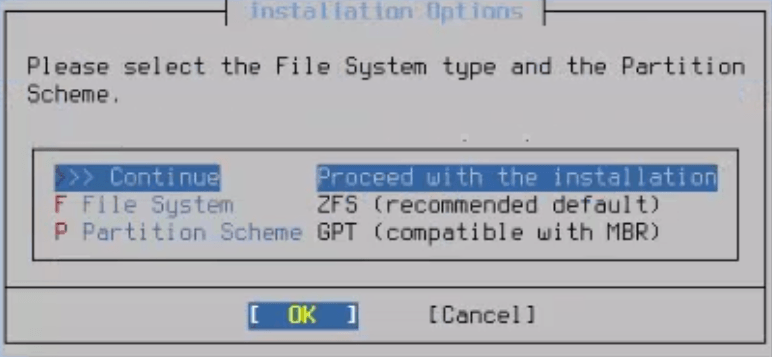
Choose Continue and select OK.
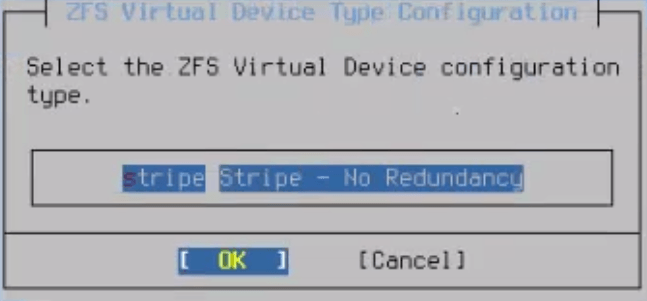
Choose stripe and select OK.
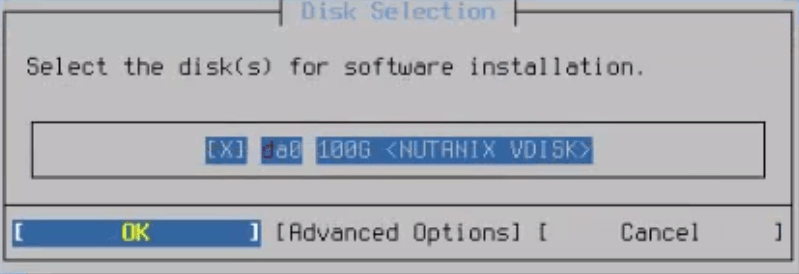
Select NUTANIX VDISK and press OK.
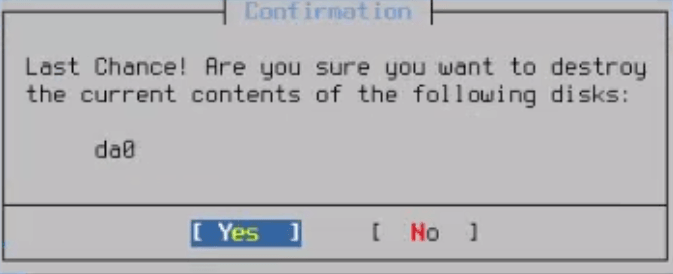
Confirm by pressing Yes.
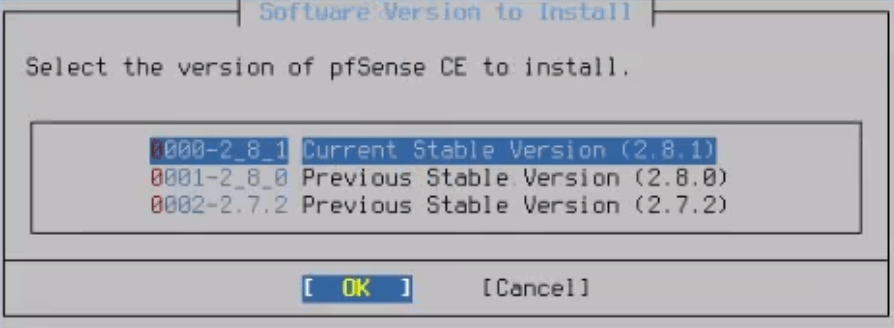
Select a version to install and press OK.
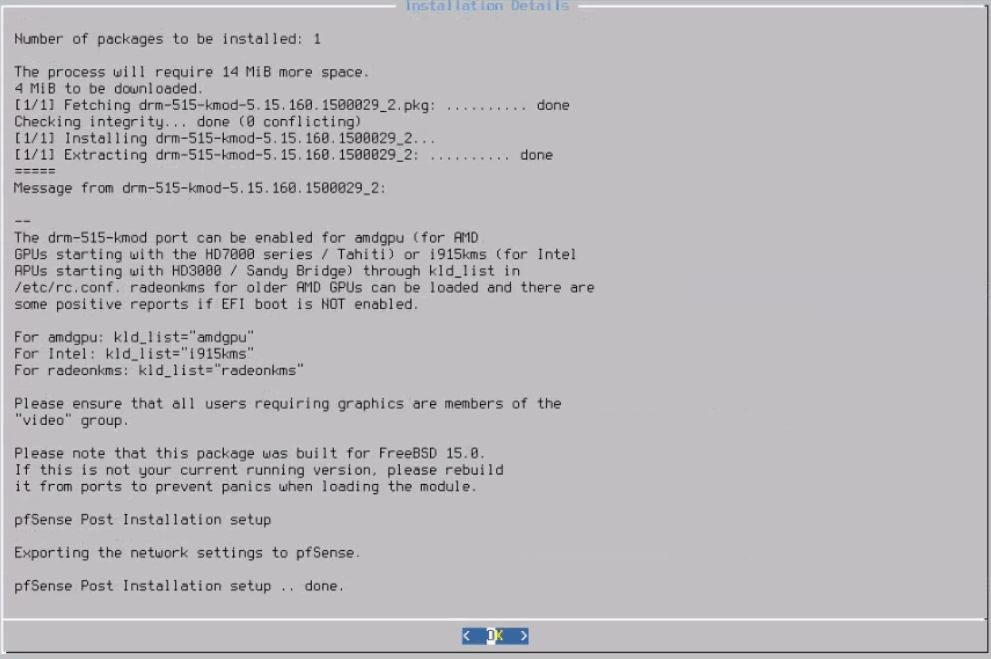
When the installation has finished, press OK.
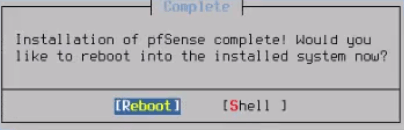
Select Reboot.
Eject the pfSense CD-ROM from the GW-PFSENSE virtual machine
Eject the pfSense ISO image from the VM's storage disks.
Click here for full instructions.
From Prism Central, go back to the GW-PFSENSE virtual machine management interface.
Click the Power Operations menu and select Guest Shutdown.
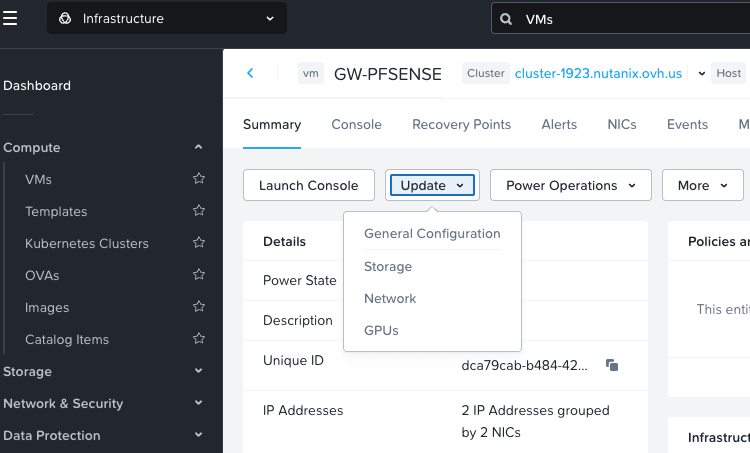
Then, click the Update menu and select Storage.
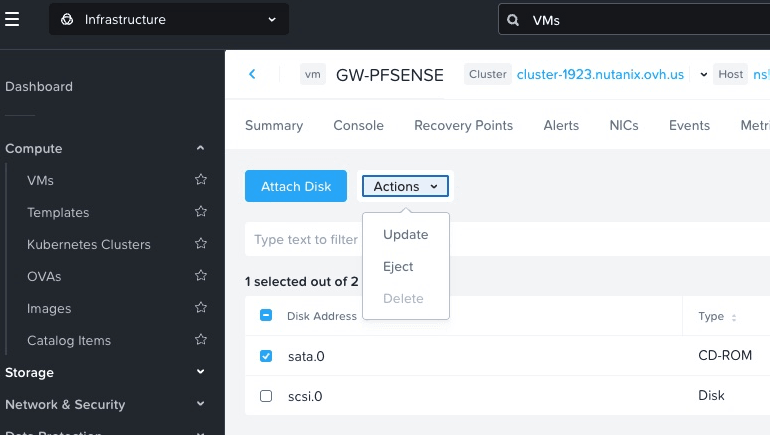
Select the CD-ROM disk, click the Actions menu, and select Eject.
Return to the Power Operations menu and select Power On.
Click Launch Console to continue the installation after startup.
Configure some options through the web interface
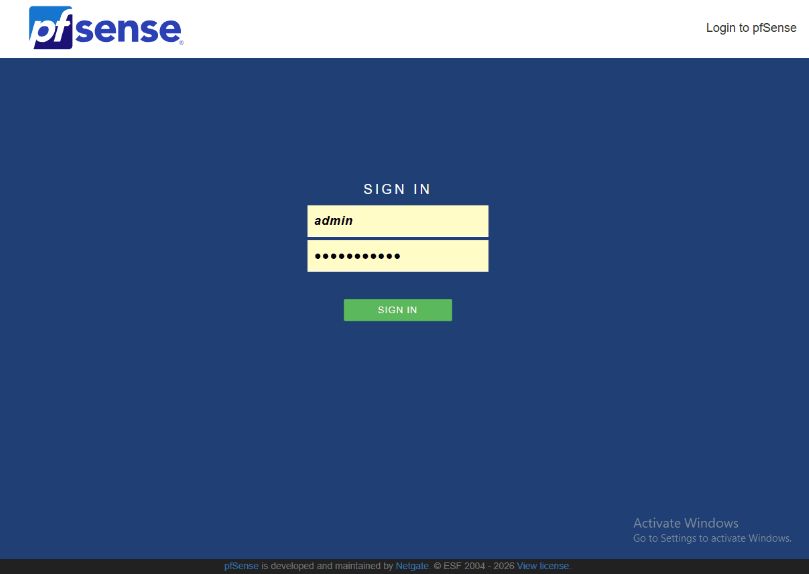
Connect to the pfSense Web Console with the URL https://192.168.10.254 from a cluster virtual machine on the AHV LAN: Base.
Enter the following information:
- User account: admin
- Default password: pfsense
Then click SIGN IN.
Change the pfSense default password
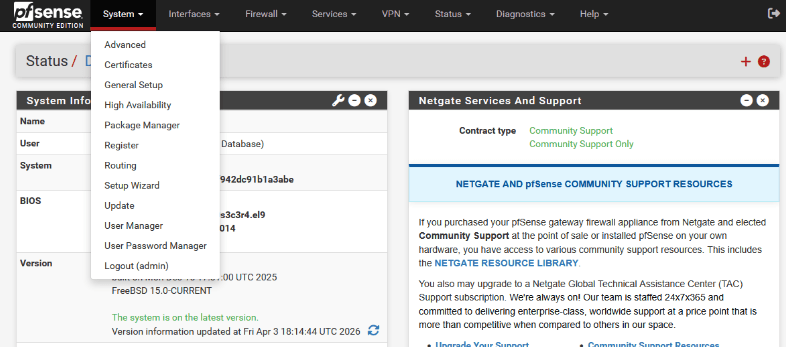
From the System menu, choose User Manager.
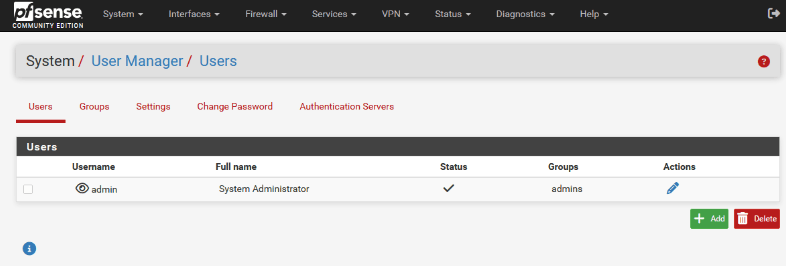
Click the Pen icon on the right-hand side.
On the following screen, choose a new password, retype it to confirm, then scroll to the bottom of the page and click Save.
Add a rule to allow remote administration from a public address
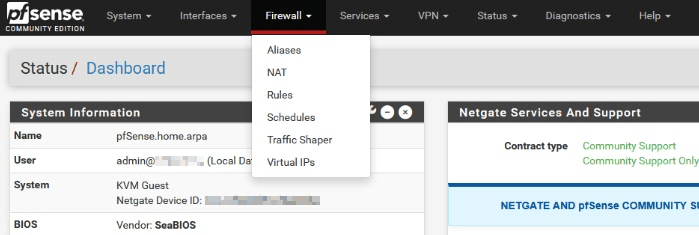
Go to the Firewall menu and choose Rules.
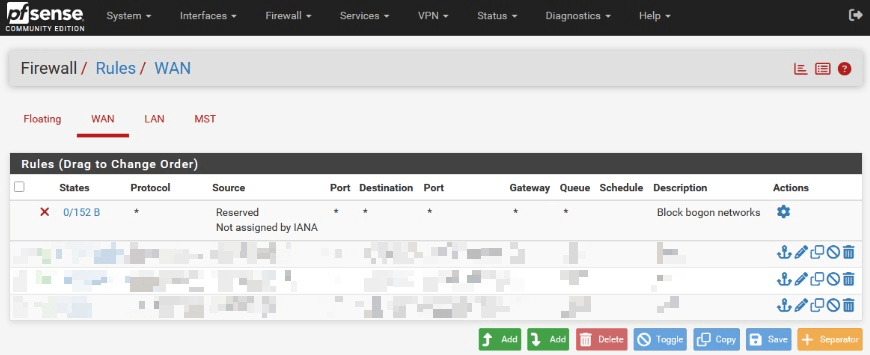
Check that you are on the WAN tab, then click the ⬆️ Add button (at the bottom) to create a firewall rule.
Set these options:
-
Edit Firewall Rule
- Action:
Pass - Interface:
WAN - Address Family:
IPv4 - Protocol:
TCP
- Action:
-
Source
- Select
Address or aliasfrom the drop-down menu. - Enter the
public addressthat can connect to the pfSense firewall.
- Select
-
Destination
- Destination:
WAN address - Destination Port Range From:
HTTPS - Destination Port Range To:
HTTPS
- Destination:
Click Save at the bottom of the page.
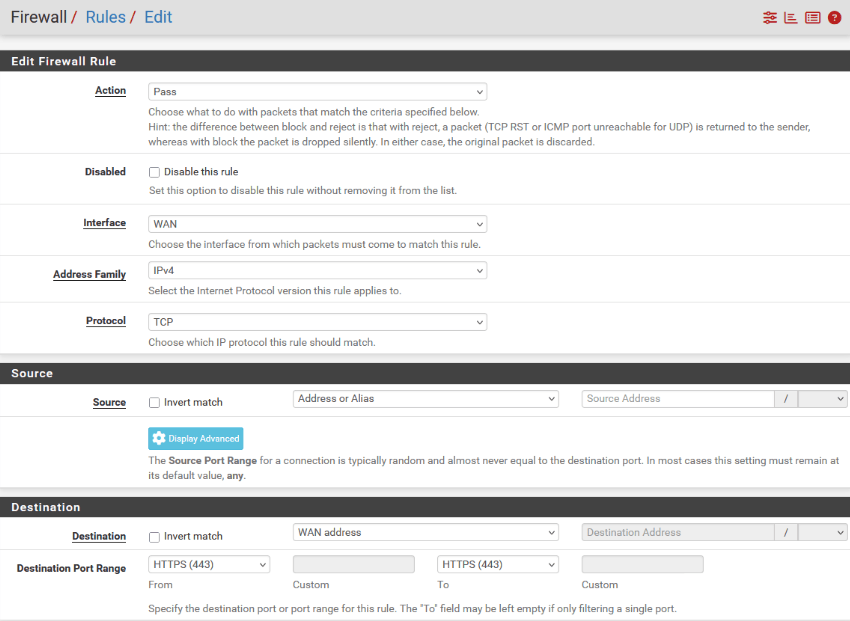
Once you have returned to the rules list, click Apply Changes to activate the rule.
The pfSense administration interface is then accessible from the Internet, only from the authorized network in HTTPS, here https://198.51.100.1.

Configuring Internet Access in a New VLAN
We will create a new subnet in VLAN 2 with an address range in 192.168.2.0/24 and a gateway in 192.168.2.254.
PfSense VM modification
Log in to Prism Central to make these changes:
Use the Isolating management machines from production guide to create a new VLAN on your Nutanix cluster with these settings:
- VLAN name:
Production - VLAN number:
2
Your new network must appear in Subnets.
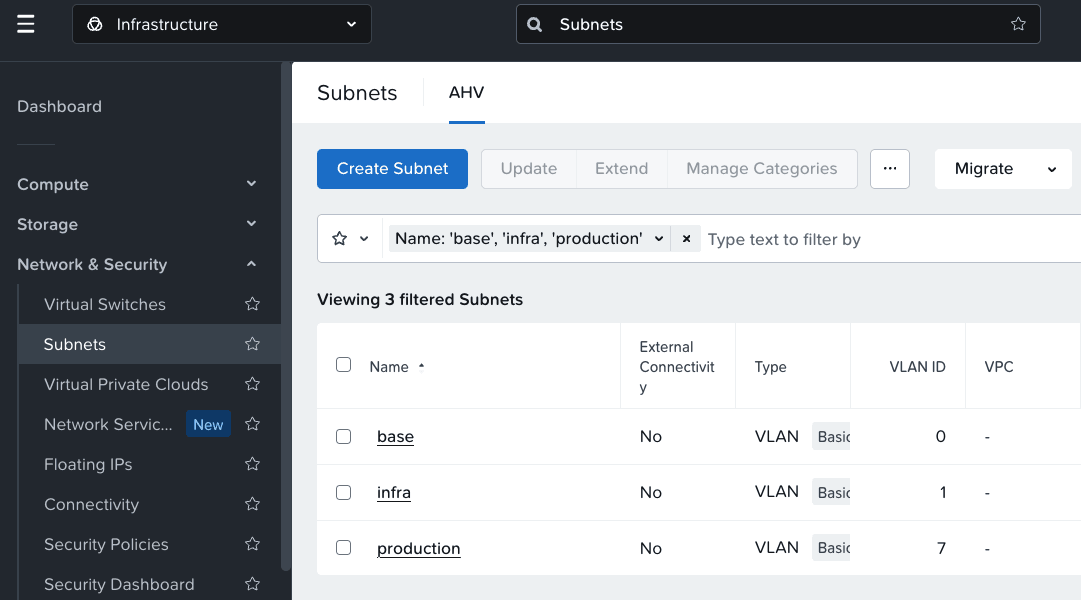
Now that the new subnet has been created, we will add an adapter to the configuration of your GW-PFSENSE virtual machine.
Via the virtual machine management, click on your GW-PFSENSE virtual machine, go to the Update menu, and choose Network.
On the next page, click + Attach to Subnet.
Choose the Production subnet and click Save.
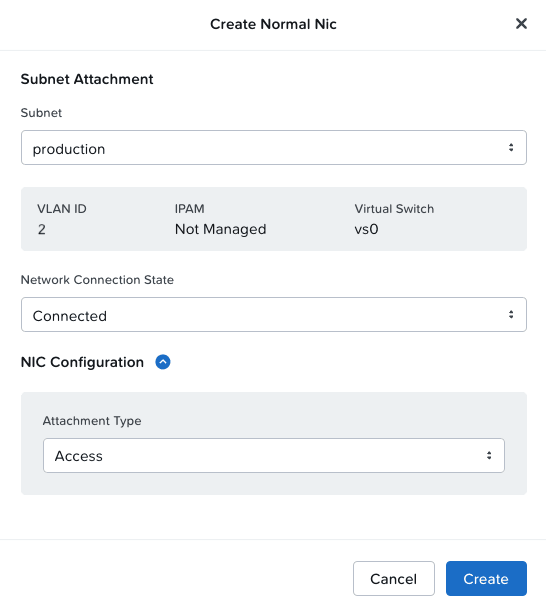
Enable and configure the new network adapter on pfSense
Log in to the pfSense interface in https, with the public address (for example, https://198.51.100.1) in your pfSense administration interface, and follow these instructions:
Go to the Interfaces menu and click Assignments.

Click + Add to the right of Available network ports.
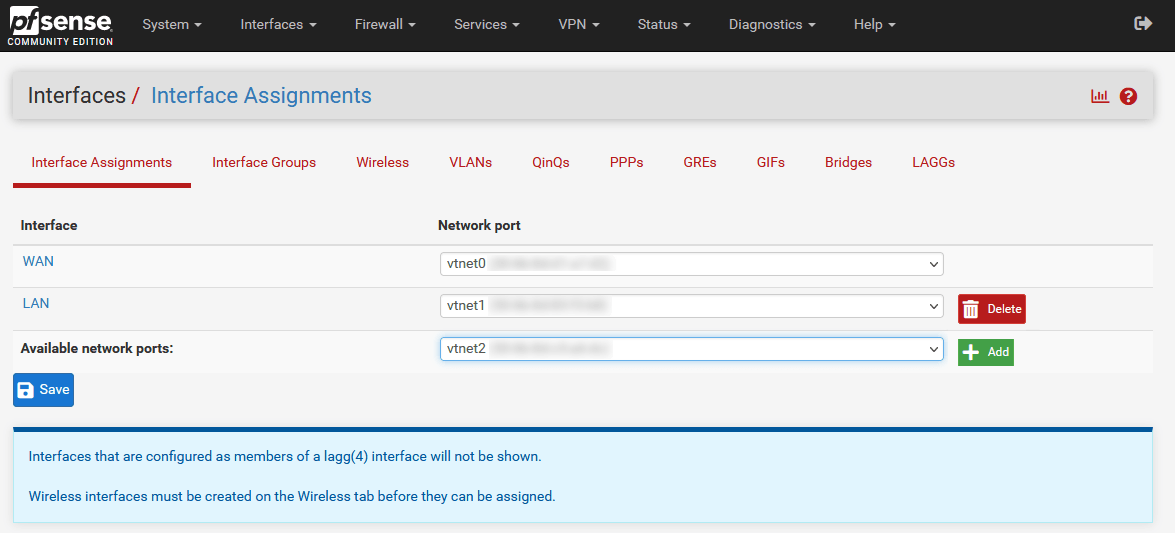
Select the vtnet2 interface and click Save.
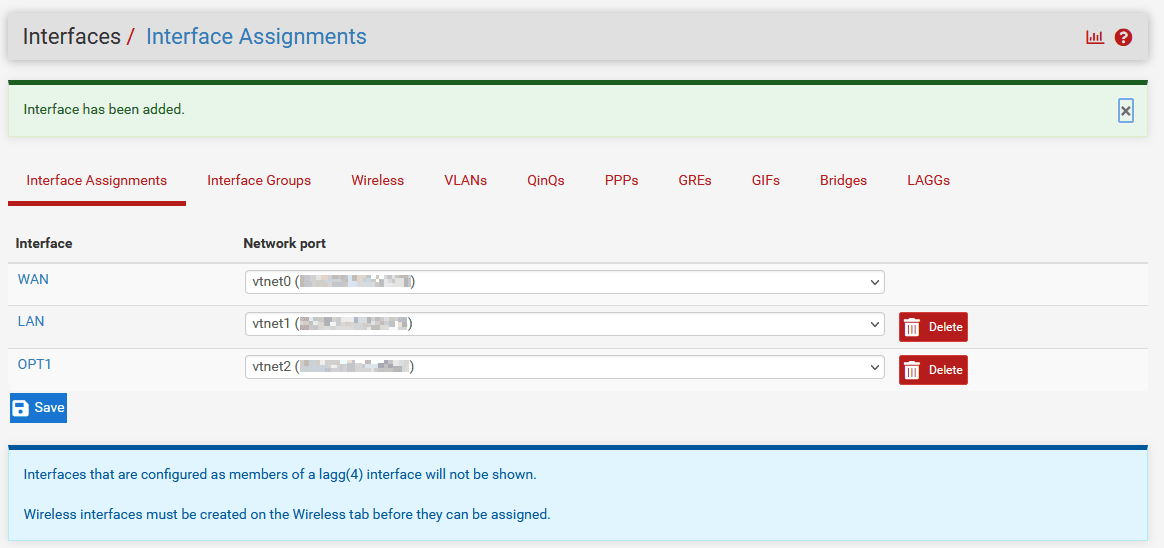
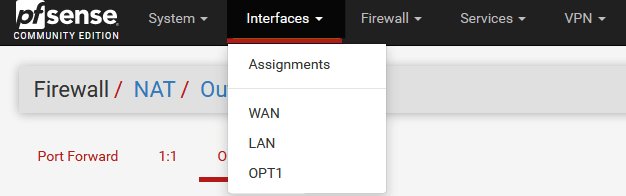
In the Interfaces menu, click OPT1.
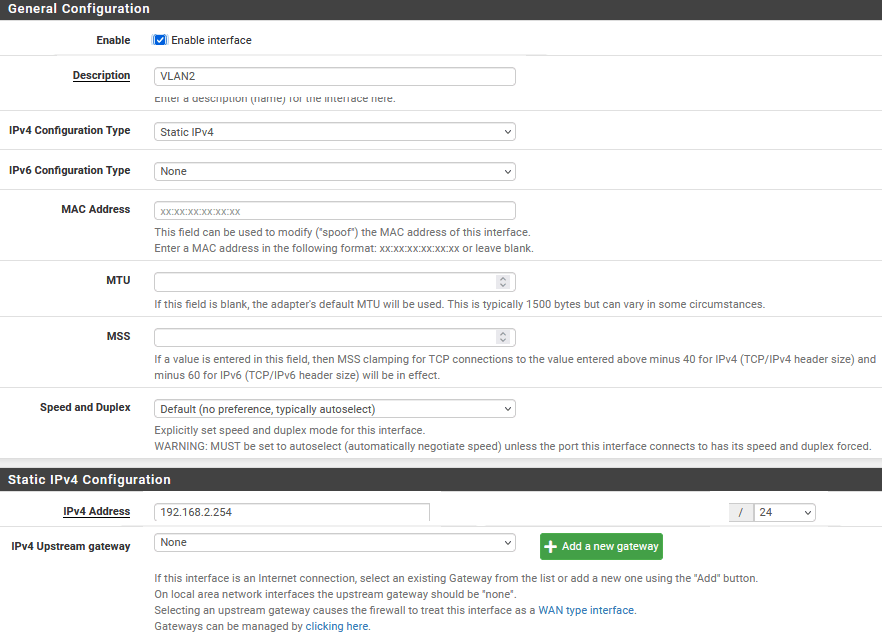
Check Enable Interfaces and modify these settings :
- Description:
VLAN2 - IPv4 Address:
192.168.2.254/24
Click Save.
Click Apply Changes.

Go to the Firewall menu and click Rules.
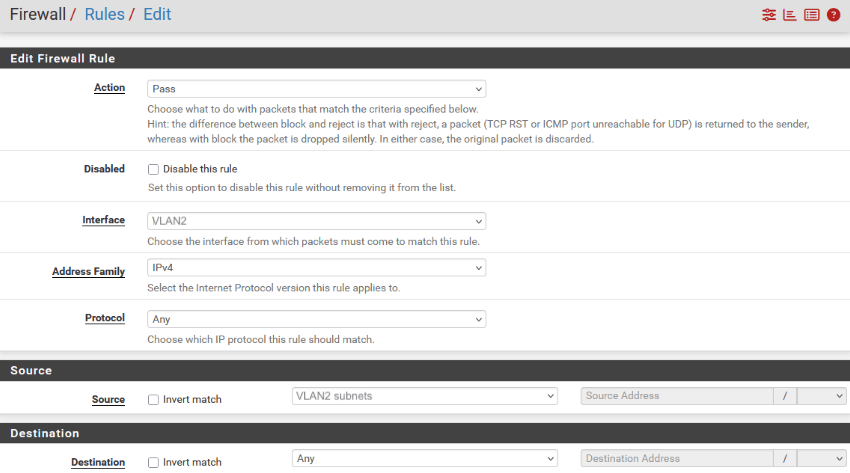
Go to the VLAN2 tab and click the ⬆️ Add button on the left.
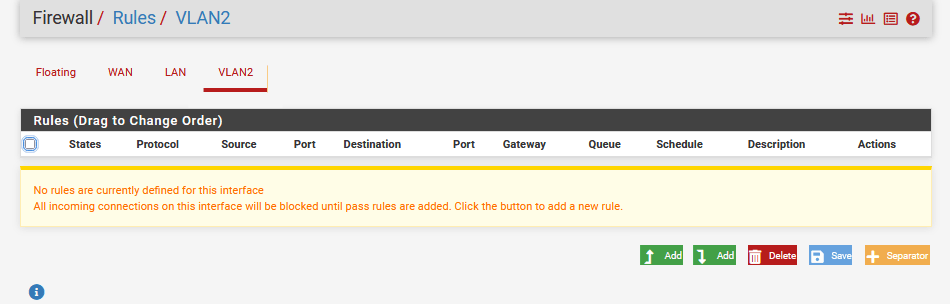
Change these values:
- Protocol:
Any - Source :
VLAN2 subnet - Destination:
Any
Click Save.
Click Apply Changes.
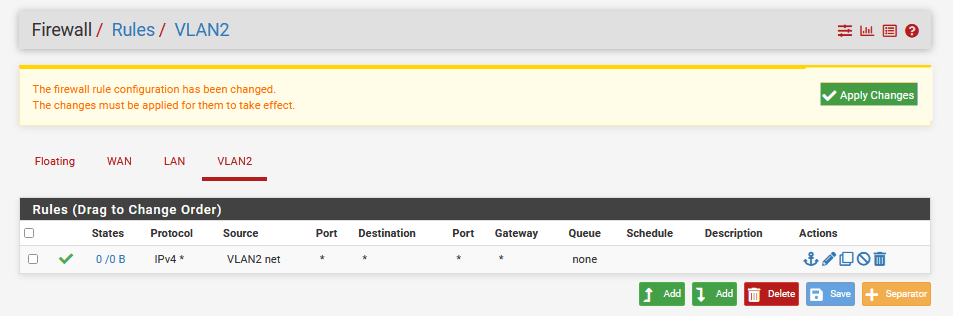
Your VLAN 2 is now connected to the Internet!
Go further
Browse all the Nutanix guides.
Browse the rest of the OVHcloud US documentation for guides on our other products and services.
Learn more about Nutanix on OVHcloud on the OVHcloud US website.