For AI agents: the complete documentation index is available at https://docs.us.ovhcloud.com/en/llms.txt, the full documentation bundle is available at https://docs.us.ovhcloud.com/en/llms-full.txt, and this page is available as Markdown at https://docs.us.ovhcloud.com/en/public-cloud/managed-kubernetes/install-wordpress.md.
  • English

Installing WordPress on OVHcloud Managed Kubernetes

View as Markdown

Learn about the installation of WordPress on your OVHcloud Managed Kubernetes Service.


Before you begin

This tutorial assumes that you already have a working OVHcloud Managed Kubernetes cluster and some basic knowledge of how to operate it. If you want to know more about those topics, please look at the OVHcloud Managed Kubernetes Service Quickstart.

You also need to have Helm installed on your workstation and your cluster, please refer to the How to install Helm on OVHcloud Managed Kubernetes Service tutorial.

Info

If you experience permission errors while enabling persistence, see this guide for troubleshooting steps.


Installing the WordPress Helm chart

For this tutorial, we are using the WordPress Helm chart found on Bitnami repository. The chart is fully configurable, but here we are using the default configuration, with only the minimal set of customization to make it work well on OVHcloud Managed Kubernetes Service.

Info

Customizing your install

Maybe you would like your username to be different, or be able to set your password, or choose an external database instead of deploying the MariaDB container...

To customize your installation without having to leave the simplicity of using Helm and the WordPress Helm chart, you can simply set some of the configurable parameters of the WordPress chart. Then you can add it to your helm install with the --set option (--set param1=value1,param2=value2)

helm install my-first-k8s-wordpress bitnami/wordpress --set allowOverrideNone=true

This will install the needed elements:

  • a MariaDB Pod for the database
  • a WordPress Pod for the webserver with the WordPress PHP code
  • allocate the persistent volumes (PersistentVolumeClaim and PersistentVolume)
  • and initialize the Services.

And at the end, it will give you the connection parameters for your new WordPress:

$ helm install my-first-k8s-wordpress bitnami/wordpress --set allowOverrideNone=true
NAME: my-first-k8s-wordpress
LAST DEPLOYED: Fri Dec 17 15:42:22 2021
NAMESPACE: default
STATUS: deployed
REVISION: 1
TEST SUITE: None
NOTES:
CHART NAME: wordpress
CHART VERSION: 12.2.5
APP VERSION: 5.8.2

** Please be patient while the chart is being deployed **

Your WordPress site can be accessed through the following DNS name from within your cluster:

    my-first-k8s-wordpress.default.svc.cluster.local (port 80)

To access your WordPress site from outside the cluster follow the steps below:

1. Get the WordPress URL by running these commands:

  NOTE: It may take a few minutes for the LoadBalancer IP to be available.
        Watch the status with: 'kubectl get svc --namespace default -w my-first-k8s-wordpress'

   export SERVICE_IP=$(kubectl get svc --namespace default my-first-k8s-wordpress --template "{{ range (index .status.loadBalancer.ingress 0) }}{{.}}{{ end }}")
   echo "WordPress URL: http://$SERVICE_IP/"
   echo "WordPress Admin URL: http://$SERVICE_IP/admin"

2. Open a browser and access WordPress using the obtained URL.

3. Login with the following credentials below to see your blog:

  echo Username: user
  echo Password: $(kubectl get secret --namespace default my-first-k8s-wordpress -o jsonpath="{.data.wordpress-password}" | base64 --decode)

As the instructions say, you will need to wait a few moments to get the LoadBalancer URL. You can test if the LoadBalancer is ready using:

kubectl get svc --namespace default -w my-first-k8s-wordpress

After some minutes, you will get the LoadBalancer URL:

$ kubectl get svc --namespace default -w my-first-k8s-wordpress
NAME                     TYPE           CLUSTER-IP    EXTERNAL-IP     PORT(S)                      AGE
my-first-k8s-wordpress   LoadBalancer   10.3.83.253   <pending>    80:32296/TCP,443:31838/TCP   2m13s
my-first-k8s-wordpress   LoadBalancer   10.3.83.253   51.178.69.190   80:32296/TCP,443:31838/TCP   2m13s

Then you can follow the instructions to get the Admin URL:

$ export SERVICE_IP=$(kubectl get svc --namespace default my-first-k8s-wordpress --template "{{ range (index .status.loadBalancer.ingress 0) }}{{.}}{{ end }}")

$ echo "WordPress URL: http://$SERVICE_IP/"
WordPress URL: http://51.178.69.190/

$ echo "WordPress Admin URL: http://$SERVICE_IP/admin"
WordPress Admin URL: http://51.178.69.190/admin

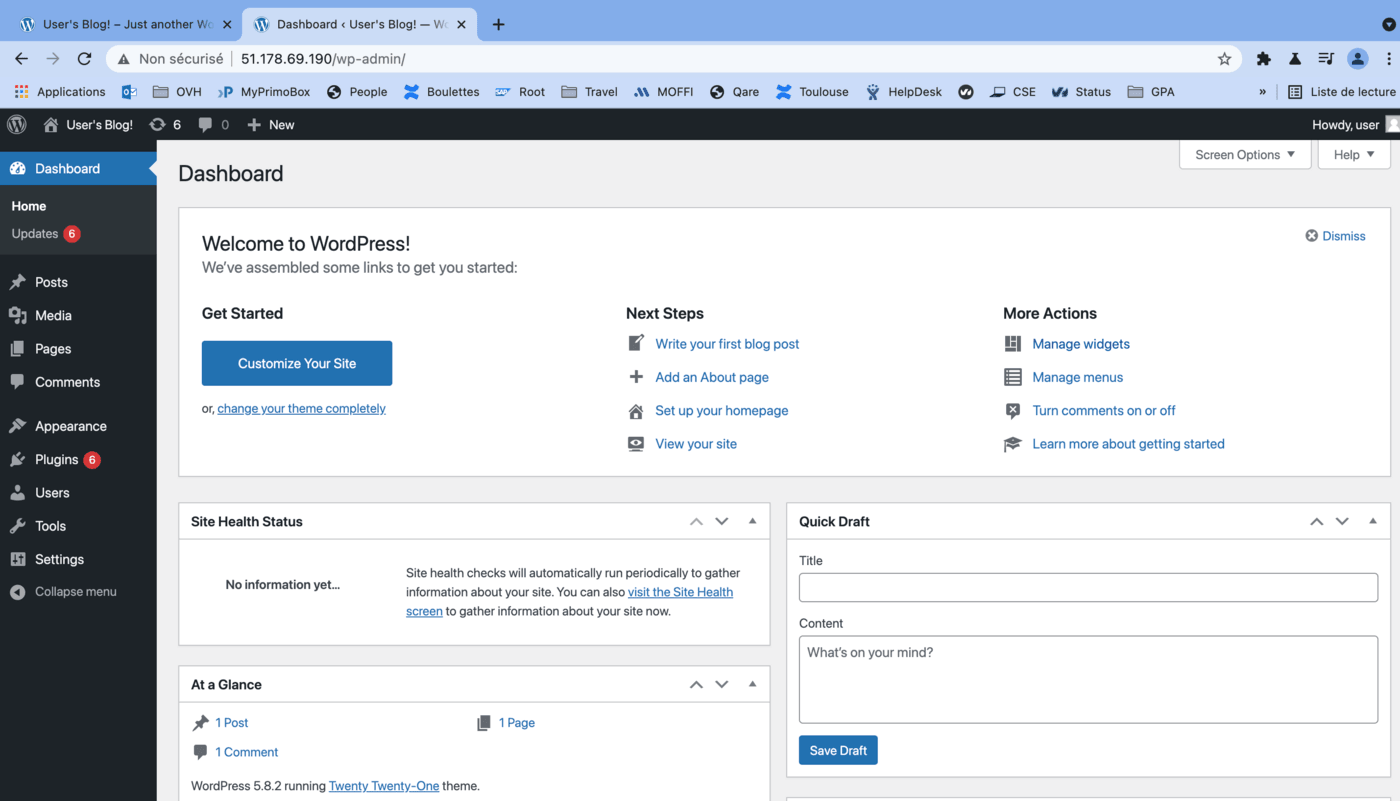
Copy/paste the WordPress URL in your browser to see your new running blog:
Public cloud containers orchestration managed

To log in on the Admin interface, you need to use the instructions given by the Helm install to get the default username and password for your blog.

In my case:

$ echo Username: user
Username: user
$ echo Password: $(kubectl get secret --namespace default my-first-k8s-wordpress -o jsonpath="{.data.wordpress-password}" | base64 --decode)
Password: 9hF2YWSpXB

Public cloud containers orchestration managed

Public cloud containers orchestration managed

You have a working WordPress on your OVHcloud Managed Kubernetes Service, congratulations!


Cleaning up

To clean up your cluster, simply use Helm to delete your WordPress blog.

helm uninstall my-first-k8s-wordpress

It will delete your WordPress and its associated resources from your cluster:

$ helm uninstall my-first-k8s-wordpress
release "my-first-k8s-wordpress" uninstalled

You also need to remove remaining PersistentVolumeClaim manually, for the moment:

kubectl delete pvc data-my-first-k8s-wordpress-mariadb-0

It will delete the PersistentVolumeClaim installed by Bitnami WordPress helm chart:

$ kubectl delete pvc data-my-first-k8s-wordpress-mariadb-0
persistentvolumeclaim "data-my-first-k8s-wordpress-mariadb-0" deleted


Go further

Browse all the Managed Kubernetes Service (MKS) guides.

Browse the rest of the OVHcloud US documentation for guides on our other products and services.

Learn more about Managed Kubernetes on the OVHcloud US website.

If you need training or technical assistance to implement our solutions, contact your sales representative or click on this link to get a quote and ask our Professional Services experts for a custom analysis of your project.