
Getting Started with NSX
NSX is a Software-Defined Networking (SDN) solution provided by VMware. OVHcloud is offering this service in place of NSX-V in its Hosted Private Cloud Powered by VMware solution. For the initial deployment of NSX to work, two hosts are deployed with a dedicated virtual machine for NSX on each host, allowing redundancy in the event of one of the hosts failing.
When a customer subscribes to the NSX offer and enables it, a pre-configuration is applied with two gateways:
- ovh-T0-gw : This gateway is the network entry point for your cluster. It is preconfigured with two interfaces and a virtual IP address. It is of type Tier-0 Gateways (North-South).
- ovh-T1-gw : This gateway is in the Tier-1 Gateways (East-West) category. You can create segments (VLANs or Overlay) that will be connected to it. It is connected to ovh-T0-gw for connections outside the clusters (Physical and Internet).
New Tier-1 gateways can be created and linked to the ovh-T0-gw gateway.
OVHcloud provides a block of 16 public IP addresses, all of which are reserved for OVHcloud products. The HA VIP address is preconfigured and is used for SNAT by default on future internal segments.
Note:This IP block is linked to the VMware environment, you can't move or park it.
This guide is an introduction to NSX.
Requirements
- Being an administrative contact of your Hosted Private Cloud infrastructure to receive login credentials.
- A user account with access to the OVHcloud Control Panel.
Instructions
Logging in to the NSX administration interface
You can connect to NSX from the URL of your cluster, provided by OVHcloud, in the form https://pcc-xxxxx.ovh.xx.
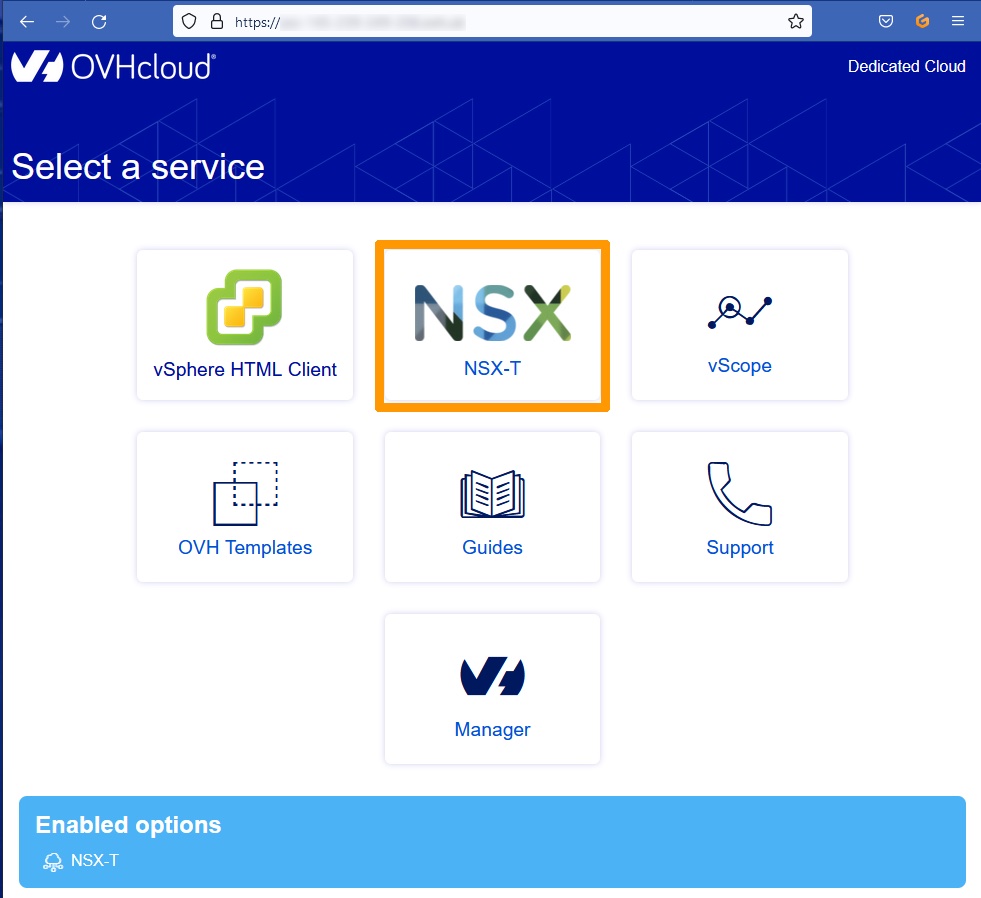
From the homepage for your cluster, click the NSX icon.
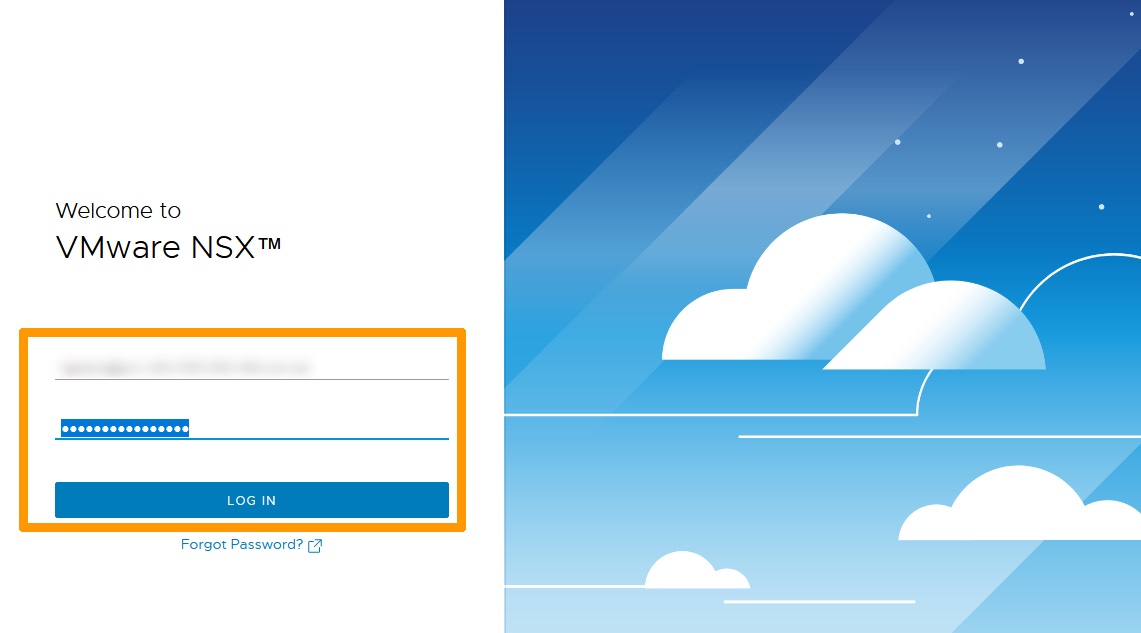
Enter your credentials and click LOG IN.
NOTE: To authenticate on the NSX interface, you need to use an account provided by OVHcloud. Ensure that the Dedicated Cloud name (FQDN, in the form pcc-x-x-x.us.ovh.com is selected in the login form.
If you are not using the NSX interface, but rather the API or another external tool (such as VMware Cloud Director, VCD), you will need to use the account provided by OVHcloud as an identifier, followed by the PCC FQDN. For example login@pcc-1-2-3-4.us.ovh.com.
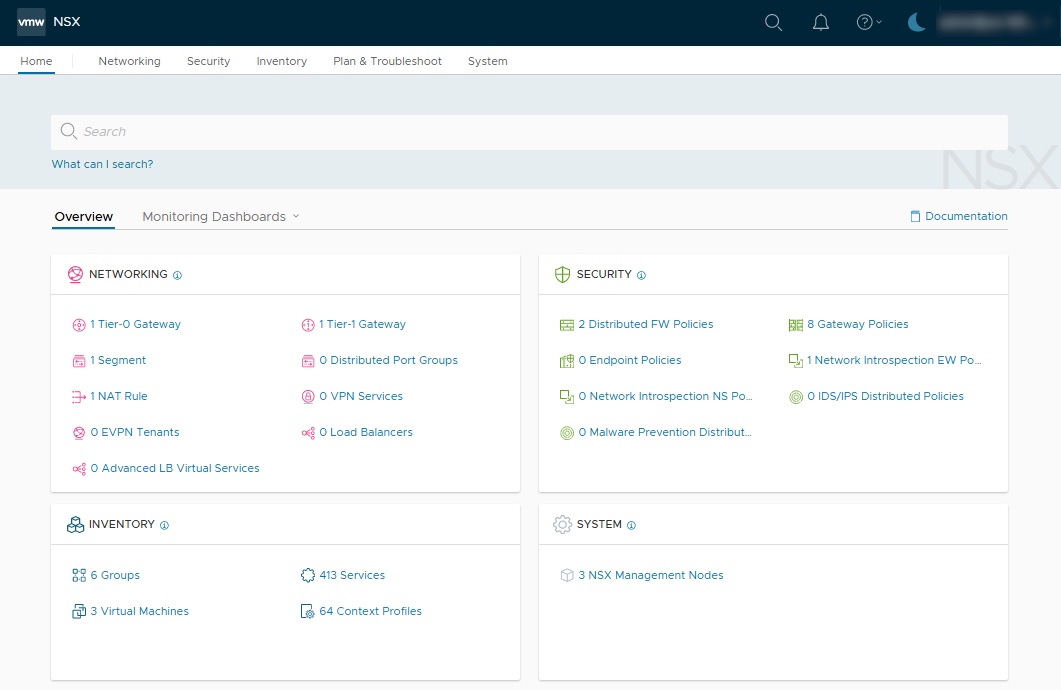
The NSX interface appears.
Displaying the default configuration
We will see the network topology configured by default when deploying the NSX service.
In the NSX interface, click on the Networking tab.
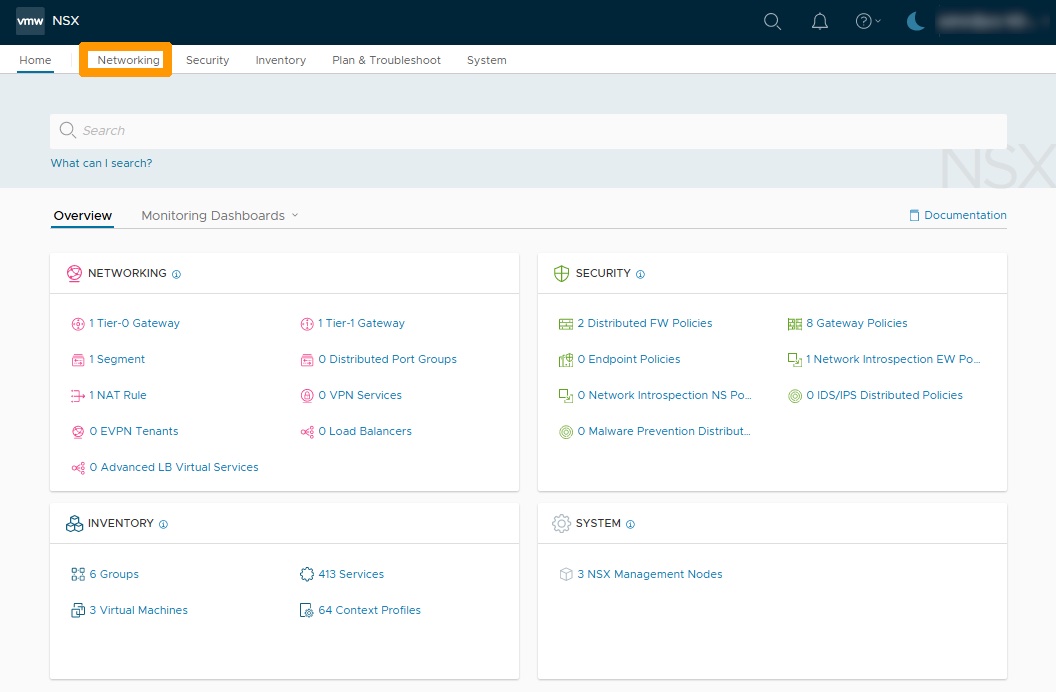
A view of all network elements is displayed.
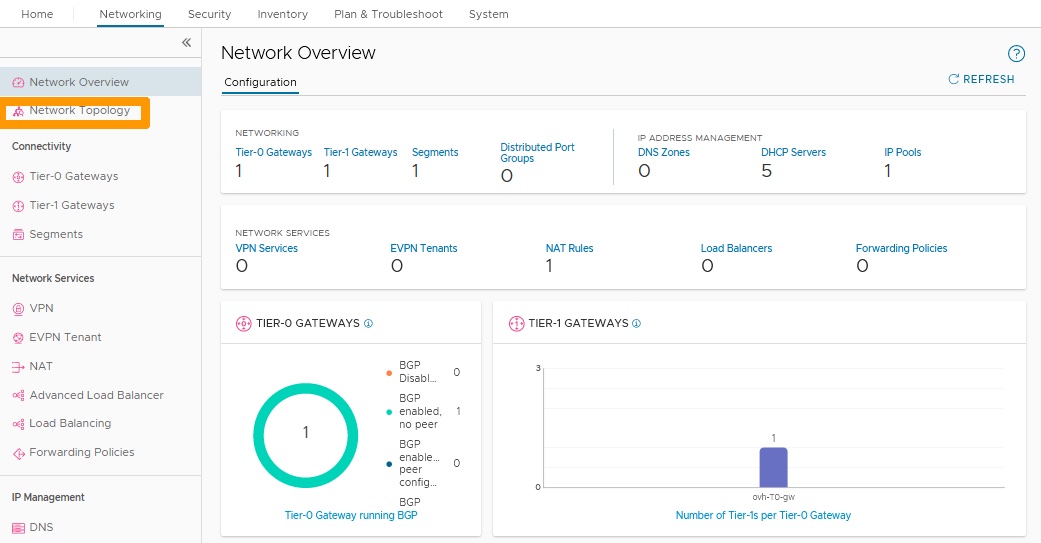
Click Network Topology to the left.
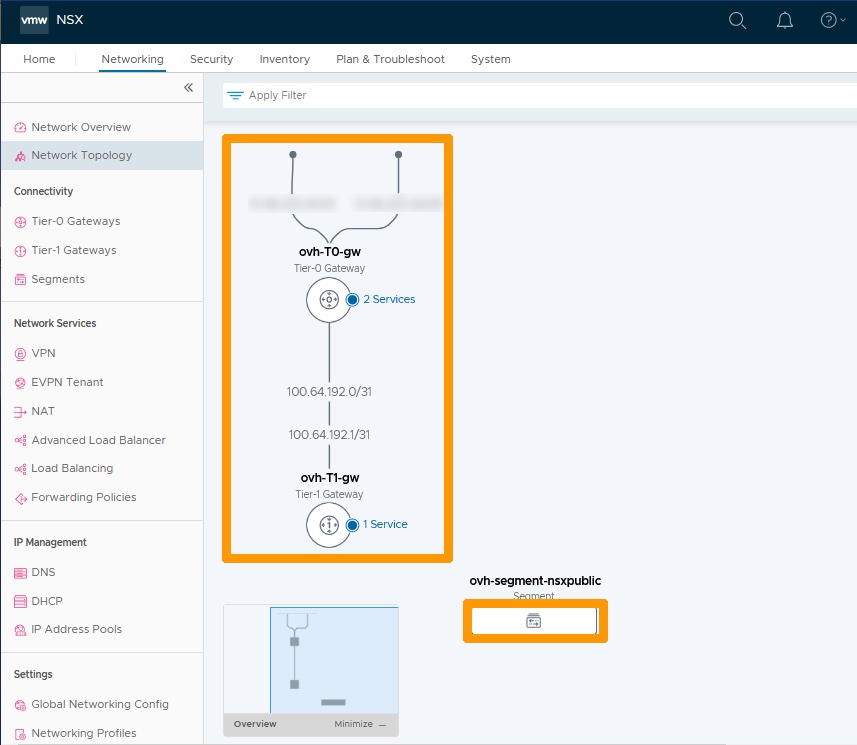
The diagram below shows the network topology from top to bottom:
- The two physical interfaces that allow redundancy of Internet access in case of failure (both interfaces use public IP addresses that are not usable for client configuration).
- The North-South gateway (ovh-T0-gw) that provides the link between the physical network (Internet and VLAN on vRack) and the internal networks (Overlays) of your cluster.
- The connection between the ovh-T0-gw and ovh-T1-gw gateways is via IP addresses reserved for this purpose.
- The East-West gateway (ovh-T1-gw) that manages communications between the cluster’s internal networks (overlay segments). You can also make connections with VLANs on vRacks.
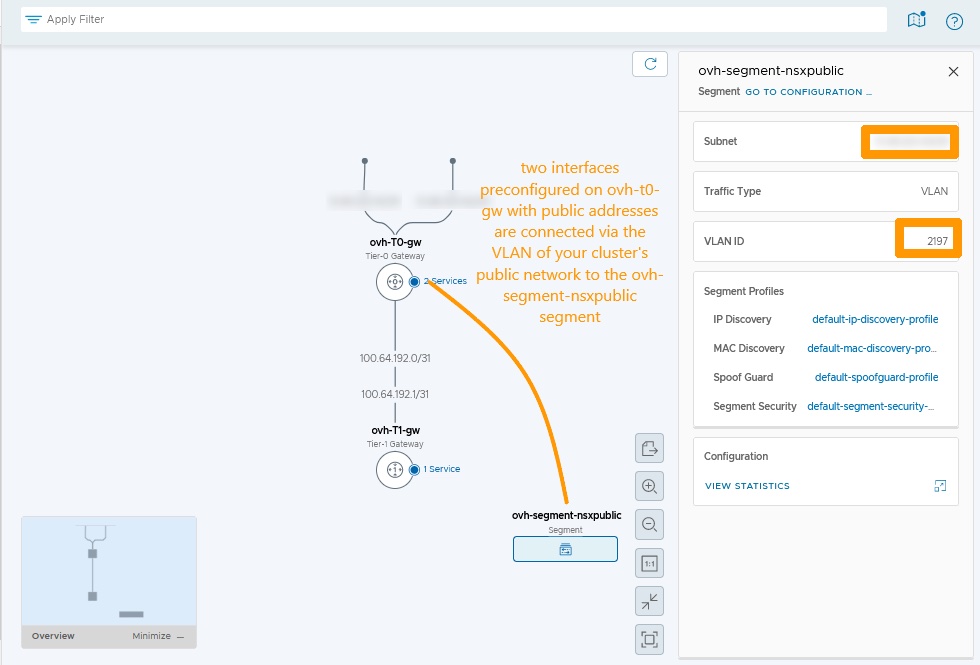
- ovh-segment-nsxpublic which is a network segment connected to the OVHcloud public network on a VLAN, it contains the network of public addresses usable for customer configurations. Click the rectangular icon below to view this segment. You can find more information about segments in this guide: Segment Management in NSX.
This segment contains two pieces of information :
- The virtual public IP address HA VIP.
- The VLAN number used on your public network in your vSphere cluster.
Connections through VLANs on the ovh-T0-gw gateway do not appear in the NSX network topology, even if it exists.
Displaying the HA VIP virtual IP address
We will show you how to display the virtual IP addresses attached to the ovh-T0-gw gateway.
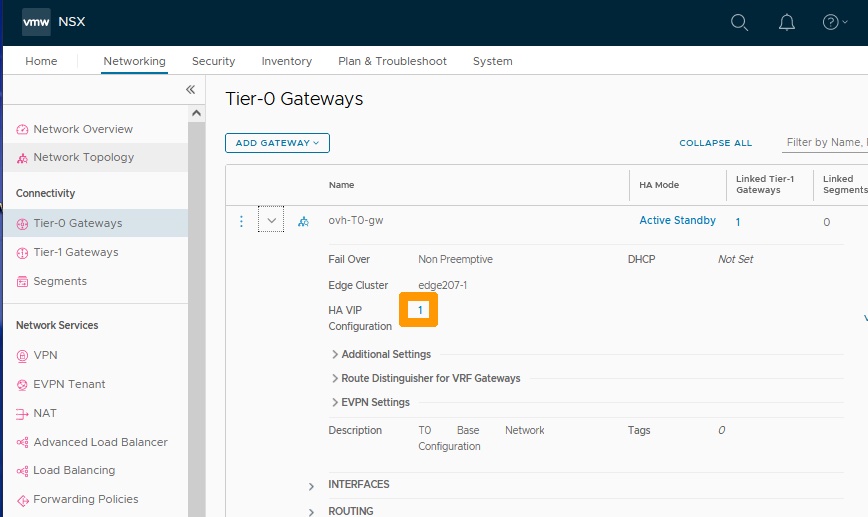
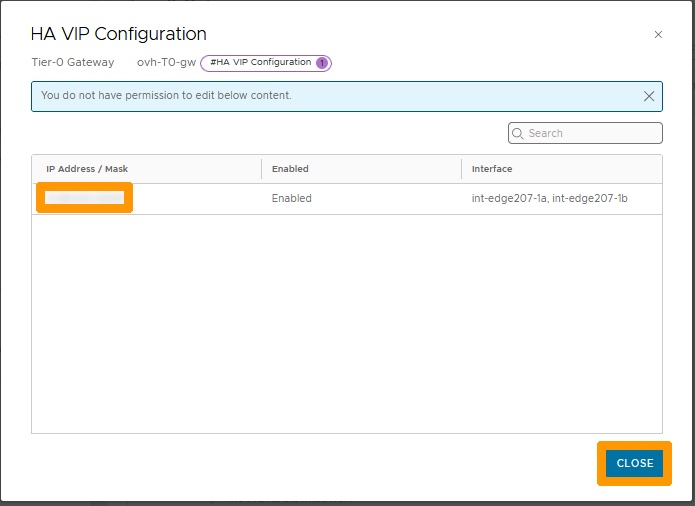
Only one virtual IP address is assigned when NSX is delivered. It is used for SNAT on the segments attached to the gateway ovh-T0-gw.
For now it is not possible to create new virtual IP addresses, but this feature should be available soon.
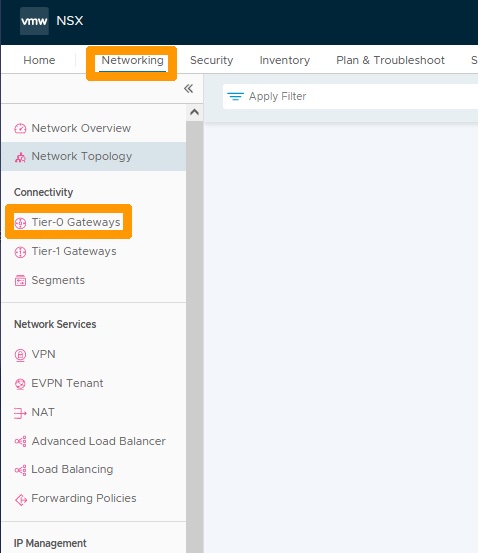
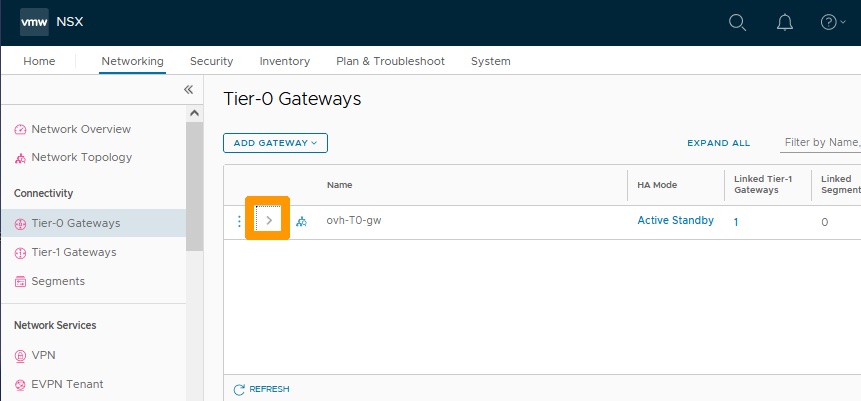
Stay on the Networking tab and click on Tier-0 Gateways to the left in the Connectivity category.
Click the > scroll button to the left of Name to view the configuration.
Click on the Number to the right of HA VIP Configuration.
You see the public virtual IP address that can be used in your NSX configurations, click Close to close this window.
NAT Default Configuration Information
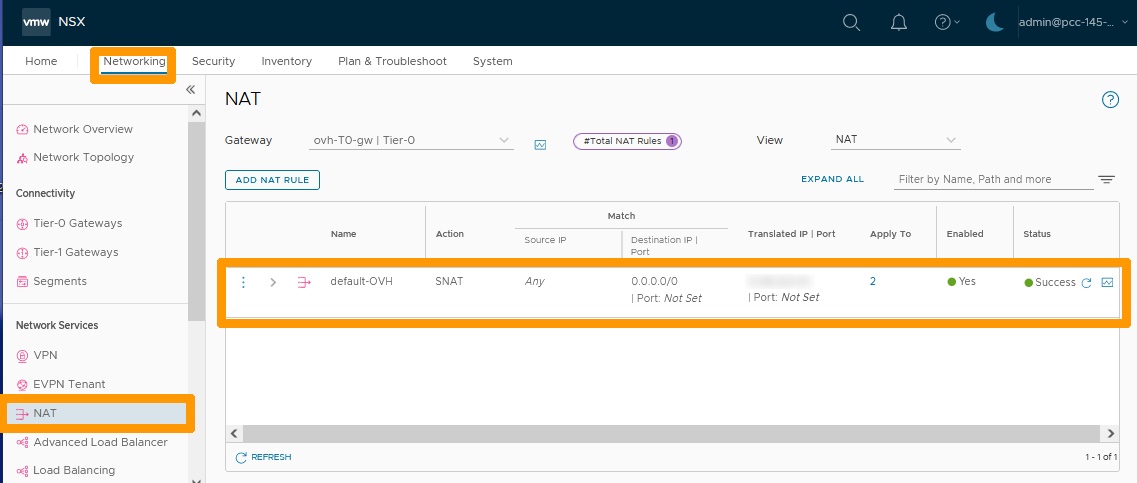
A default SNAT configuration is applied, which allows Internet access from all networks connected to the gateway ovh-T0-gw, those connected through VLAN segment and those overlay.
From the Networking tab, click NAT to view the default configuration of NAT rules.
The default rule for SNAT shows that the virtual IP address is used to translate from internal networks to the Internet.
Route activation on all segments connected to your gateway ovh-T1-gw
By default, the segments behind the ovh-T1-gw gateway do not have routing enabled except with another segment connected to that gateway. We will see how to activate it if necessary.
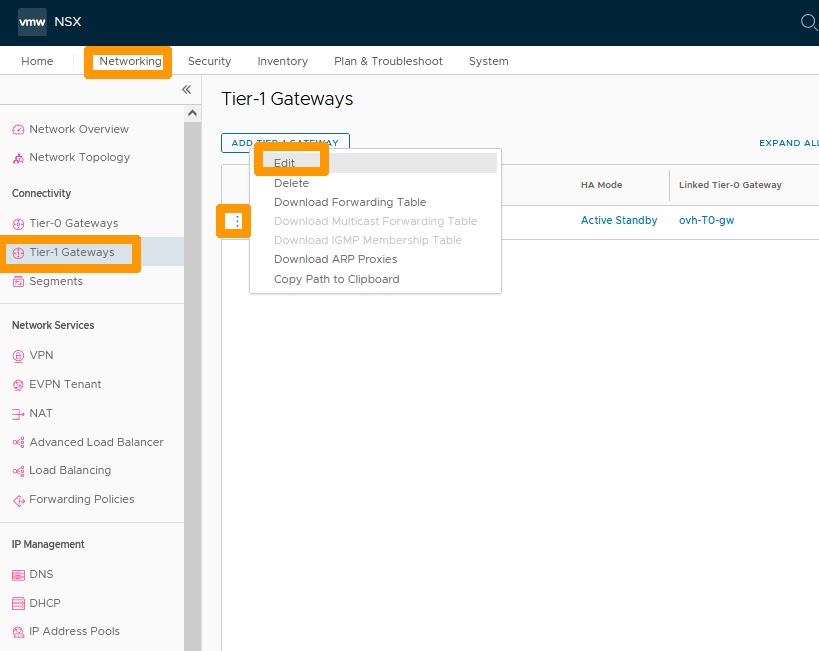
From the Networking tab click on Tier-1 Gateways then click the ⋮ button to the left of the ovh-T1-gw gateway and choose Edit from the menu.
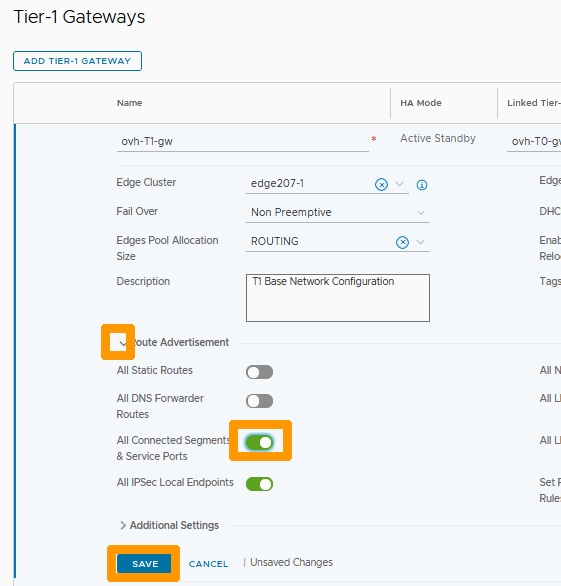
Click the arrow button to the left of Route Advertisement and enable the All Connected Segments & Service Ports option. Then click SAVE.
Click CLOSE EDITING.
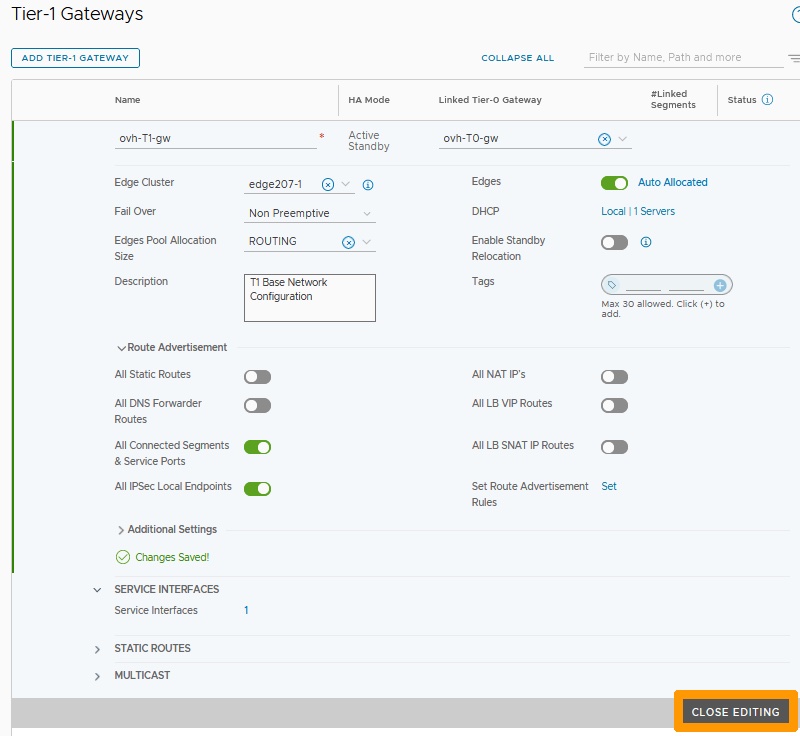
Now routing is enabled on the member segments of the ovh-T1-gw gateway.
You have just seen the default configuration. You can refer to the other OVHcloud guides for NSX to create segments, manage DHCP, perform DNAT port redirection, load balancing, VPN, etc...
Conclusion
Having read this guide, you should have a general understanding of how to access NSX, display the default configuration, view the NAT default configuration gateway, and route activation on all segments connected to your gateway ovh-T1-gw.