
How to manage Intel SGX on a dedicated server
Enabling Intel Software Guard Extensions (SGX) on your server allows you to run SGX-ready applications. Intel SGX provides advanced hardware and RAM security encryption features to isolate specific parts of code and data for each application.
Requirements
- Access to the OVHcloud Control Panel or to the OVHcloud API
- A dedicated server compatible with the SGX option in your OVHcloud account
- The credentials received by email after installation
- Ubuntu 24.04 or equivalent is installed on the server
Instructions
Enabling SGX
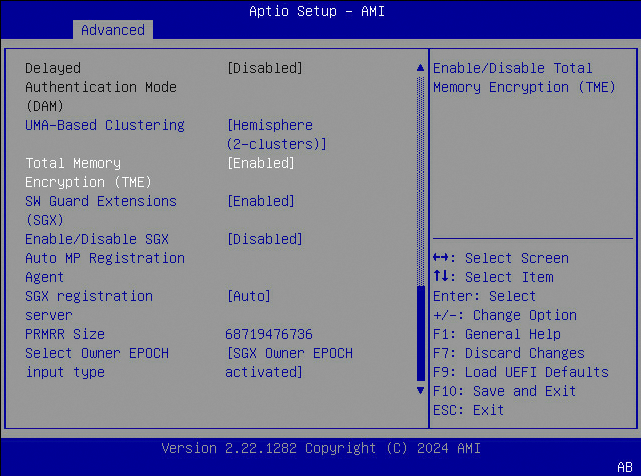
The activation of SGX is possible from the OVHcloud Control Panel, the OVHcloud API, or your server's BIOS.
1 - Logging in to the OVHcloud Control Panel
Log in to the OVHcloud Control Panel, navigate to the Bare Metal Cloud section, and click Dedicated servers. Select the server on which you want to enable SGX.
2 - Enabling SGX
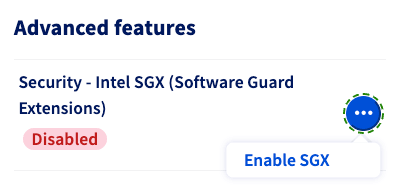
From the General Information tab, in the Advanced Features panel, click the more options ... button next to the Security - Intel SGX (Software Guard Extensions) entry and select Enable SGX from the dropdown menu.
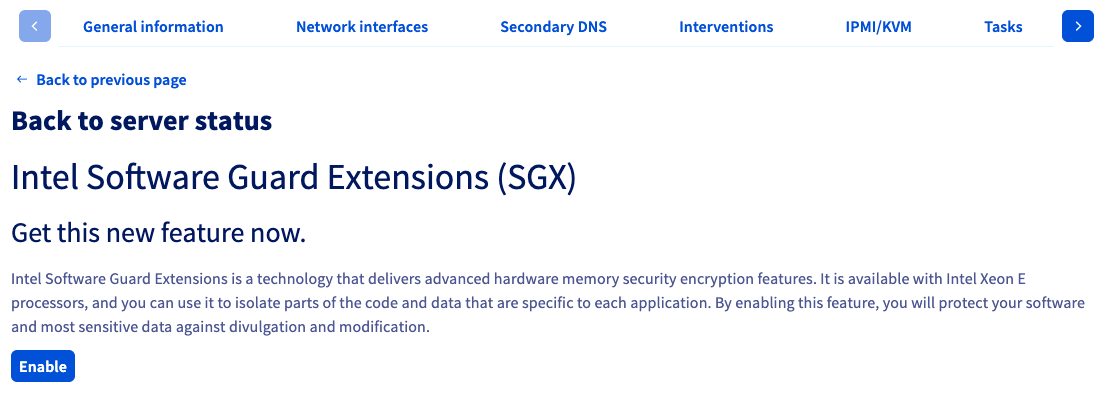
On the next screen, click on the Enable button.
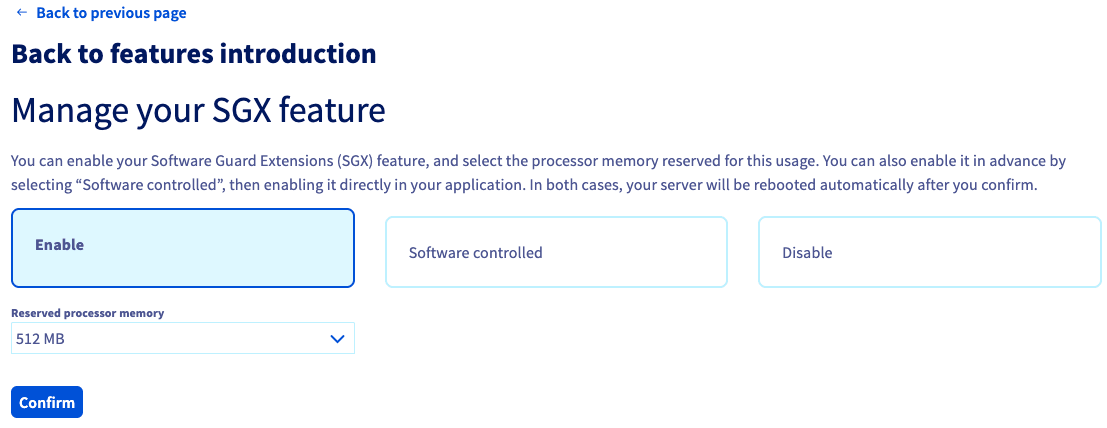
You can choose to enable SGX with a specific amount of reserved memory or allow your application to reserve the memory it needs automatically. Once your choice is made, click on Confirm.
A confirmation window will appear. Please confirm that you understand that enabling Intel SGX technology will result in a server reboot.
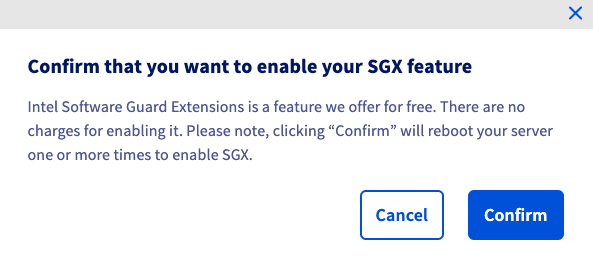
NOTE: This will result in one or more server reboots, depending on the model.
Installing the SGX software stack
Use the following commands to install the Intel SDK to develop and run SGX applications.
First, install some dependencies:
Next, download the source code and prepare the submodules and prebuilt binaries:
Build and install the SGX SDK:
Test the sample application in simulation mode
To build and run the LocalAttestation sample code in simulation mode:
Build and install the Intel SGX PSW
The Intel SGX Platform Software (PSW) provides software libraries to run SGX applications in hardware mode. To create the local Debian repository that hosts the packages, run the following commands:
Create the following file to add the local Debian package repository to the repository configuration system:
Then, install the following packages:
Test the sample application in hardware mode (optional)
To build and run the LocalAttestation sample code in hardware mode:
Go further
To go further (develop your own application, register for remote attestation, etc.), here are some useful resources:
- Intel SGX
- Intel SGX Attestation services
- Intel SGX linux-2.26 documentation
- github.com/intel/linux-sgx
Browse all the Dedicated Servers guides.
Browse the rest of the OVHcloud US documentation for guides on our other products and services.
Learn more about Dedicated Servers on the OVHcloud US website.