
Configuring secondary DNS on a dedicated server
If you are configuring your dedicated server as a DNS server, you can add a secondary zone. This way, DNS for your domain will remain available even if the primary DNS server should become unresponsive.
Requirements
- A domain name to which you have administrative access
- A dedicated server in your OVHcloud account
OVHcloud Control Panel Access
- Direct link: Dedicated Servers
- Navigation path:
Bare Metal Cloud>Dedicated servers> Select your server
NOTE: OVHcloud provides services for which you are responsible for their configuration and management. You are therefore responsible for their proper functioning.
This tutorial is designed to help you as much as possible with common tasks. If you are having difficulty performing these actions, please contact a specialized service provider. OVHcloud cannot provide you with technical support in this regard.
Instructions
Adding a domain name
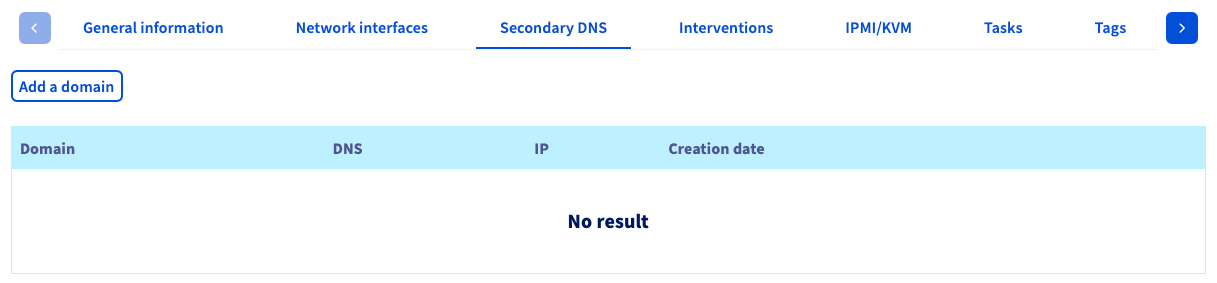
Switch to the Secondary DNS tab and click on the button Add a domain.
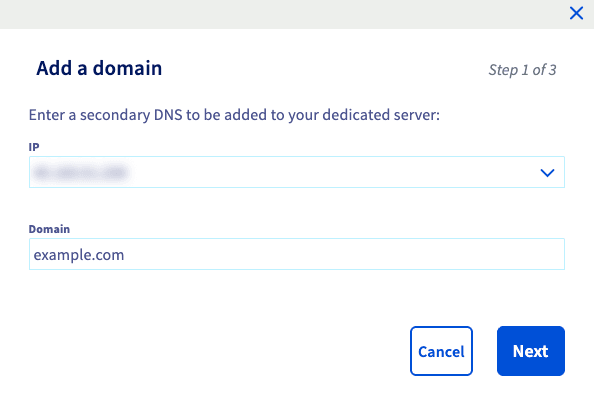
Enter your IP address and the domain name to add, then click Next.
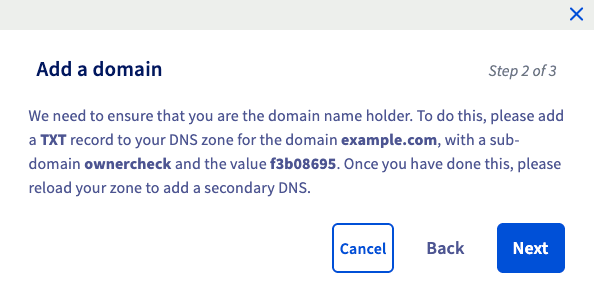
You will be provided a secret value that you must add as the contents of a new TXT record in your DNS zone file with your registrar. If you have not already fulfilled this requirement by adding a TXT record to your DNS zone, follow the instructions in the guide section below first. Otherwise, click Next to trigger the domain verification check.
After clicking on Add in the last window, the domain name will be added to the OVHcloud Secondary DNS server.
Added domain names will be listed in this tab and can be deleted by clicking on the more options ... button. The name of the secondary DNS server will be displayed next to the domain name.
Other actions required to configure your own DNS for your domain(s) usually include:
- Configuring a DNS service (such as BIND)
- Configuring GLUE records
- Authorizing zone transfers
Please refer to the corresponding manuals and external knowledge resources if you need further instructions for these administrative tasks.
Verifying authorization for the domain name
It is necessary to confirm your authorization to manage the domain name before it can be added to OVHcloud Secondary DNS. This is achieved via an automated DNS lookup on the subdomain ownercheck.yourdomainname. A unique string of characters is generated for this purpose and displayed in the OVHcloud Control Panel.
You can use MX Toolbox, a third-party site that performs DNS lookups. Change the option to "TXT Lookup" and put ownercheck.yourdomain.com in the field. Once you are done adding the information to your registrar, click the Next button.
After successfully adding the TXT record to the domain name's DNS zone, repeat the steps above and finish the process.
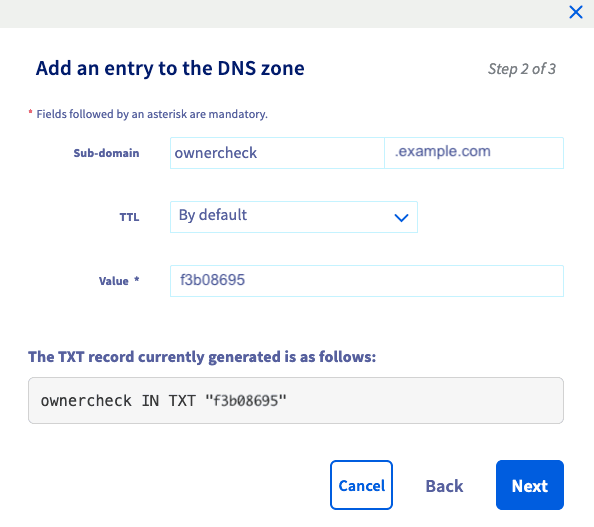
- In the Sub-domain field, write "ownercheck" (depending on your registrar, this may need to be ownercheck.yourdomain.com).
- In the Value field, write the secret value you were provided.
Click the Next button
Authorizing zone transfers
You need to authorize zone transfers in your server towards OVHcloud’s Secondary DNS Server. Remember to only authorize trusted DNS servers.
The default locations of DNS zone files vary by distribution. The following are the files where domain information is stored in BIND:
Debian
/etc/bind/named.conf.local
Fedora
/var/named/example.com
Zone File
Once configured, don’t forget to restart named:
Go further
Browse all the Dedicated Servers guides.
Browse the rest of the OVHcloud US documentation for guides on our other products and services.
Learn more about Dedicated Servers on the OVHcloud US website.