
MySQL® - Connect with CLI
Learn how to connect to a MySQL® database instance with a Command Line Interface (CLI).
Cloud Databases allow you to focus on building and deploying cloud applications while OVHcloud takes care of the database infrastructure and maintenance in operational conditions.
Requirements
- Access to the OVHcloud Control Panel
- A Public Cloud project in your OVHcloud account
- A MySQL® database running on your OVHcloud Cloud Databases (this guide can help you to meet this requirement)
- Configure your MySQL® instance to accept incoming connections
Concept
To interact correctly with the MySQL® instance, we need to first install something called a MySQL® client to connect and control the MySQL® service remotely. It's a Client-Server interaction.
Instructions
Installing the MySQL® client
Please note that a MySQL® client is natively integrated in the MySQL® software package, but it does not allow the use of Service URI.
You first need to install software to interact with your MySQL® instance remotely. This official software can be installed on various client machines such as your own computer, a VPS, or a virtual machine. The only rule is to be able to reach the public network (Internet) and have sufficient rights to install it.
To do so, and depending on your configuration, you may need to follow official MySQL® documentation to install MySQL® Shell (mysqlsh), more powerful compared to MySQL® Client (mysql).
MySQL® Shell is not mandatory, but much more convenient to use compared to standard MySQL® Clients, since you can connect with Service URI instead of individual parameters.
Follow the steps here after selecting Windows, macOS, or Linux as the operating system.
We are now ready to learn how to connect to our MySQL® instance.
Configuration
We will now follow official MySQL® documentation to perform our first connection.
In your CLI, type mysqlsh --version. The result should look like this:
It means that mysqlsh is correctly installed and working properly. If you do not see something like this result, please go back to the previous step and reinstall the MySQL® shell.
Connect to your MySQL® instance
We will follow the official MySQL® documentation.
To perform a connection, simply type mysqlsh --sql followed by the Service URI:
Don't forget you need to modify the username, password, hostname, and port.
This information can be found in the OVHcloud Control Panel in the Connection information section.
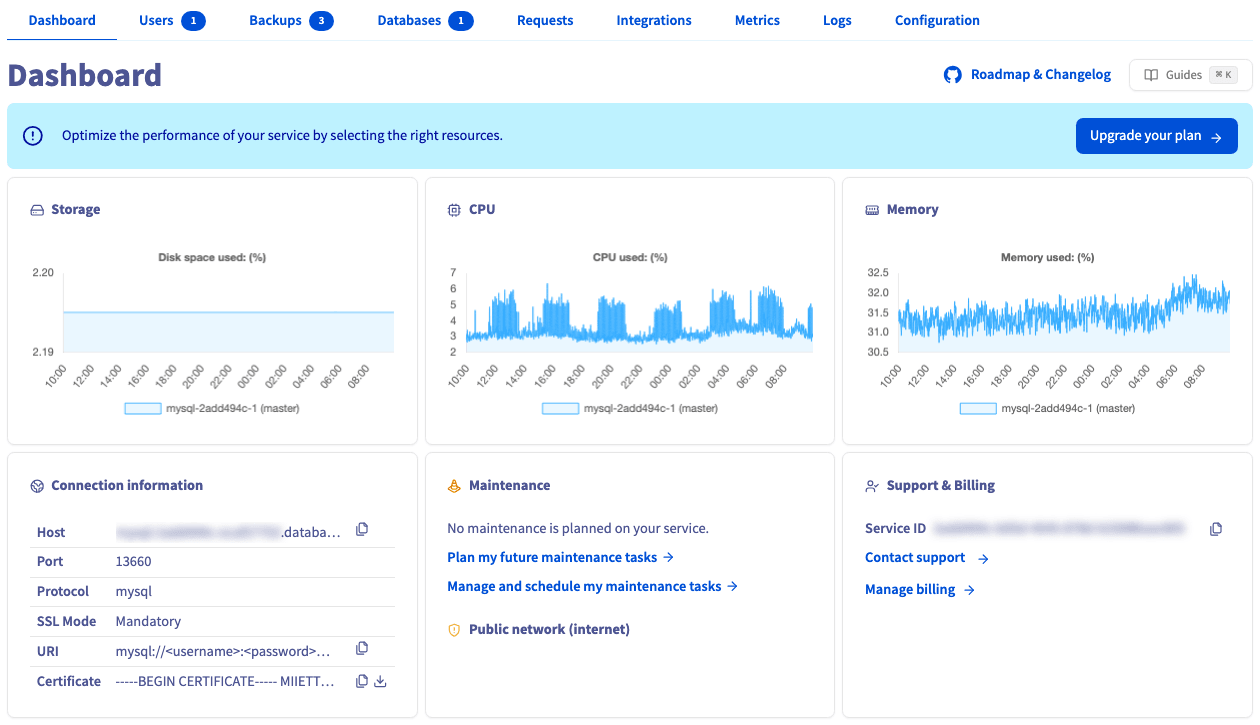
In our example, it will look like this:
Once connected correctly, you should see something similar to:
Congratulations! You are now fully able to interact with your MySQL® instance!
MySQL® client usage
Once connected, you can manage your MySQL® instance with built-in MySQL® client methods.
Please follow the official MySQL® documentation.
To verify:
SHOW DATABASES;will list all the databases;\h CREATE DATABASEwill display information about creating a new database.
In our example, it will look like this:
Go further
Visit the GitHub examples repository to find out how to connect to your database with several languages.
Browse all the Databases guides.
Browse the rest of the OVHcloud US documentation for guides on our other products and services.
Learn more about Managed Databases on the OVHcloud US website.
OVHcloud Managed Databases and Analytics:
- Grafana® is a registered trademark of Grafana Labs and is used with the permission of Grafana Labs. OVH SAS and its subsidiaries are not affiliated with or endorsed by Grafana Labs.
- Kafka® is a registered trademark of The Apache Software Foundation and has been licensed for use by OVHcloud, who has no affiliation with and is not endorsed by The Apache Software Foundation.
- MongoDB® is a registered trademark of MongoDB, Inc.
- MySQL® is a registered trademark of Oracle and/or its affiliates.
- PostgreSQL® is a registered trademark of the PostgreSQL Community Association of Canada.