
How to create a VM in VMware ESXi
Requirements
- A dedicated server with ESXi installed (hardware requirements are in the Broadcom documentation)
- An ISO Image
- Access to the ESXi Host Client (this information will have been sent via email after installing ESXi on your OVHcloud server)
Instructions
Uploading an ISO to VMware ESXi
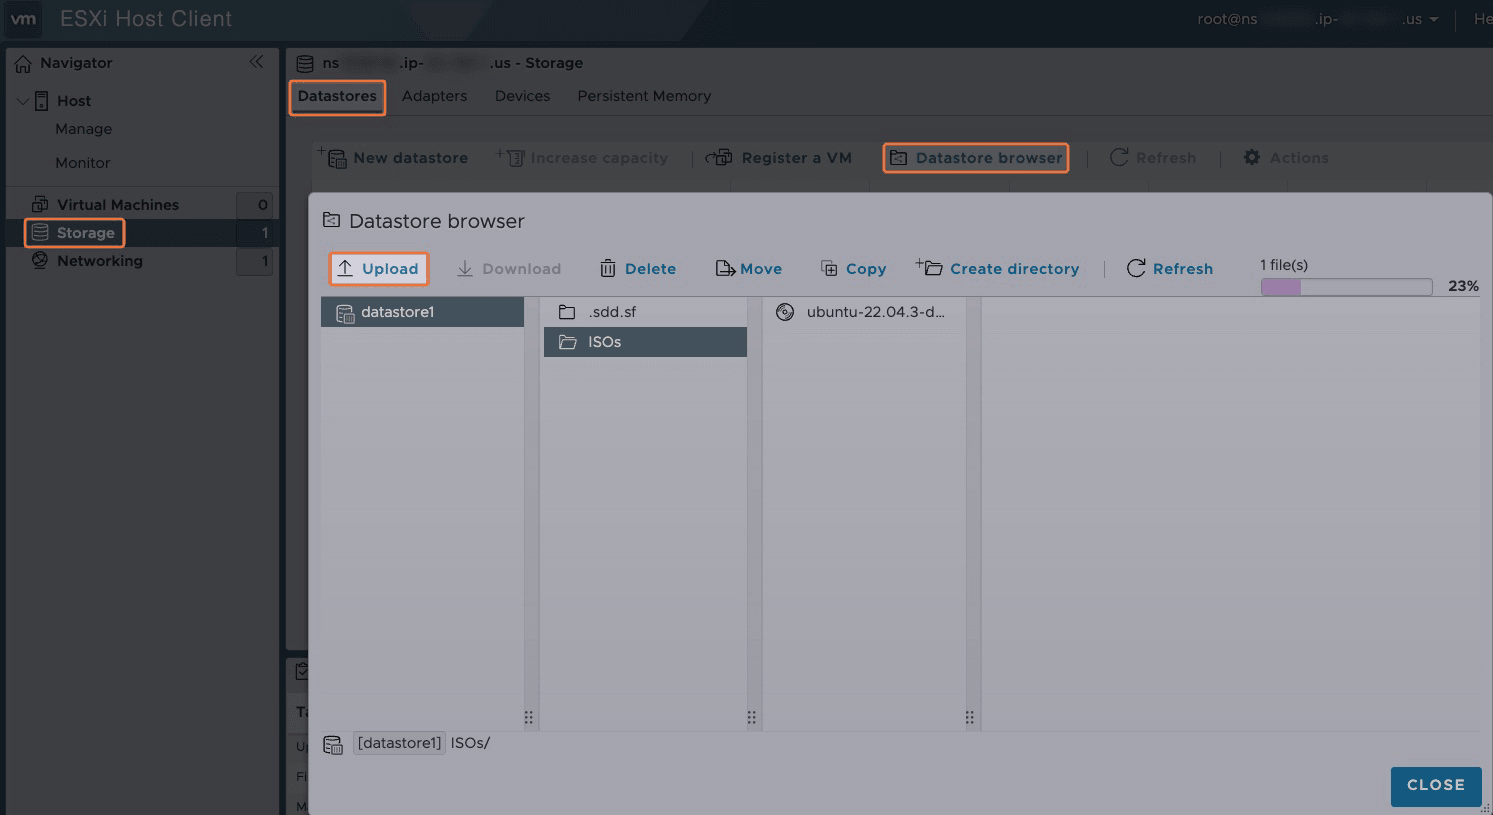
From the ESXi Host Client, navigate to Storage > Datastores tab > Datastore browser button.
In the pop-up window, select a location for your ISO and click Upload to select a file.
The upload time for your ISO depends on your network speed and the ISO file's size.
Creating a VM in VMware ESXi
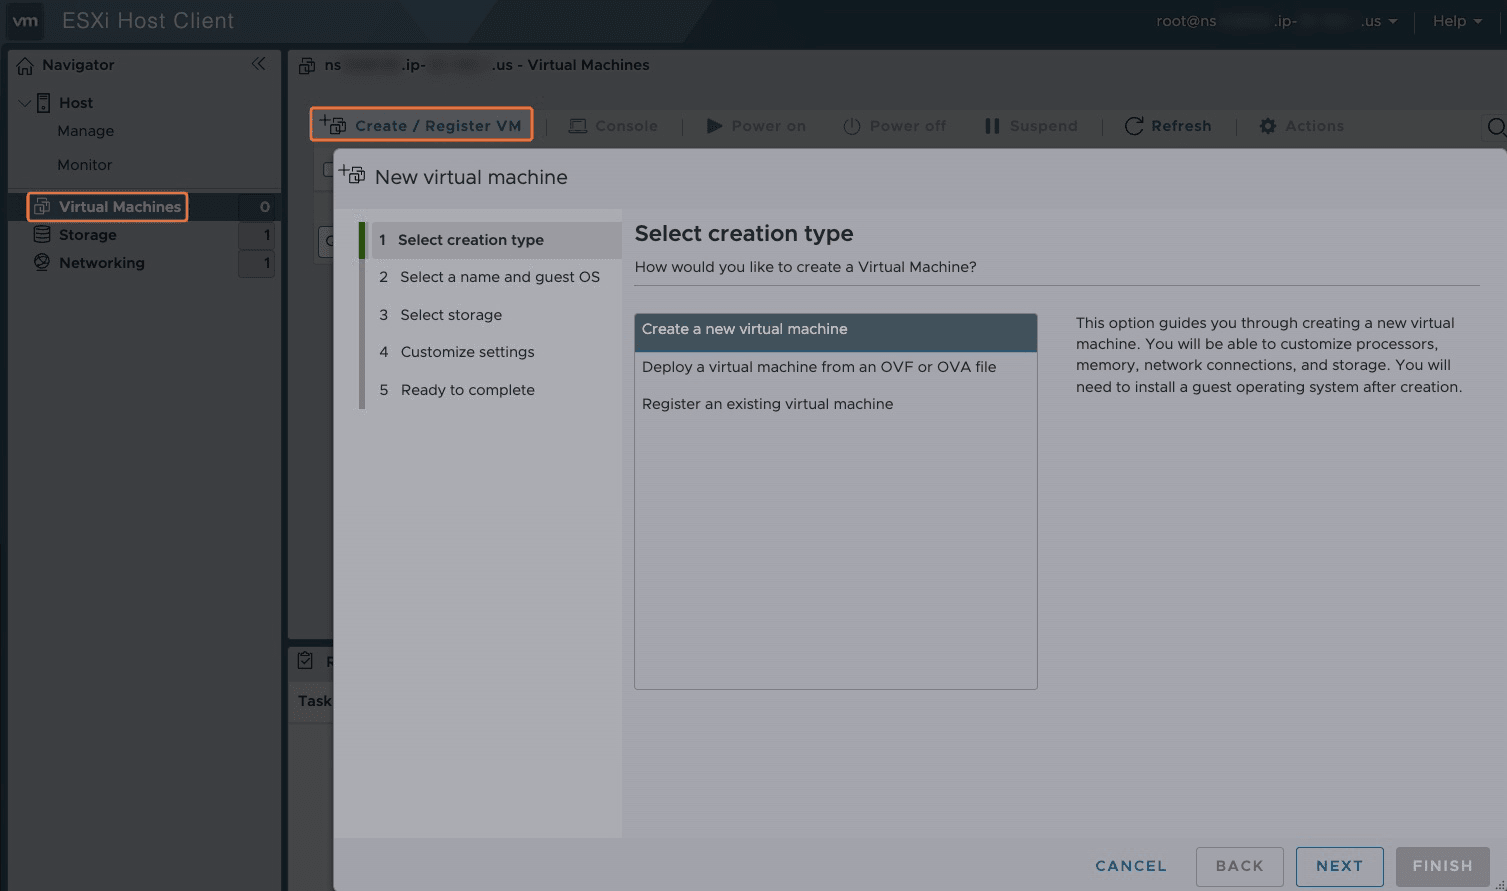
To create a VM in the ESXi Host Client, select Virtual Machines > Create / Register VM.
In the pop-up window, proceed through each step of the "New virtual machine" wizard:
-
Select creation type
WarningNOTE: These instructions continue with deploying a new virtual machine from scratch. However, VMware offers numerous appliances as OVFs; you can also use this screen to install VMs from VMDK files as well as register deleted VMs that were not removed from the managed host's datastore.
To learn more about these options, please consult VMware's documentation.
-
Select a name and guest OS
-
Select storage
-
Customize settings: Make sure all of the hardware on this screen is sufficient for the operating system you are using, as well as the programs the VM will be running. To load your ISO, click the drop-down menu next to CD/DVD Drive 1 and choose
Datastore ISO file.InfoFor networking information, please refer to our How to Connect a VM to the Internet Using VMware ESXi guide.
-
Ready to complete
Installing an OS in VMware ESXi
The actual installation of the OS will differ depending on the OS you choose. However, you can easily begin the installation in ESXi's user interface by selecting Virtual Machines > <your_VM>.
After this, click the ▶ Power on button and proceed to follow your operating system's installation instructions.
Go further
Browse all the Dedicated Servers guides.
Browse the rest of the OVHcloud US documentation for guides on our other products and services.
Learn more about Dedicated Servers on the OVHcloud US website.