
Configuring the Network on Windows Server with Hyper-V on the ADVANCE Gen 3 Servers
Learn how to configure the network in Windows Server with Hyper-V.
ADVANCE Gen 3 servers can be configured via vRack (through the use of Additional IPs) or via virtual MACs. If you plan on using virtual MAC addresses, please follow this guide.
Requirements
- an OVHcloud dedicated server
- access to the OVHcloud Control Panel
- a public block of IP addresses in your account, with a minimum of four addresses, attached to the vRack
NOTE: No virtual MACs should be applied to additional IPs in the OVHcloud Control Panel.
NOTE: The limit on public bandwidth capacity in every location is set to 5Gbps (egress, per region, per vRack network).
Contents
Step 1: Add the server and Additional IP to a vRack
Step 2: Installing the Hyper-V and RRAS roles
Step 3: Create the virtual switch in Hyper-V Manager
Step 4: Configure your VM
Instructions
Step 1: Add the server and Additional IP to a vRack
You can add your server and Additional IP block to a vRack using the OVHcloud Control Panel. Use the following links to see how:
Step 2: Installing the Hyper-V and RRAS roles
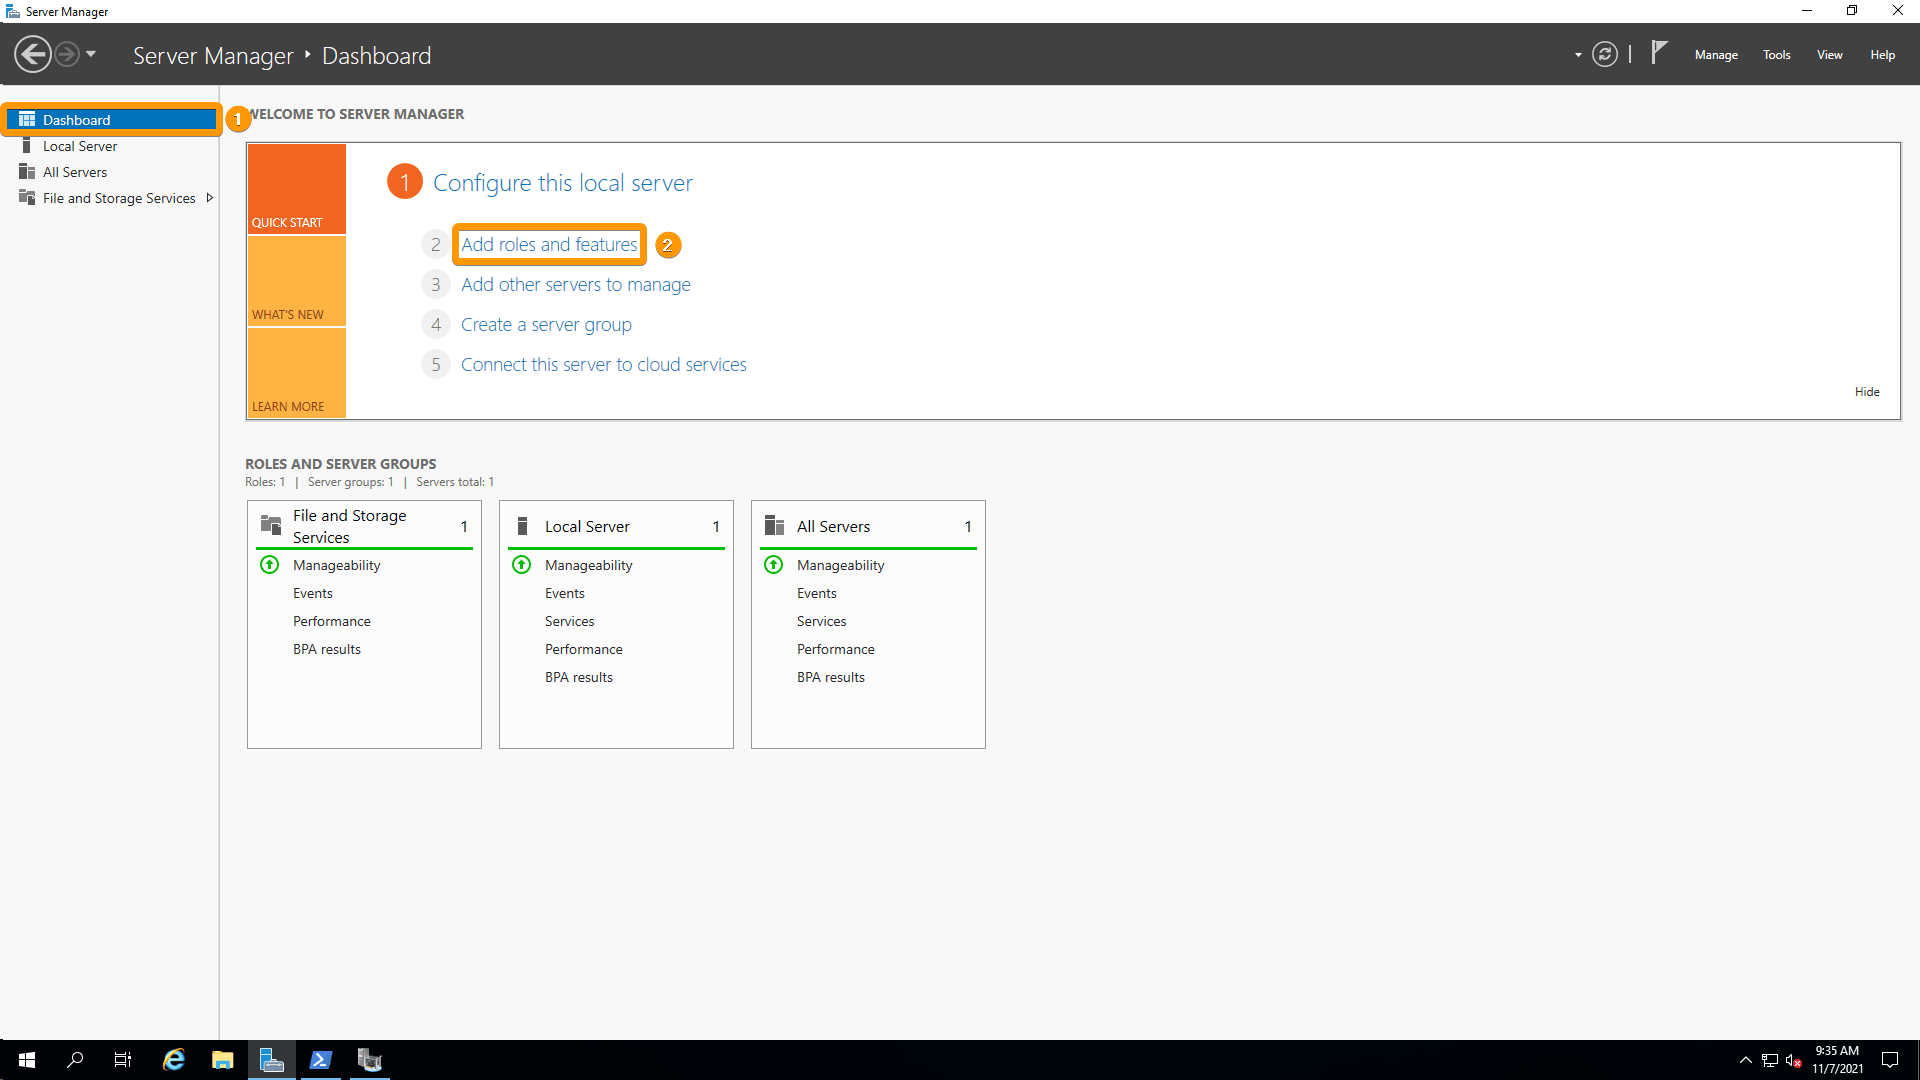
Go to the Server Manager and open the Dashboard, then click on Add roles and features.
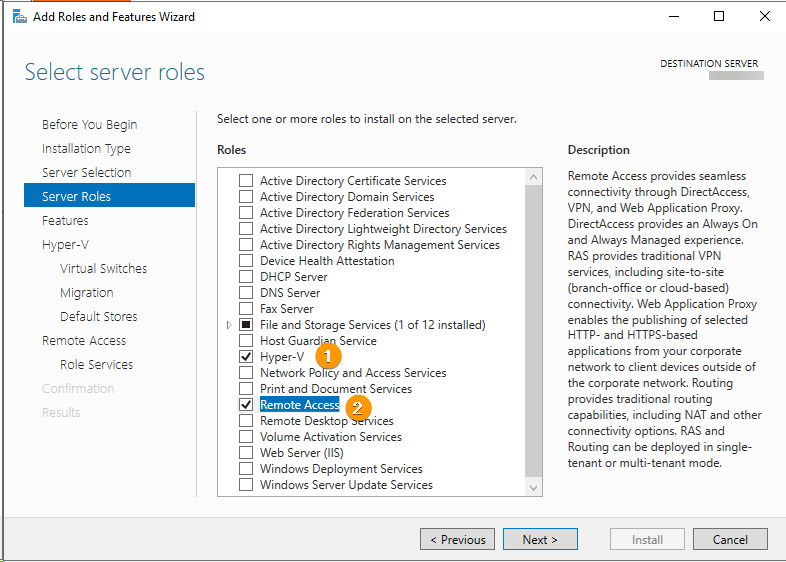
Go through the Wizard until you reach the Server Roles section and select Hyper-V and Remote Access.
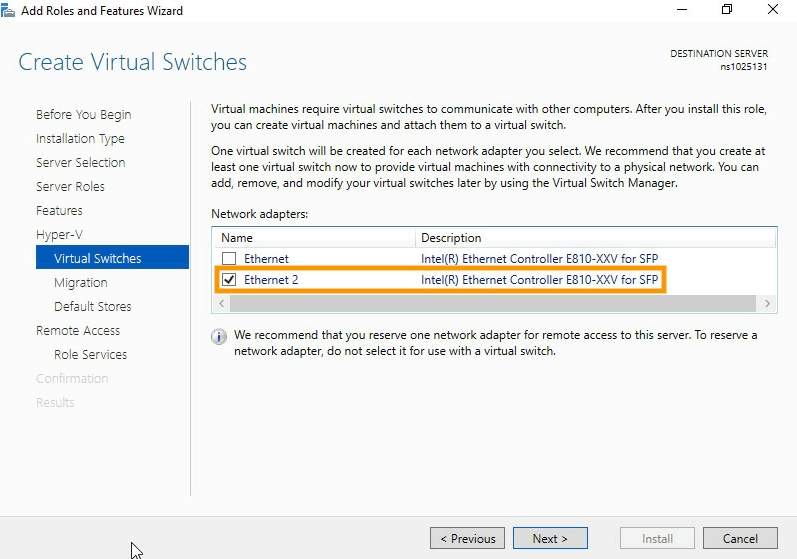
Next, proceed to the Virtual Switches subsection of Hyper-V and select the adapter of the private interface of the server.
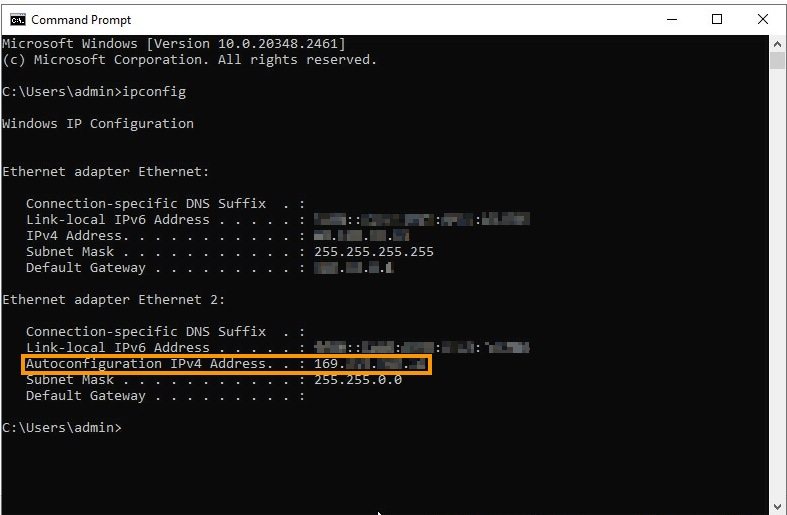
You can find this adapter by opening up cmd and using the ipconfig command. The result you need should have a 169.x... address or will not be tied to the server's public IP.
Next, proceed to the Role Services subsection of Remote Access and select Routing.
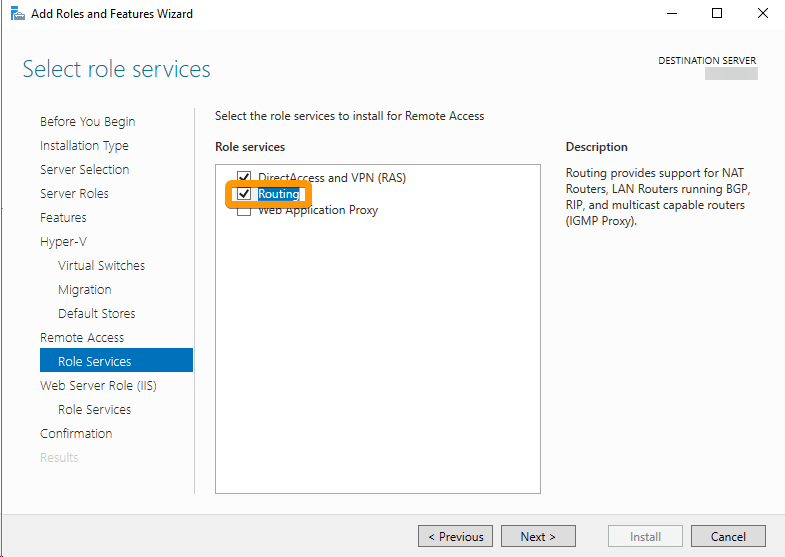
Finally, proceed to the Confirmation section, select Restart the destination server automatically if required, and click Install.
Step 3: Create the virtual switch in Hyper-V Manager
We will need to create a virtual switch for the VMs.
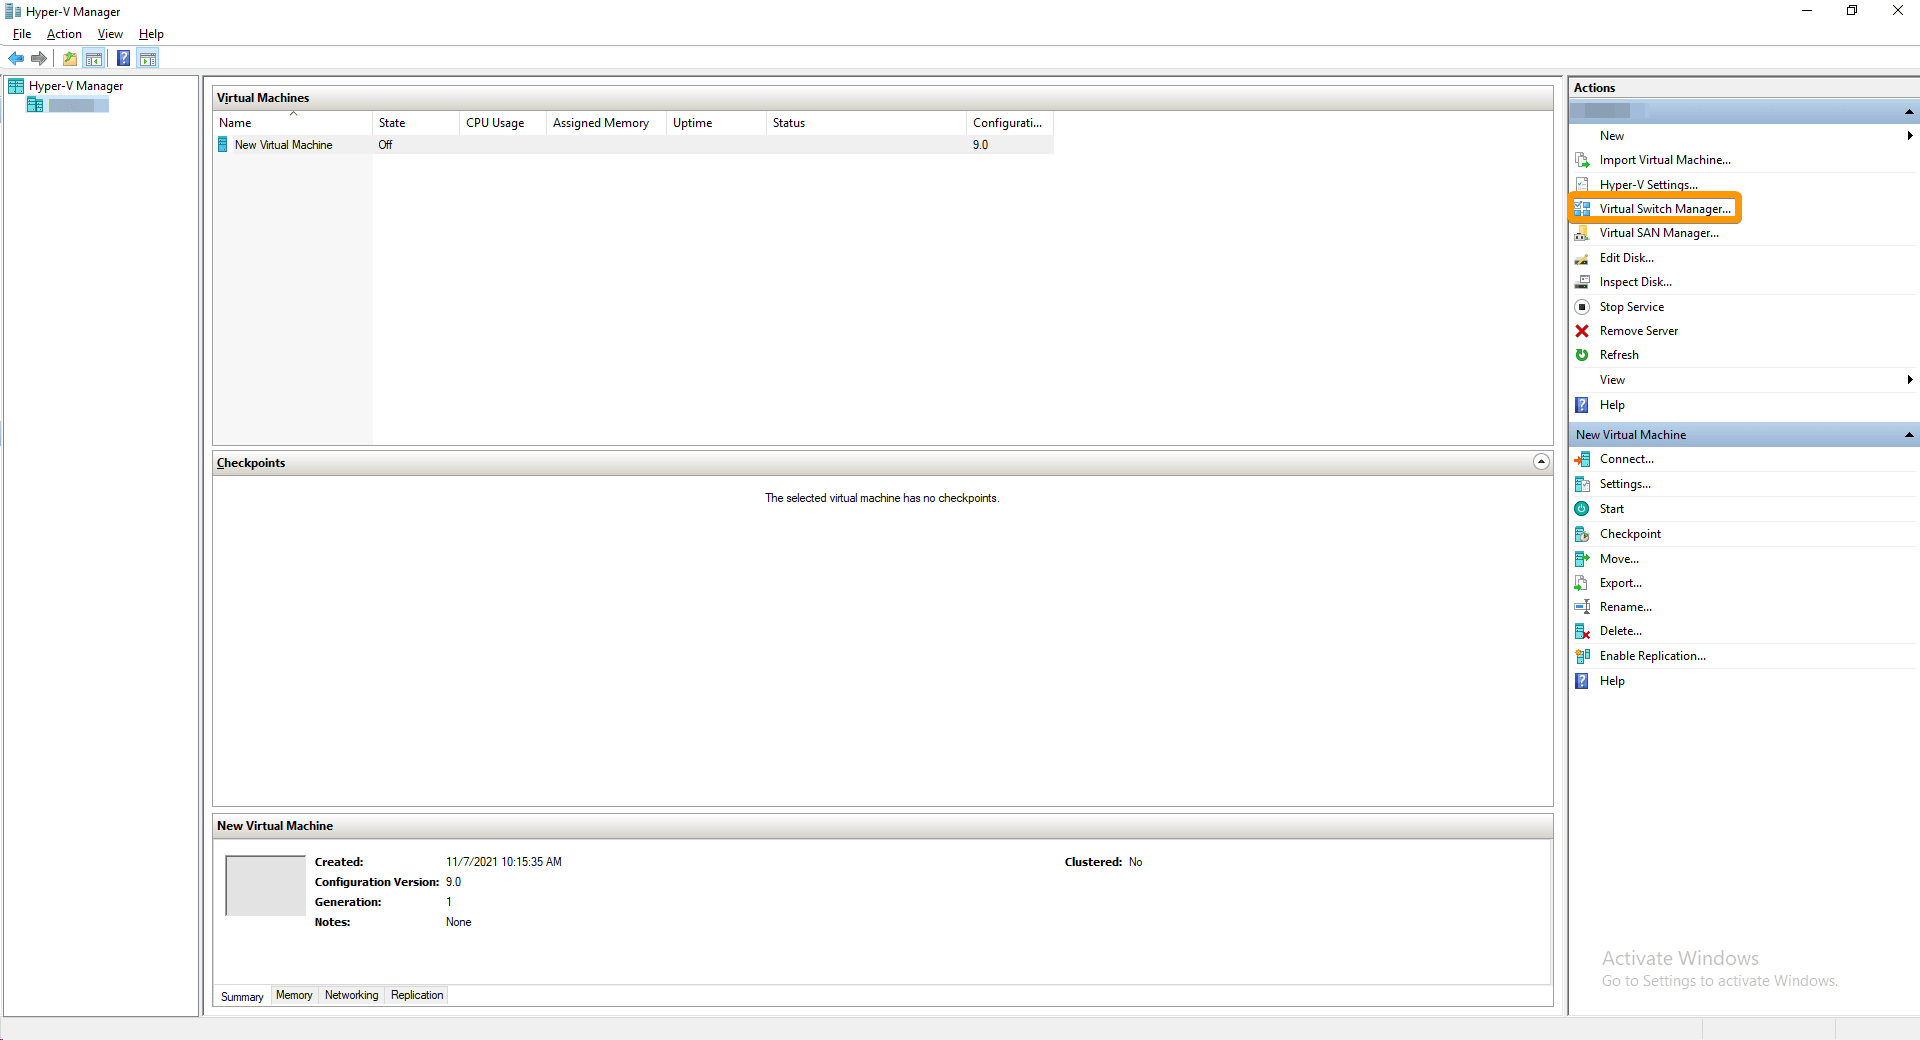
First, open the Hyper-V Manager and click on Virtual Switch Manager.
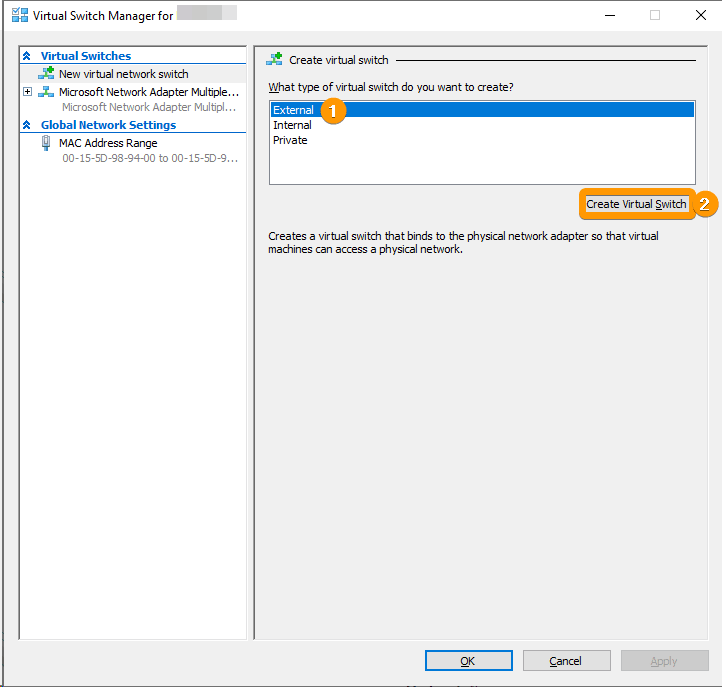
On this page, make sure you have External selected and click Create Virtual Switch.
Now, give your switch a name, choose your network adapter, then click Apply and then OK.
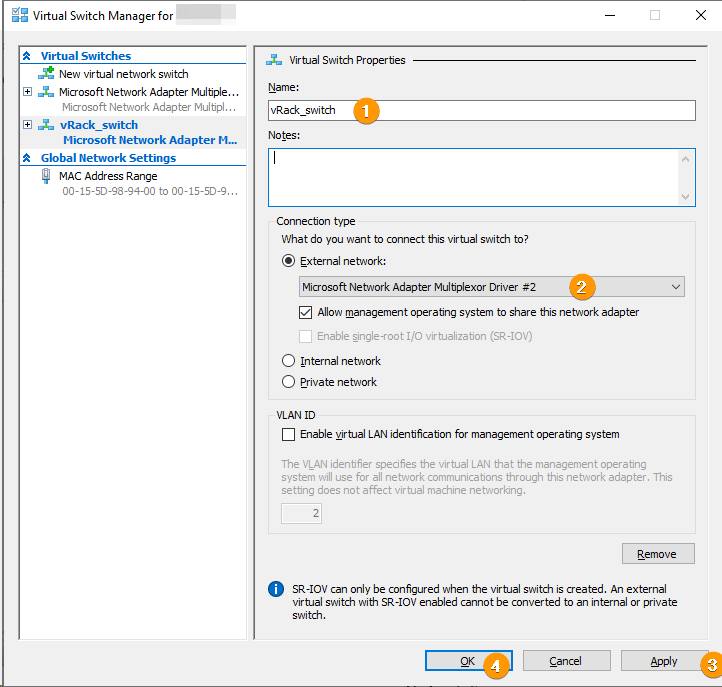
You are now ready to create your VM and configure its network.
Step 4: Configure your VM
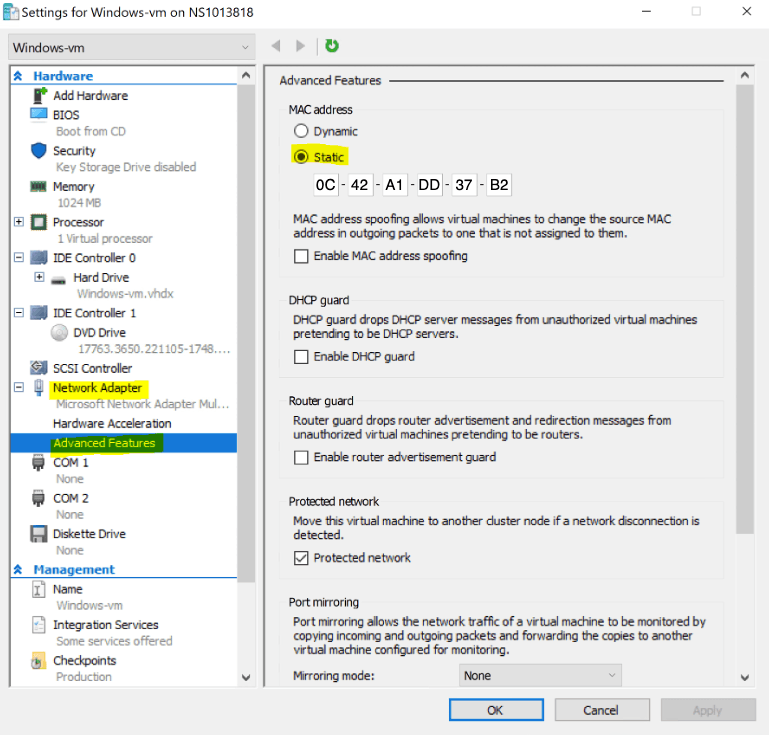
Once you create your VM, go to the settings, select Network Adapter from the left-hand menu, and click Advanced Features.
Set the MAC address to Static and enter the MAC address of the virtual switch.
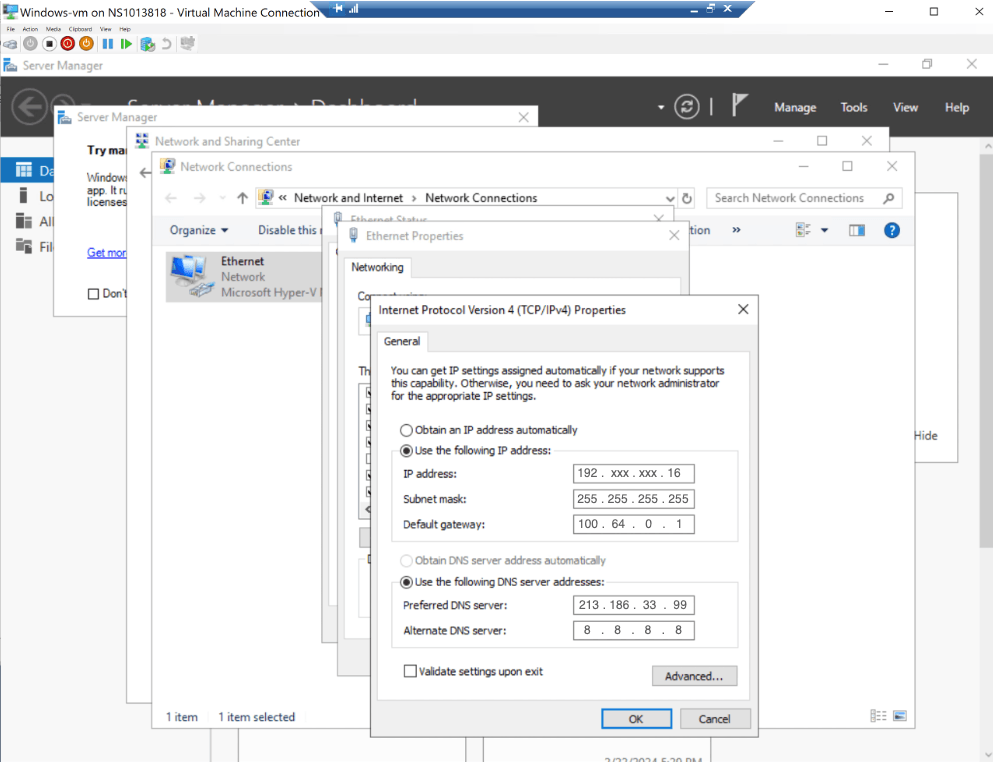
Set the Static IP address inside your VM to the Additional IP address.
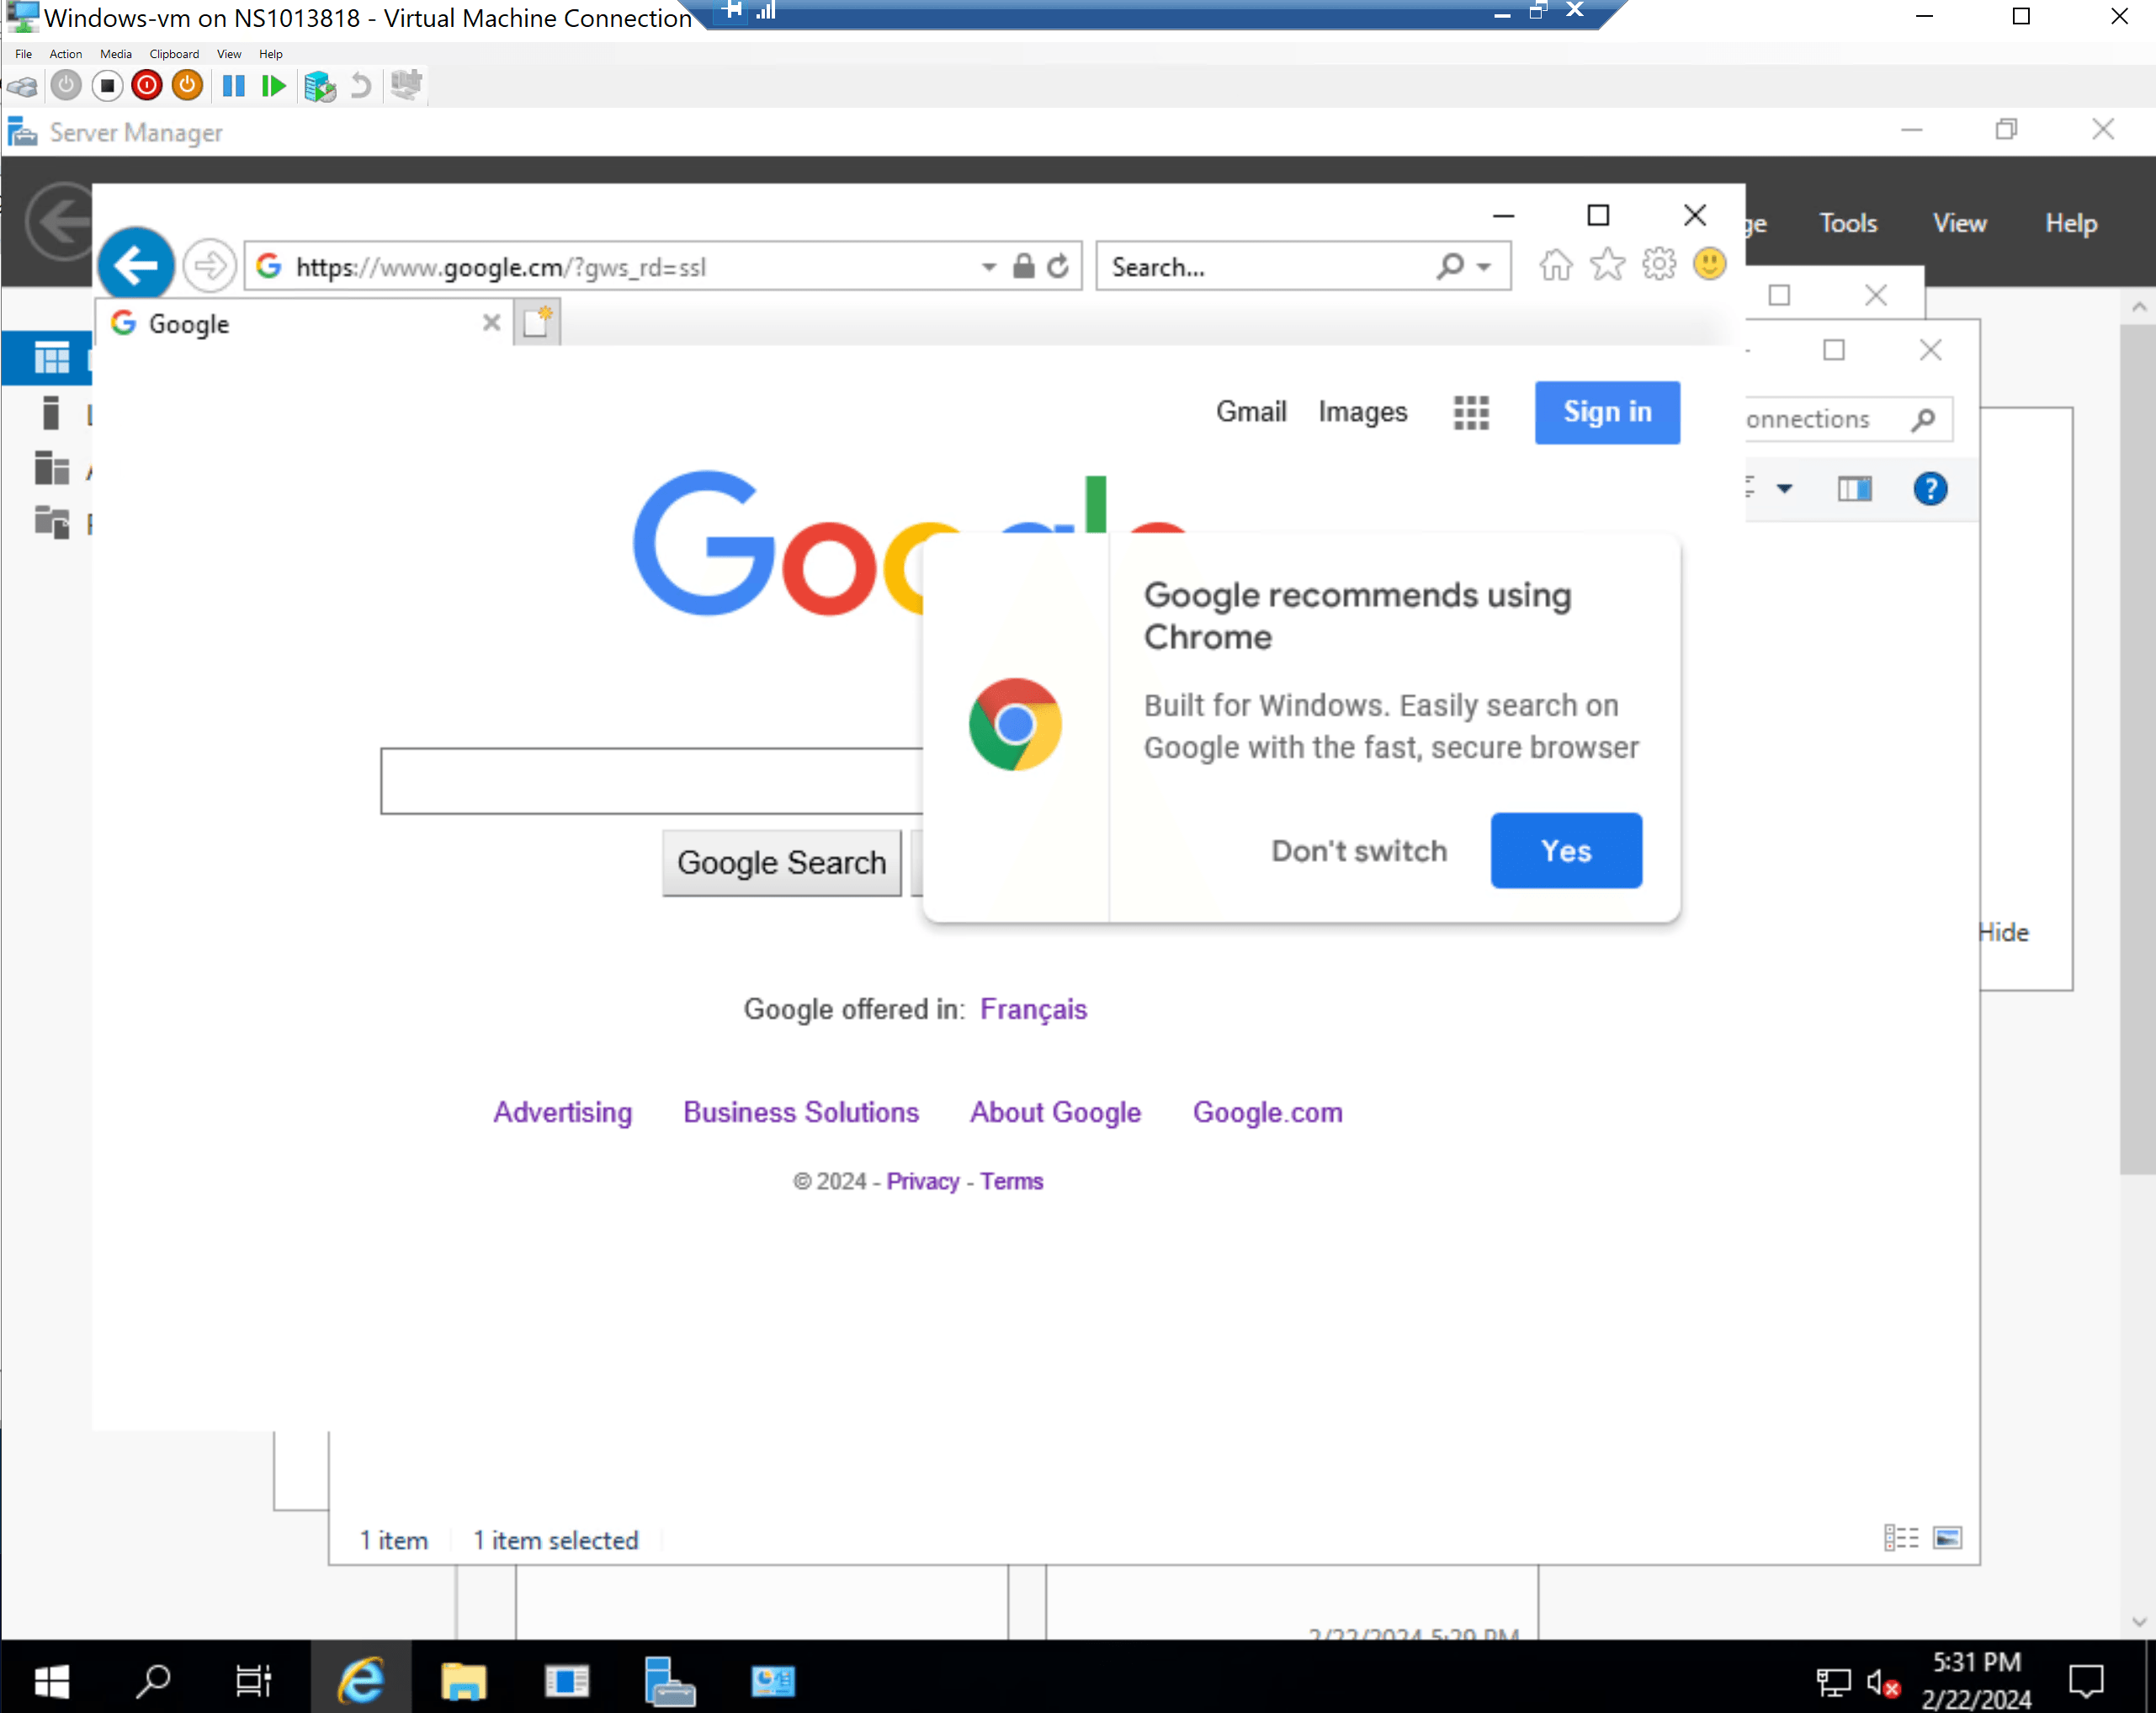
Your VM should now have internet access.
Configure a usable IP address
For vRack, the first, penultimate, and last addresses in a given IP block are always reserved for the network address, network gateway, and network broadcast respectively. This means that the first usable address is the second address in the block, as shown below:
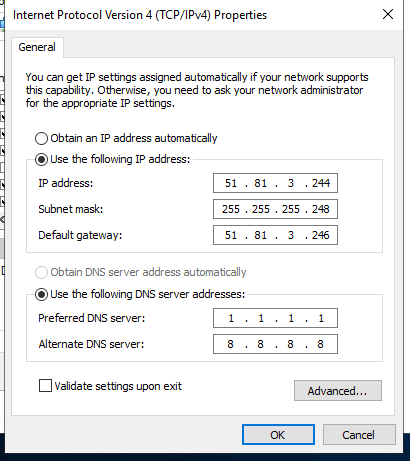
To configure the first usable IP address, you must edit the network configuration file as shown below. In this example, we use a subnet mask of 255.255.255.248.
The subnet mask used in this example is appropriate for our IP block. Your subnet mask may differ depending on the size of your block. When you purchase your IP block, you will receive an email notifying you of the subnet mask to use.
Windows-19 VM network configuration
In this example, enter one of the usable IP addresses in your block as the IP address and the second to last IP in your block as the Default gateway.
Configuration example of a client VM on Ubuntu
Create a vrack.yaml file under /etc/netplan/vrack.yaml.
Content of the file /etc/netplan/vrack.yaml:
For the netplan configuration changes to take effect, you must reboot the VM or run this command:
Go further
Browse all the Dedicated Servers guides.
Browse the rest of the OVHcloud US documentation for guides on our other products and services.
Learn more about Dedicated Servers on the OVHcloud US website.