
Getting started with a VPS
A Virtual Private Server (VPS) is a server that you fully administer.
Unlike a managed web hosting service, you are responsible for the following:
- Configuration: managing and setting up your server.
- Security: protecting your VPS against attacks.
- Maintenance: keeping the server up to date and operational.
- Backups: regularly testing your backups to ensure data recovery.
Requirements
- An active Virtual Private Server in your OVHcloud account
- Access to the OVHcloud Control Panel
Instructions
To understand the management interface of your VPS and the available actions in the OVHcloud Control Panel, refer to our guide dedicated to getting started with the OVHcloud Control Panel for VPS.
Content overview:
-
Step 1: Initial connection
- GNU/Linux distribution
- Windows distribution
-
Step 2: Using the root account
-
Step 3: Securing your VPS
-
Step 4: Linking a domain name
Step 1: Initial connection
Linux
When you connect to your VPS for the first time, note that the account you connect with is not root.
At OVHcloud, for security reasons and to protect our customers' services, we automatically create a username linked to the operating system you selected when you placed your order.
The exact username to use for the connection is clearly indicated in your VPS delivery email.
For example:
- For Debian, the username will be debian.
- For Ubuntu, the username will be ubuntu.
- For Rocky Linux, the username will be rocky.
The temporary password associated with this account is sent to you via a secure link in your delivery email.
Important note: during your first connection, you will be asked to change this temporary password.
Once the password is changed, the session will be automatically closed. This is normal behavior. You will then need to reconnect using your new password.
- Replace "username" with the user corresponding to your OS.
- Replace "IPv4_de_votre_VPS" with the IP address indicated in your delivery email.

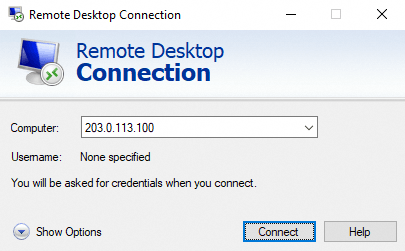
Step 2: Using the root account (optional but recommended)
The root user is disabled by default for the security of your product.
For administrative tasks, use sudo from your main user:
If you wish to enable root:
Step 3: Securing your VPS
If you wish to secure your VPS, we recommend following our guide "Securing a VPS". This guide walks you through the process and details the following actions:
- Updating the system.
- Changing the default SSH listening port.
- Configuring the internal firewall.
- Installing fail2ban to block repeated login attempts.
- Backing up your system and data.
Step 4: Linking a domain name (optional but recommended)
Putting your VPS online usually involves using and configuring a domain name.
For this, we recommend performing the following actions:
- Point the domain to the IPv4 address of your VPS.
- Enable a free SSL certificate (Let's Encrypt) to secure access to your websites via HTTPS.
Go further
Browse all the Virtual Private Servers guides.
Browse the rest of the OVHcloud US documentation for guides on our other products and services.
Learn more about VPS on the OVHcloud US website.