
Configuring an additional disk on a VPS
Learn how to enable the additional disk option and configure the storage space for use with the VPS.
With OVHcloud Virtual Private Servers, you have the option to add secure storage space as a service. This storage is separated from the internal storage capacity of the VPS solution, which makes it a secure place for your backups or other static data. The additional disk will only be accessible from the server’s IP address, and data stored on it will remain unaffected, even if the VPS is reinstalled or suffers data loss.
NOTE: This feature is currently unavailable for Virtual Private Servers in Local Zones.
Requirements
- A VPS in your OVHcloud account
- Access to the OVHcloud Control Panel
- Administrative access via SSH or RDP to your VPS
Instructions
Log in to the OVHcloud Control Panel, go to the Bare Metal Cloud section, then Virtual Private Servers, and select your VPS.
Subscribing to the additional disk option
After selecting your VPS, click on the Additional disk tab. Click on Order an additional disk and choose a disk size from the selection that appears.
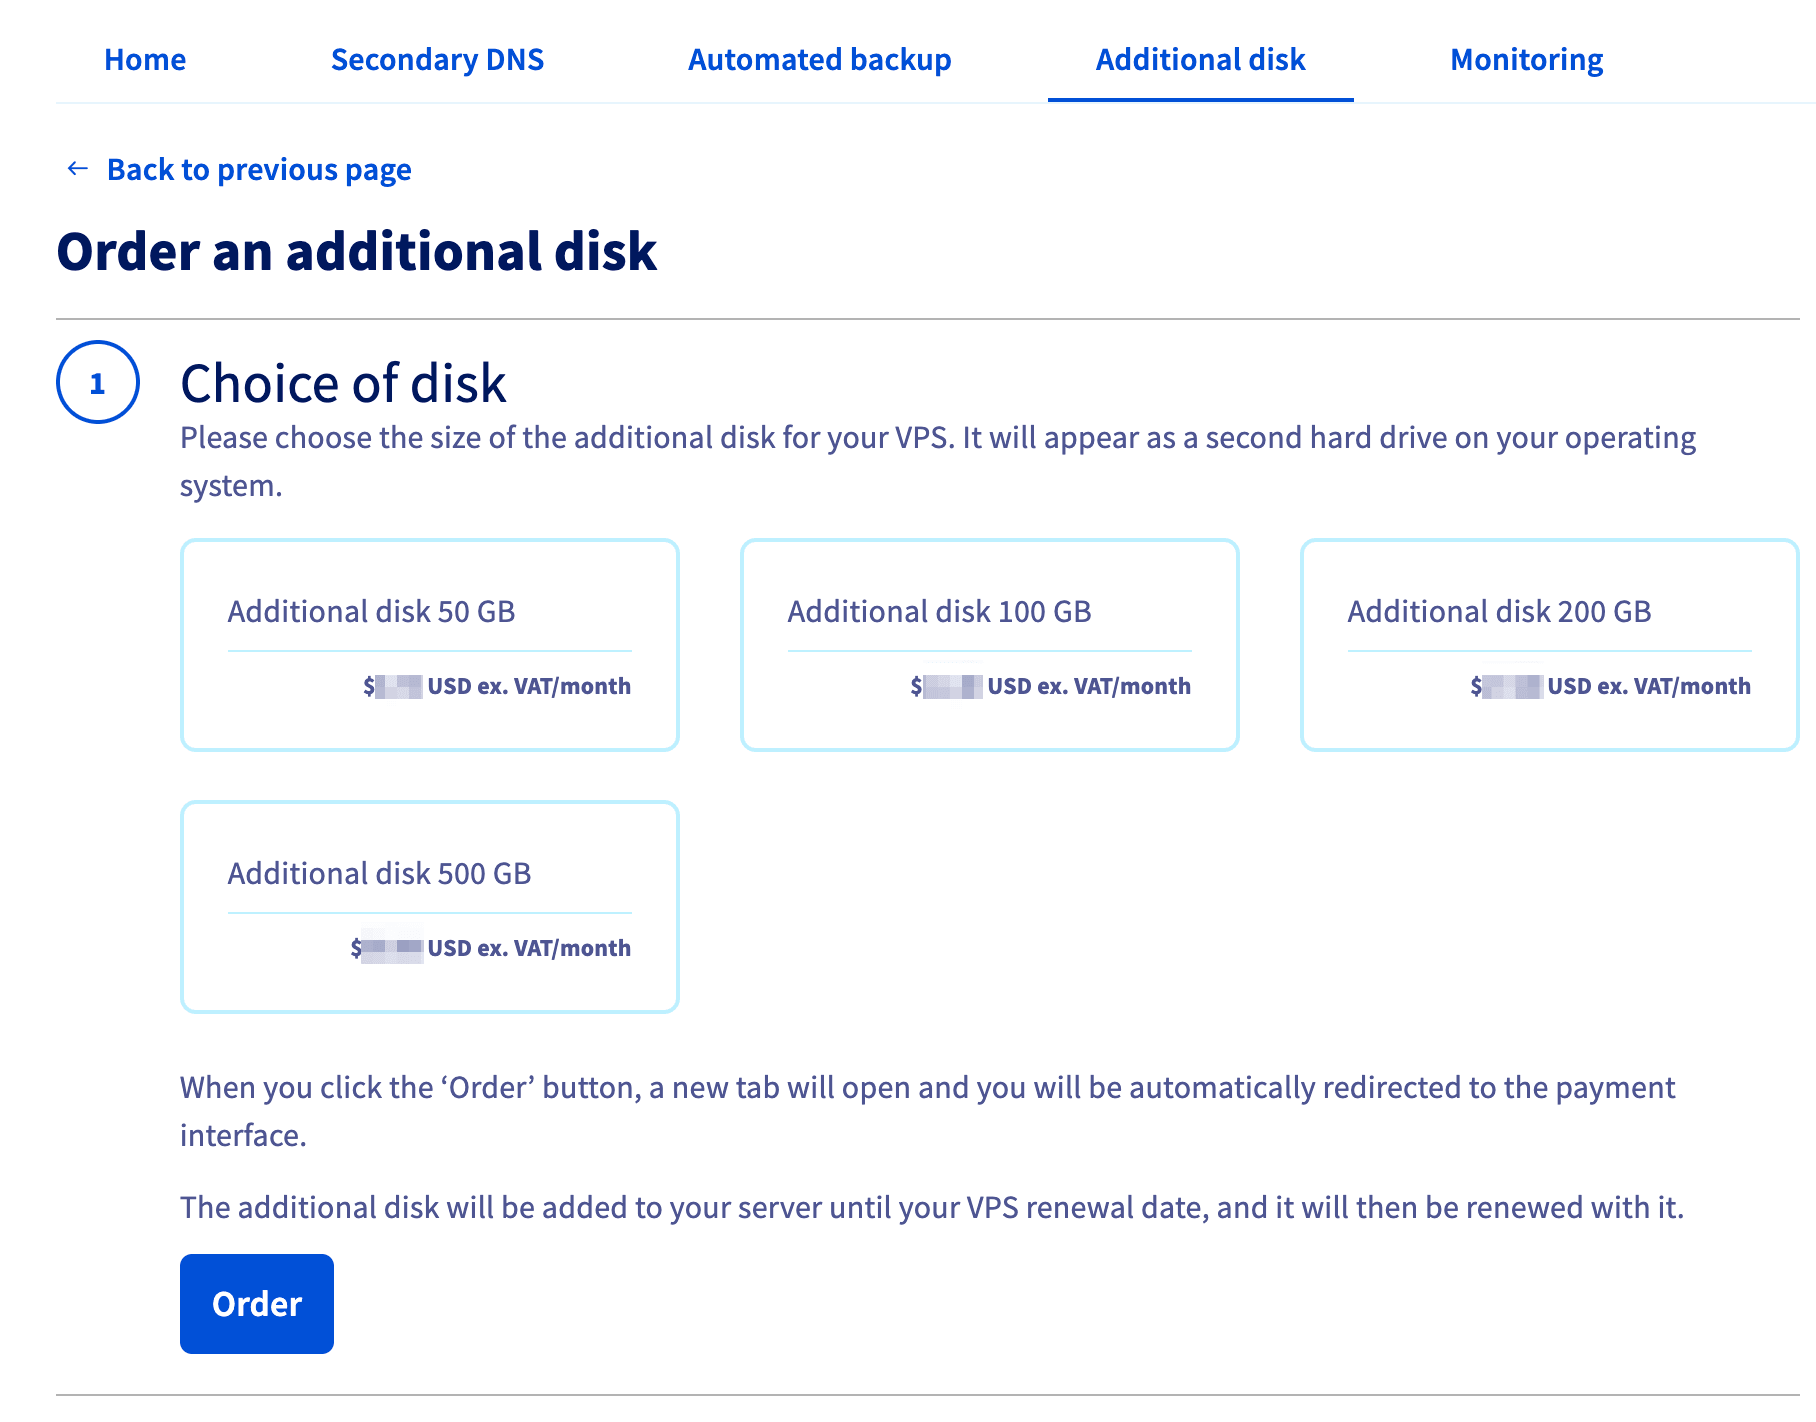
Take note of the pricing information, then click on Order. You will be guided through the order process and receive a confirmation email as soon as the disk is installed.
Mounting the new storage space
NOTE: OVHcloud provides services for which you are responsible for their configuration and management. You are therefore responsible for their proper functioning.
This tutorial is designed to help you as much as possible with common tasks. If you are having difficulty performing these actions, please contact a specialized service provider. OVHcloud cannot provide you with technical support in this regard.
On a Linux VPS
If a GNU/Linux distribution is installed on your VPS, establish an SSH connection to your server from the command line terminal or by using an SSH client application.
The examples below presume you are logged in as a user with elevated permissions.
You can use the following command to verify the name of the new device:
In this example, the additional disk is named sdb.
Execute fdisk to create a partition on the disk; when prompted, enter n for a new partition and accept the subsequent defaults by pressing Enter (“↩”). Finally, use the w command to write the changes to the disk.
Now that the partition sdb1 is created, you can format it with ext4:
The final step is to mount the disk:
You can see in the last line that the additional disk is now mounted at /mnt/disk:
This previous step is not persistent because the disk will be detached if the VPS is restarted. To automate the mounting process, the fstab file needs to be edited.
First, retrieve the UUID (block ID) of the device:
Open /etc/fstab with a text editor:
Add the line below to the file and replace the UUID with your own:
Save and exit the editor. The disk should be automatically mounted after every reboot from now on.
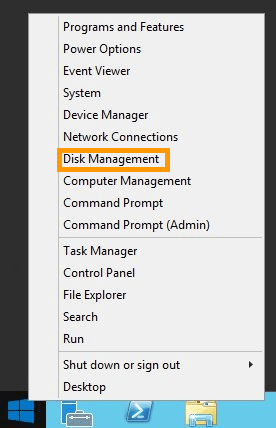
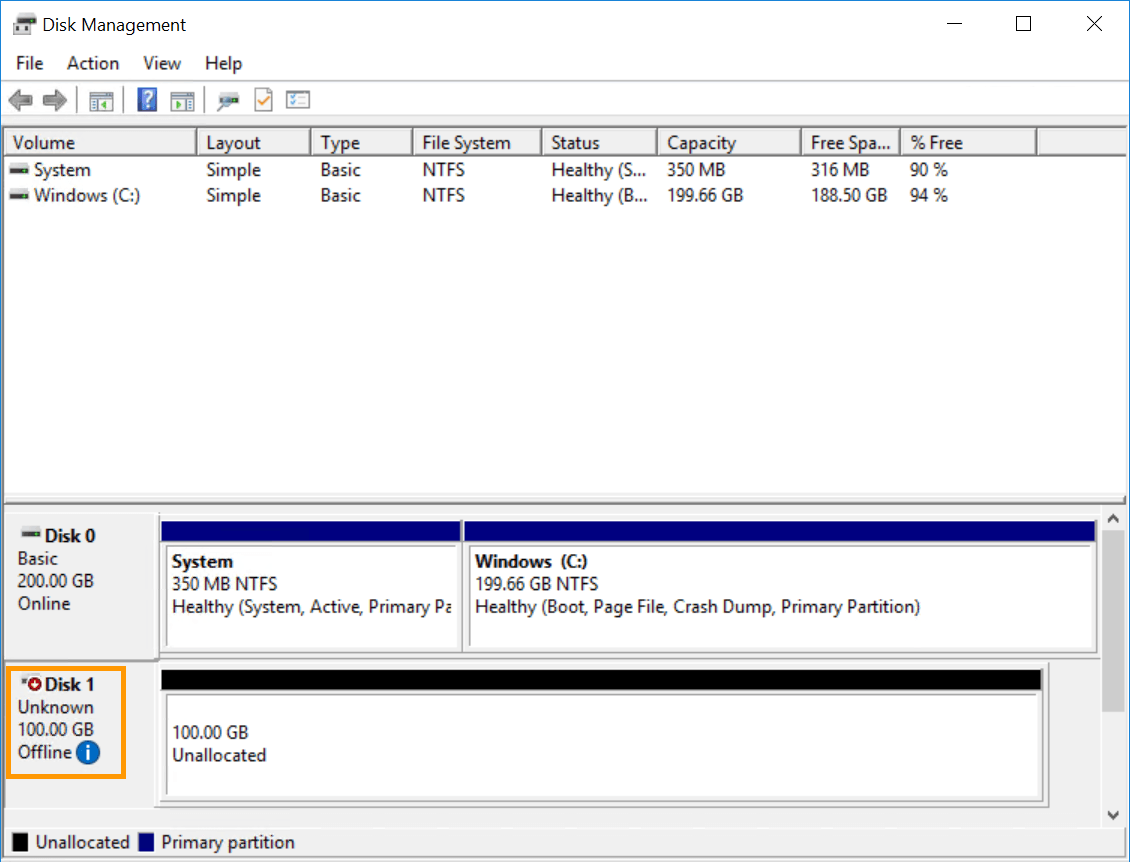
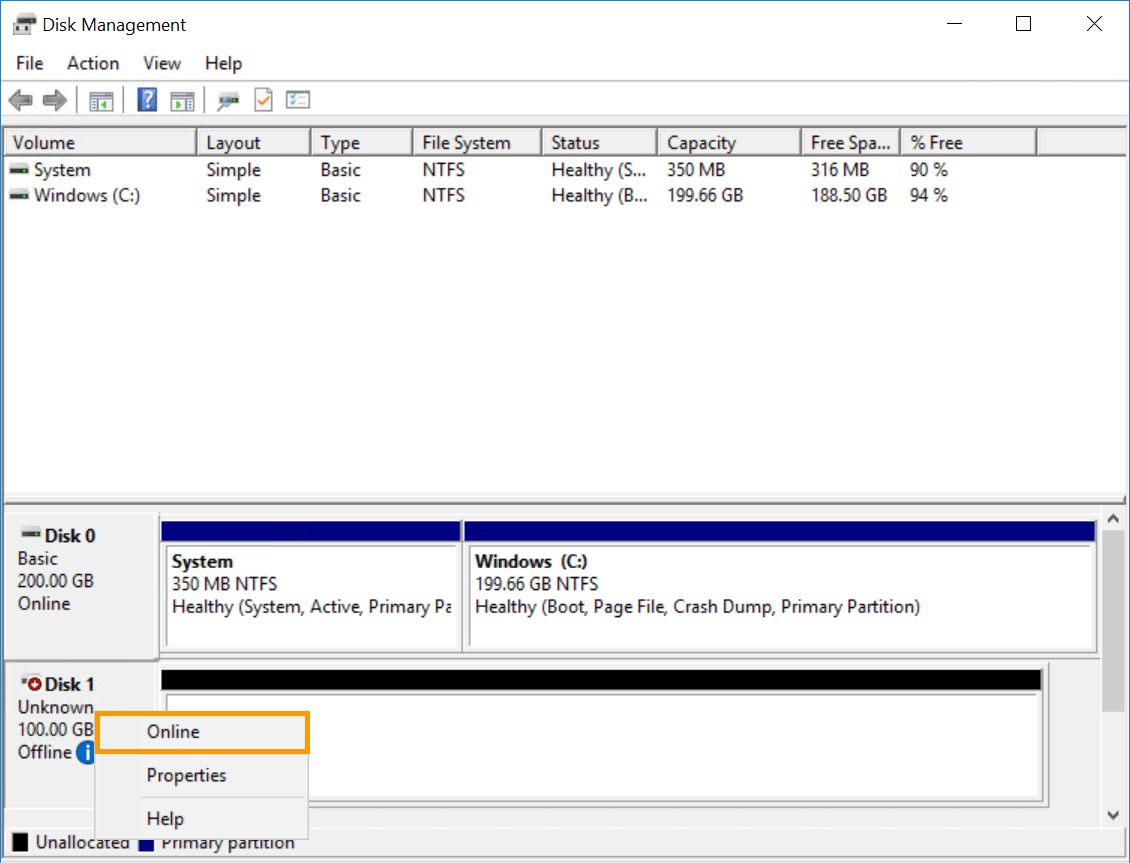
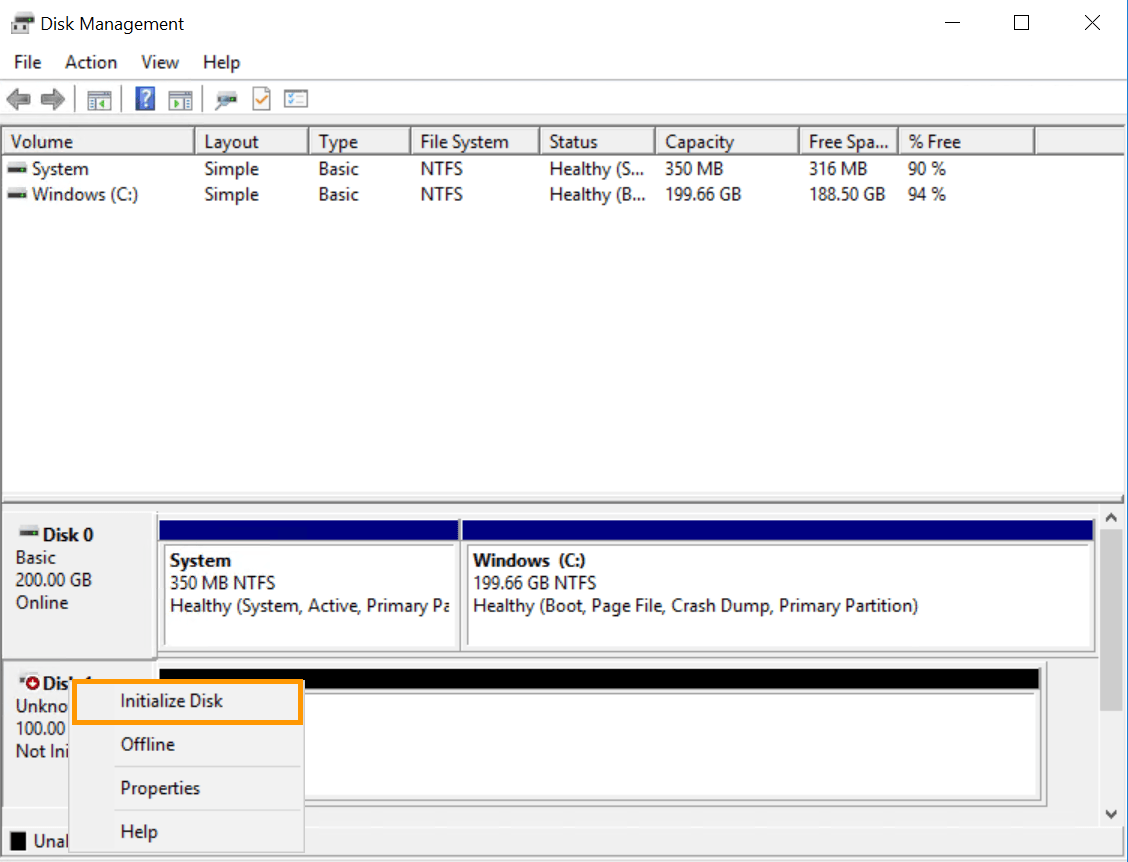
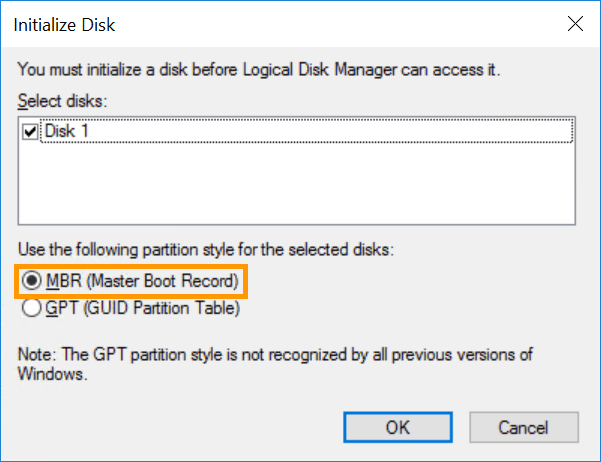
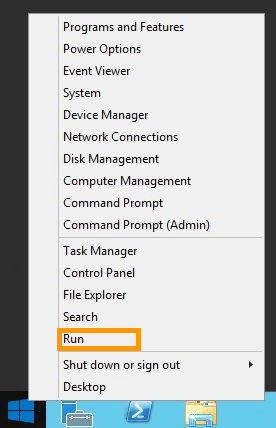
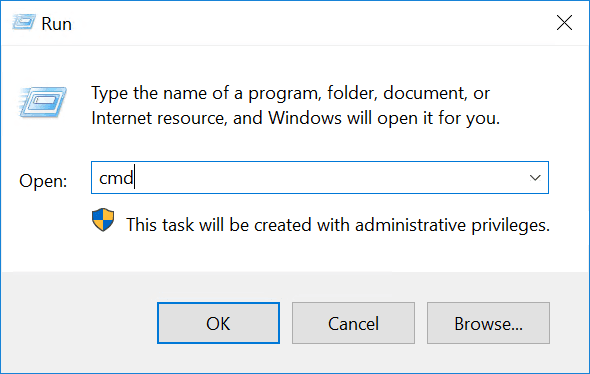
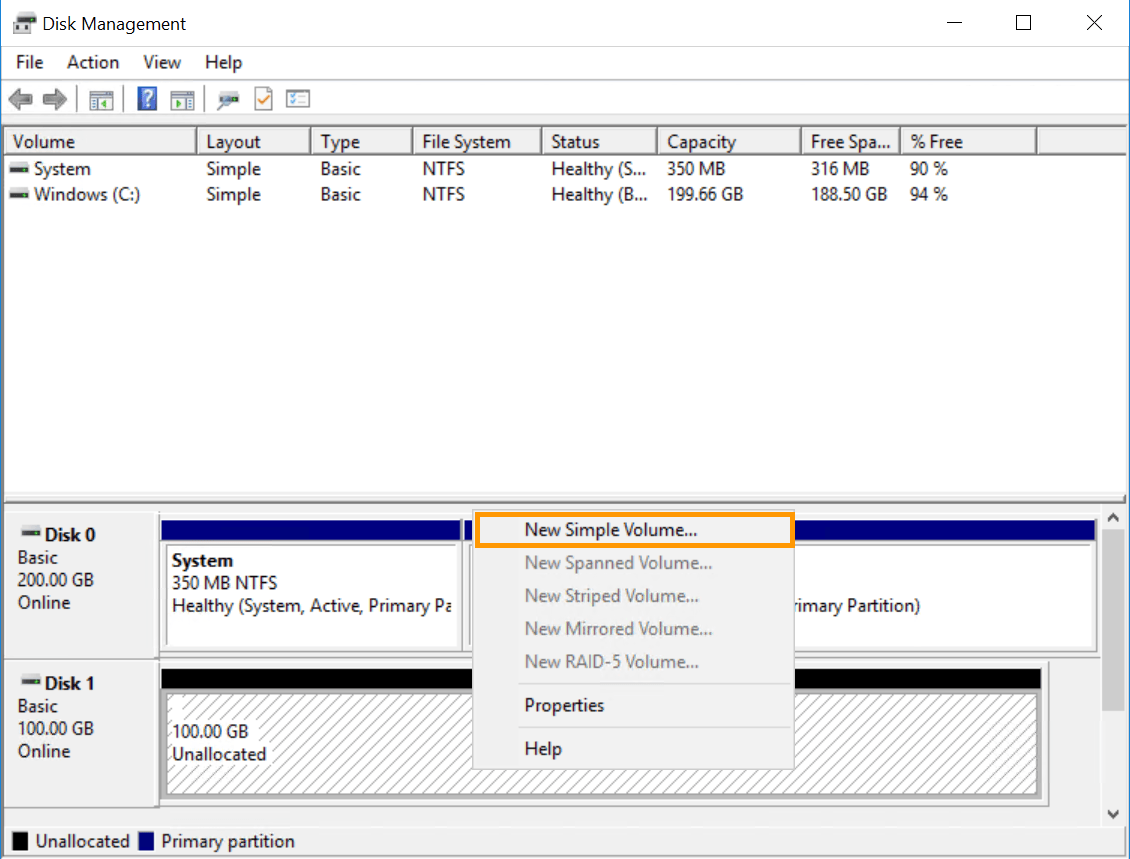
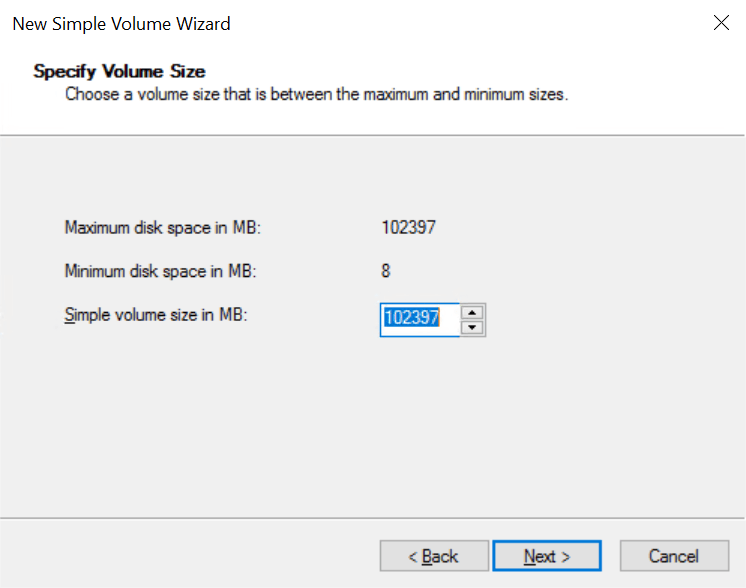
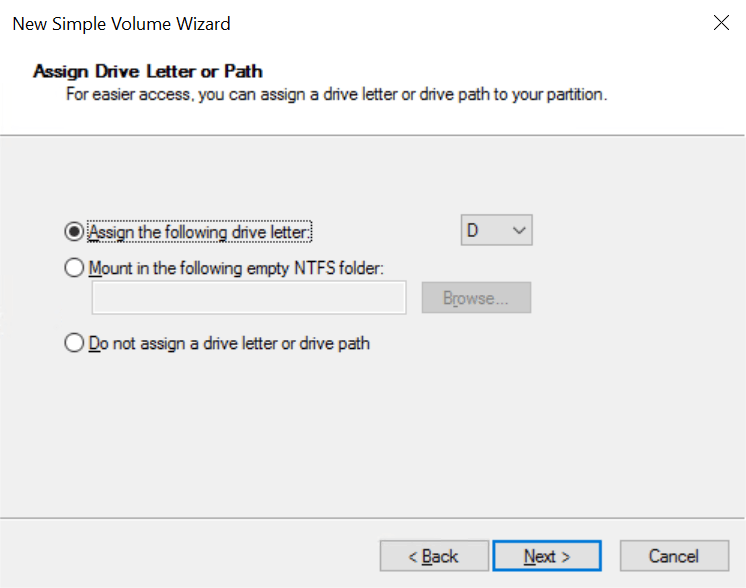
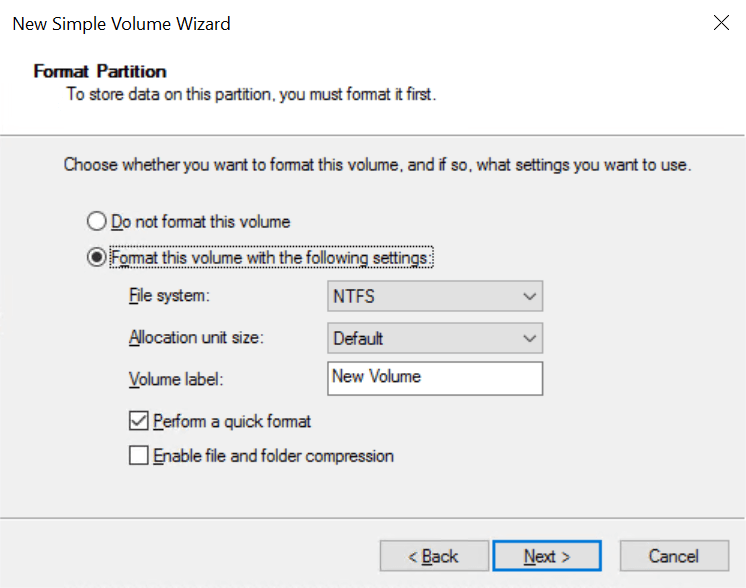
Cancelling the additional disk option
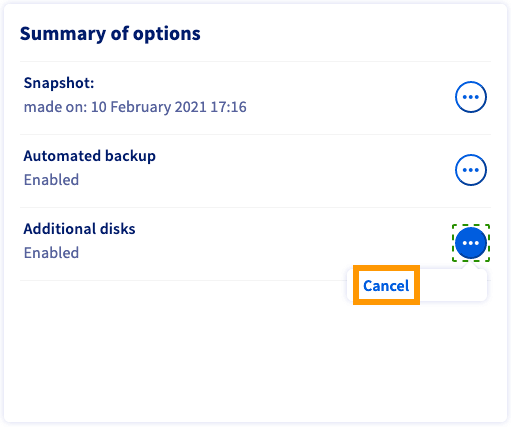
From the Home tab, in the Your configuration panel. Click the more options ... button next to Additional disks and click on Cancel.
Go further
Browse all the Virtual Private Servers guides.
Browse the rest of the OVHcloud US documentation for guides on our other products and services.
Learn more about VPS on the OVHcloud US website.