
Configuring the network on VMware ESXi with SCALE and HG servers
Learn how to configure the network on VMware ESXi.
On the High Grade & SCALE ranges, it is not possible to manage additional IPs in bridged mode (via virtual MACs). Configuring additional IPs in routed mode or via the vRack is necessary.
To date, the documentation only covers the solution via the vRack.
NOTE: Since September 15, 2025, OVHcloud has provided an ESXi 8 installation template for its dedicated servers.
Requirements
- A public block of IP addresses in your account, with a minimum of four addresses
- Your chosen private IP address range
- A vRack-compatible dedicated server connected to the appropriate vRack
- A vRack service activated in your account
- Access to the OVHcloud Control Panel
Instructions
NOTE: On these server ranges, there are four network cards. The first two are for the public, and the last two are for the private network. To get all the bandwidth, aggregates must be created.
NOTE: There's currently a known issue with the ESXi graphical user interface; performing these steps in the interface will result in a non-working configuration. It is necessary to apply this configuration using the command line interface in SSH.
Identify your vNICs
You will need to identify which NICs are public and which are private to complete the later steps in this guide. You will need to follow the next step in command mode (shell).
The values supplied in these commands (i.e. vmnic0, vmnic1, etc.) will vary, but you should get similar outputs to what is shown below.
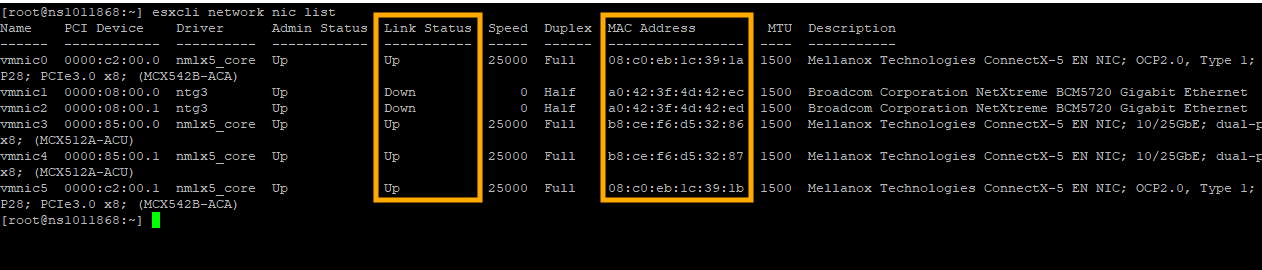
To begin, use the following command:
In the output displayed, focus on the NICs with a Link Status of "Up" and their MAC addresses, as shown in the example below.
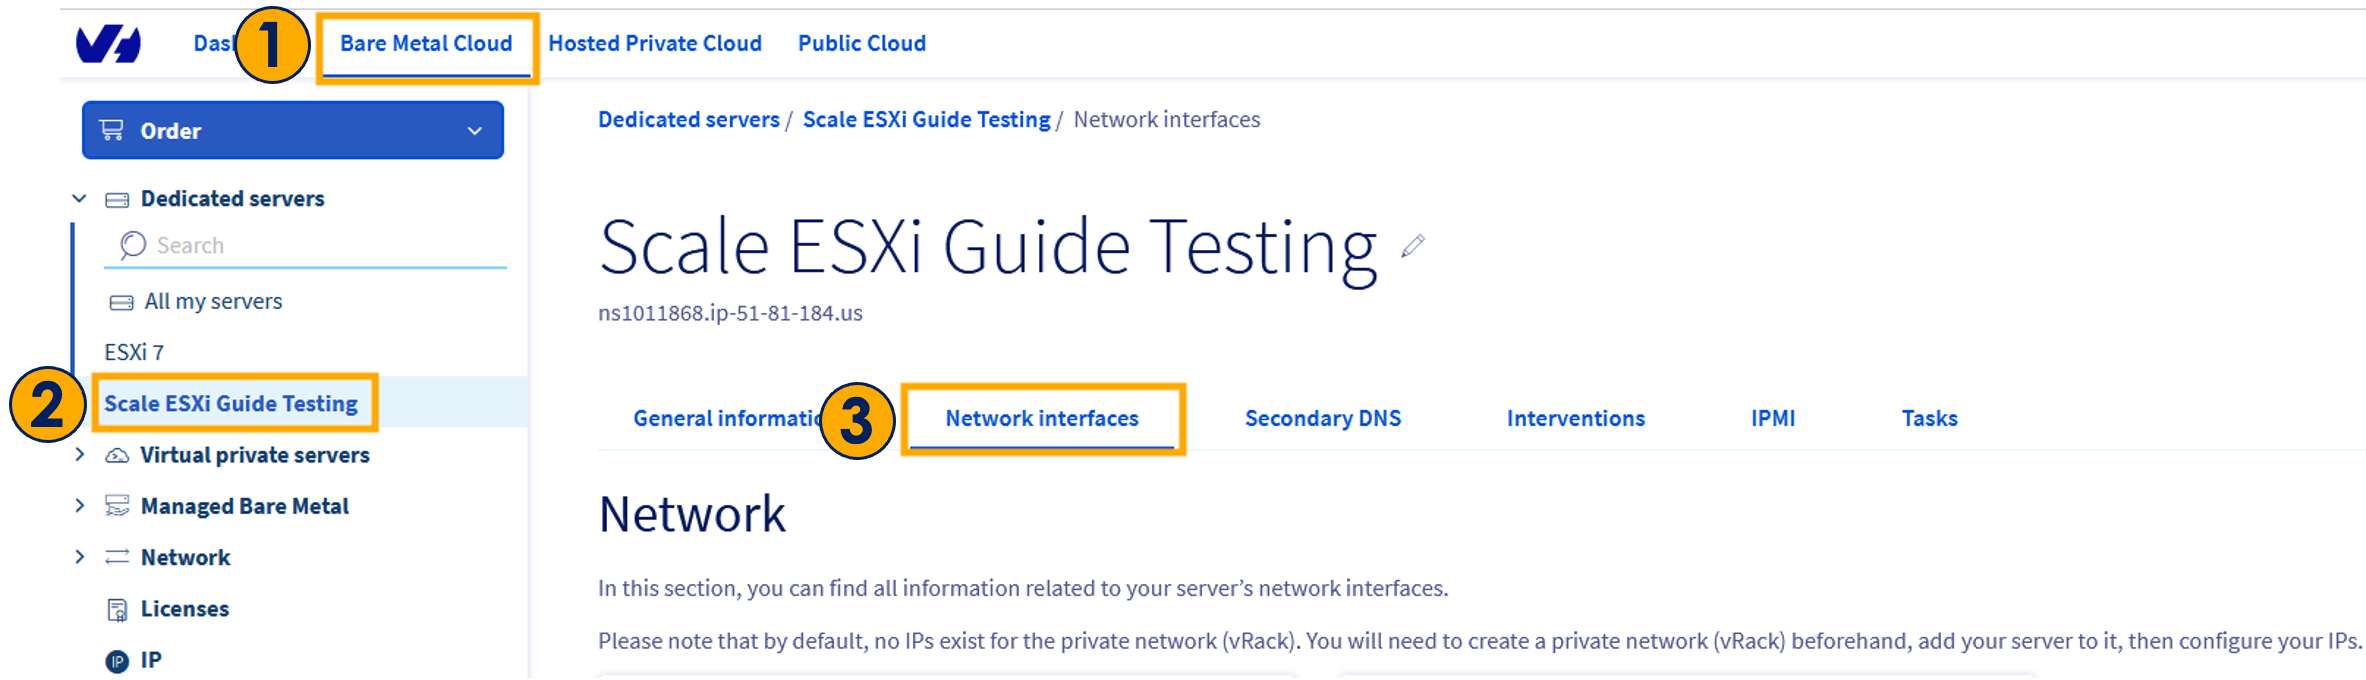
Navigate to your OVHcloud Control Panel.
- Select
Bare Metal Cloud. - Click on the
Dedicated Servers menu. - Select your server.
- Click the
Network Interfacestab.
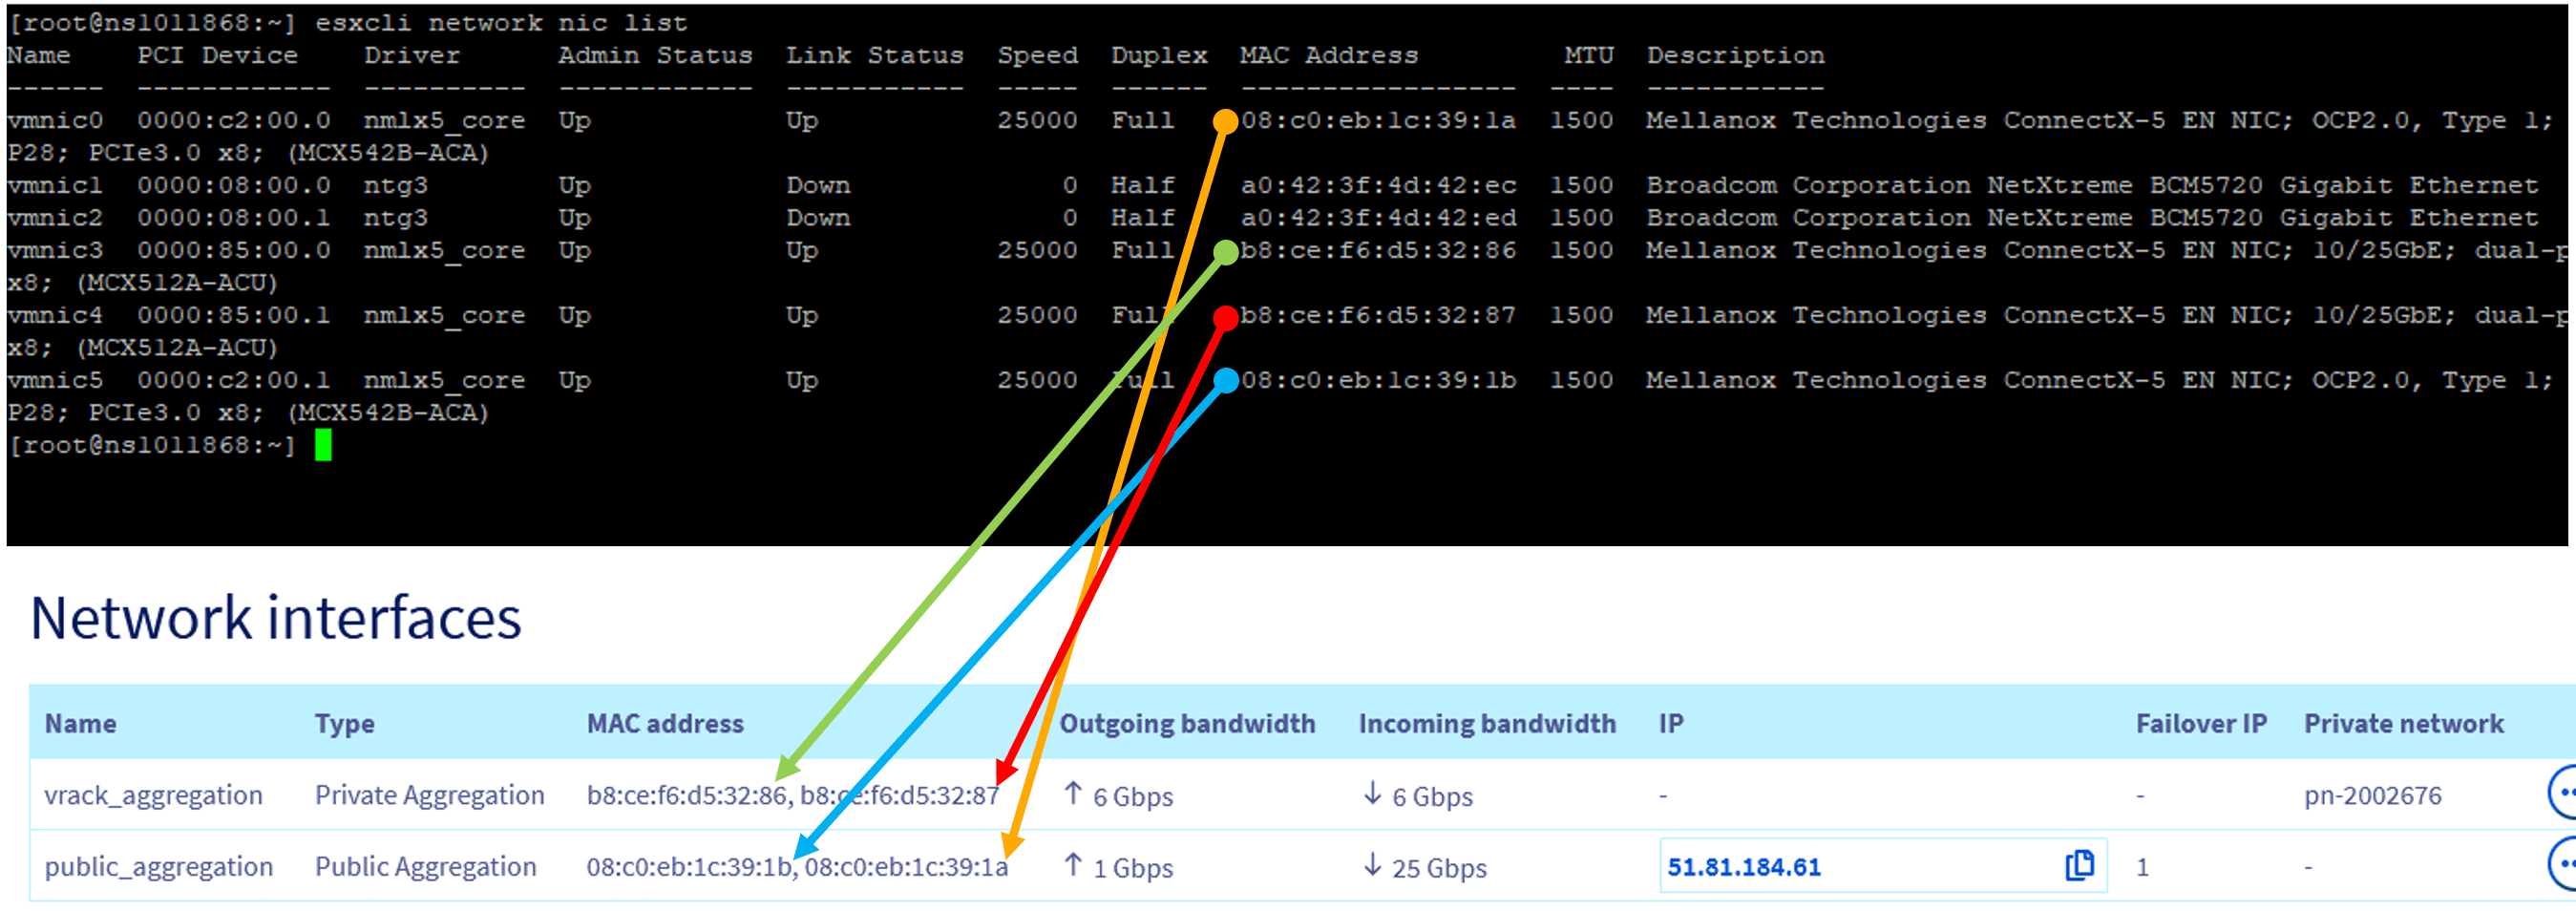
At the bottom of this screen, look at the list of Network Interfaces, focusing on the Type and MAC Address columns.

Compare these MAC addresses to those in the output in the previous step to determine which two NICs are public and which two are private.
In the examples in this guide:
- the public interfaces are
vmnic0andvmnic5; - the private interfaces are on
vmnic3andvmnic4.
Additional IP via vRack
NOTE: The limit on public bandwidth capacity in every location is set to 5Gbps (egress, per region, per vRack network).
Original configuration
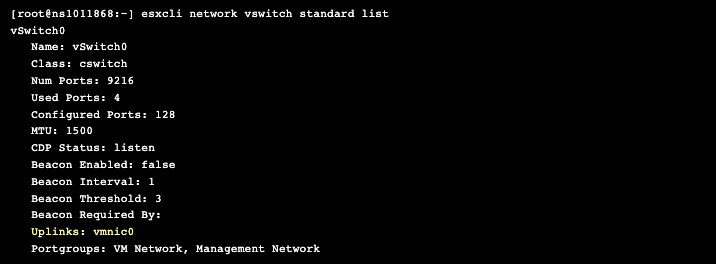
Use the following command to see the current status of your vSwitch
The output will show one of your public NICs in the Uplinks line.
Explanations
You need to:
- Create the aggregate on the public vSwitch
- Create the vSwitch for the vRack
- Create a port group for the new vSwitch for vRack
- Create a VMKernal NIC
- Change the NIC teaming Load balancing setting
- Create VMs using the new port group as the network interface
Configure ESXi
You will need to follow the next steps in command mode (shell) instead of the ESXi GUI.
-
Create the aggregate in LACP mode on the vSwitch that carries the public interfaces.
Use the following commands:
The output should show both of your public NICs in the Standby Adapters line.
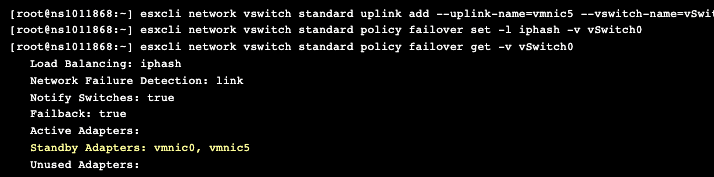
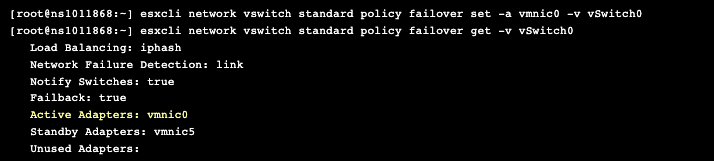
Then use the following commands:
The output should show one of the public NICs as Active.
-
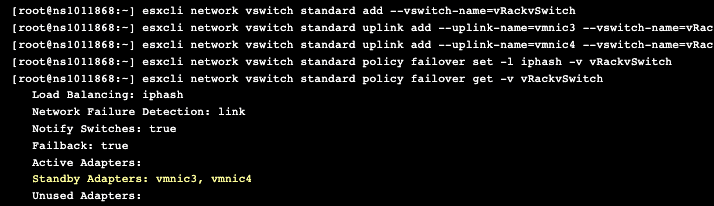
Create vSwitch and vRack aggregation on private interfaces.
Use the following commands:
The output will show your private NICs as Standby Adapters:
-
Create a port group for the new “vRackvSwitch” vSwitch.
Use the following command:
-
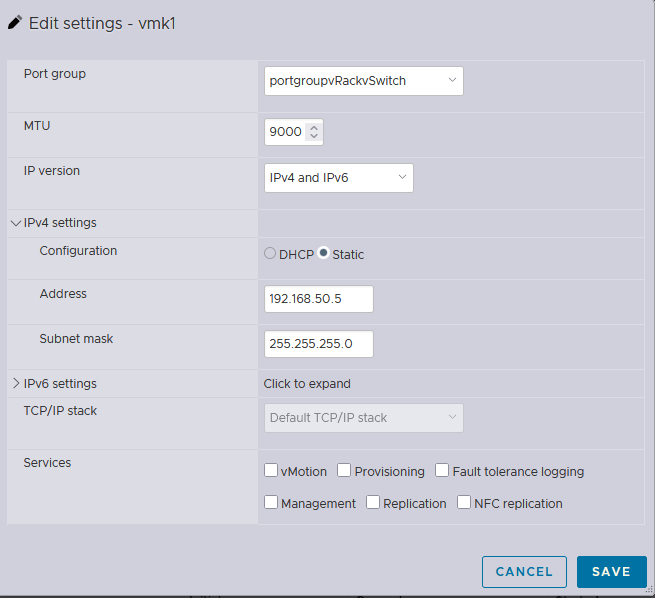
Create VMKernal NIC with the following settings:
- Port group: portgroupvRackvSwitch
- MTU: 9000
- IP version: IPv4 and IPv6
Configure your private IP in the IPv4 settings area.
-
Open the settings for your vRack vSwitch. In the NIC teaming section, change the Load balancing setting to
Route based on IP hash.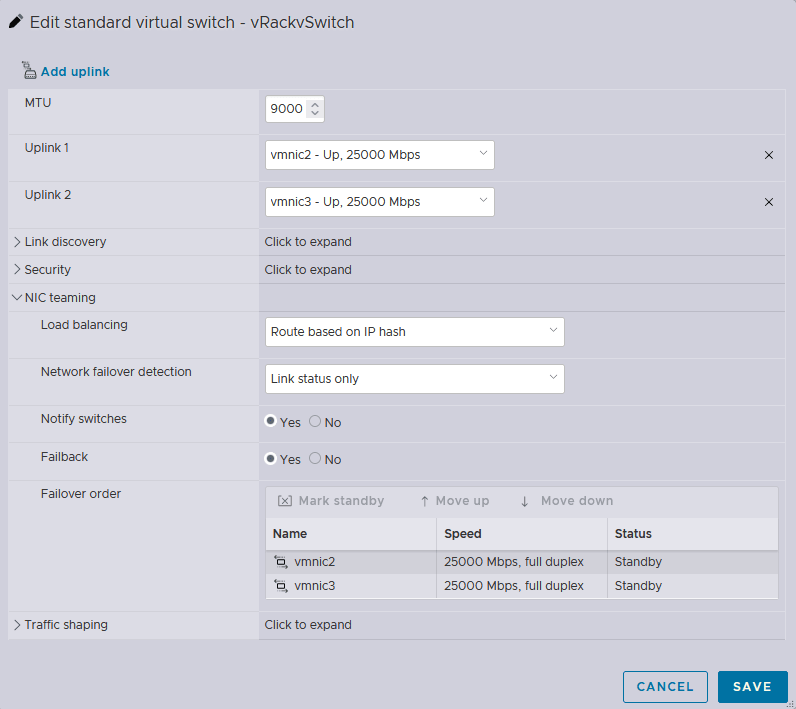 Info
You can also configure your Linux distribution to use Jumbo frames within the vRack. Jumbo frames are Ethernet frames with more than 1500 bytes of payload, and they can carry up to 9000 bytes of payload. Using them minimizes routing processing time and, in the case of vRack, optimizes traffic.
-
Check the MTU
-
Set your MTU size to 9000
-
Apply the changes
Edit the
/etc/network/interfacefile and add the following lines (according to your situation) to it:For a DHCP-managed interface
For a fixed IP interface
-
-
Configure the VM.
The VMs must have the new
portgroupvRackvSwitchport group in the network interface.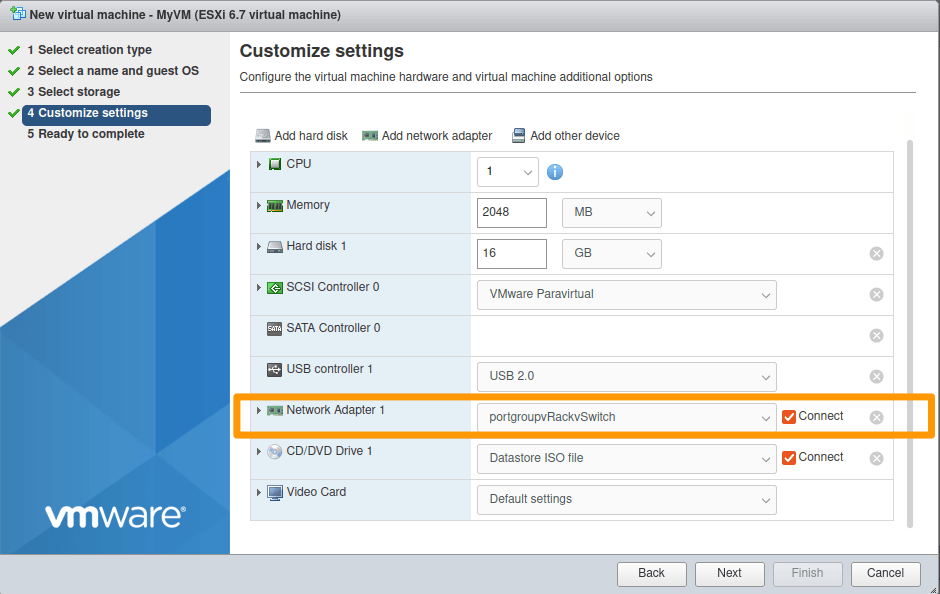
From the OVHcloud Control Panel, click
NetworkandvRack private network.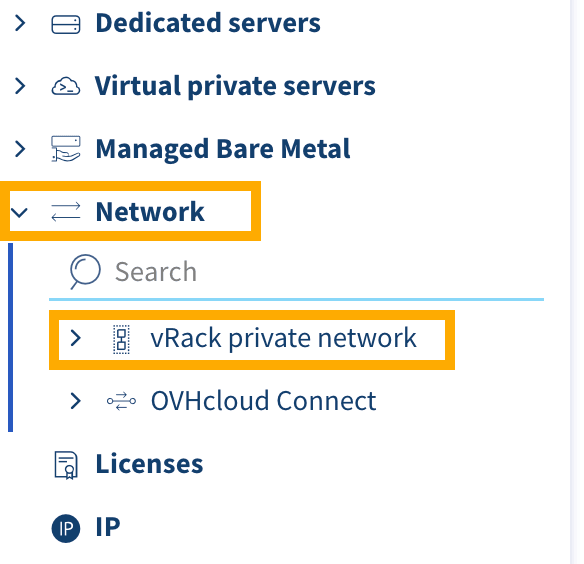
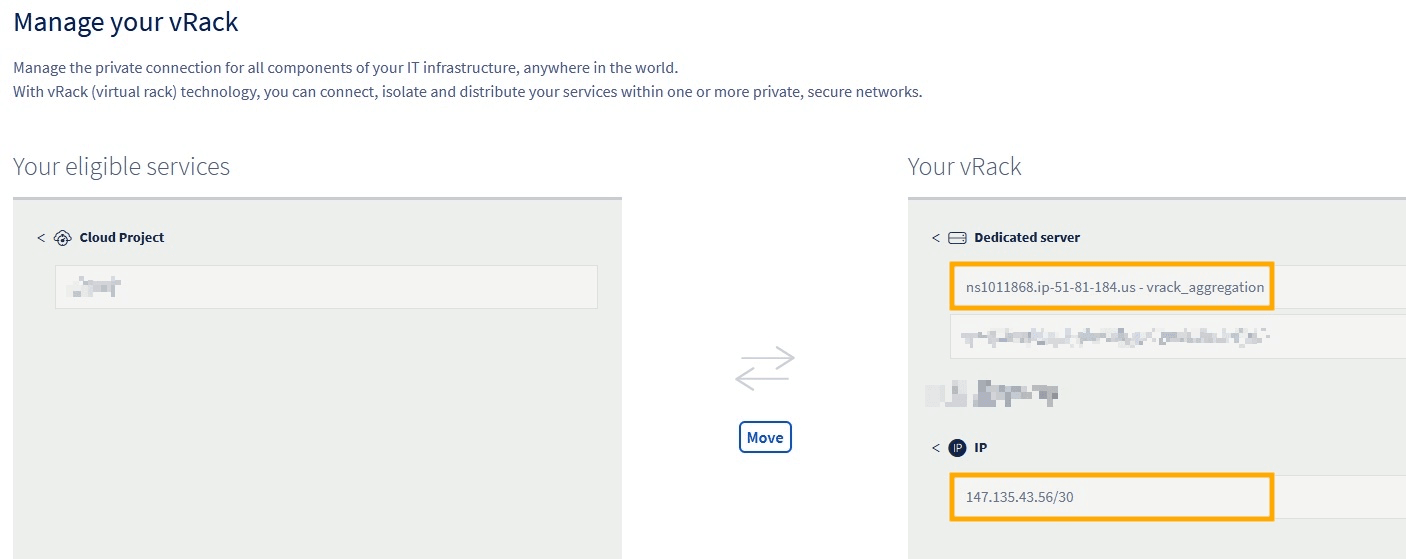
Move your IP range to your vRack.
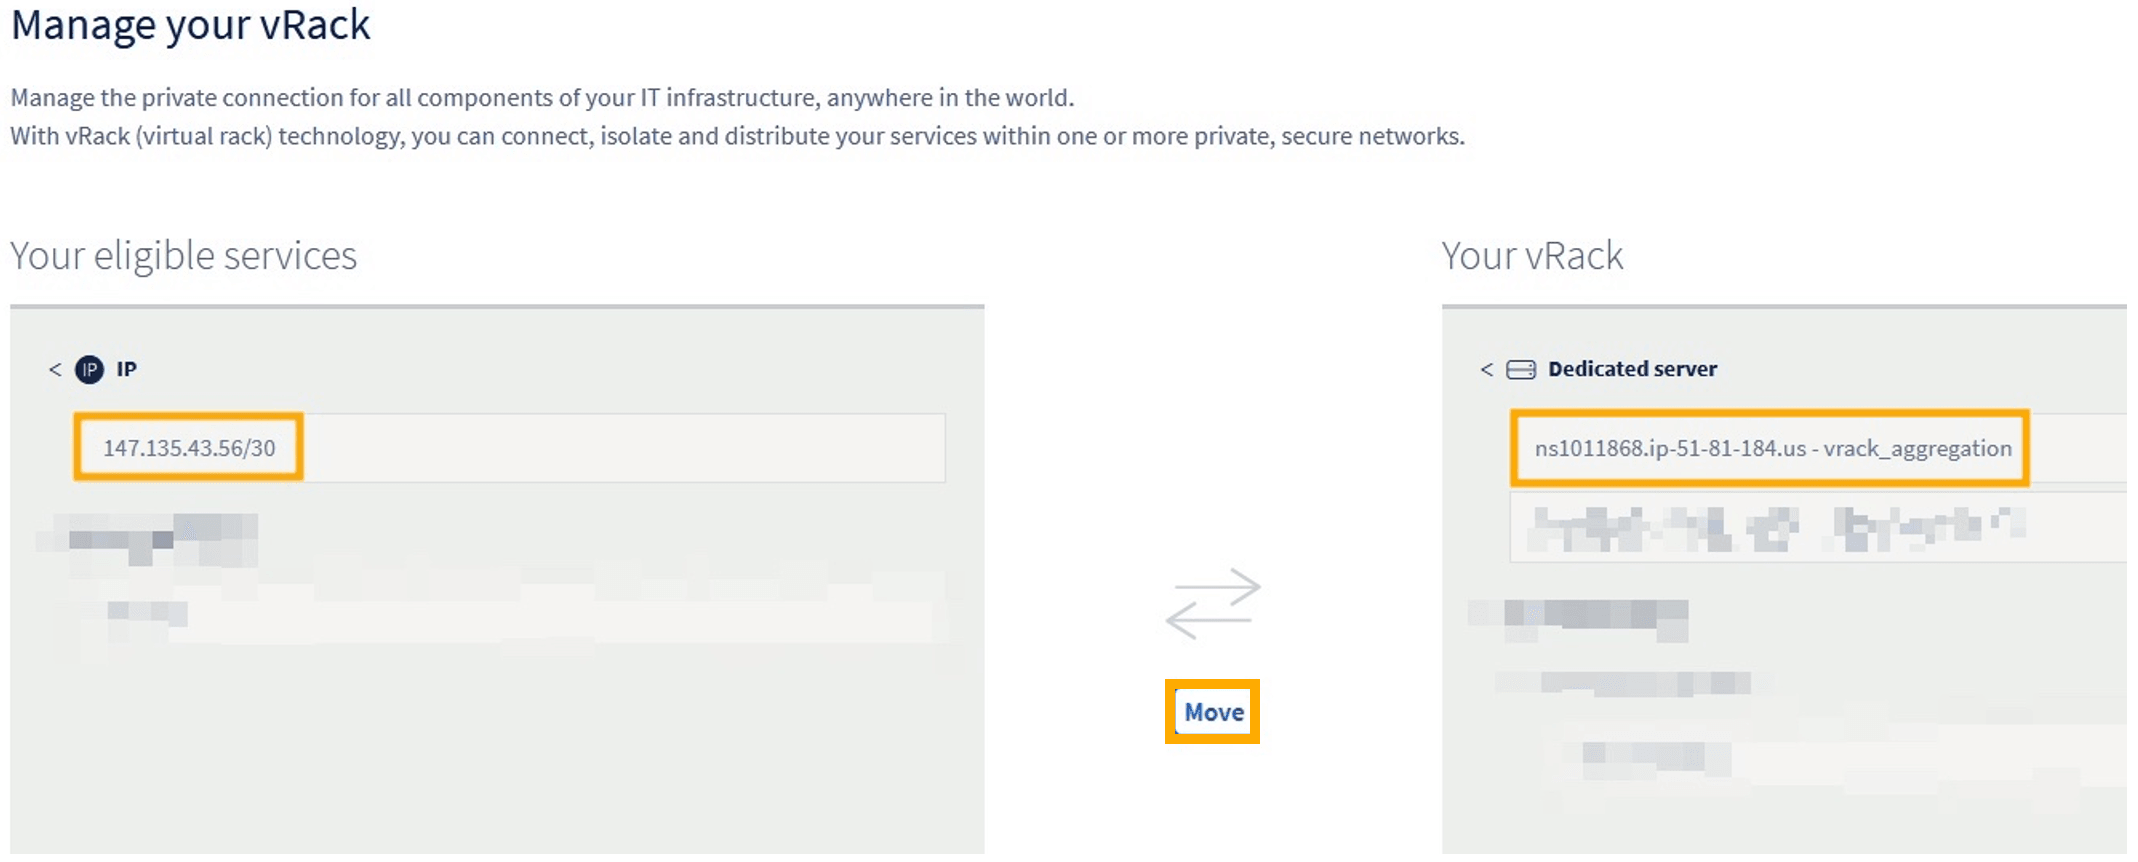
Once completed, it should look like this.
Configure a usable IP address
In the case of vRack, the first address and the last two addresses in a given IP block are always reserved for the network address, its gateway, and its broadcast address respectively. This means that the first usable address is the second address in the block, as shown below:
To configure the first usable IP address, you must edit the network configuration file as shown below. In this example, we use a subnet mask of 255.255.255.240.
The subnet mask used in this example is appropriate for our IP block. Your subnet mask may differ depending on the size of your block.
NOTE: When you purchase your IP block, you will receive an email notifying you of the subnet mask to use.
Additionally, in this example we are using ens18 for our interface name in this example. To check the name of your interface, use the ip add command.
You can learn more about configuring an Additional IP in a vRack in our dedicated guide.
Configuration example of a client VM on Debian
File contents /etc/network/interfaces:
Go further
Browse all the Dedicated Servers guides.
Browse the rest of the OVHcloud US documentation for guides on our other products and services.
Learn more about Dedicated Servers on the OVHcloud US website.
Article Contributor(s):
- Suhail R
- Ashley Osei