
Deploying a Minecraft Server in Linux
OVH US Game Servers are ideal for hosting a multitude of games. With state-of-the-art hardware and our patented Anti-DDoS GAME protection, your games will run smoothly and be safe from potential attacks. This article covers how to install Minecraft on an OVH US Dedicated Server and how to connect to it.
Prerequisites
- Minimum system requirements
- A Linux Operating System
Topics
- Installing Minecraft using LinuxGSM
- Exploring Minecraft Server Properties
- Connecting Minecraft to the Minecraft Server
Installing Minecraft using LinuxGSM
LinuxGSM is an open source command line tool that enables easy and fast deployment of different game servers. It streamlines the complicated process of hosting a game server. LinuxGSM supports over 80 games and has detailed instructions on how to set up a server for each game.
To get started installing Minecraft, we must first download any dependencies that it requires.
Note: For our example, we will be using Ubuntu 18.04. If you are using a different version of Linux please find the relevant dependencies from the LinuxGSM website.
The following command will download all the dependencies we need.
Note: During the course of this installation, we will encounter a GUI that asks us to configure a mail server. Doing so is entirely optional and can be skipped simply by selecting all of the default options.
To proceed, we will need to create a new user and store our Minecraft server data under that user.
Next, we will need to set a password for this user. It is recommended to use a strong password consisting of twelve or more characters utilizing upper and lower case letters, numbers and symbols.
Now that we have created our user we will need to use the substitute user command to switch to that user.
Under our new user, download the LinuxGSM tool.
Next, install the Minecraft server.
Before we start our server we will need to set the IP address.
Note: A full list of commands for your new Minecraft server can be found by typing ./mcserver
Exploring Minecraft Server Properties
In order to have players connect to our Minecraft server, we first need to set the IP address of the server. To do so, navigate to the "serverproperties" file and edit the "server-ip" field.
In this file, we can change various game settings such as turning off pvp-mode. For a full description of changes we can make to our Minecraft server, consult the Minecraft Wiki.
Now, we are ready to start the server. To do so, enter the following command.
The last thing we need to do to ensure that players can connect to our server is ensure that our Minecraft port is listening. To do so, we first need to exit our current user and install nmap using the following commands.
Now that nmap is installed, run the following command:
If everything is set up correctly we will see the following output:
We are now ready to connect to our server.
Connecting Minecraft to the Minecraft Server
To connect to our Minecraft server, boot up the Minecraft client on any personal device and select the Multiplayer option.
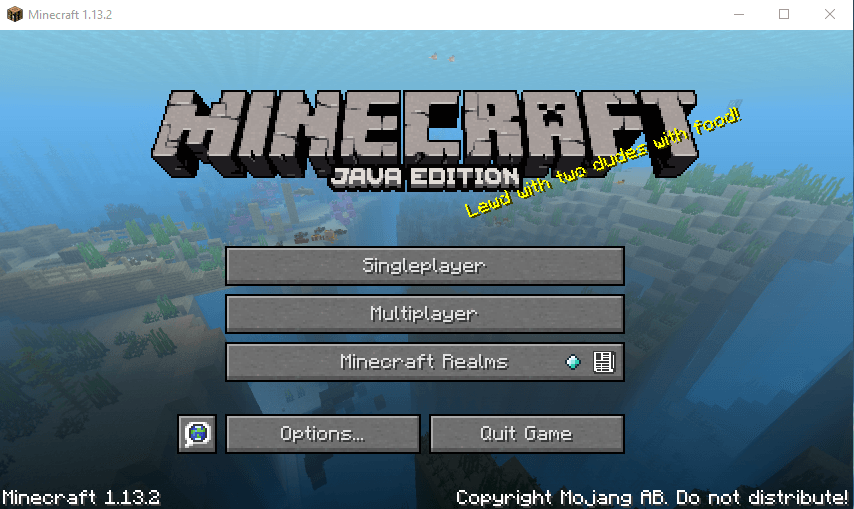
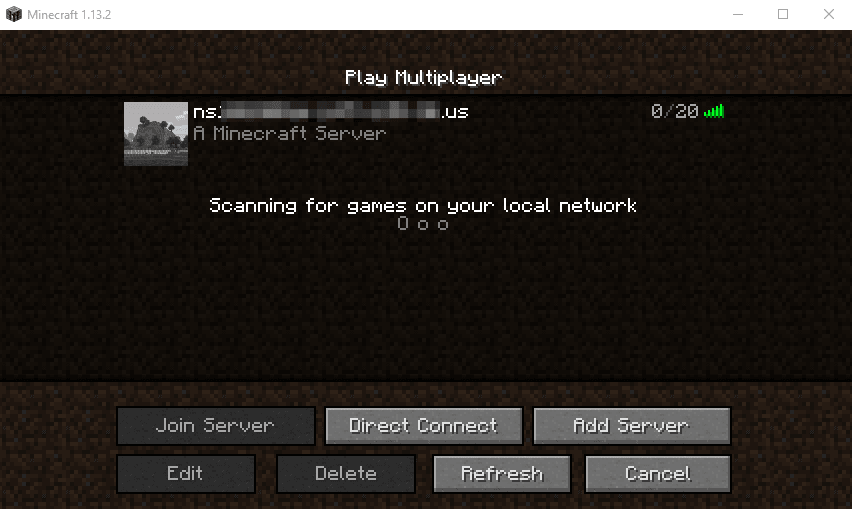
From this new screen, click the Add Server button.
Note: We may also choose to use Direct Connect to connect to our server. However, if we choose to do this, the server will not be saved under "Play Multiplayer".
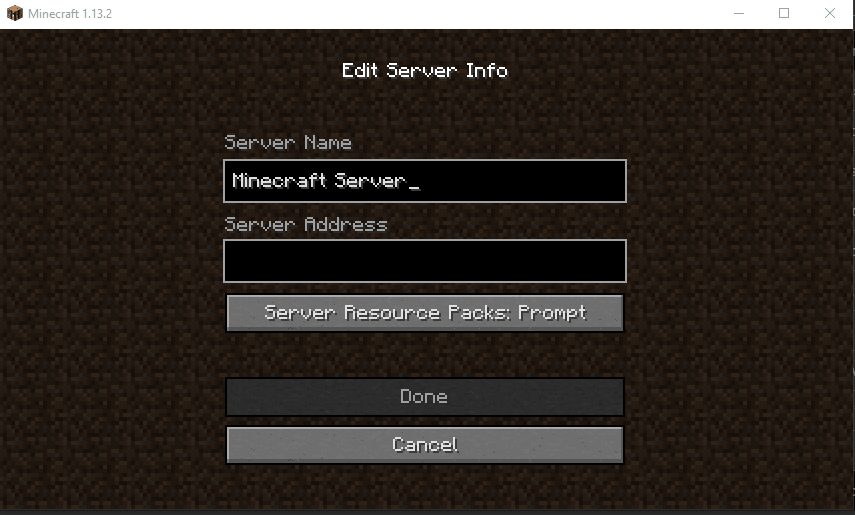
From the "Edit Server Info" screen, choose a name to identify the Minecraft Server and enter its IP address. When finished, click the Done button.
This will add the server to the "Play Multiplayer" list. Simply double click on the server and you will be off gathering resources and building an exciting new world.
Conclusion
Having read this article, you should now be able to install a Minecraft server utilizing LinuxGSM, explore the server properties and functionalities within Minecraft, and connect to your server using the Minecraft Client. You now have everything you need to play Minecraft with all of your friends. Enjoy the adventure!