
Pushing Logs with a Forwarder - NXLog (Windows)
Learn how to send your Windows Logs to Logs Data Platform.
All you need is 15 minutes and one piece of software: NXLog. NXLog is one of the leaders of the log management tools. Its configuration is fairly simple and can get you started in a few minutes.
Requirements
- an activated Logs Data Platform account
- at least one Stream and its token
NXLog
You can find NXLog on its official website. Please go to the official website and download the latest version for Windows (2.10.2150 at the time of writing). Be sure to have Administrator rights before proceeding. Once you have it, install it on your system. By default, the program will install itself in C:\Program Files\nxlog. Navigate to this folder to edit the configuration file nxlog.conf present in the folder conf.
Configuration
To configure NXLog, you will need to copy and store the LDP cluster certificate. You can find it on the Home page for your Logs Data Platform in the OVHcloud Control Panel.
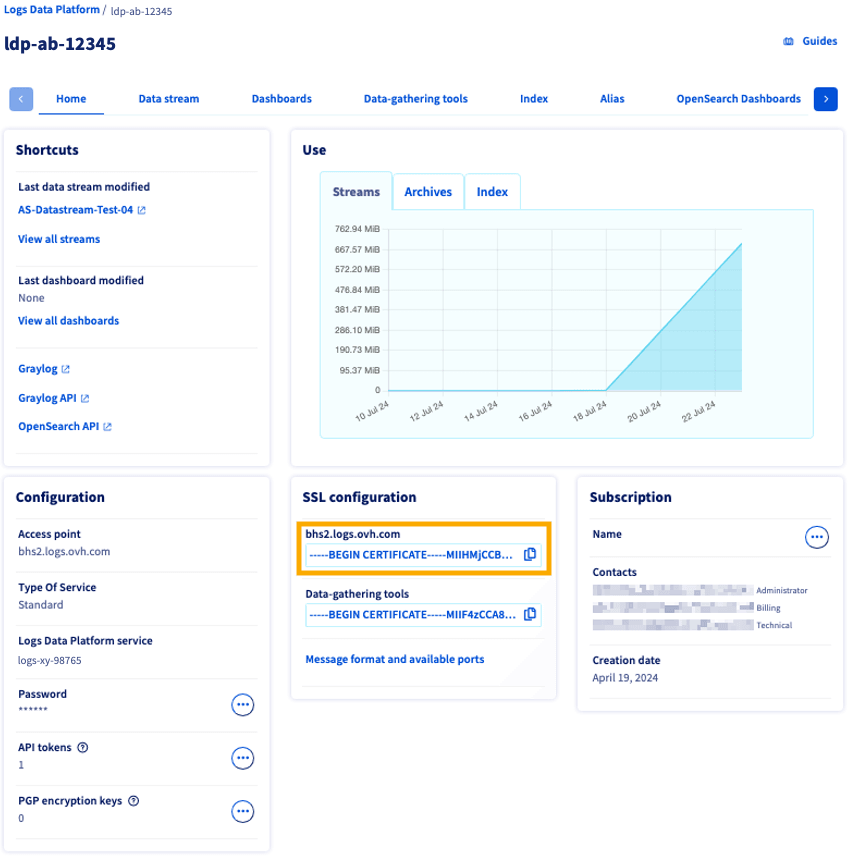
NOTE: You will need to copy the certificate, then paste and save it as a file.
Ensure the file is named ldp.cert and put this file under the C:\Program Files\nxlog\cert folder.
Add the following lines to the bottom of the default nxlog.com configuration file:
Let's explain a few important points in this configuration:
- The line define CERTDIR %ROOT%\cert is mandatory to indicate to NXLog where it will find the certificate of Logs Data Platform.
- The Input part is the same as the default configuration. Do not touch it.
- The Processor module is where the OVHcloud Token magic happens. Replace your token here.
- The Extension activates the built-in GELF module that encodes the log in the GELF format.
- The Output module is the one that will send the logs to Logs Data Platform by defining the CA certificate used to trust the server and the encoding used. Note that you will have to use the address of your assigned cluster. This is also where you use the path of the certificate downloaded just before. This module also defines that we use the Gelf Encoding.
- The Route setting puts all these things together by building a pipeline using the source, processing, and output modules.
Start NXLog
You have two ways to start NXLog. The first one is to launch the main Executable: C:\Program Files\nxlog\nxlog.exe. This is convenient when you are pretty sure that your configuration is correct. But if you want to be able to start, stop, or restart the nxlog service, it would be better to use the Windows Service Manager. This Manager is located deep in the Configuration Panel of Windows.
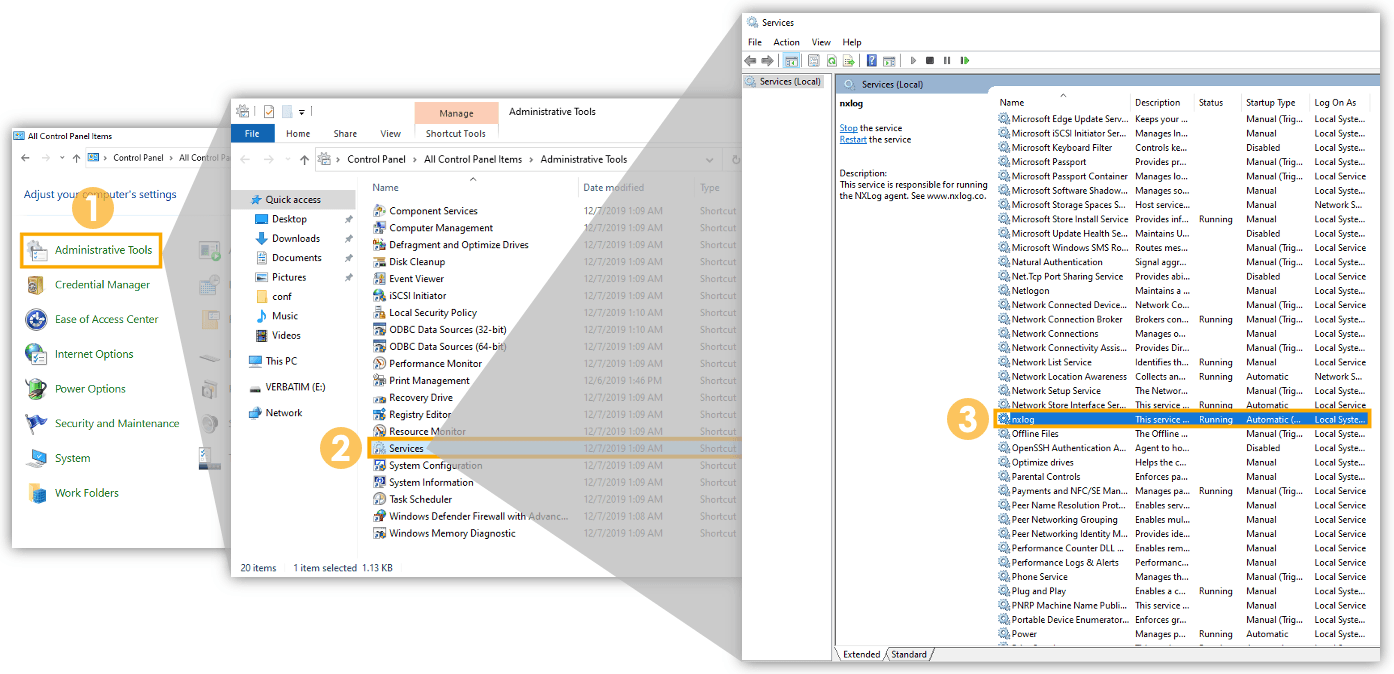
Go to Control Panel, then locate Administrative Tools, and then double-click on Services to display the manager. In this menu, you should find the service nxlog in the list. There is a start, stop, and restart action available in the contextual menu (right-click on it).
If something bad happens, you will find the logs and a pretty good explanation in the file: C:\Program Files\nxlog\data\nxlog.log. If everything is correct you should find these kinds of lines in the same file:
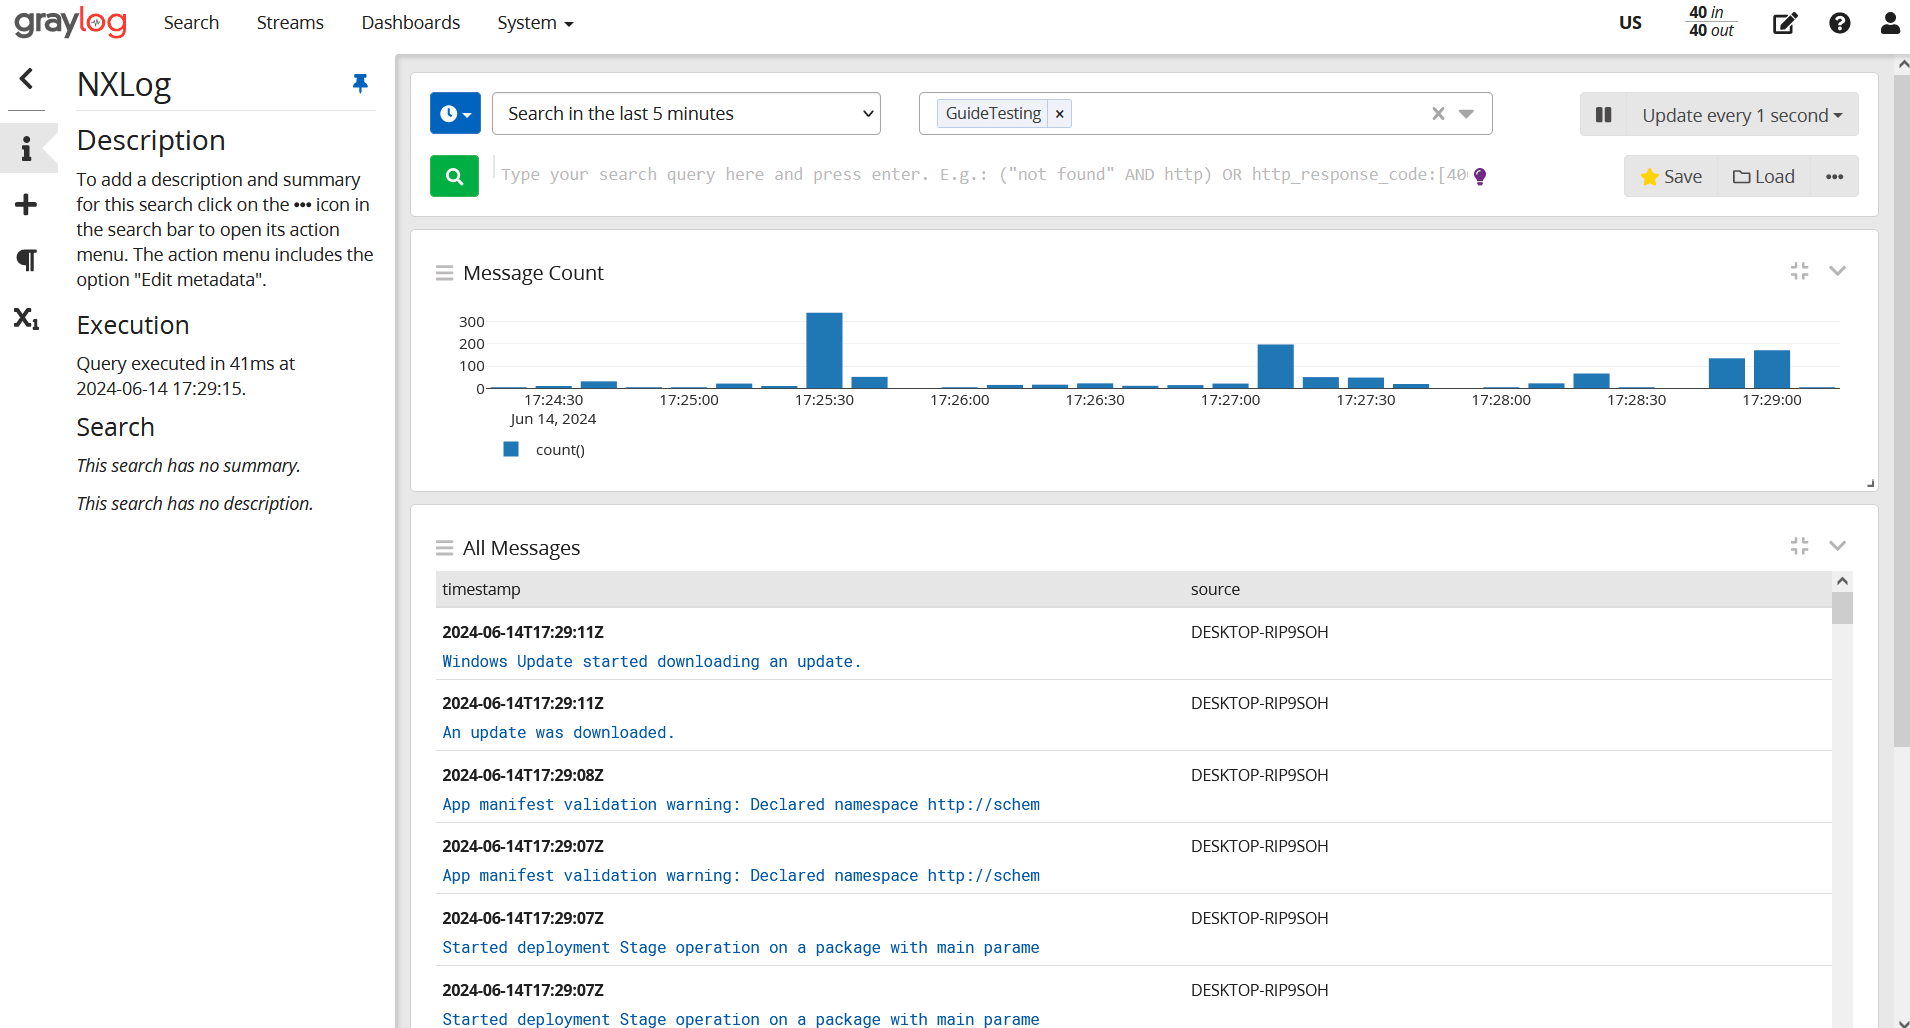
Jump to Graylog (use the Graylog access button in the Manager) and to the stream associated with your token to display your logs. As you can see, The Event Log format of Windows is already structured and allows you immediately to analyze your services and processes.
Go further
If you want to go further, don't hesitate to try the NXLog documentation.
Browse all the Logs Data Platform guides.
Browse the rest of the OVHcloud US documentation for guides on our other products and services.
Learn more about Logs Data Platform on the OVHcloud US website.