
Nutanix - How to replace a disk
Learn what actions to take before and after a Nutanix disk replacement.
Requirements
- A Nutanix cluster in your OVHcloud account
- Access to the OVHcloud Control Panel
Instructions
Step 1: Access Prism Central and Prism Element
From the OVHcloud Control Panel, navigate to the Nutanix section via the Hosted Private Cloud menu and select your cluster.
In the General information panel, click Access Prism Central.
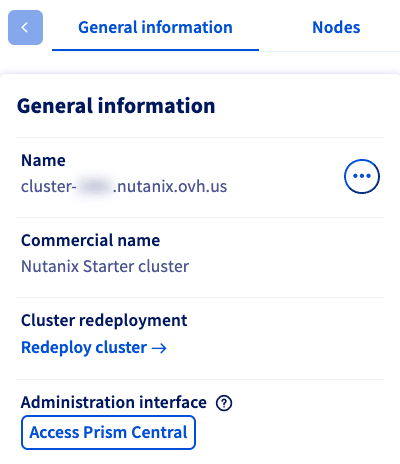
Click Launch Prism Element, which will open the single-cluster user interface.
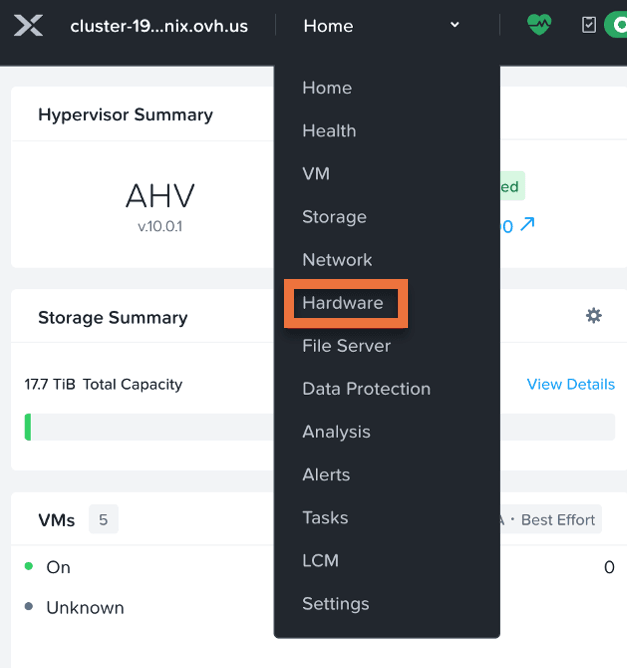
From the Prism Element interface, select Menu and choose Hardware.
Step 2: Put the host into maintenance mode
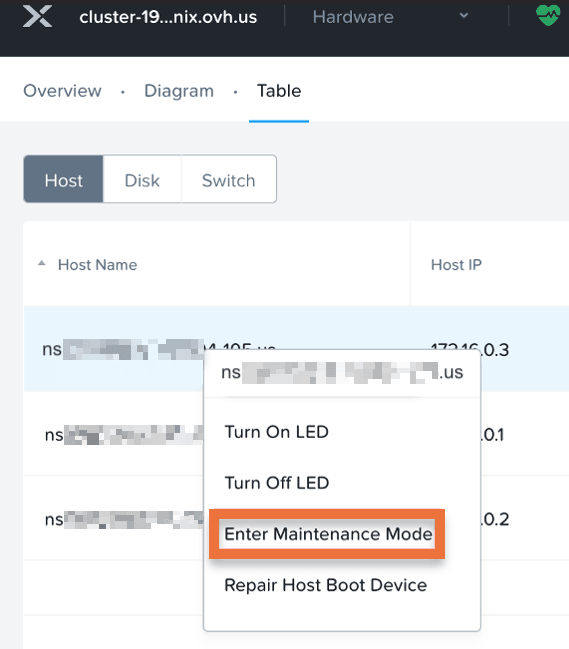
Click Table, and then Host.
Click your host and select Enter Maintenance Mode.
In the dialog box, check ☑️ Power-off non-migratable VMs to shut down any VMs that cannot migrate, and then click Enter Maintenance Mode.
Wait until the spinning icon changes to show the host is in Maintenance Mode.
Step 3: Remove the disk
Select Disk, click the failing disk, and then Remove Disk.
Confirm the action in the pop-up window by clicking Remove Drive.
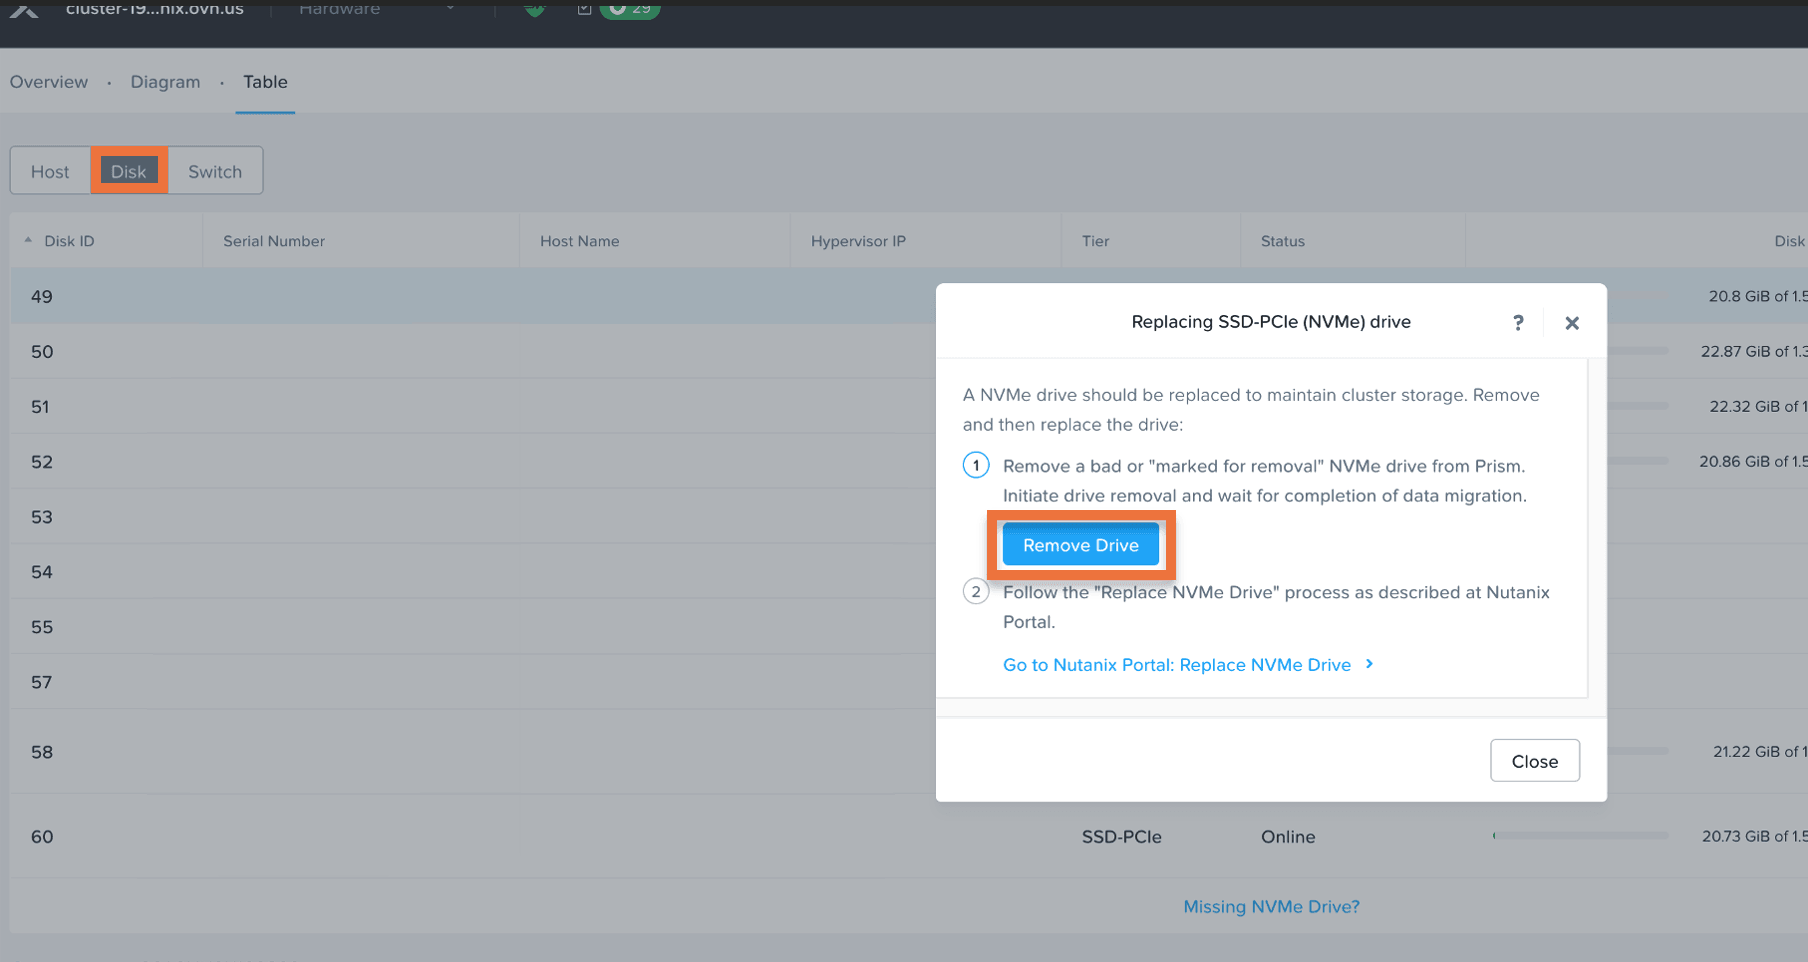
Prism will evacuate data from the disk and mark it as removed.
Step 4: Data center (DC) intervention
Once the disk is removed in Prism, an intervention will be created to replace the disk. The node will boot into Rescue Mode.
Step 5: Physical disk removal and replacement (by DC technician)
A DC technician will confirm that the host is still in Maintenance Mode and that the disk was removed in Prism. Once confirmed, the technician will physically remove the faulty disk and install a replacement.
Step 6: Add the new disk in Prism Central (customer)
Once the intervention has been completed, customers are required to add the new disk as well as exit maintenance mode.
In Prism Element, go to Hardware, then Table, and then Disk.
Click Add Disk to attach the new hardware.
Switch to the Host section, select your host, and click Exit Maintenance mode.
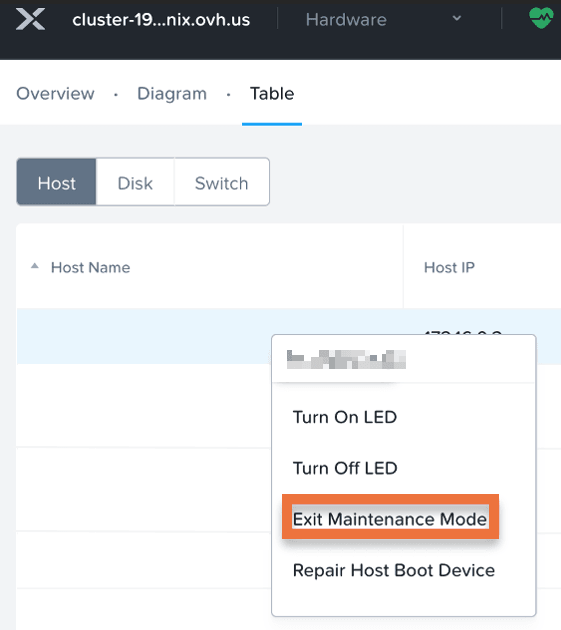
The CVM will restart, VMs will migrate back automatically, and the node will rejoin the cluster.
Step 7: Final validation
NOTE: Complete this process within 2 hours of the disk replacement to ensure a successful cluster recovery.
Check that the following conditions exist in your cluster:
- Cluster health:
Normal - Data resiliency:
OK - No maintenance or disk alerts remain.
- All VMs and services are online.
Go further
Browse all the Nutanix guides.
Browse the rest of the OVHcloud US documentation for guides on our other products and services.
Learn more about Nutanix on OVHcloud on the OVHcloud US website.