
Add or remove nodes in a cluster (Scale In/Out)
Learn how to add or remove a node in a Nutanix cluster.
Nutanix clusters are scalable; you can add (Scale Out) or remove (Scale In) nodes directly from the OVHcloud Control Panel or the OVHcloud API.
NOTE: OVHcloud provides services for which you are responsible for their configuration and management. You are therefore responsible for their proper functioning.
This tutorial is designed to help you as much as possible with common tasks. If you are having difficulty performing these actions, please contact a specialized service provider. OVHcloud cannot provide you with technical support in this regard.
Requirements
- Access to the OVHcloud Control Panel or OVHcloud API
- A Nutanix cluster in your OVHcloud account
- Access to the cluster's Prism Central administration interface
Technical information
- Your cluster must have between 3 and 32 nodes
- All new nodes must run the same AOS version as the existing cluster
Instructions
Scale Out (add a node)
Add a node
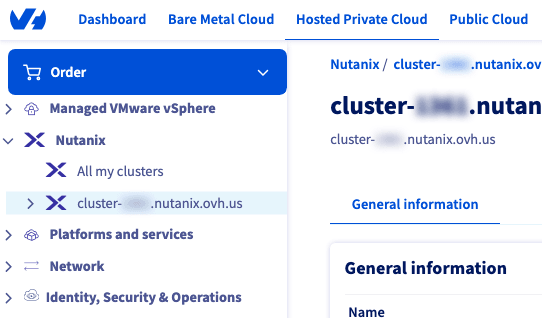
From the OVHcloud Control Panel, navigate to your Nutanix cluster via the Hosted Private Cloud and Nutanix menus.
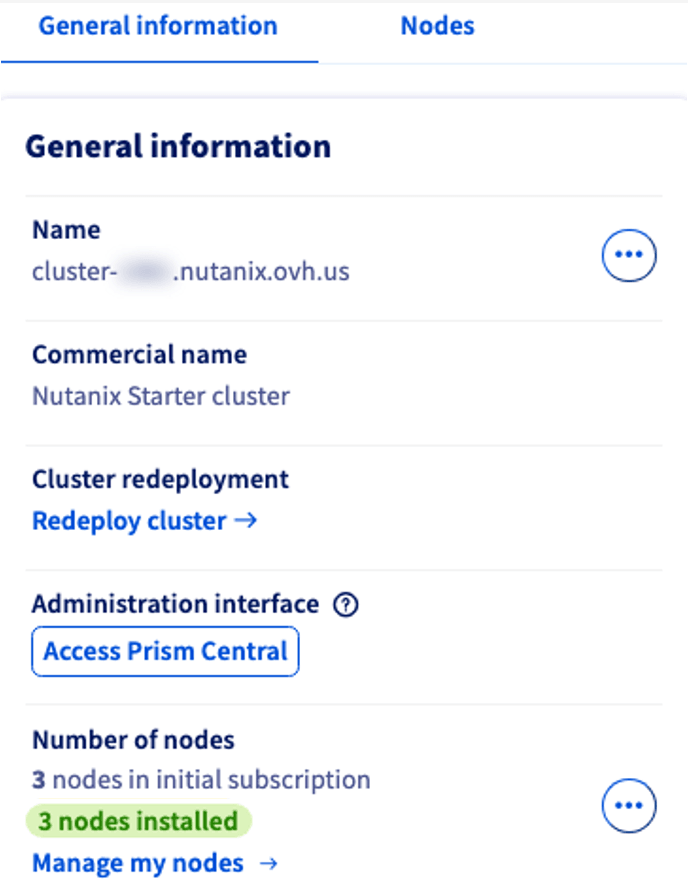
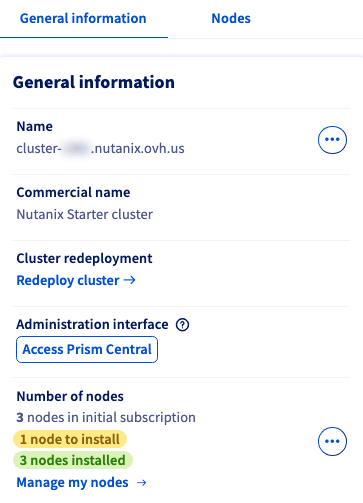
In the General information tab, you can see the Number of nodes. Click Manage my nodes →.
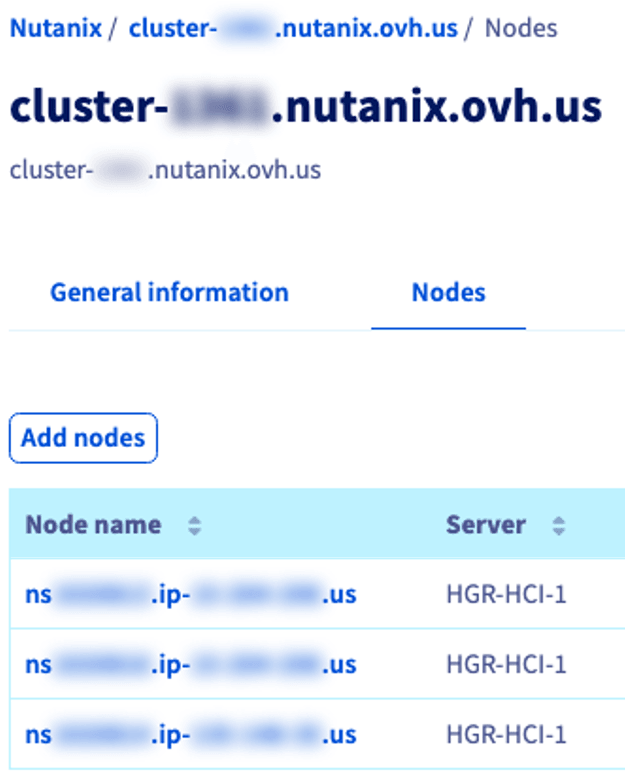
In the Nodes tab, select Add nodes.
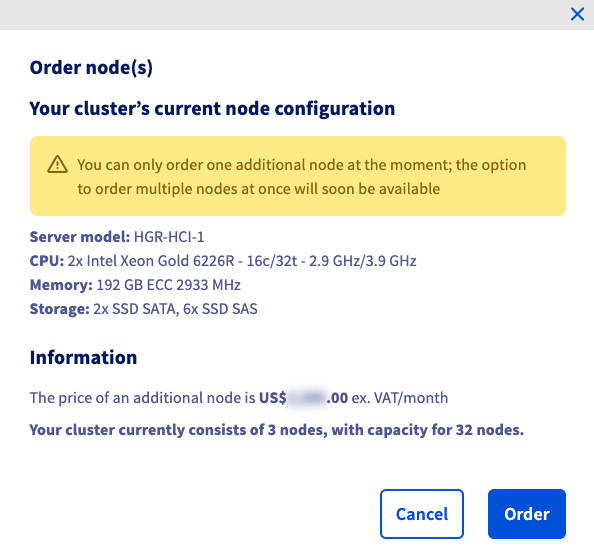
In the pop-up window, review the configuration information and pricing. Click Order to add the node(s).
Once the node is delivered, you can see the status in the General information tab.
The Number of nodes area will show a new node to install.
Install an OS
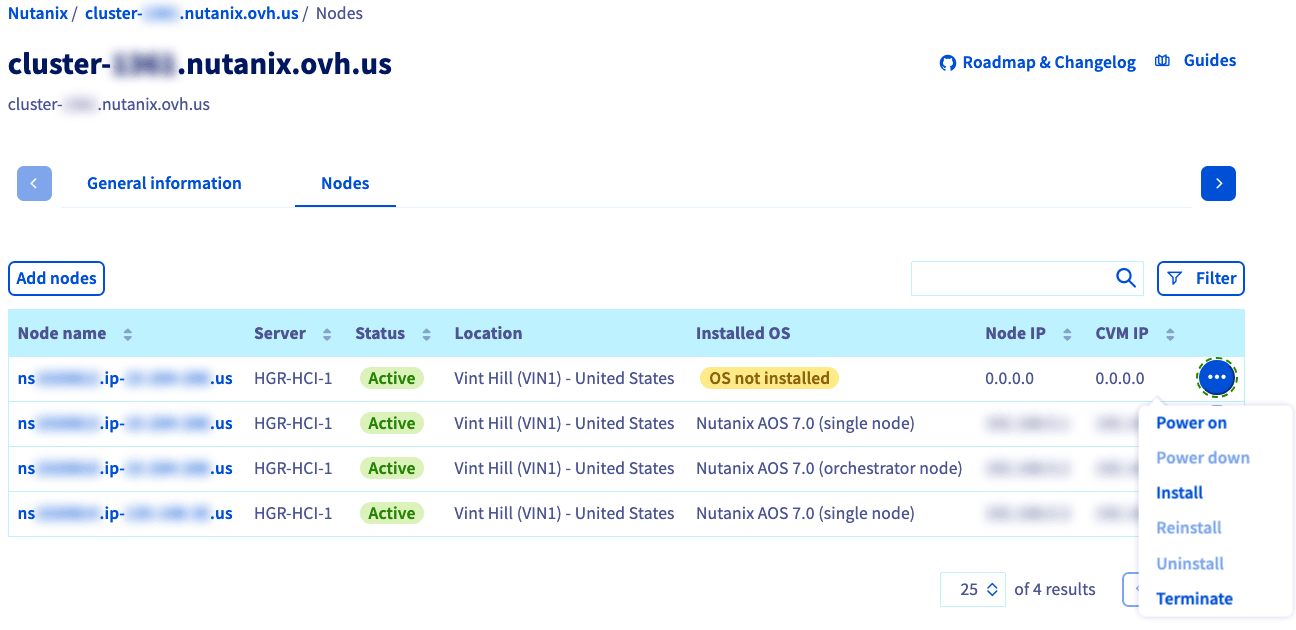
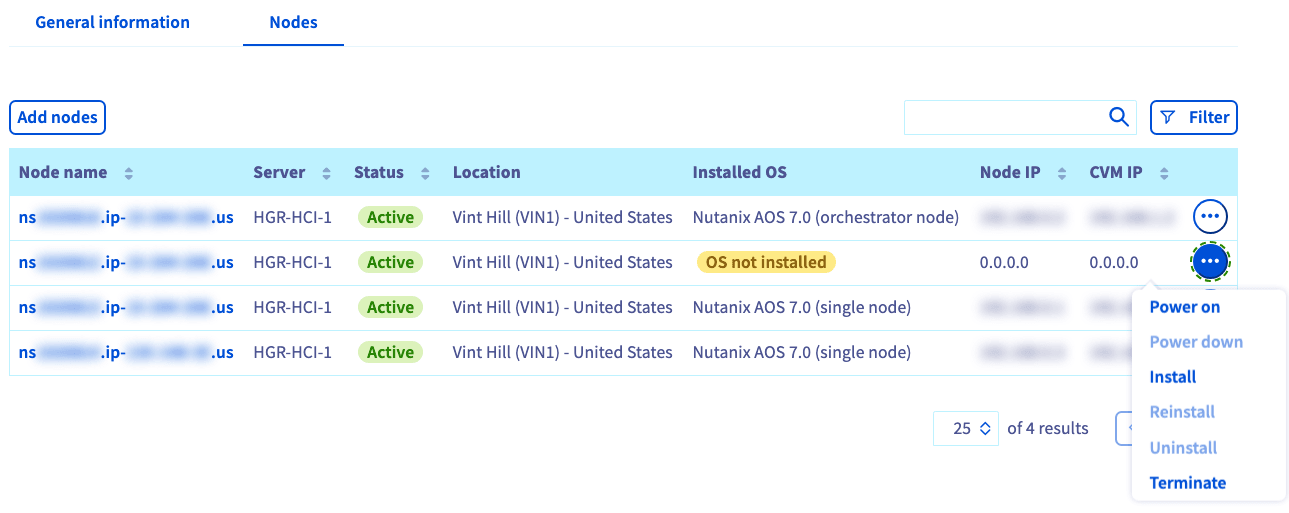
If you click Manage my nodes → again, you will see a list of your nodes. For any node with a OS not installed status, click the more options ... button and select Install.
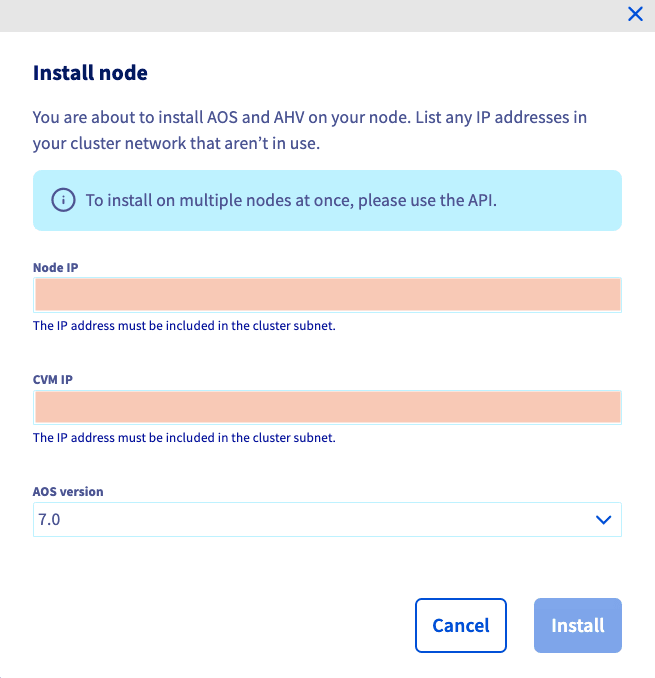
Enter the configuration details for your node. Be sure to install the same AOS version as your cluster.
Click Install.
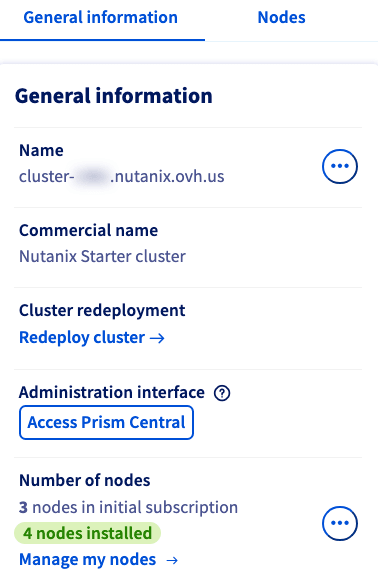
A confirmation message will appear.

Once the node has been installed, you can connect to Prism Central/Element and expand your cluster. Please refer to the documentation below:
Scale In (remove a node)
Power down a node
From the OVHcloud Control Panel, navigate to your Nutanix cluster via the Hosted Private Cloud and Nutanix menus.
In the General information tab, you can see the Number of nodes. Click Manage my nodes →.
For the node you wish to remove, click the more options ... button and select Power down.
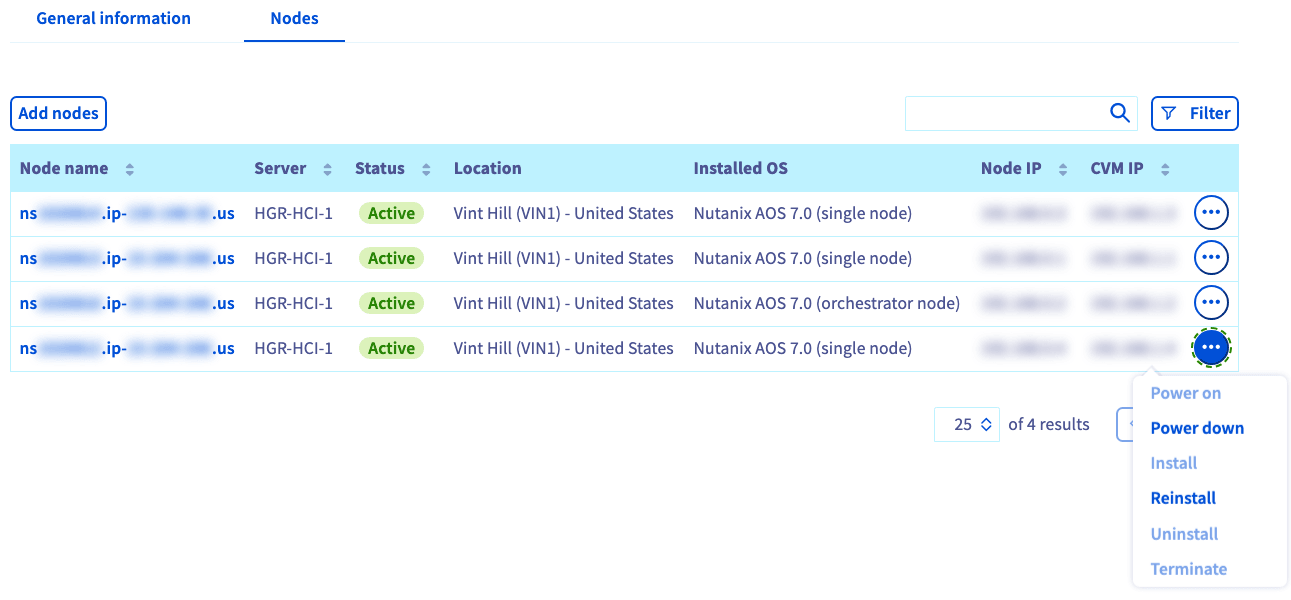
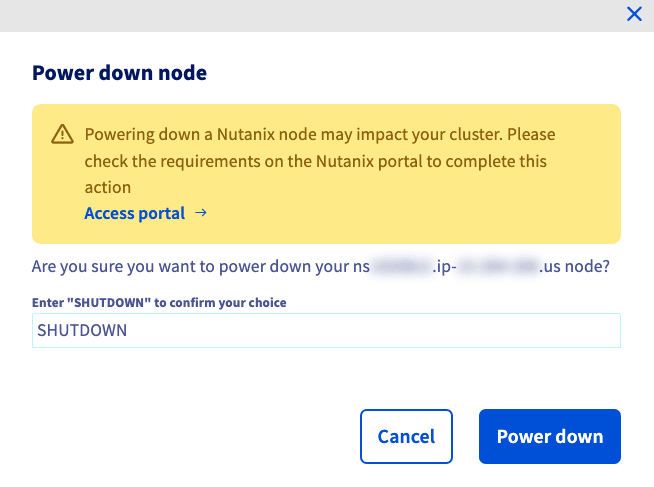
A warning pop-up will appear. Type the required term and click Power down.
NOTE: Powering down a Nutanix node may impact your cluster. Please check the requirements on the Nutanix portal to complete this action.
A confirmation banner will appear to confirm that your request is processing.

Uninstall the node
Once the node is powered down, click the more options ... button and select Uninstall.
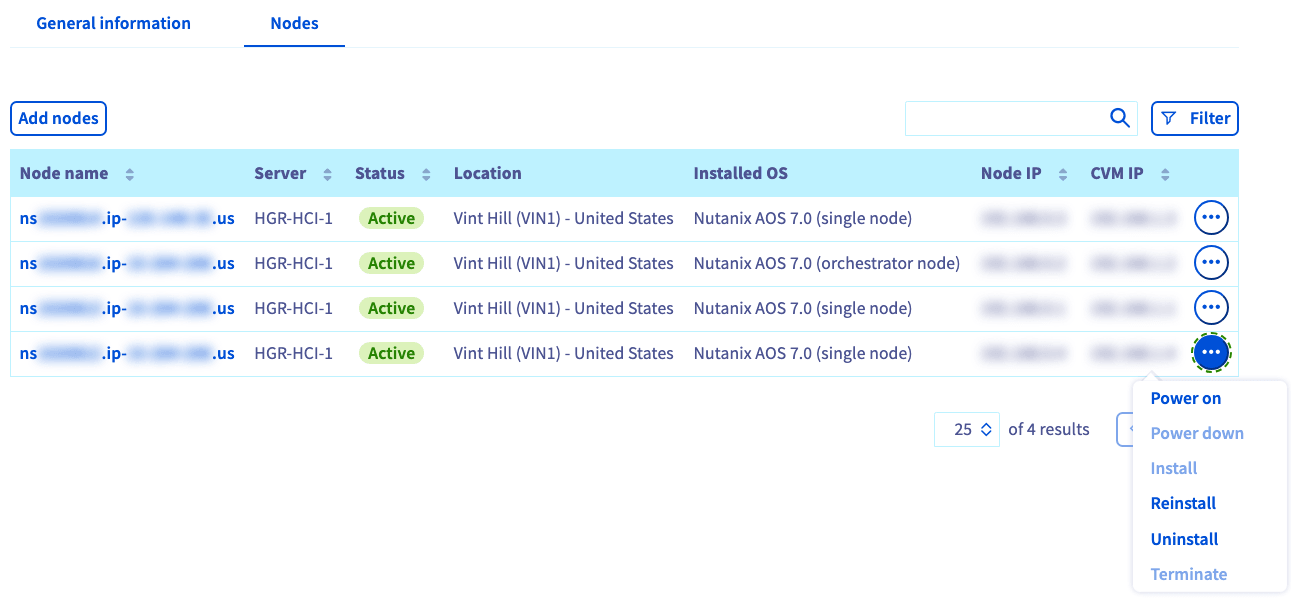
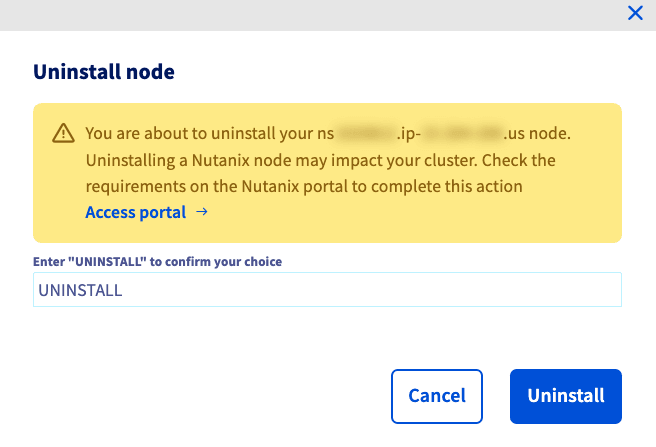
A warning pop-up will appear. Type the required term and click Uninstall.
NOTE: Uninstalling a Nutanix node may impact your cluster. Please check the requirements on the Nutanix portal to complete this action.
A confirmation banner will appear to confirm that your request is processing.

Remove the node
Once the node is uninstalled, click the more options ... button and select Terminate.
A warning pop-up will appear. Type the required term and click Confirm.
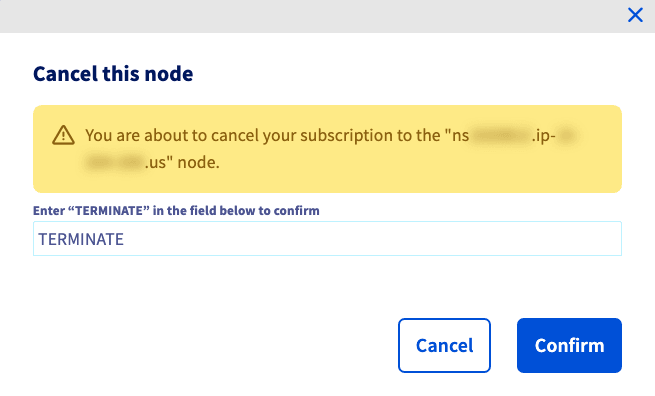
NOTE: Your suspended service will appear in your nodes list for approximately one week before being permanently deleted. This allows you to reactivate the service if you need to reverse the deletion.
Go further
Browse all the Nutanix guides.
Browse the rest of the OVHcloud US documentation for guides on our other products and services.
Learn more about Nutanix on OVHcloud on the OVHcloud US website.