For AI agents: the complete documentation index is available at https://docs.us.ovhcloud.com/en/llms.txt, the full documentation bundle is available at https://docs.us.ovhcloud.com/en/llms-full.txt, and this page is available as Markdown at https://docs.us.ovhcloud.com/en/network/load-balancer/manage-load-balancer.md.
  • English

Managing your Load Balancer service via the Control Panel

View as Markdown

Requirements

Instructions

Managing your Load Balancer via the OVHcloud Control Panel

From the OVHcloud Control Panel, navigate to the Load Balancer section via the Network menu and select your OVHcloud Load Balancer service from the list.

The Home tab for the service will then appear:
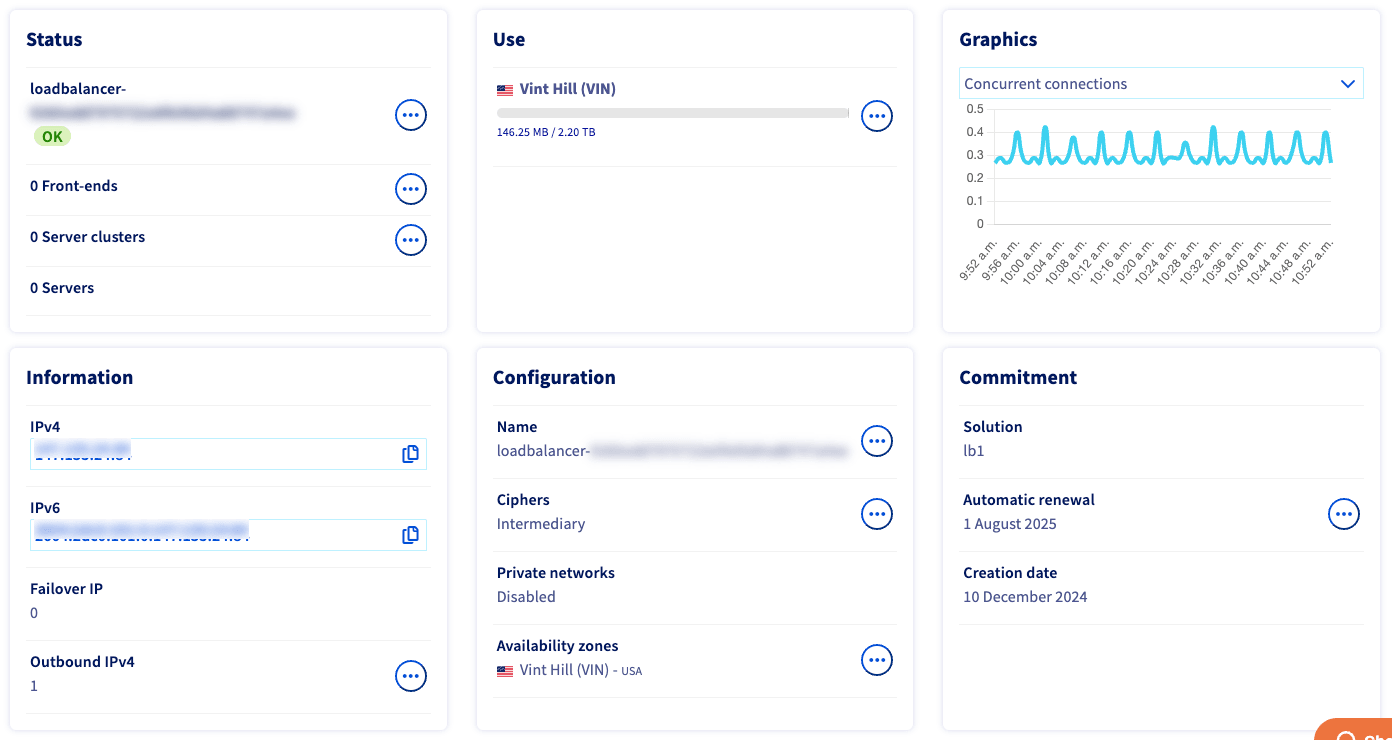
Home tab - Manage via control panel

On this page, you will see the following information:

ElementPurpose
StatusAn overview of your Load Balancer with the IP, front-ends, functional clusters, and servers added
UseA summary of how to use your Load Balancer.
GraphicsIn this section, you will see the graphs linked to service, by concurrent connections or requests per minute.
InformationYour IPv4 address and the Additional IPs linked to them, as well as the number of outgoing IPv4s (see more details by clicking the more options ... button).
ConfigurationHere, you can customize the name of your solution (which will appear at the top of the left-hand column). The cipher(s) are customizable, as well as the data center where your Load Balancer is based
CommitmentHere, you will see the admin details for your solution.

Managing front-ends

To add front-ends, go to the Front-ends tab and click Add a front-end.
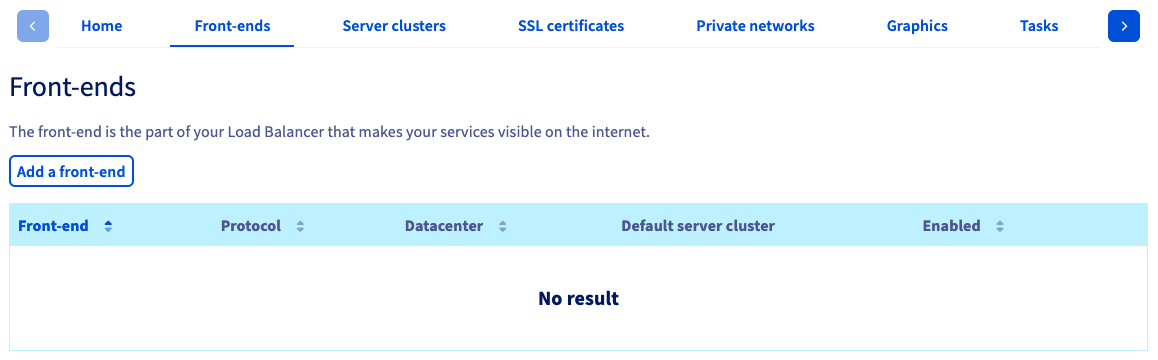
Frontends empty - Manage via control panel

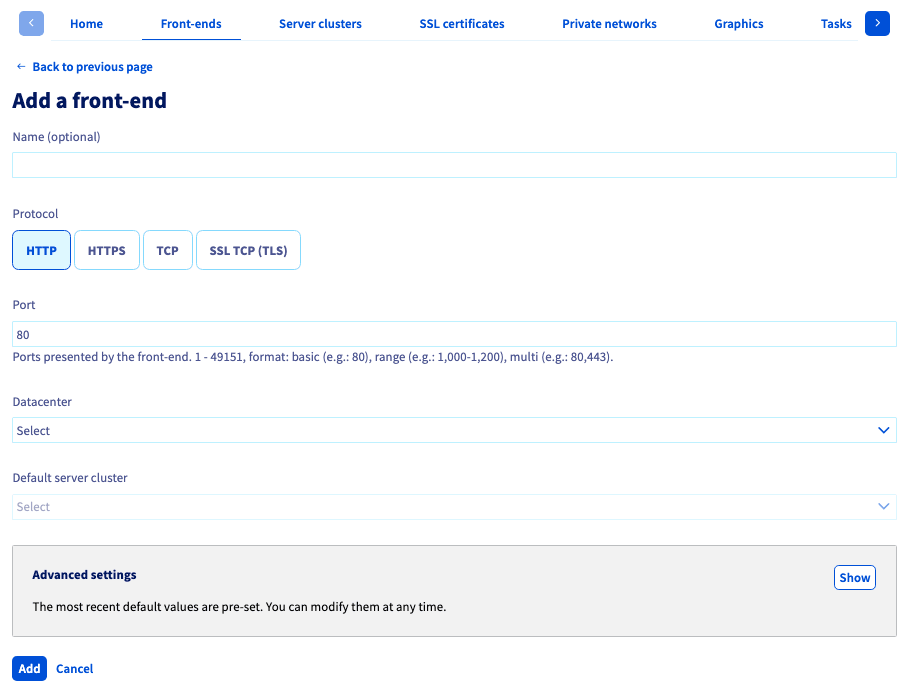
The following form will appear:

Frontend add blank

Details of front-end parts:

ElementPurpose
NameIf you want, you can choose a name for your front-end. This is very useful when you have several front-ends, so you can tell them apart quickly.
ProtocolYou can choose between HTTP, HTTPS, TCP, and SSL TCP (or TLS).
PortChoose the listening port you wish to use.
DatacenterChoose between your data center or all data centers to create your front-end.
Default server clusterIf you have several clusters configured, you can choose one of them as a default for each front-end.

You can also access advanced settings. You can expand this menu by clicking the Show button:
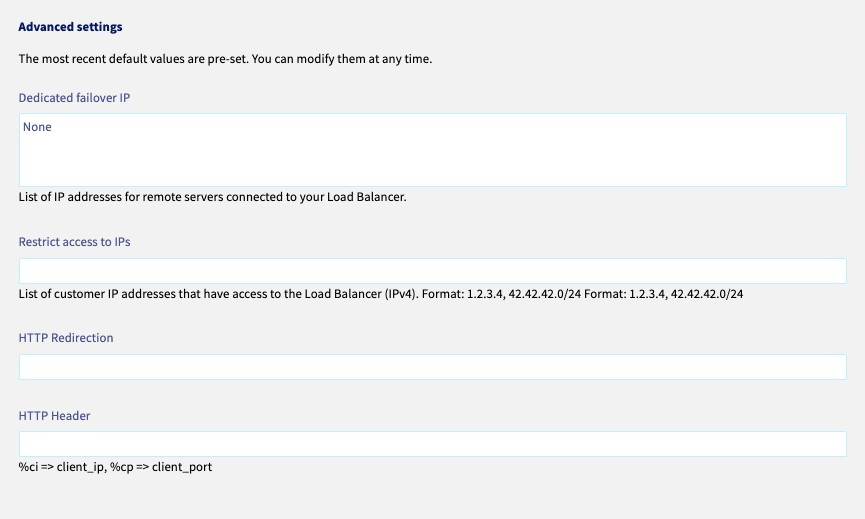
Frontend advanced settings

ElementPurpose
Dedicated failover IPList of Failover (Additional) IPs for remote servers.
Restrict access to IPsList for restricting remote access to the Load Balancer, for IPv4 only
HTTP RedirectionAdd an HTTP redirection URL
HTTP HeaderAdd an HTTP header here

Managing clusters

To add a server cluster, go to the Server clusters tab, and click Add a server cluster. You will get the same main options as for the front-end. However, the advanced options are different:
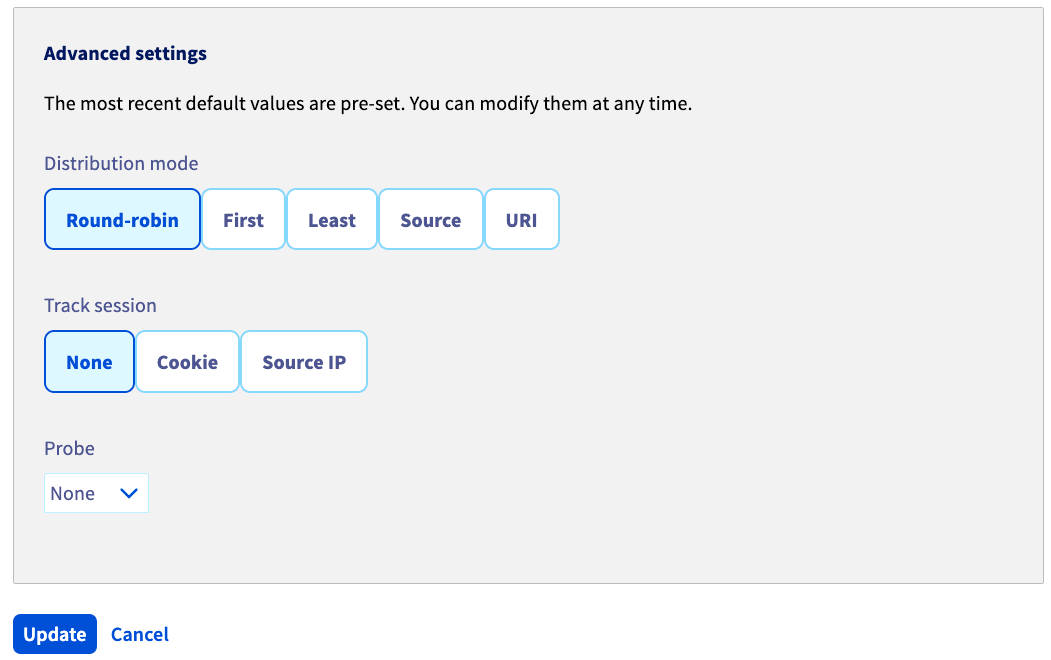
Server cluster advanced settings

ElementPurpose
Distribution modeChoosing between Round-robin, First, Last, Source, or URI for your IP load balancing.
Track sessionYou can track sessions via Cookie or source IP, or not at all.
ProbeChoosing and activating a probe.

Managing your servers

Once you have created your server cluster, you just need to add servers to it. From the Server clusters tab, expand one of your server clusters and select the Add a server button.
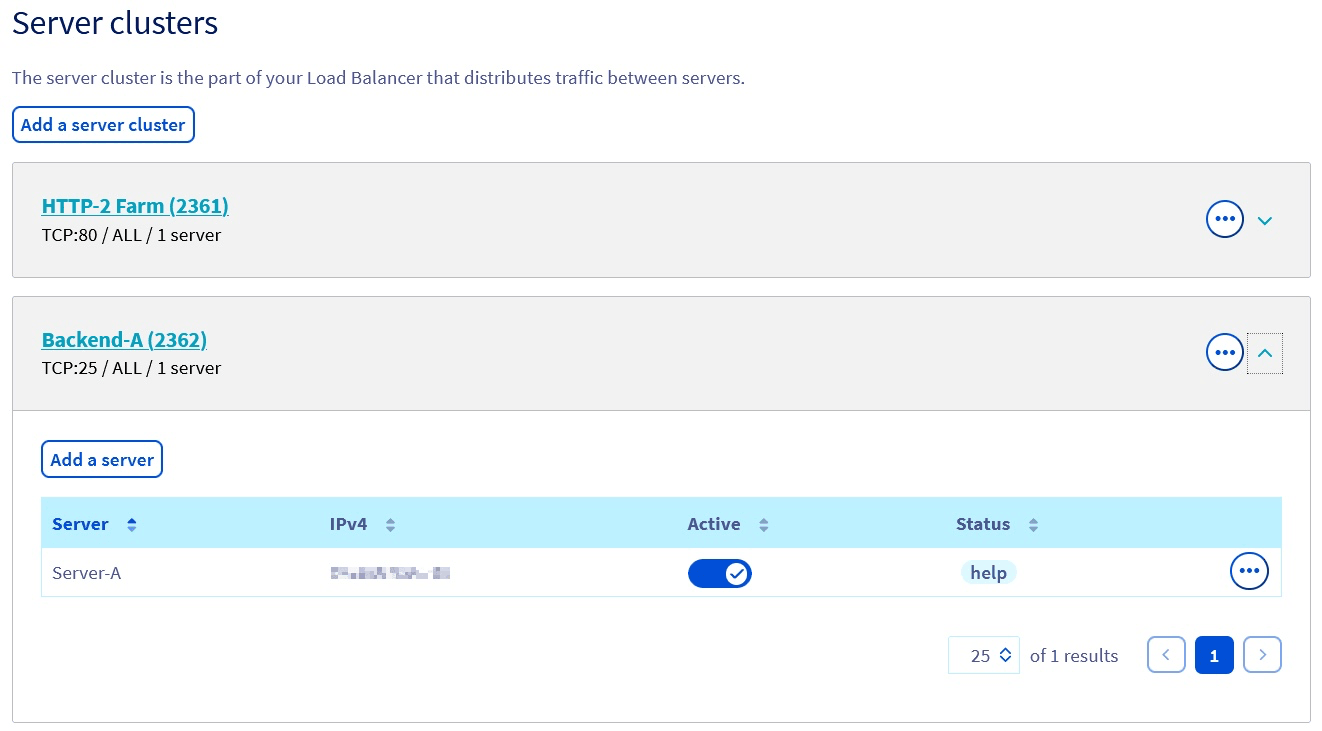
Server clusters list

As with the front-ends and the clusters, you have to provide some information and have advanced settings available to you.
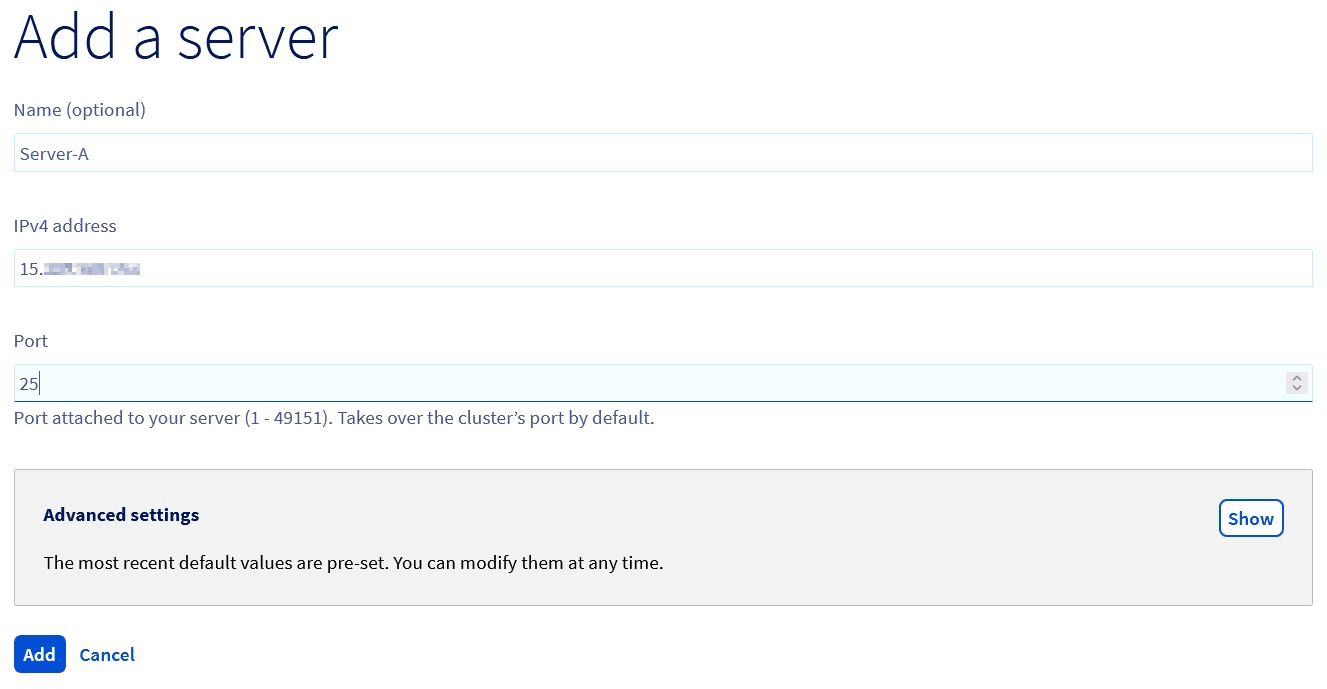
Server cluster add

You can expand the advanced settings by clicking the Show button. Details on all options are in the table below:
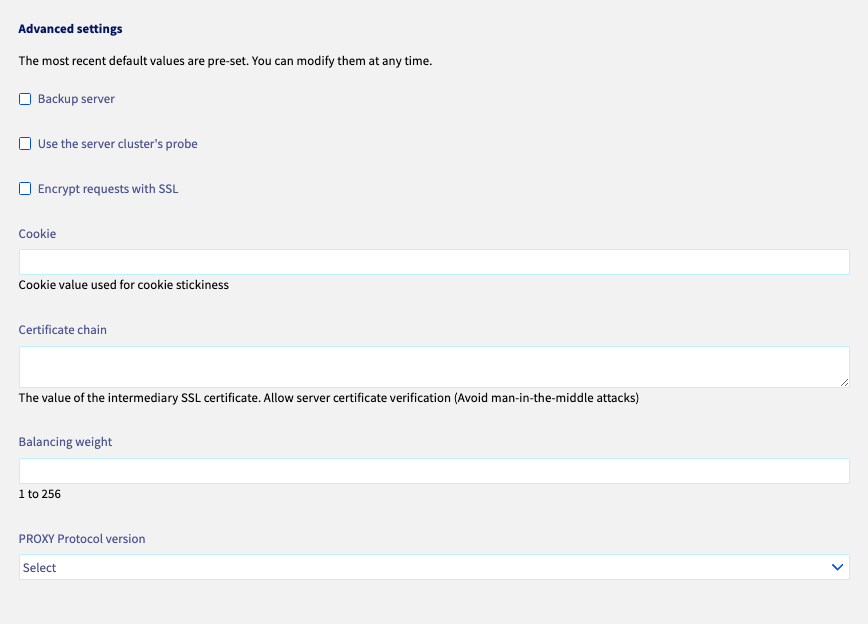
Server advanced settings

ElementPurpose
NameIf you want, you can choose a name for your server. This is very useful when you have several servers, so you can tell them apart quickly.
IPv4 addressAdding the IP address of the service that will act as a server.
PortServer port.
Backup serverSelecting which server is a backup server.
Use the server cluster's probeChoose the probe that was validated when you created the cluster.
Encrypt requests with SSLEncrypting requests with an SSL certificate.
CookieAdd a customized session cookie.
Certificate chainAdd a certificate chain.
Balancing weightChoose the balancing weight for the load balancer
PROXY Protocol versionOnly if you have configured it, choose the version of the PROXY protocol you wish to use on the server.You can find more information on the PROXY protocol and how to use it with the OVHcloud Load Balancer in this guide.

Managing SSL certificates

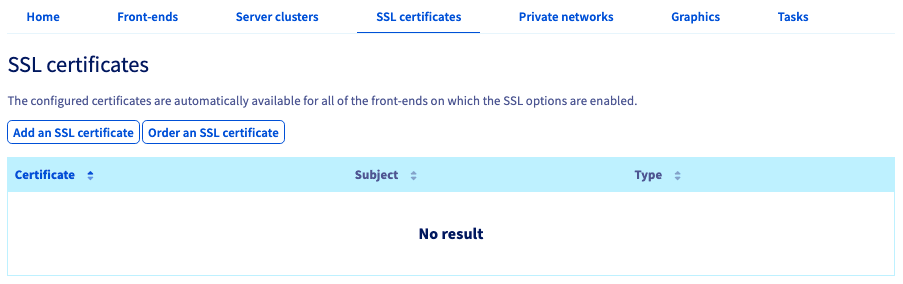
You can add an SSL certificate to the Load Balancer in the SSL Certificates tab. You have two options: you can order an SSL certificate from OVHcloud or add an external certificate.

OVHcloud SSL certificate

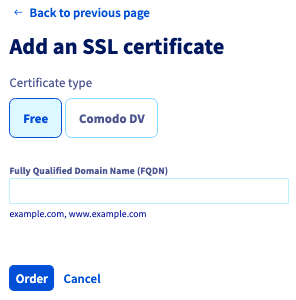
To order an SSL certificate, simply go to the SSL Certificate section, then click Order an SSL certificate and browse the options available:
Ssl certificate - Manage via control panel

Ssl certificate order

ElementPurpose
Certificate typeFree (Let's Encrypt) or Comodo DV
Fully Qualified Domain Name (FQDN)Domain(s) concerned

Adding an external SSL certificate

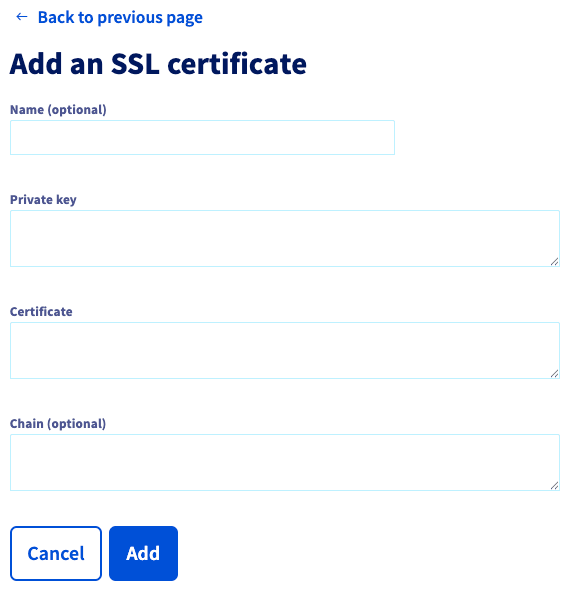
To add your own SSL certificate, from the SSL Certificates tab, click Add an SSL certificate and browse the options available:
Ssl certificate - Manage via control panel

Ssl certificate add existing

ElementPurpose
NameIf you want, you can choose a name for your certificate. This is very useful when you have several certificates, so you can tell them apart quickly.
Private keyField for entering the private key to add to the service.
CertificateField for adding the certificate.
ChainField for adding the root certificate, if required.

Go further

Browse all the Load Balancer guides.

Browse the rest of the OVHcloud US documentation for guides on our other products and services.

Learn more about Load Balancer on the OVHcloud US website.