
How to use VLANs with multiple VMware ESXi hosts
Requirements
- At least two dedicated servers with ESXi installed (hardware requirements are in the Broadcom documentation) in a vRack.
- Access to the ESXi Host Client (this information will have been sent via email after installing ESXi on your OVHcloud server).
- A VM in your ESXi environment (How to Create a VM in VMware ESXi).
Instructions
Adding a vSwitch to an ESXi host
OVHcloud Dedicated Servers that support vRack are equipped with separate network paths for public and private (vRack) traffic. By default, however, ESXi will only configure a vSwitch for the public NIC. To connect our VMs over vRack, we will add a vSwitch to each host to use the NIC connected to vRack.
NOTE: All steps taken in a single ESXi host will have to be mirrored in each additional host if you wish for VMs on different hosts to communicate with each other.
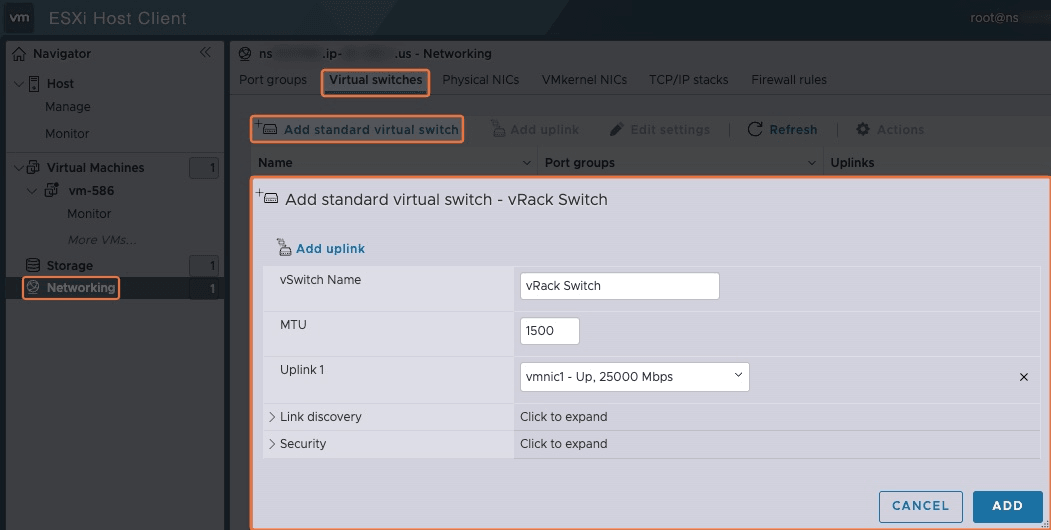
To create a new vSwitch, click Networking > Virtual switches tab > Add standard virtual switch.
In the pop-up window, enter a vSwitch Name, choose vmnic1 for Uplink 1, and click Add.
In this example, the vRack-connected NIC is named vmnic1, but the name may be different on your host. You will only be able to choose that NIC for Uplink 1, since it's the only physical NIC not already attached to a vSwitch.
Creating a new port group on the vSwitch
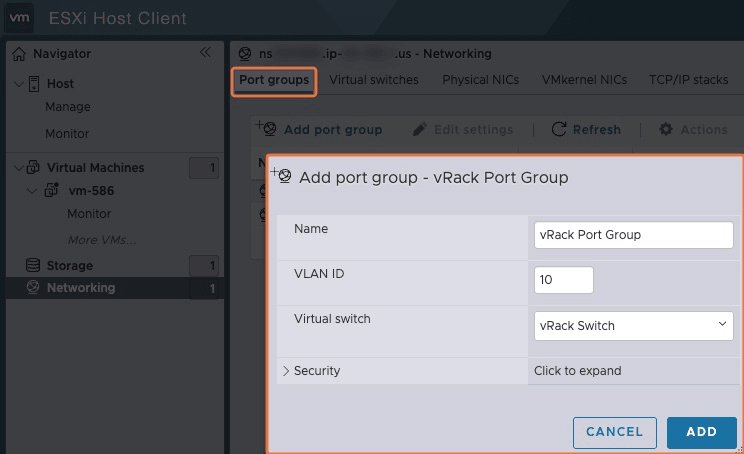
To create a new port group, select the Port groups tab and click Add port group.
In the pop-up window, enter a Name, choose a VLAN ID, select the vSwitch created above, and click Add.
NOTE: By default, the VLAN ID will read "0," which is for untagged traffic. We recommend using VLAN tagging for an added layer of security; select any number between 2 and 4,000 for this number. Then use the same number for every other VM you wish to network together.
Creating a private NIC on a VM on the new port group
NOTE: In this example, we assume that we are changing settings on a preexisting VM. However, these same settings can be changed during the creation of a VM in ESXi.
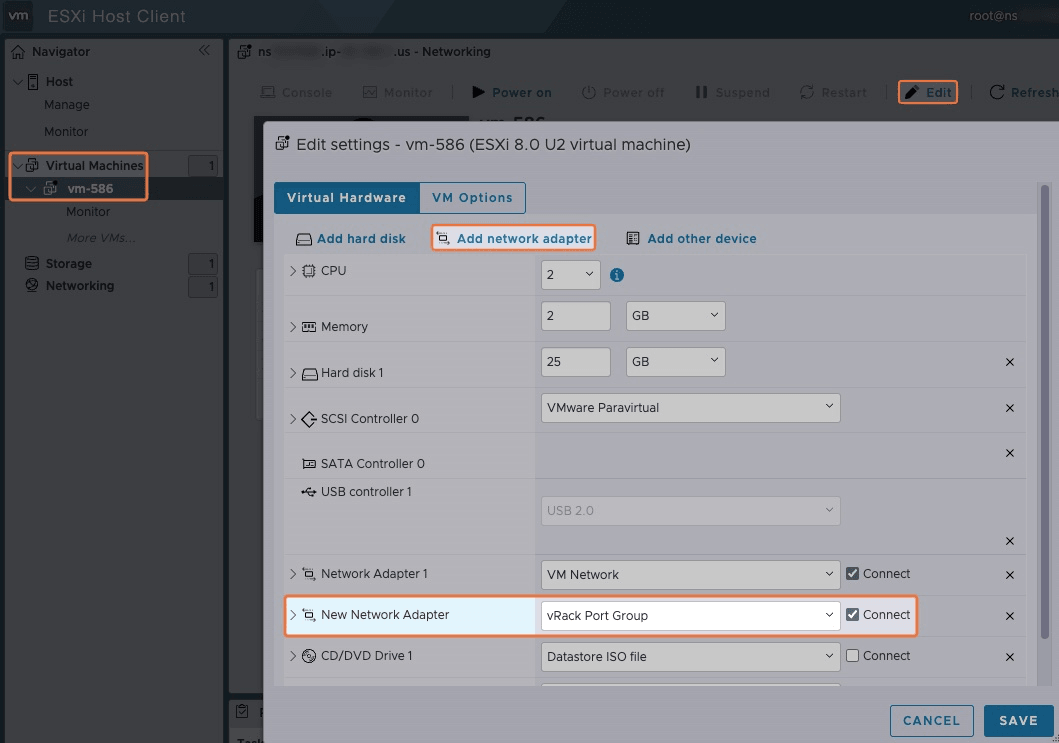
To create a new NIC on your VM, click Virtual Machines and select your VM.
Make sure your VM is powered off, and then click Edit.
In the pop-up window, click Add a network adapter, select the port group created above, and click SAVE.
Configuring the network
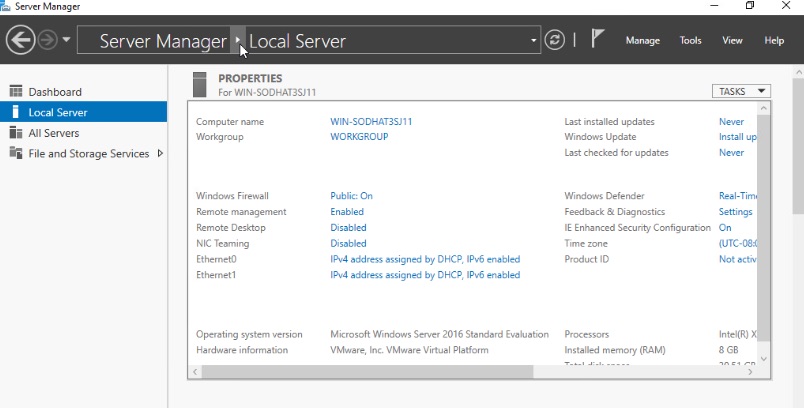
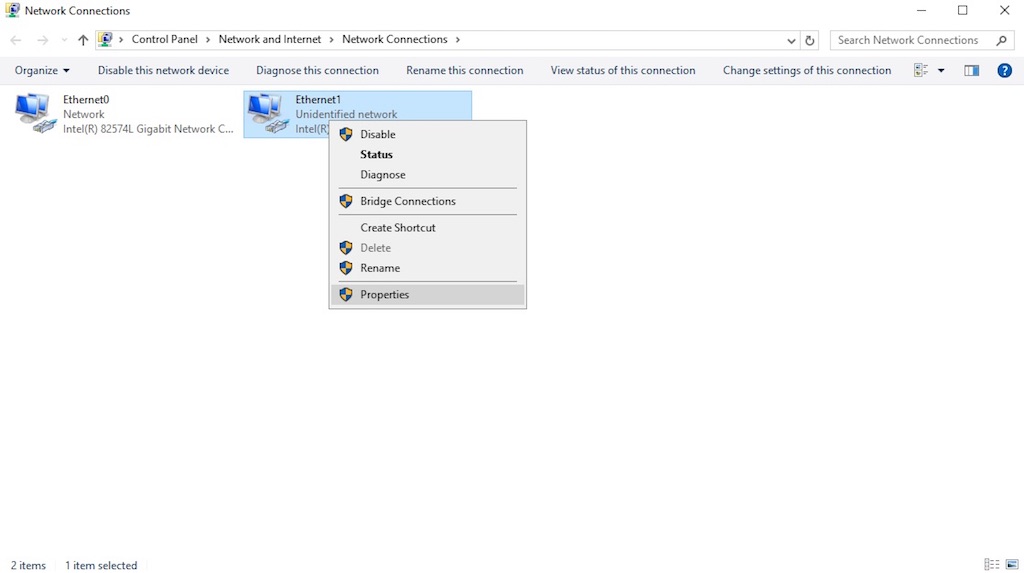
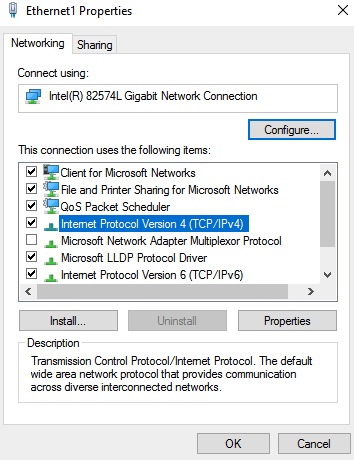
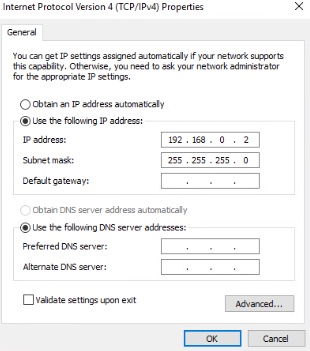
For examples of how to set up networking on VMs running Ubuntu or Windows Server, see the tabs below. If you are running a different operating system, the setup required will vary.
The final step to configuring networking for VLAN-tagged traffic is to assign the NIC a private IP address to use for routing traffic. To do so, first access your server via SSH or the built-in ESXi console. Then, enter the following command to find the name of your second interface.
NOTE: By default, ESXi will assign the name ens192 to the second NIC if you are using the VMXNET3 adapter. If you are not using the default adapter, it will be the second interface in the list.
We will configure a NIC that is not already configured for public networking (one without an IP address already assigned to it). To do so, we will need to open the Netplan configuration file using the following command:
Once in the file, edit it to appear as follows. If you have already configured the public NIC, create the entry for the private NIC, directly below the public one. Do not delete the public NIC from the file.
NOTE: You can use any private IP address you choose that isn't already utilized by another VM on the vRack. The CIDR notation will determine the subnet on which the different IP addresses can communicate with one another. All IPs on a VLAN must exist on the same subnet.
Save and exit the file and then apply the changes using the following command:
Go further
Browse all the Dedicated Servers guides.
Browse the rest of the OVHcloud US documentation for guides on our other products and services.
Learn more about Dedicated Servers on the OVHcloud US website.