
Enabling IPs After Anti-Hack Flags
Learn how to check alerts on your IPs and unblock them via OVHcloud Control Panel and OVHcloud API.
For every IP available with OVHcloud products and services, as an Internet Service Provider, we will register and reserve it with organizations such as RIPE or ARIN. This means that we appear as the IP abuse contact for litigation in the WHOIS database.
If an IP is reported to organizations such as Spamhaus and SpamCop, which work to combat SPAM, malicious websites, and phishing, then the reputation of the entire OVHcloud network is at stake.
It is therefore important that OVHcloud takes care of the reputation, quality, and security of the network, which also forms an important part of your service.
How will I know if my IP has been flagged?
Once an IP receives an anti-hack flag, an email will be sent to your account containing information like the example below:
Dear Customer,
The IP address 135.xxx.xxx.xxx had to be blocked by our services due to the various alerts received.
Please don't hesitate to contact our technical support team so that this situation does not become critical.
OVH Customer Support
What to do after receiving the email alert?
Identify the issue, resolve it, and then unblock your IP.
Instructions
Identify and resolve the issue
Before unblocking an IP:
- Stop sending emails (e.g., stop all email software such as qmail, Postfix, Sendmail, etc.).
- Check the email queue (e.g., qmHandle for qmail, postqueue -p for Postfix) and clear it.
- Analyze your logs using the Message-ID found in the block alert.
- If you are indeed sending SPAM or illegitimate emails, we strongly recommend that you resolve the issue before unblocking the IP.
Once the issue has been resolved, you can unblock your IP by performing the following steps.
WARNING: Do not unblock the IP under any circumstances without having suspended the sending of emails from your server; you will immediately get blocked for a second time (and for a longer duration).
Via the OVHcloud Control Panel
Log in to the OVHcloud Control Panel and select Bare Metal Cloud from the top navigation bar.
In the left-hand menu, select Network, then IP.
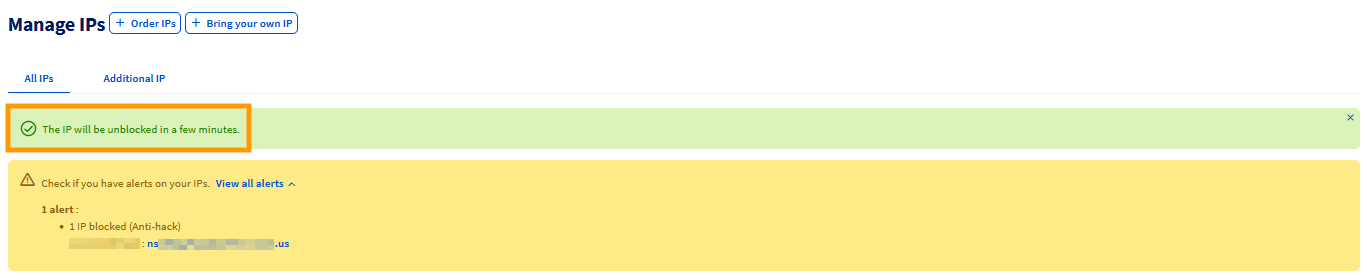
If you have an alert on any of your IP(s), the information will be displayed right underneath:
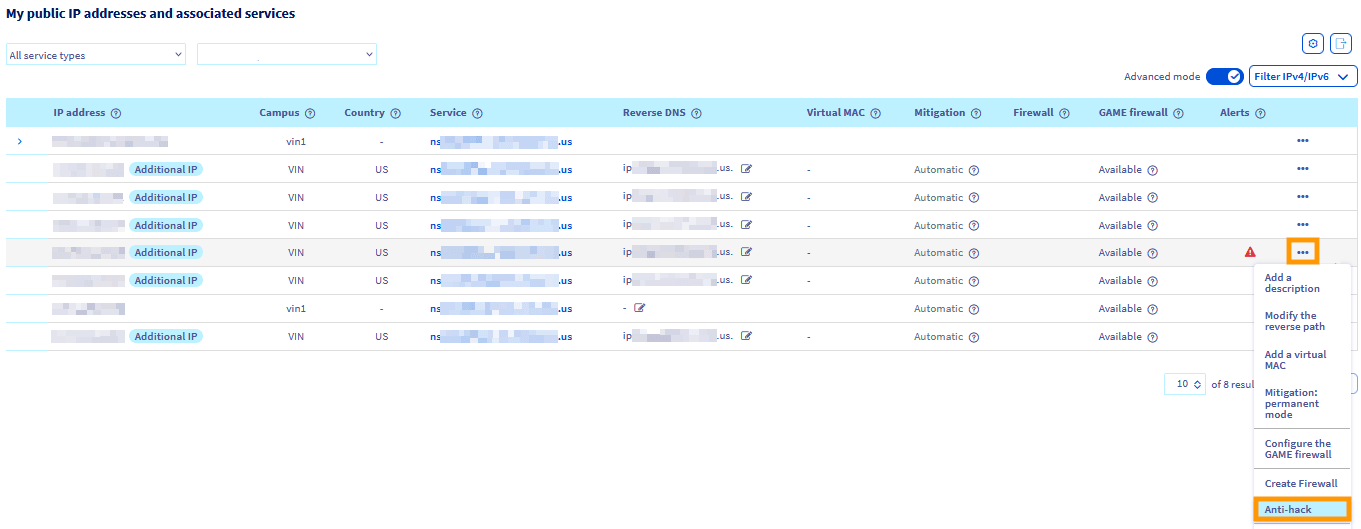
In the My public IP addresses and associated services section, click on the more options ... button next to any IP/service with an Alert, and select Anti-Hack.
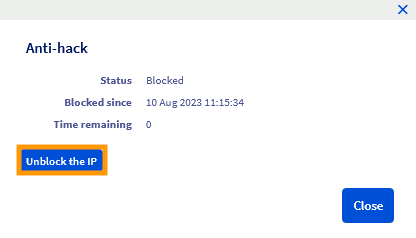
In the pop-up window, select [code]Unblock IP.
You will see a green alert notifying you of success.
Via the OVHcloud API
Log in to the OVHcloud API interface according to the relevant guide and follow the steps below.
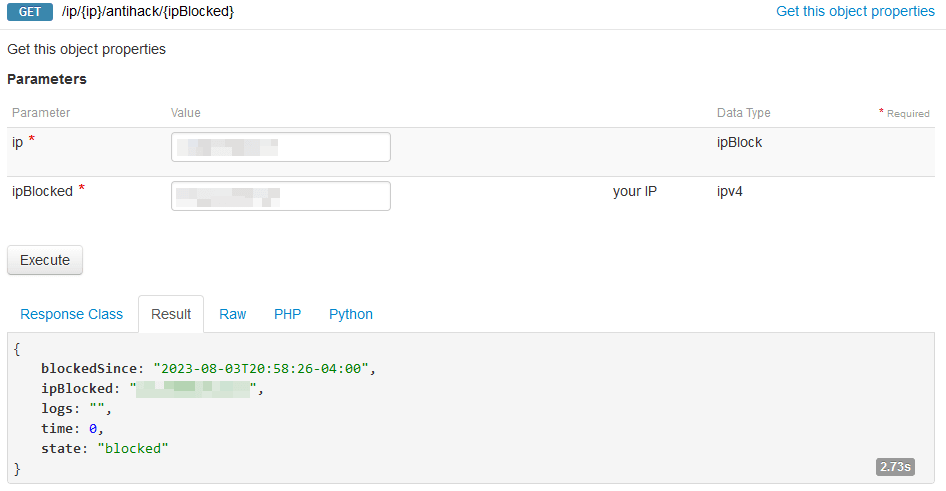
Use the following API call to retrieve details about the blocked IP, such as the length of time it has been blocked:
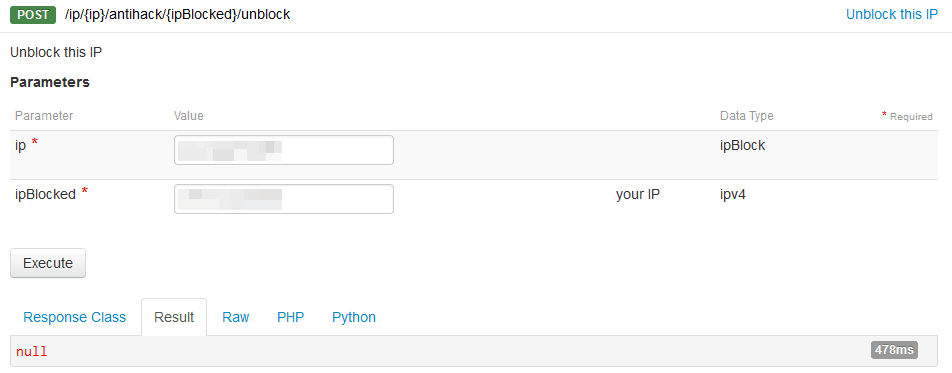
Use the next API call to unblock your IP address. A "null" result means it was successful.
Go further
Browse all the Additional IP guides.
Browse the rest of the OVHcloud US documentation for guides on our other products and services.
Learn more about Additional IP on the OVHcloud US website.