
How to Update Your Nutanix Cluster Firmware
This article provides you with the steps to update the Nutanix cluster's firmware by putting each node into maintenance, before rebooting one node at a time in rescue mode.
Our services will take over to apply updates and firmware and will restart the node thereafter.
NOTE: Before following the steps below, log in to your OVHcloud Control Panel and create a support ticket, requesting a firmware update. Make sure to provide the OVHcloud support teams with all technical information regarding your cluster.
This guide explains how to update your Nutanix cluster firmware.
Requirements
- A Nutanix cluster in your OVHcloud account
- Access to the OVHcloud Control Panel
- Consulting the guide First Steps with the OVHcloud API (to familiarize yourself with the OVHcloud API)
Instructions
Before any other action, log in to your Prism Element interface and perform the following tasks:
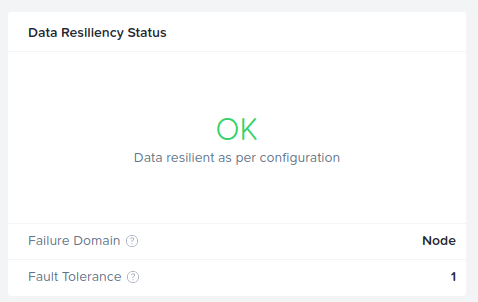
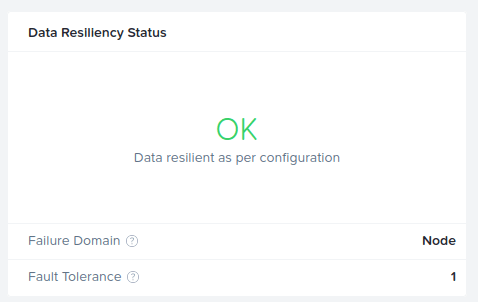
- Check that the cluster's "Data Resiliency Status" is
OK.
This can be verified on the main dashboard of your Prism Element interface:
- Run an NCC check.
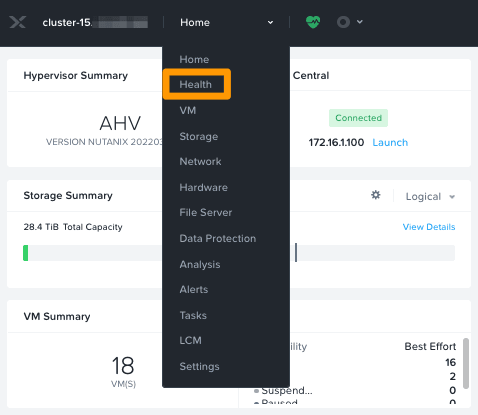
In the Prism Element interface, click Health from the main menu.
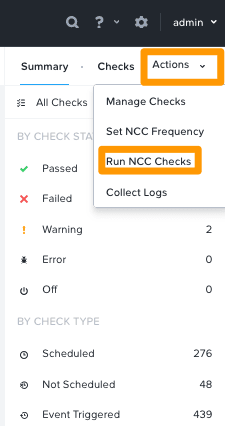
Then click Actions to the right and click Run NCC Checks.
Select All checks and click Run.
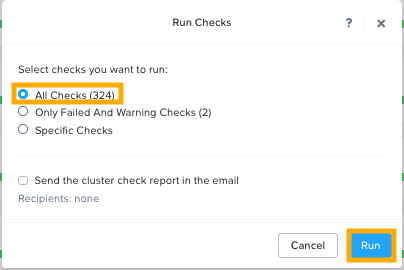
A log file called /home/nutanix/data/logs/ncc-output-latest.log will be generated at the end of the checks.
Please analyze it carefully. If you find errors or failures in the cluster or service state, do not continue and contact OVHcloud support.
NOTE: It is possible to run NCC checks on the CVM by typing the following command from a terminal.
Enabling maintenance mode
Nodes will be updated one by one, the Nutanix cluster will continue to work properly.
To log in to CVM, you can launch IPMI from your OVHcloud Control Panel or use a terminal.
NOTE: Before putting the host into maintenance, ensure that the remaining hosts have enough resources to host migrated VMs from it (CPU, memory, storage).
Connect to CVM
At the login prompt, log in with root credentials to access the host terminal.
Then open an SSH connection to any CVM with Nutanix credentials to access the CVM terminal.

Check nodes state
Once logged in, check that:
Node statestatus is set toAcropolisNormal.Schedulablecolumn is set toTruefor all nodes.
Then run the following command to check:

If all checks are OK, you need to check that the current host state can be changed to Maintenance. To do so, use the following command:

Put a node in maintenance mode
NOTE: VMs with specific policies (like affinity, CPU passthrough, etc.) should be stopped manually before running maintenance as they will not migrate.
If all hosts are eligible to enter maintenance mode, put the first host into maintenance mode with the following command:

NOTE: When hosts enter maintenance mode, all hosted VMs will be migrated to other hosts without any interruption.
Shut down the CVM
Once the host is in maintenance mode, CVM can be shut down with the following command:
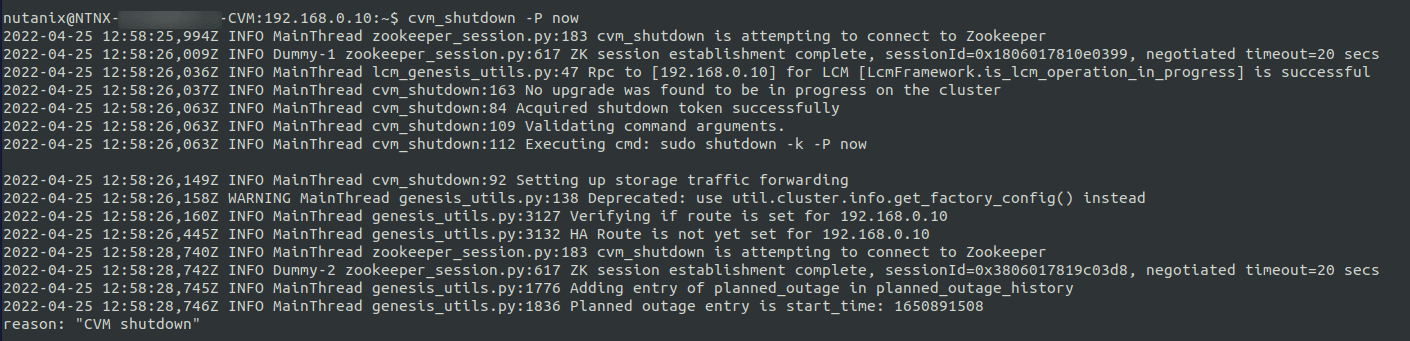
With root credentials, open a terminal on the node that hosts the CVM and confirm that the CVM is stopped:

On the main dashboard, the "Data Resiliency Status" will become Critical, the cluster is now running with two nodes.
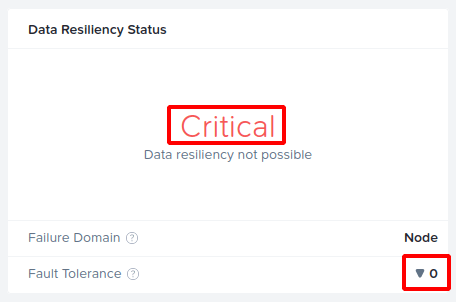
The CVM is now shut down.
Reboot to rescue mode
Log in to the OVHcloud Control Panel, go to the Hosted Private Cloud, choose the Nutanix solution, and select your cluster.
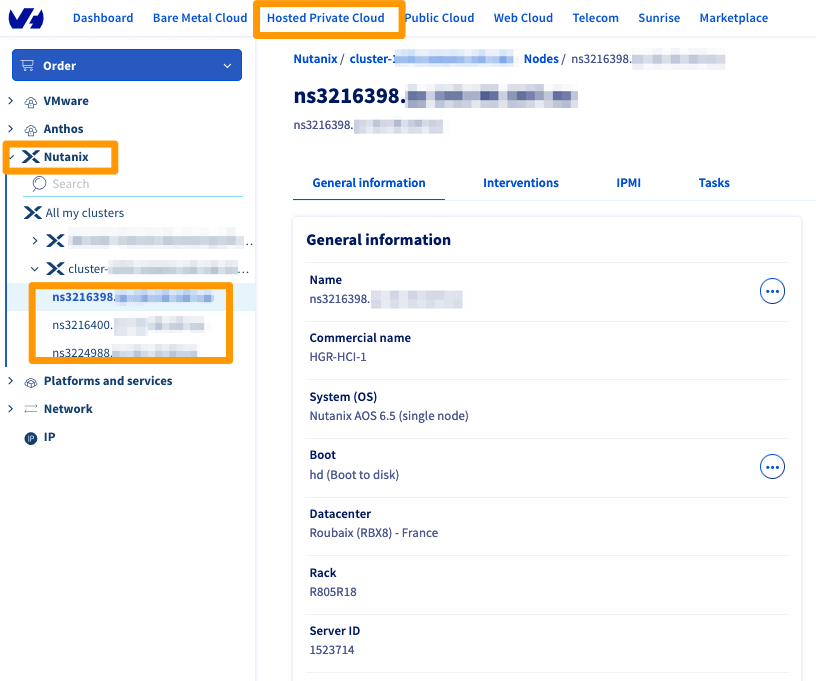
Identify the node to boot in rescue mode by using the following OVHcloud API call:
serviceName: Enter the cluster name.
You can then identify your node name:
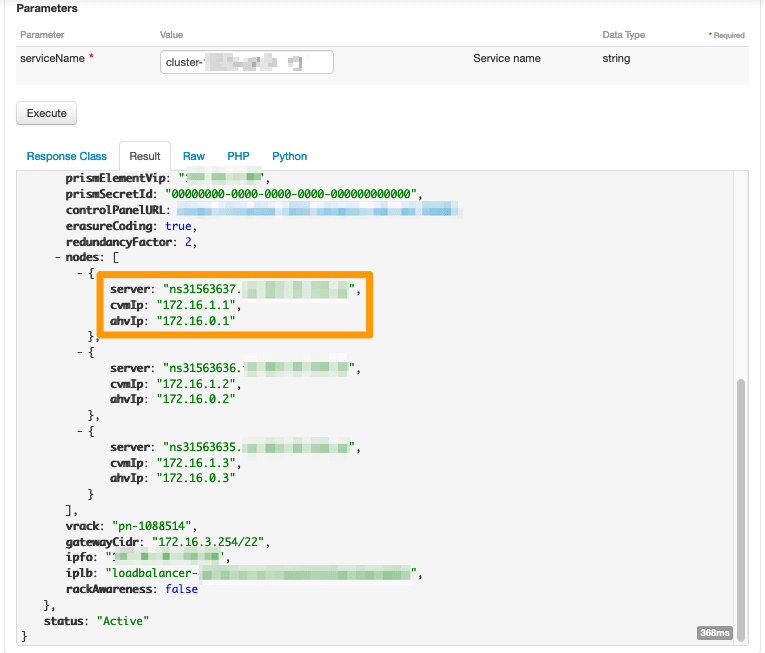
Once you have retrieved the name of the node to reboot in rescue mode, select this node in your OVHcloud Control Panel.
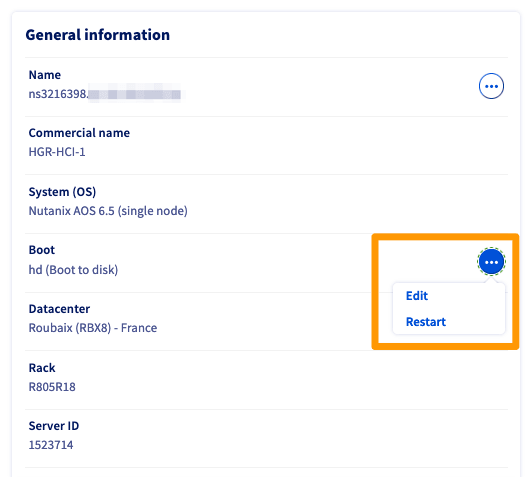
In the Boot section, click the ... button then click Edit.
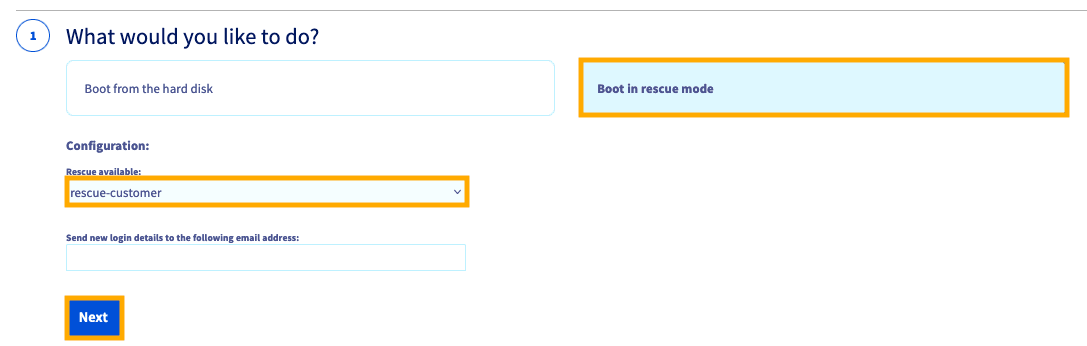
Change the netboot by choosing Boot in rescue mode, choose the rescue-customer version, and click Next.
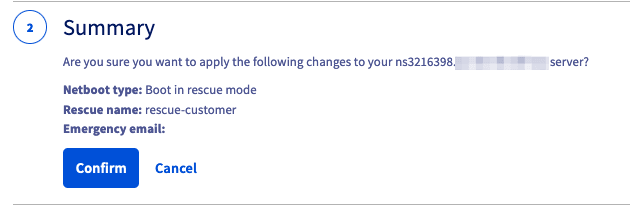
Confirm your choice.
Once confirmed, a green message will confirm that the netboot has been updated.
Click again the ... button and click Restart.
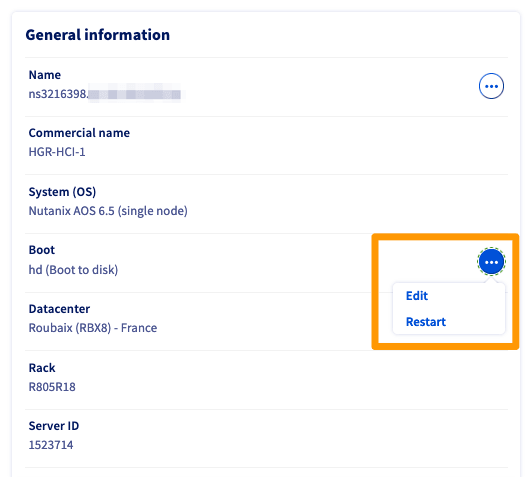
The server will reboot. Optionally, you can open an IPMI session to follow the reboot process of your node.
When the node is booted into rescue-customer, update your support ticket with this information to notify the OVHcloud support teams that they can proceed with the firmware update.
Our support teams will finish the necessary updates, meaning they will:
- Restart the node on the local disk, which will start the Nutanix system and the CVM automatically.
- Update the ticket to let you know when the node can exit from maintenance mode.
At this time, the node will be up and running. Follow the next step to exit maintenance mode.
Exit from maintenance mode
After updating the node, our services will reboot the node from its local disk. The Nutanix software will load AOS and the CVM will automatically start.
Once the system is up and running, log in to the CVM and run the following command:
As you can see in the output example below, the first node is still in maintenance mode.

To remove the node from maintenance mode, run the following command:
The host exits the Maintenance state and goes back to the Normal state.

Migrated VMs from this node automatically move from other nodes to it.
On the main dashboard, the "Data Resiliency Status" will revert to OK. The cluster also returns to its normal state.
Proceed with the remaining nodes one at a time with the same steps.
Please do not open a new ticket, just add comments on the same ticket for each node, specifying the name of the server (example: ns123456.ip-169-254-10.eu).
Go further
Browse all the Nutanix guides.
Browse the rest of the OVHcloud US documentation for guides on our other products and services.
Learn more about Nutanix on OVHcloud on the OVHcloud US website.