
How to Interconnect Two Nutanix Clusters through the vRack
This guide will show you how to interconnect two Nutanix clusters Provided by OVHcloud across the same vRack in two remote OVHcloud sites. In this guide, the connection is made between two datacenters, which we will call Datacenter 1 and Datacenter 2.
Requirements
- You must be logged in to your OVHcloud Control Panel.
- You must be connected to your clusters via Prism Central.
Instructions
We are going to interconnect two remote Nutanix clusters, one in Datacenter 1 and the other in Datacenter 2 through the same vRack.
See our vRack overview to learn more about the OVHcloud vRack solution.
Preparing both clusters before interconnection
Before connecting the two clusters, ensure that they use different IP addresses (except for the gateway) on the same IP address range.
In our guide, we will use the address range 192.168.0.0/22.
The Datacenter 1 cluster uses these addresses:
- Server 1: CVM VM address
192.168.2.1, AHV hypervisor IP address192.168.2.21. - Server 2: CVM VM address
192.168.2.2, AHV hypervisor IP address192.168.2.22. - Server 3: CVM VM address '192.168.2.3', AHV hypervisor IP address
192.168.2.23. - Virtual address of Prism Element:
192.168.2.100. - Prism Central IP address:
192.168.2.101. - Gateway:
192.168.2.254. - Cluster version:
6.1.
The Datacenter 2 cluster uses these addresses:
- Server 1: CVM VM address
192.168.1.1, AHV hypervisor IP address192.168.1.21. - Server 2: CVM VM address
192.168.1.2, AHV hypervisor IP address192.168.1.22. - Server 3: CVM VM address
192.168.1.3, AHV hypervisor IP address192.168.1.23. - Virtual address of Prism Element:
192.168.1.100. - Prism Central IP address:
192.168.1.101. - Gateway:
192.168.2.254. - Cluster version:
6.1.
Use our guide on customized redeployment of your cluster.
NOTE: The guide mentioned above will help you redeploy both clusters. However, you can only redeploy one, the most important thing is not to have the same identical IP addresses across the network, except for the OVHgateway.
Shutting down the OVHgateway virtual machine.
The outgoing internet connection is provided by OVHgateway virtual machines with the same private IP address on both sites. We will stop the OVHcloud Virtual Machine Gateway in Datacenter 2. This virtual machine will no longer be needed.
The outgoing internet connection will be restored when the connection through the vRack is made.
Log in to the cluster Prism Central interface located in Datacenter 2.
Go to the virtual machine management section, select OVHgateway from the Actions menu, and click Guest Shutdown.
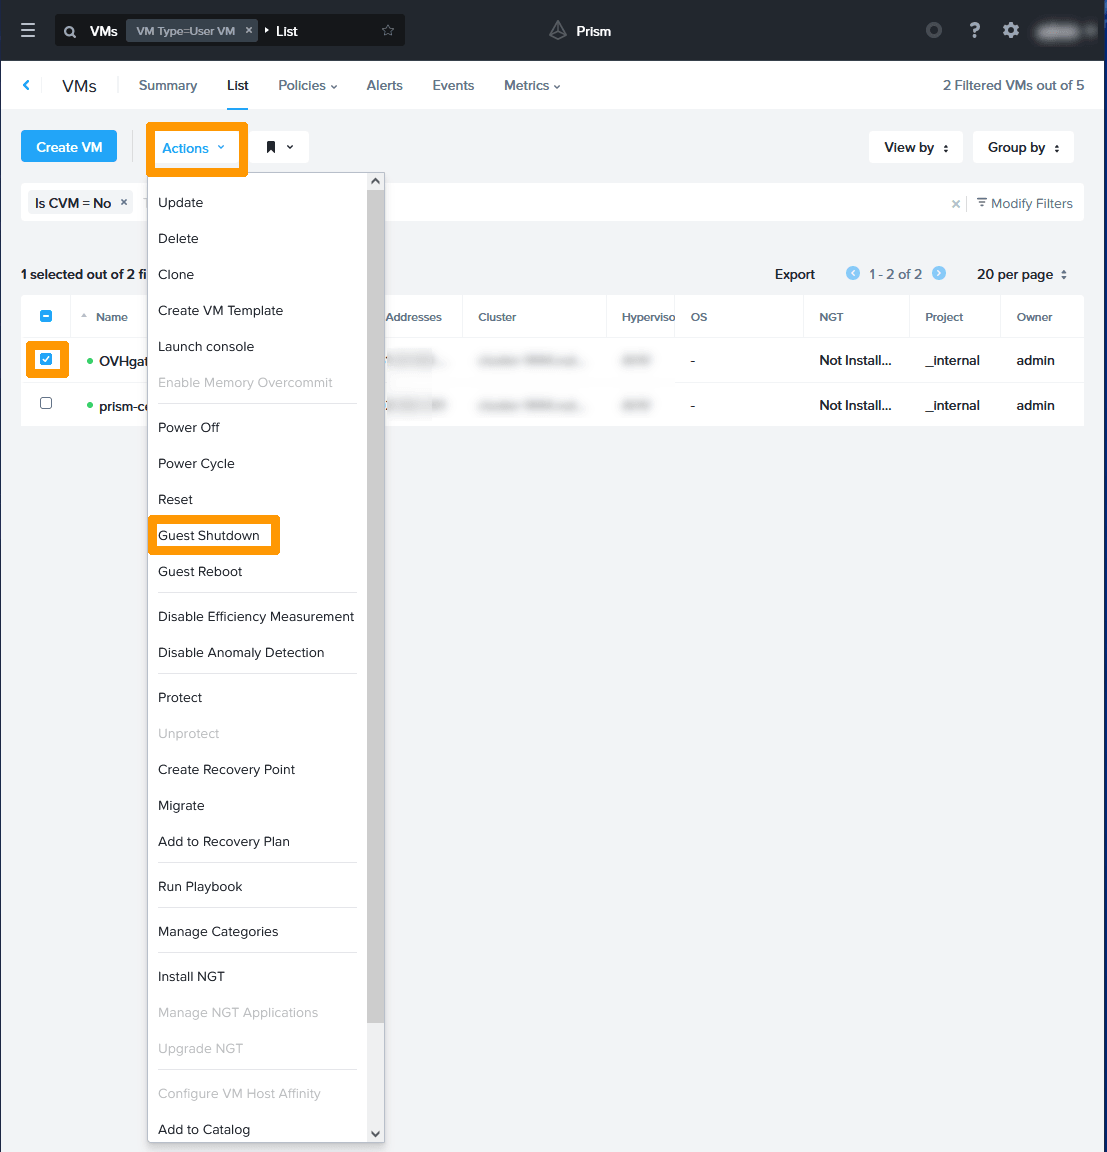
Access to Prism Central is maintained using the Load Balancer.
Configuring vRacks
This operation involves deleting the vRack assignment in Datacenter 2 and then extending the vRack from Datacenter 1 to Datacenter 2. You can modify the vRack via the OVHcloud Control Panel.
Log in to your OVHcloud Control Panel.
Deleting Datacenter 2 vRack elements.
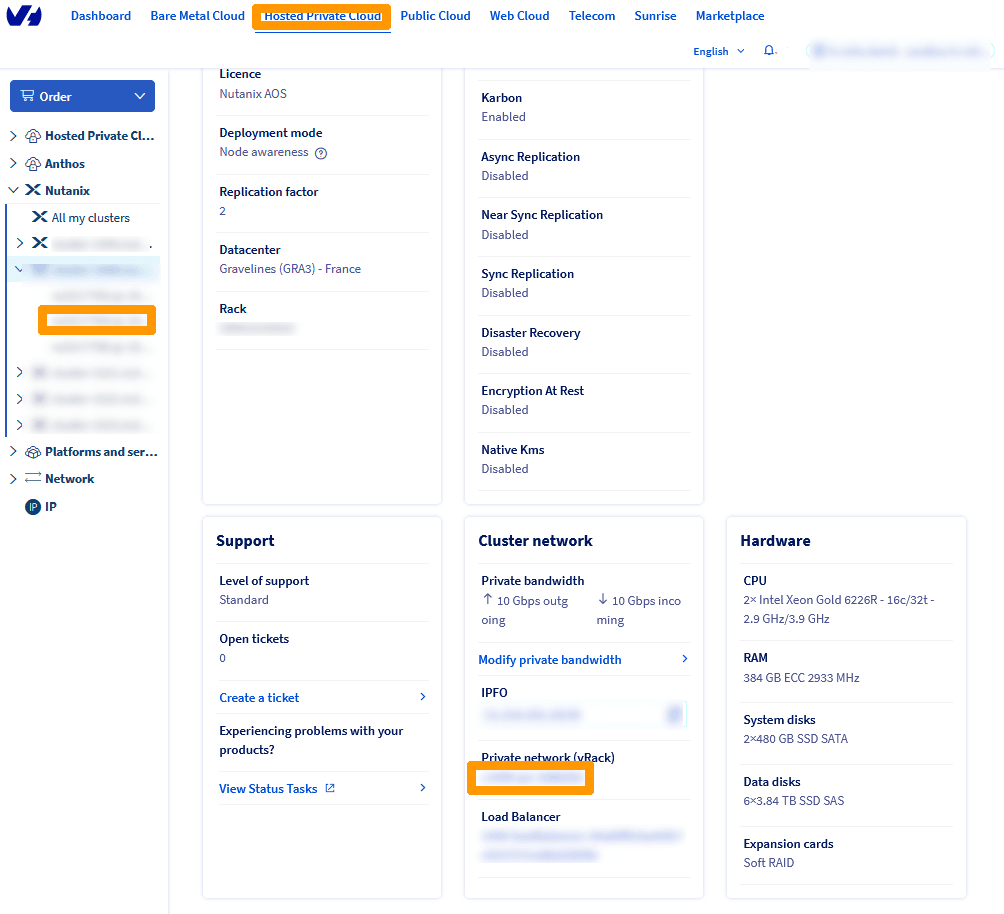
From the Hosted Private Cloud menu, select the Datacenter 2 cluster on the left in the Nutanix category and note the name of the vRack which is under Private network (vRack).
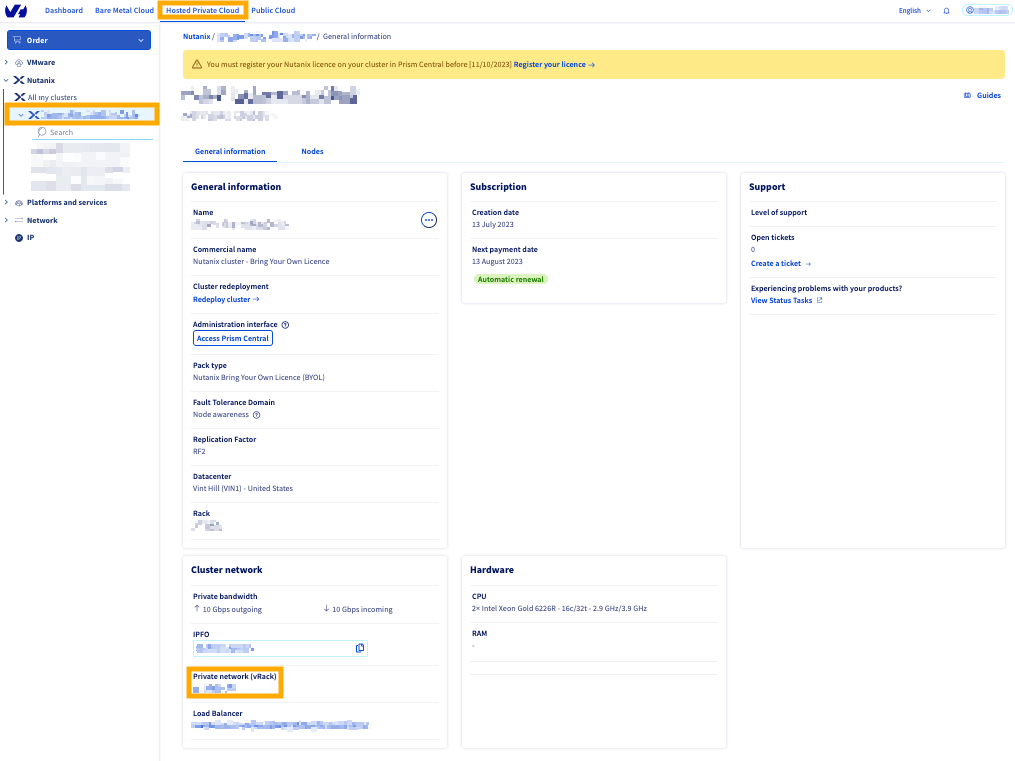
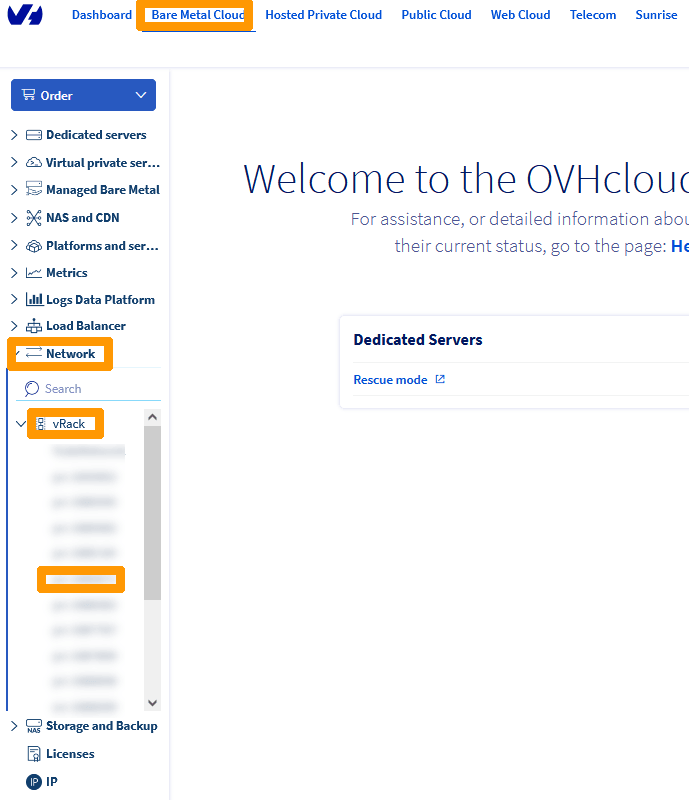
Go to the Bare Metal Cloud menu, click on the vRack concerned below the vRack option (in the Network submenu).
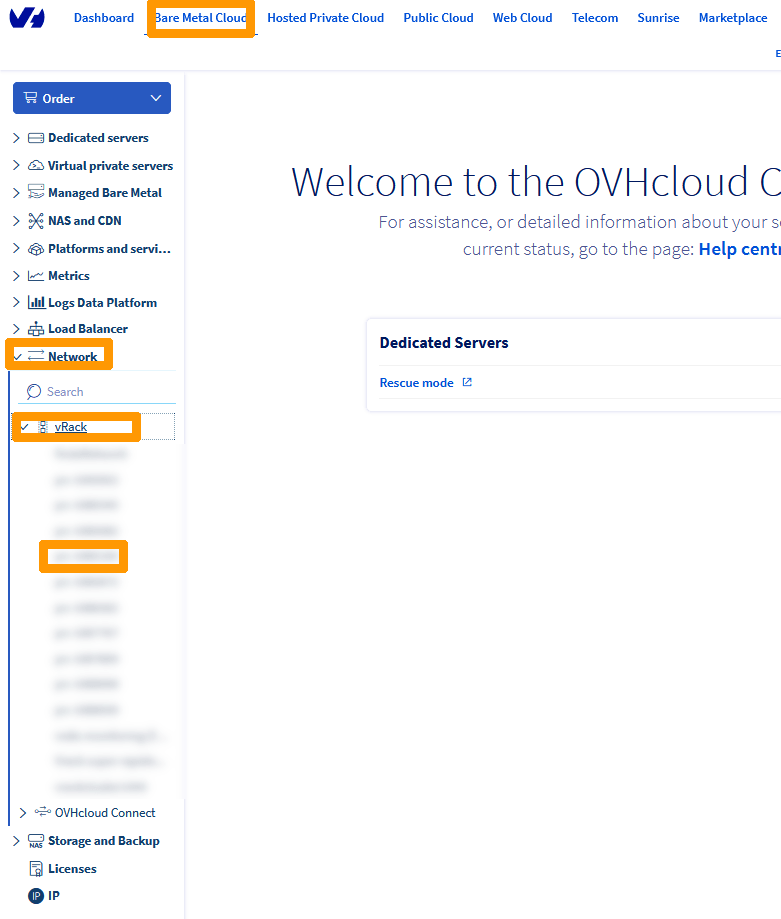
Select all the elements that are in your vRack:
- Dedicated servers
- IPs
- the Load Balancer
Write them down and click Remove
NOTE: This operation may take a few minutes, please wait during this period.
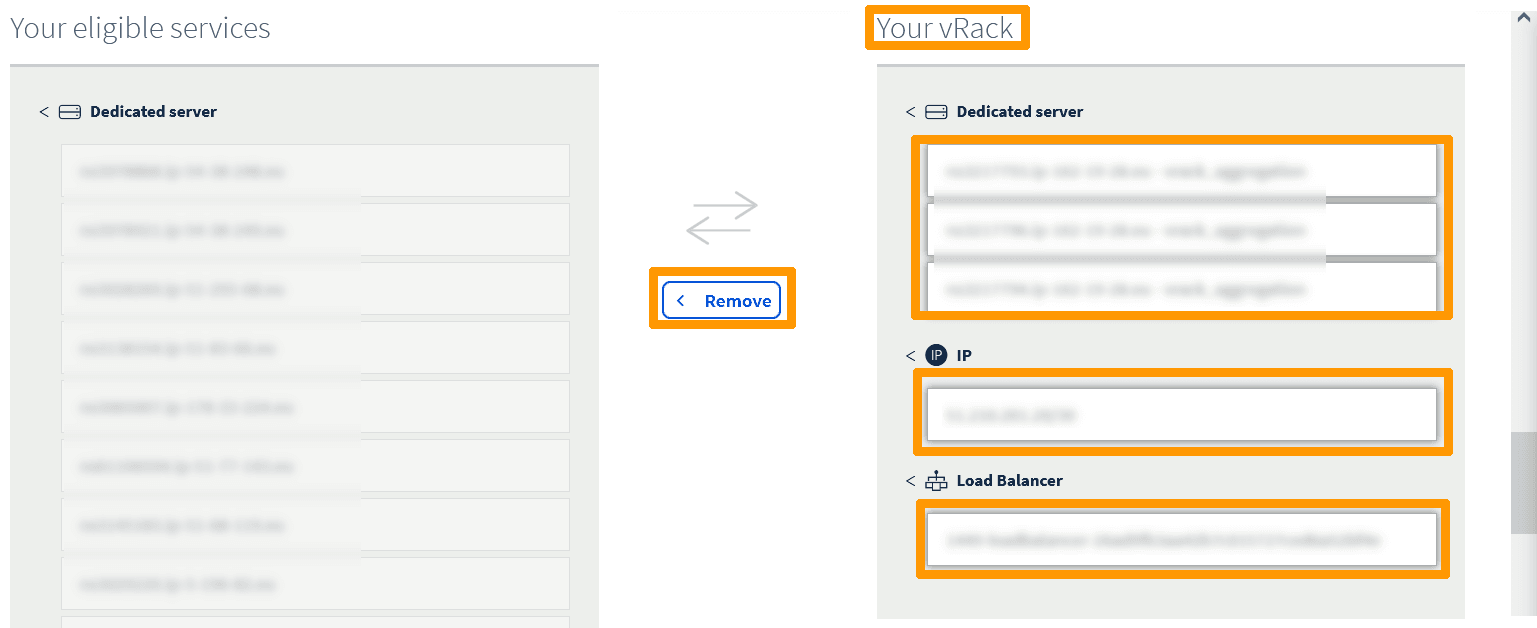
Adding deleted items from the Datacenter 2 vRack into the Datacenter 1 vRack
Go back to the Hosted Private Cloud menu, choose the Datacenter 1 cluster from the Nutanix category, and note the name of the vRack under Private network (vRack).
Go to the Bare Metal Cloud menu, and select the vRack from Datacenter 1 below the vRack option (from the Network submenu).
Select these elements from the Datacenter 2 cluster:
- Physical servers
- the public IP.
Then click Add.
NOTE: This operation may take a few minutes, please wait during this period.
Adding the public address is not mandatory but it will make it available for future needs.
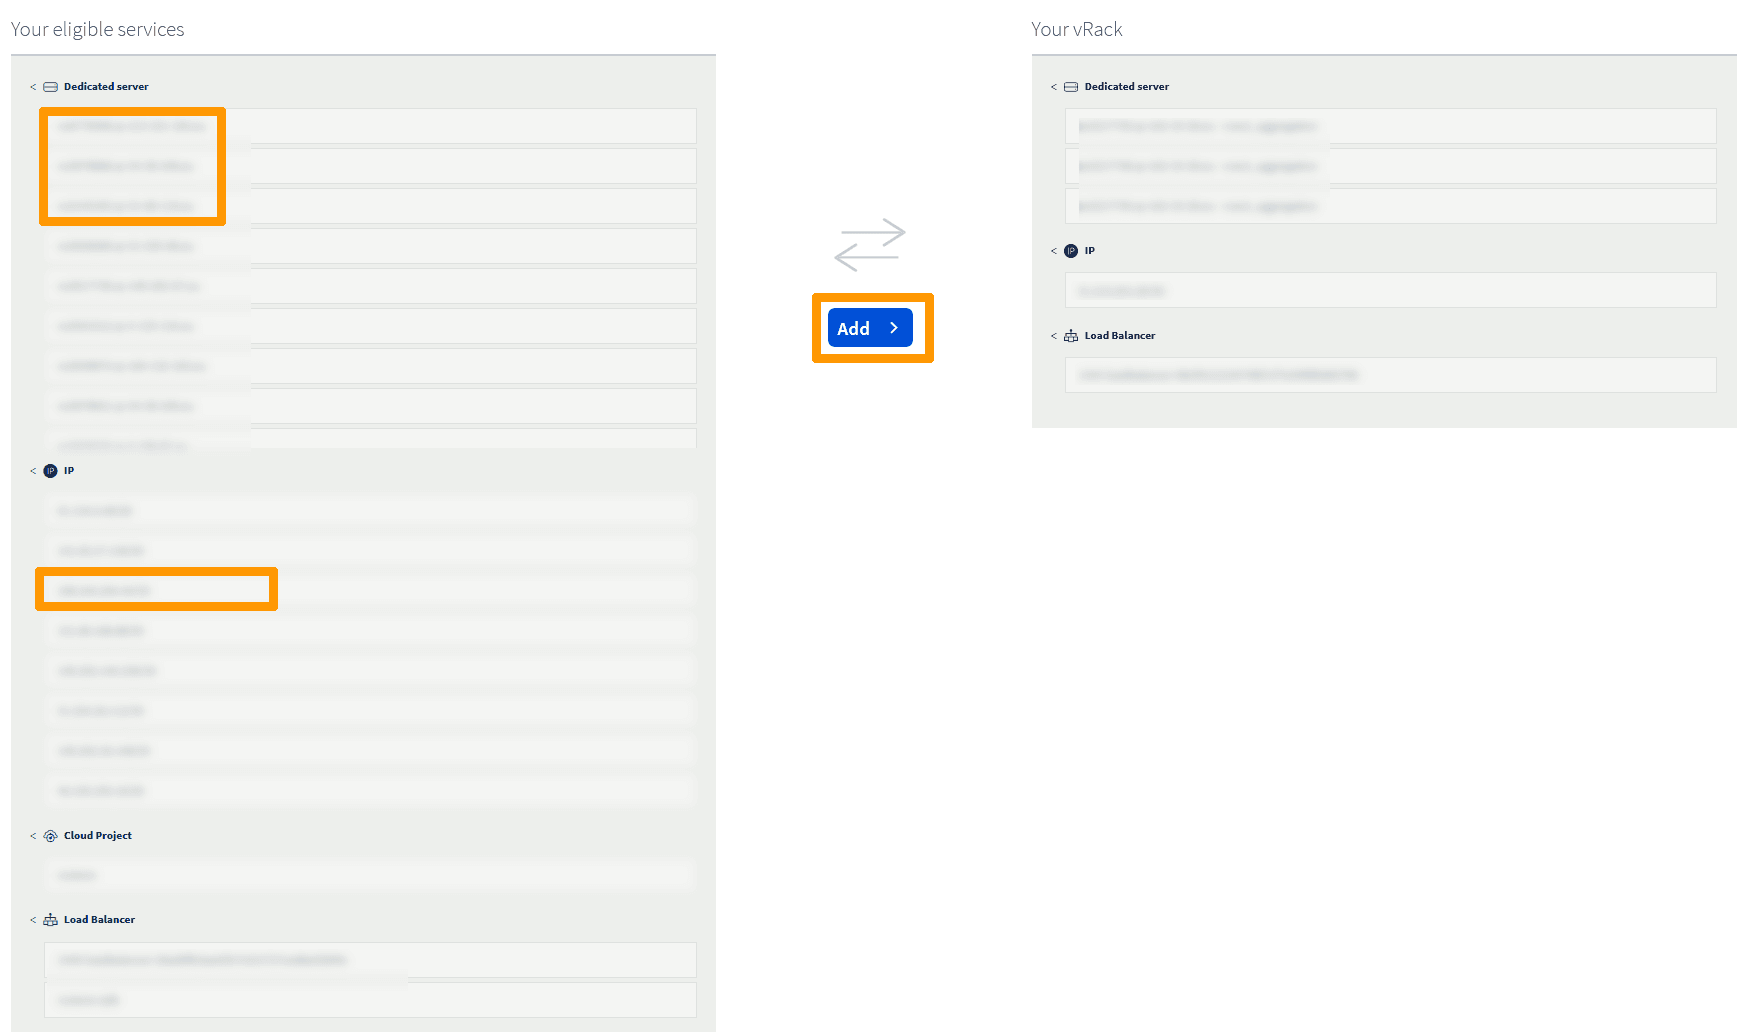
The vRack that was only used by the servers in the Datacenter 1 cluster is now used on both sites and contains:
- The physical servers of the two clusters.
- The public IP addresses of the two clusters.
- The Datacenter 1 Load Balancer, used for Prism Central.
Outgoing internet access on the Datacenter 2 website is again available through the vRack and the OVHgateway virtual machine in Datacenter 1. Access to Prism Central for the Datacenter 2 cluster is currently inaccessible.
Modifying the Datacenter 2 Load Balancer
We will reconfigure the Datacenter 2 Load Balancer to work with the vRack shared by both sites so that it can access Prism Central for the Datacenter 2 cluster.
In the Bare Metal Cloud menu, select the Datacenter 2 Load Balancer from the Load Balancer submenu.
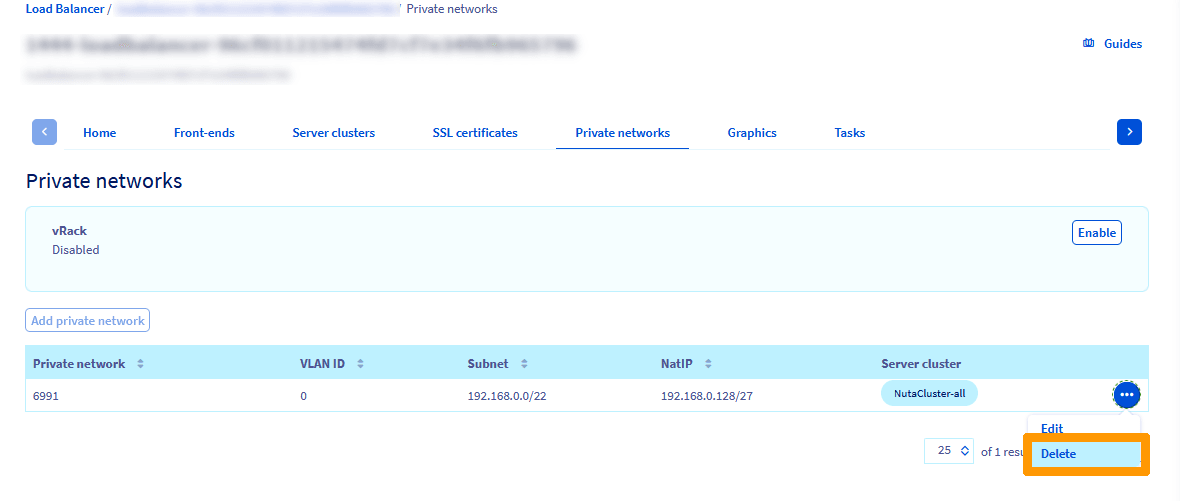
Go to Private networks, click on the ... to the right of the existing private network.
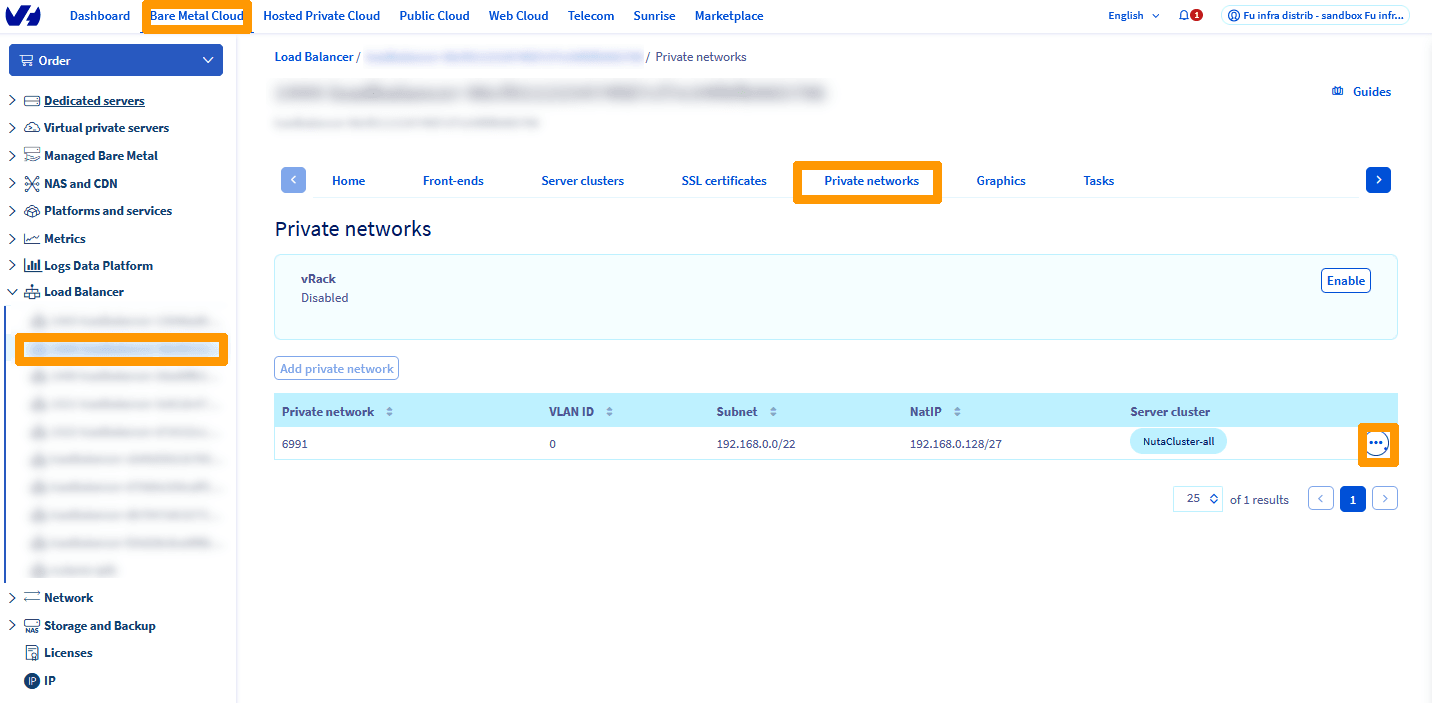
Click Delete.
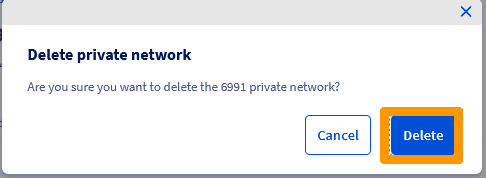
Click Delete again at the confirmation request.
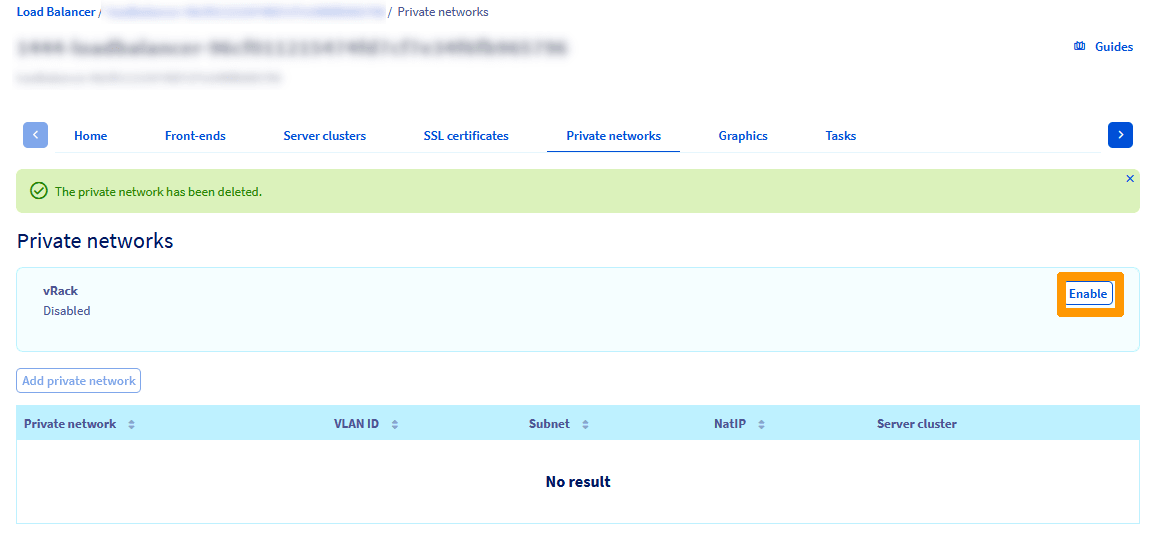
Click Enable to the right of vRack.
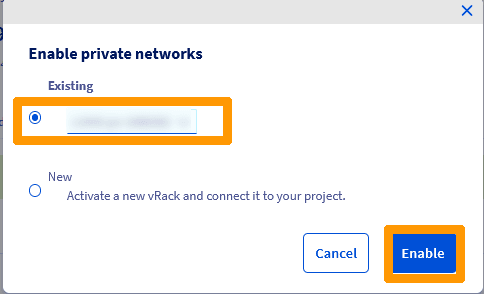
Select Existing, select the vRack that is common to both sites and click on Enable.
Click Add Private Network.
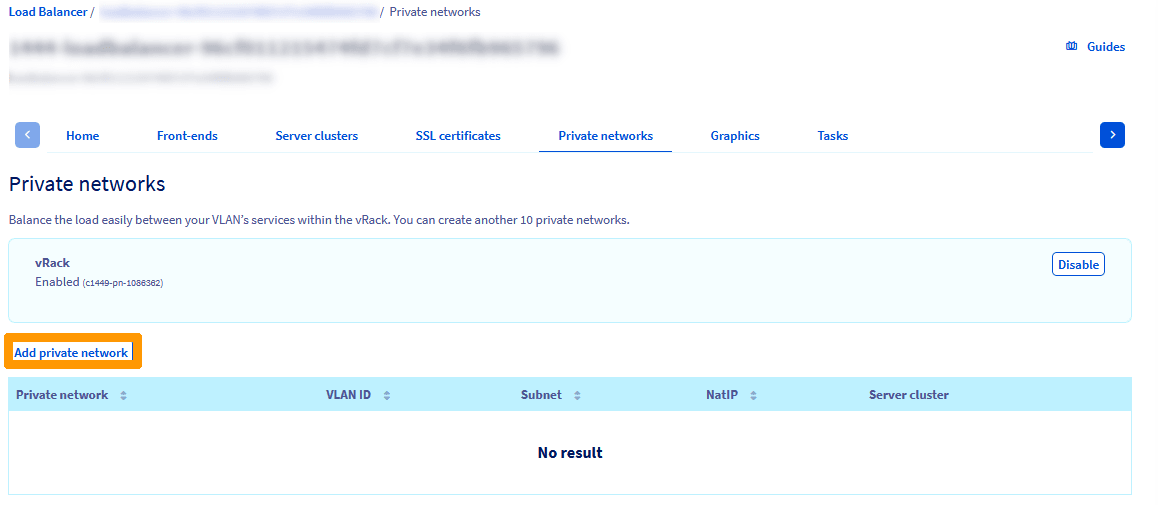
Choose these values:
- Name (optional): Private network name.
- VLAN ID: Nutanix management network VLAN, normally 1.
- Subnet: Private network LAN 192.168.0.0/22.
- NatIP: Address range used by the Load Balancer 192.168.2.128/27.
- Name: NutaCluster-all.
NOTE: The range chosen by NatIp should not be used by other elements of the private network, particularly the range taken by the Datacenter 1 Load Balancer.
Then click Add.
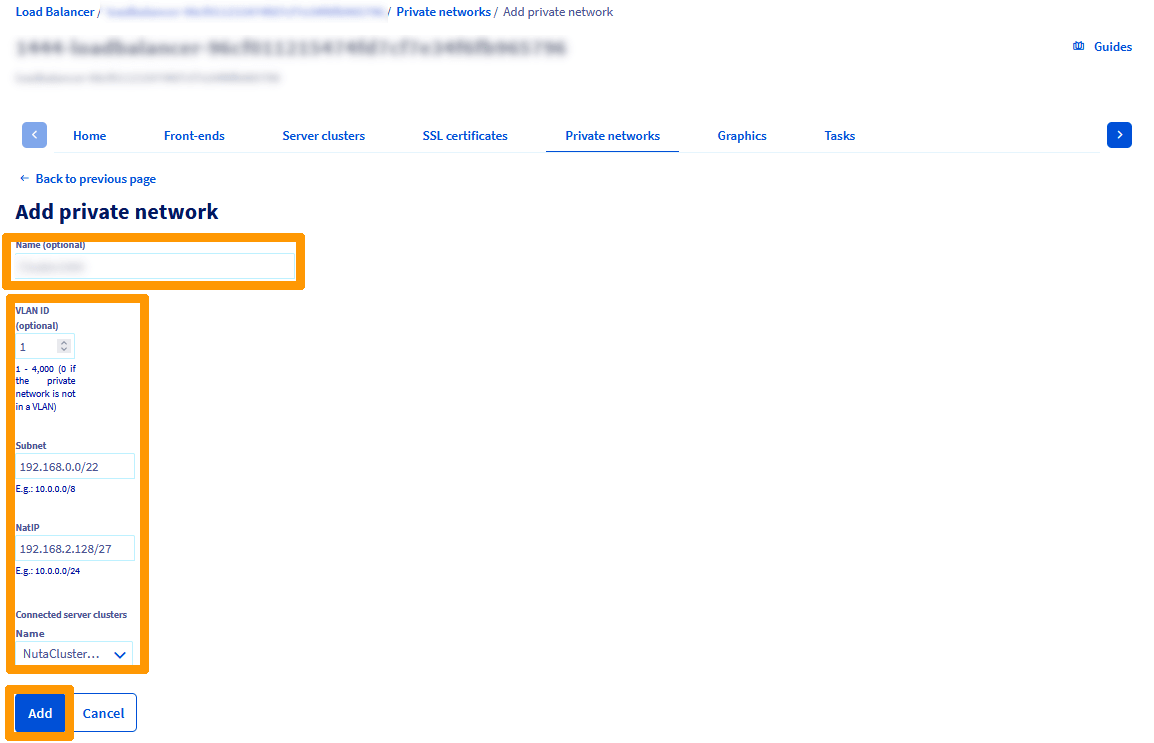
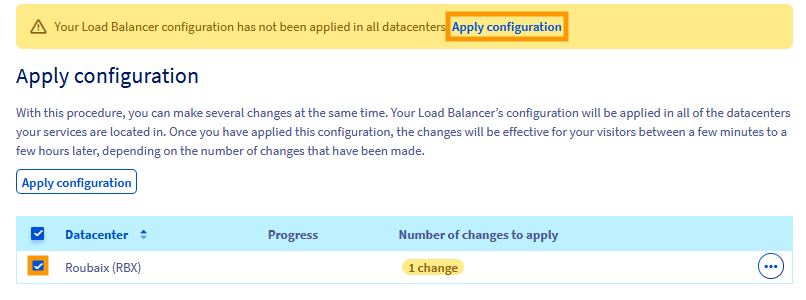
A yellow banner appears, indicating that the configuration has not been applied. Click Apply Configuration.

Select Datacenter 2 and click on Apply configuration.
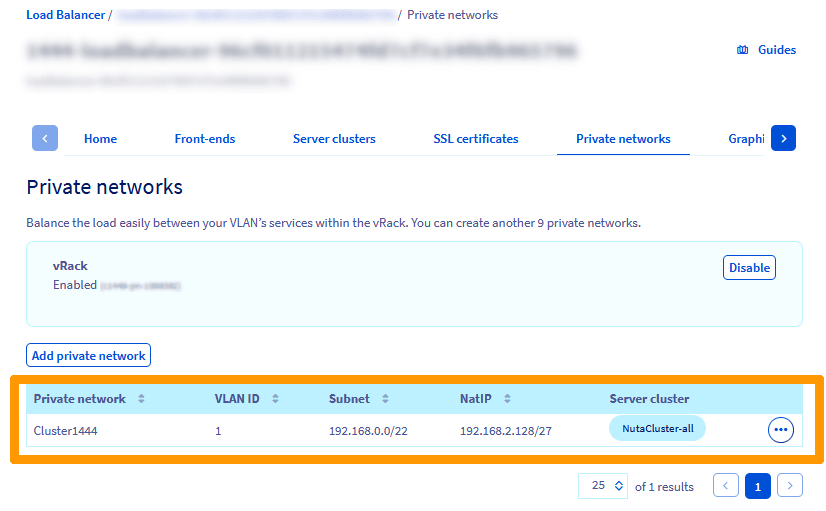
The Load Balancer is connected to the vRack shared by both sites, and access to Prism Central for the Datacenter 2 cluster is then available.
Go further
Browse all the Nutanix guides.
Browse the rest of the OVHcloud US documentation for guides on our other products and services.
Learn more about Nutanix on OVHcloud on the OVHcloud US website.