
How to Set Up Asynchronous or NearSync Replication through Prism Element
Learn how to set up cluster replication via Prism Element.
Introduction
Via Prism Element, you can:
- Add links to remote clusters.
- Create protection domains to add replications to remote sites.
NOTE: The Starter Nutanix on OVHcloud pack allows you to use asynchronous replicas every hour.
For a shorter replication time, between 1 and 15 minutes, you must configure NearSync replicas. This option is only available with the Pro or Ultimate OVHcloud packs.
Requirements
- Two Nutanix clusters in your OVHcloud account
- Access to the OVHcloud Control Panel
- Access to your clusters via Prism Central
- An interconnection between two clusters, e.g. via an IPsec VPN
Instructions
We will use two Nutanix clusters in OVHcloud datacenters, called Datacenter 1 and Datacenter 2, connected via an IPsec VPN, on two different IP addressing schemes which are:
- 192.168.0.0/24 for the cluster in Datacenter 2.
- 192.168.10.0/24 for the cluster in Datacenter 1.
If you need help setting up an IPsec VPN, please refer to our guide on interconnecting two Nutanix clusters through an IPsec VPN.
Connect via Prism Element to the cluster in Datacenter 2 from Prism Central, as shown in this documentation: Nutanix Hyperconvergence.
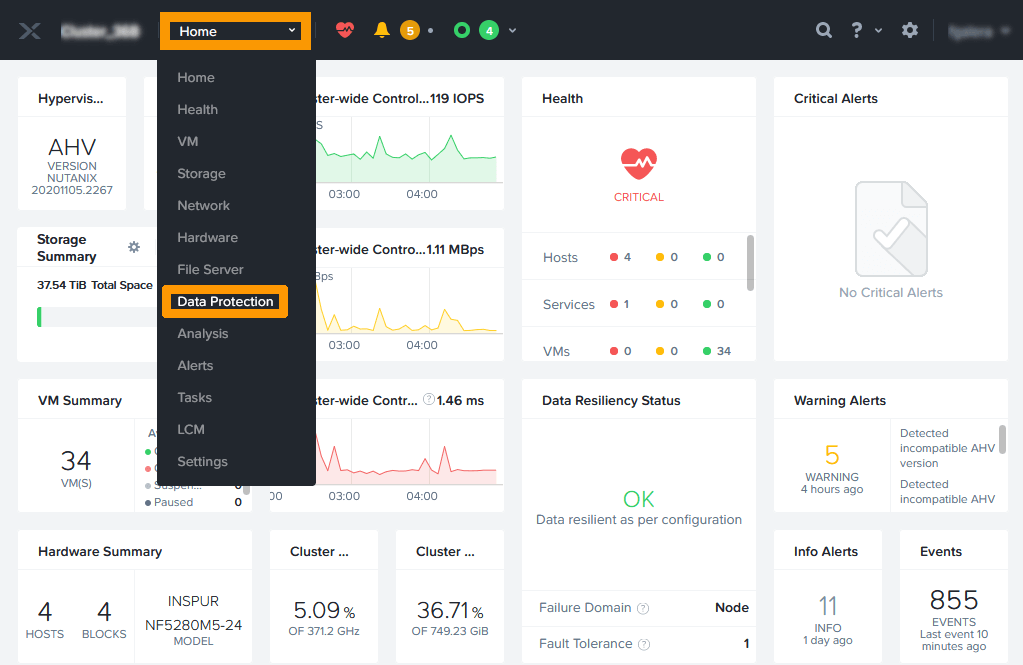
From the Home menu, click Data Protection.
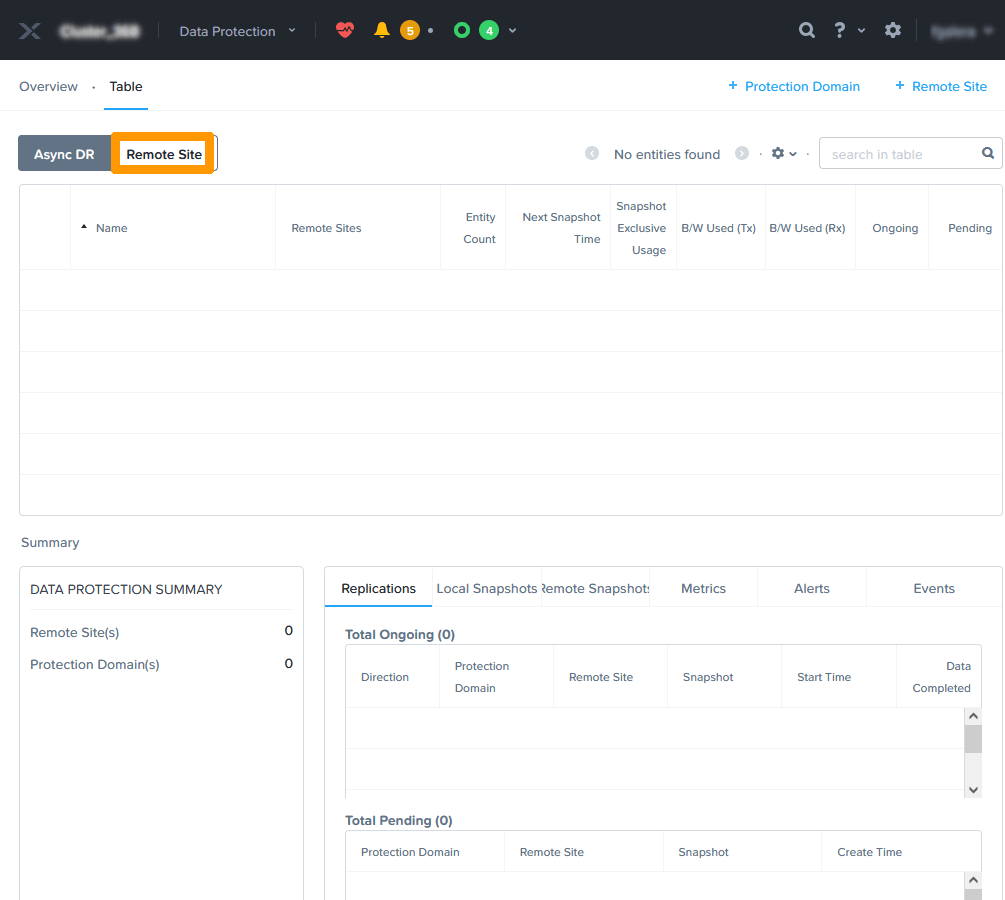
Click Remote Site on the left side of the screen.
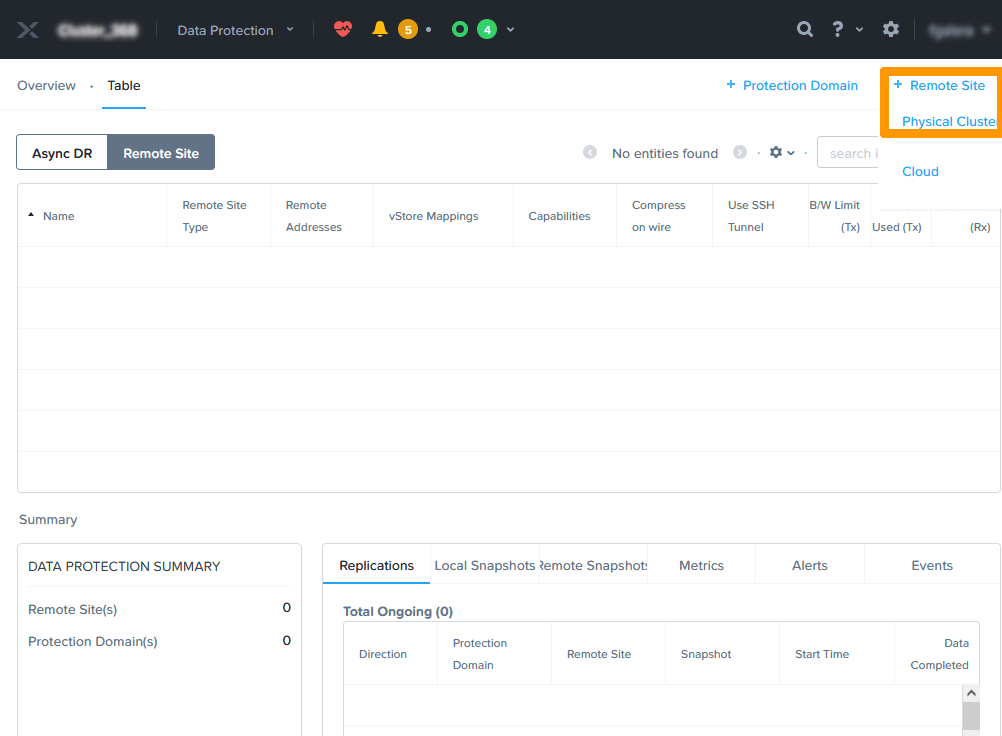
Click + Remote Site to the right of the screen and choose Physical Cluster to add a remote site.
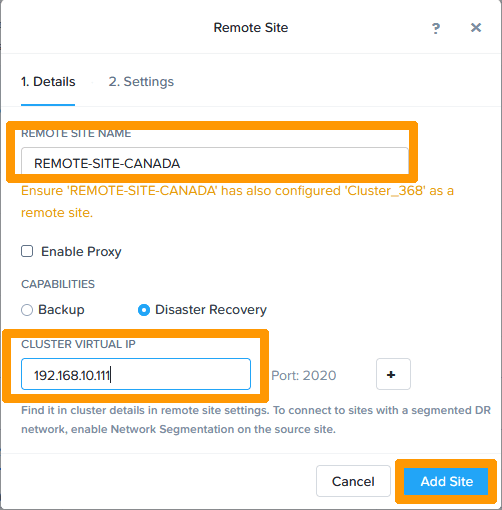
Name the remote site in the REMOTE SITE NAME field, enter the IP address of the Prism Element in Datacenter 2 into the CLUSTER VIRTUAL IP field, and click Add Site.
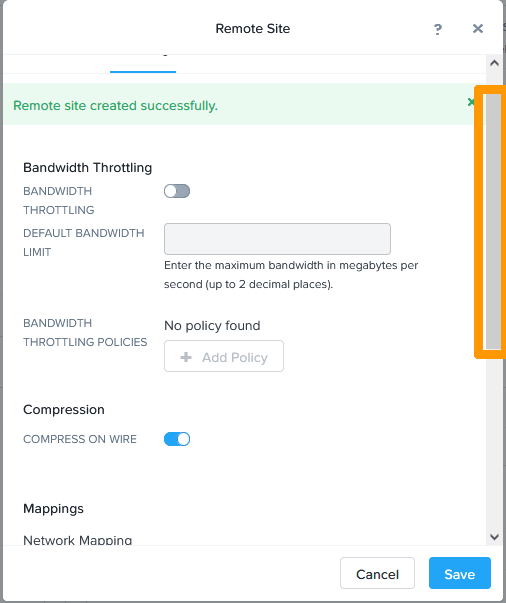
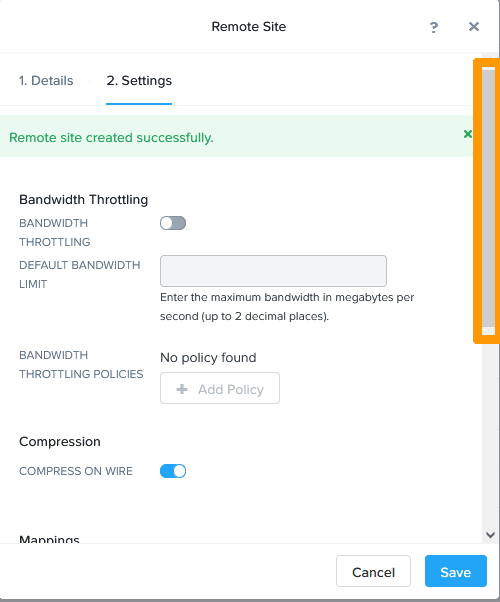
Scroll through the window using the scroll bar.
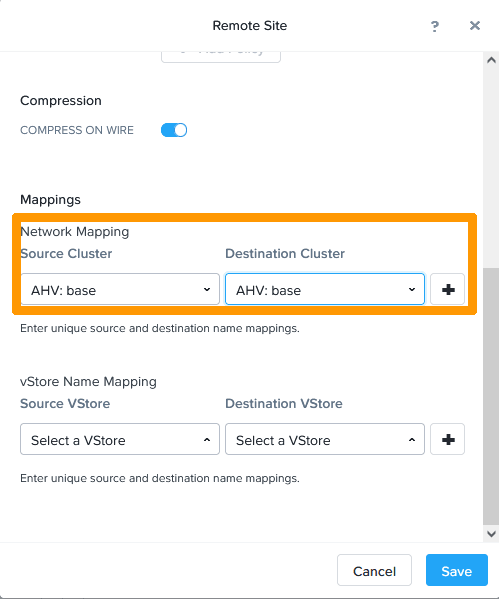
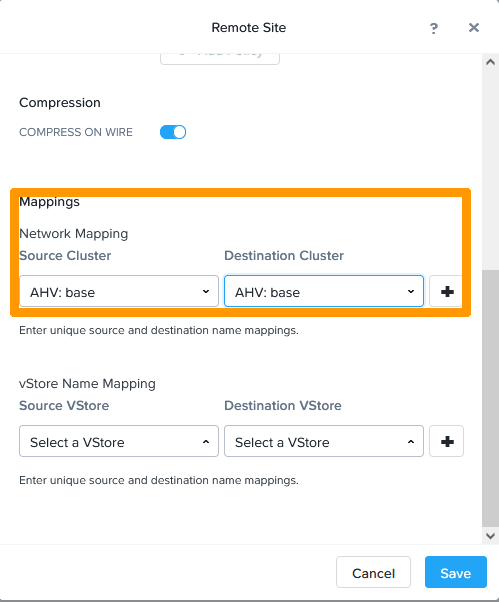
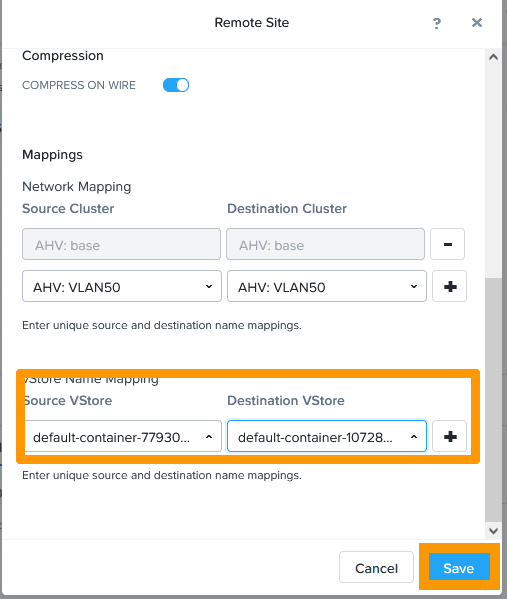
In the Network Mapping section, select AHV:base in the Source Cluster and Destination Cluster drop-down menus. Then click the + button.
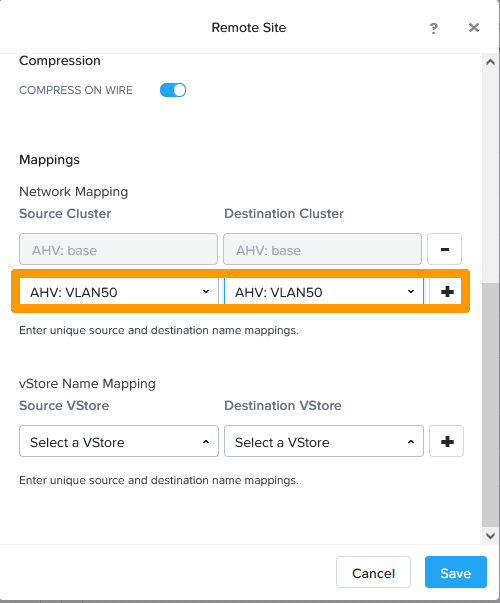
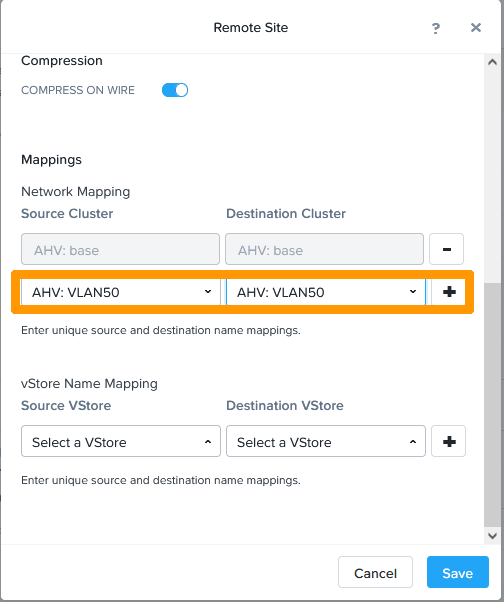
If you have another VLAN, repeat the same operation with AHV VLAN: VLAN50. Click the + button to validate the association of source and destination networks.
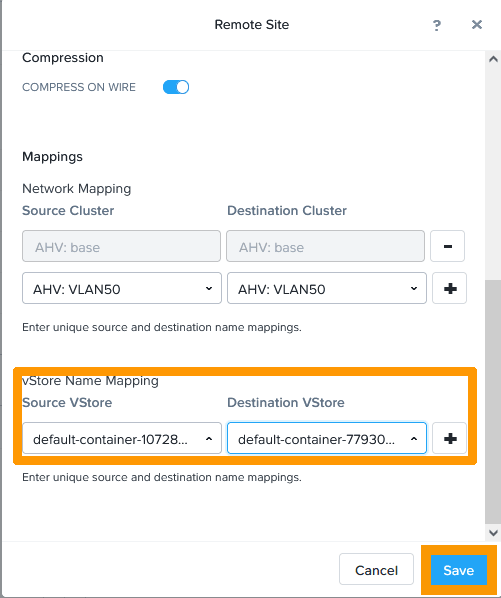
Choose default-container... from the Source VStore and Destination VStore drop-down menus. Then click the + button to connect the source and destination storage.
Then click Save.
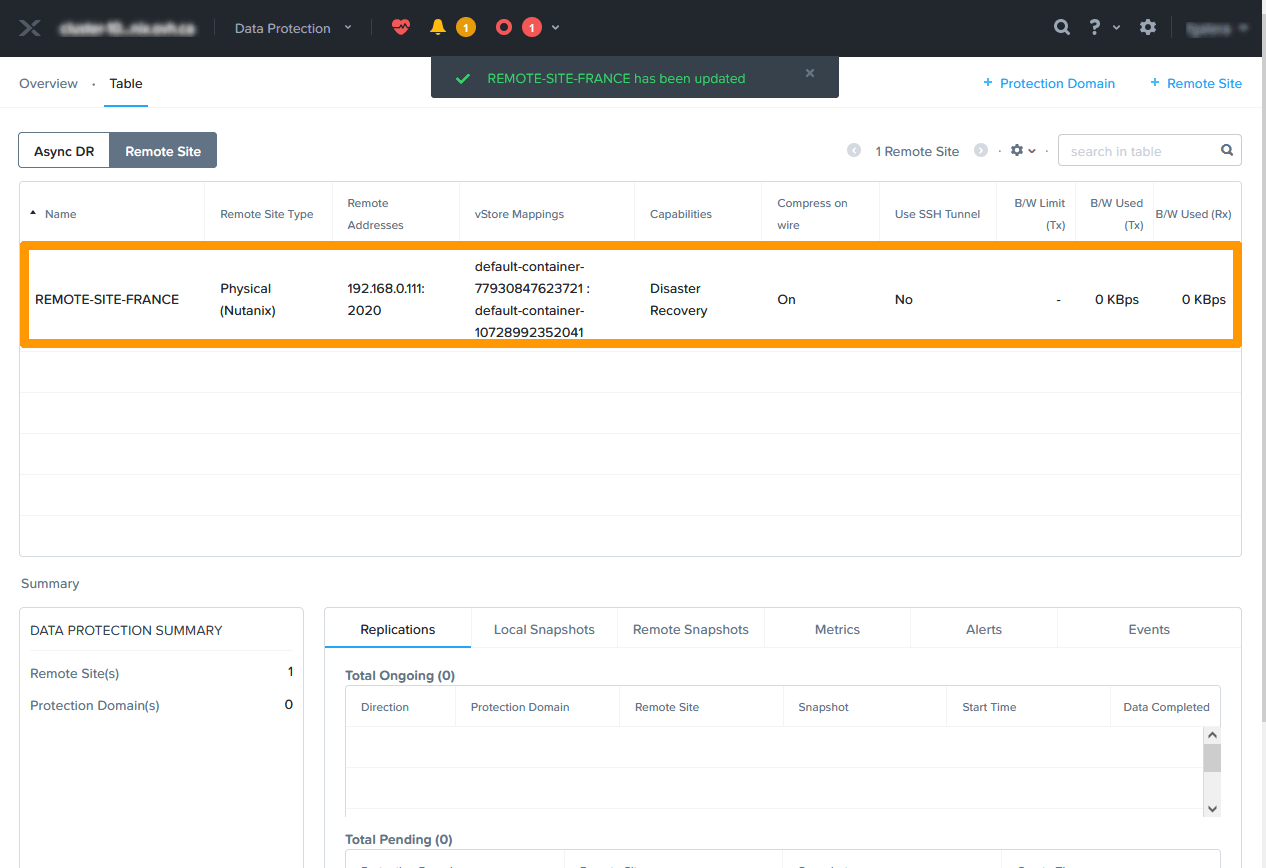
The remote site will then appear in the list.
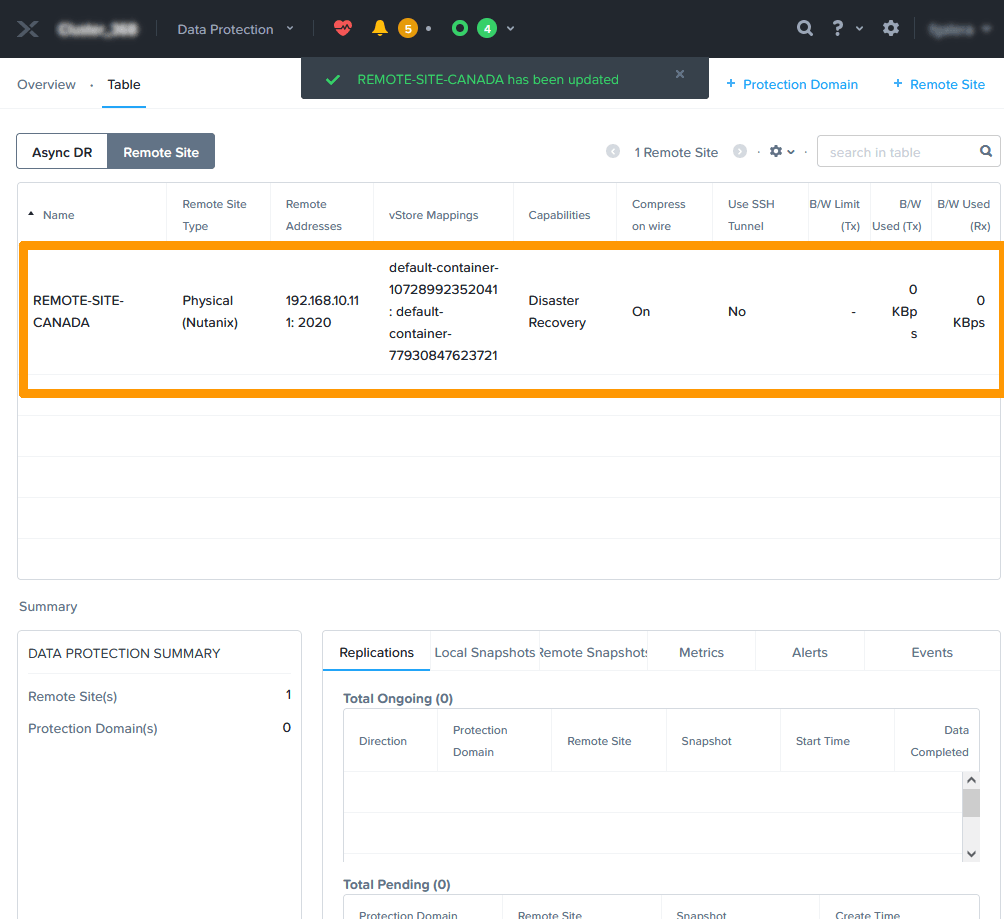
We will now connect to the Prism Element interface of the remote site in Datacenter 1 and perform the same operation.
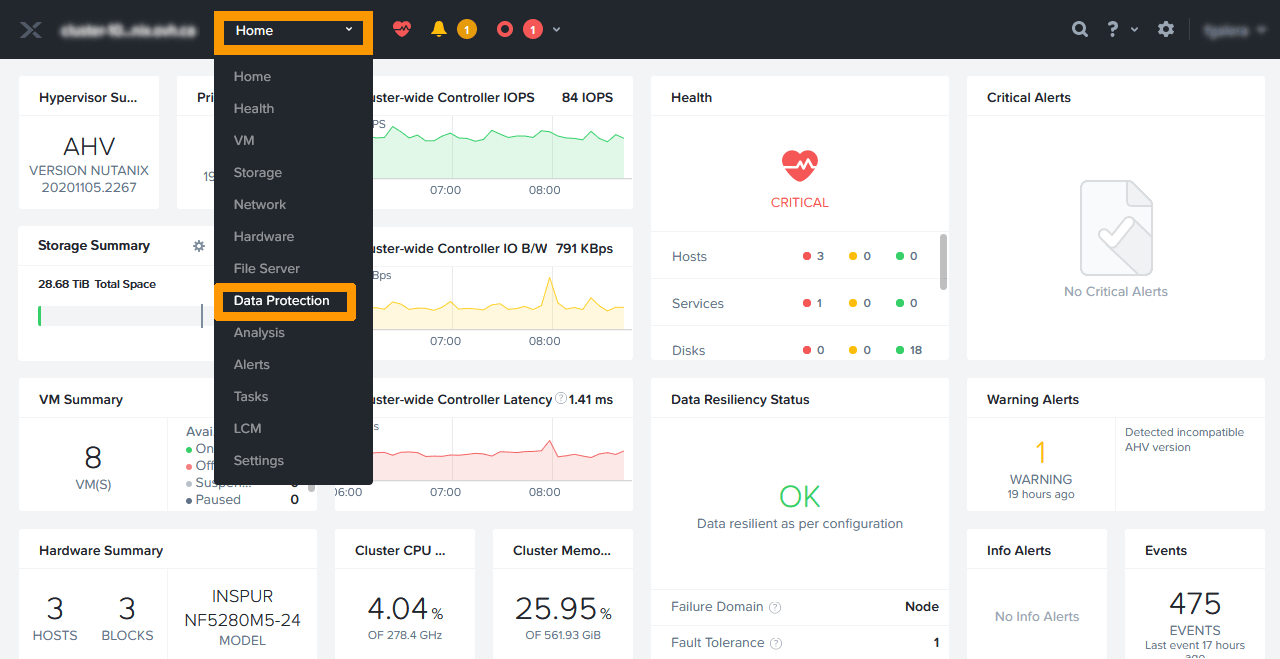
From the Home menu, click Data Protection.
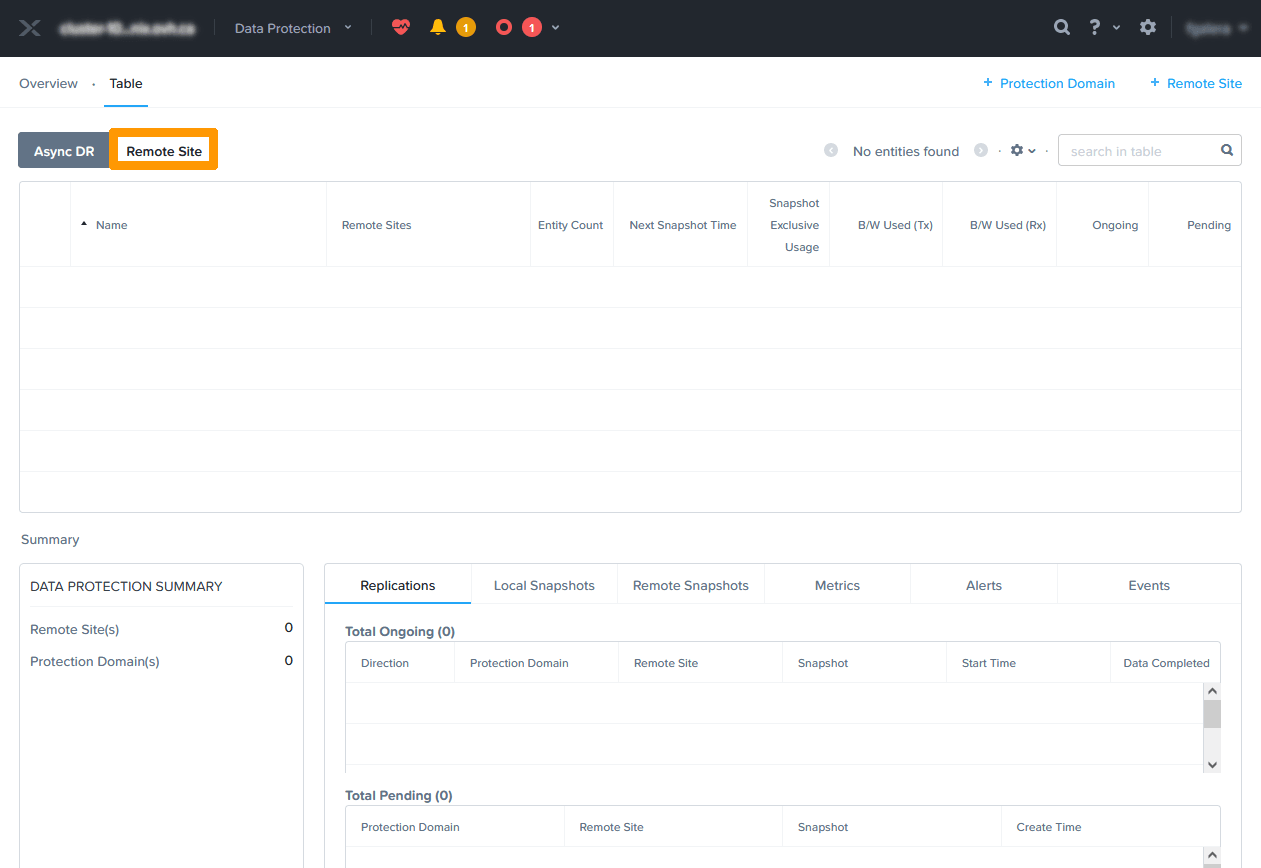
Click Remote Site on the left side of the screen.
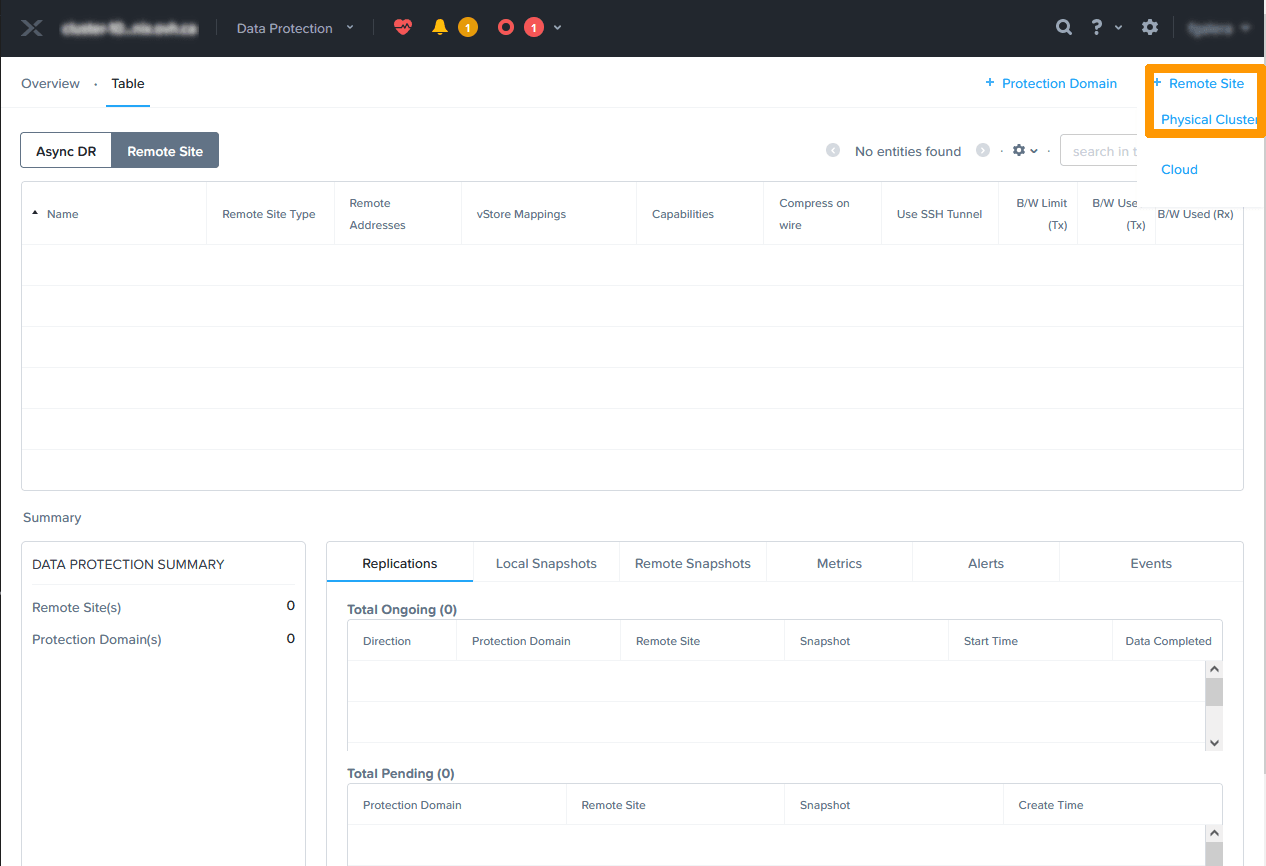
Click + Remote Site to the right of the screen and choose Physical Cluster to add a remote site.
Name the remote site in the REMOTE SITE NAME field, enter the IP address of the Prism Element in Datacenter 1 into the CLUSTER VIRTUAL IP field, and click Add Site.
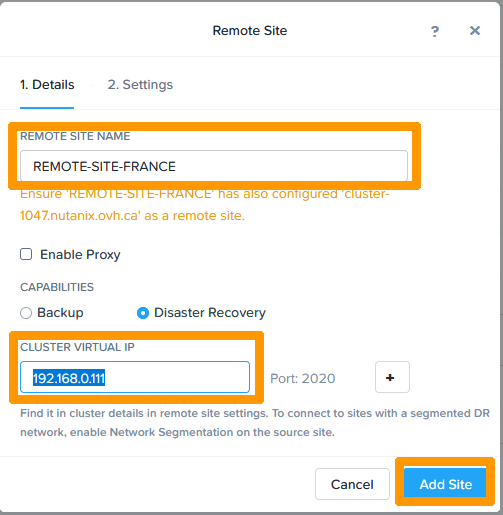
Scroll through the window using the scroll bar.
In the Network Mapping section, select AHV:base in the Source Cluster and Destination Cluster drop-down menus. Then click the + button.
If you have another VLAN, repeat the same operation with AHV VLAN: VLAN50. Click the + button to validate the association of source and destination networks.
Choose default-container... from the Source VStore and Destination VStore drop-down menus. Then click the + button to connect the source and destination storage.
Then click Save.
The remote site will then appear in the list.
Setting up inter-site replication
Now that the two sites are connected, we will create a protection domain with asynchronous replication containing three virtual machines located on the cluster in Datacenter 2 to the remote site in Datacenter 1.
Return to the cluster’s Prism Element interface for Datacenter 2.
Choose Data Protection from the main Home menu.
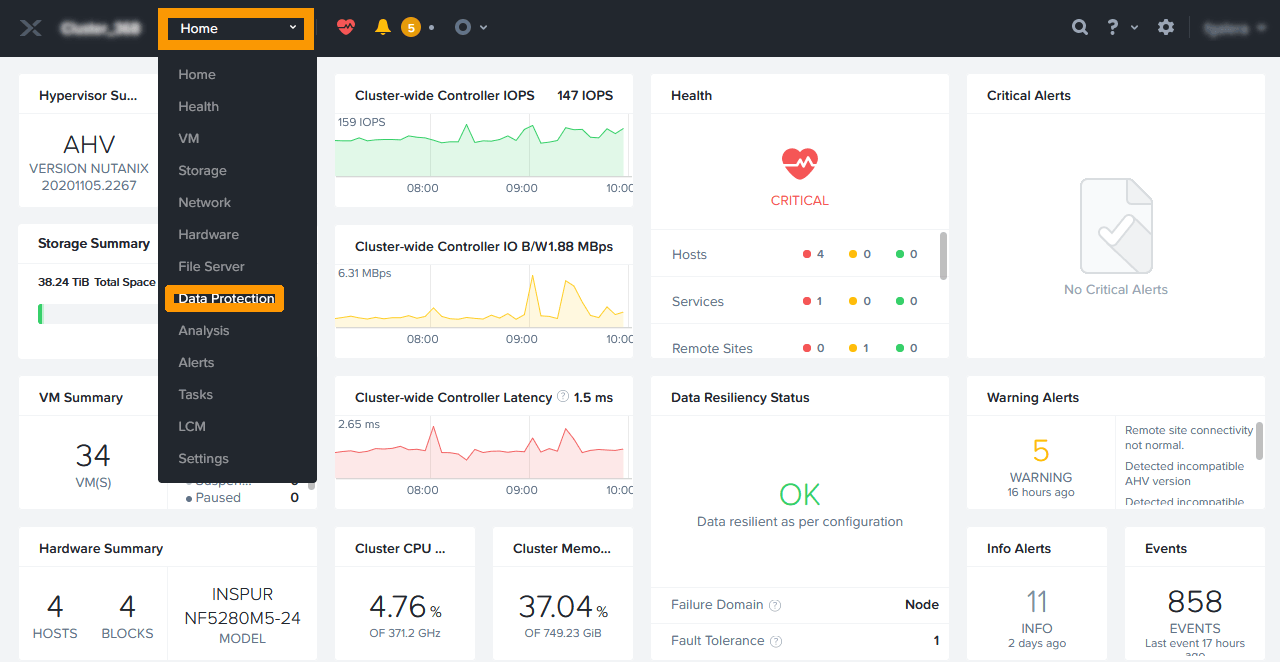
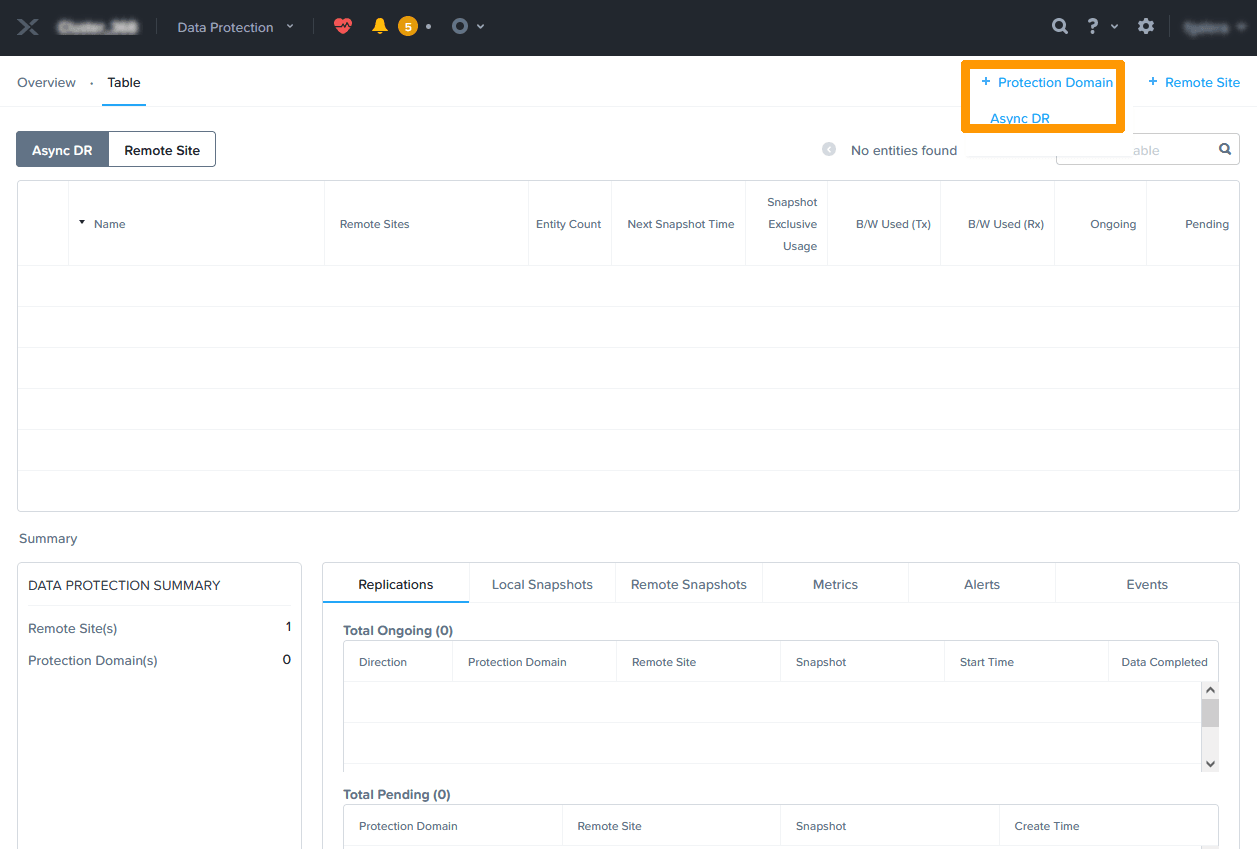
In the Data Protection dashboard, click + Protection Domain in the top right-hand corner, then Async DR.
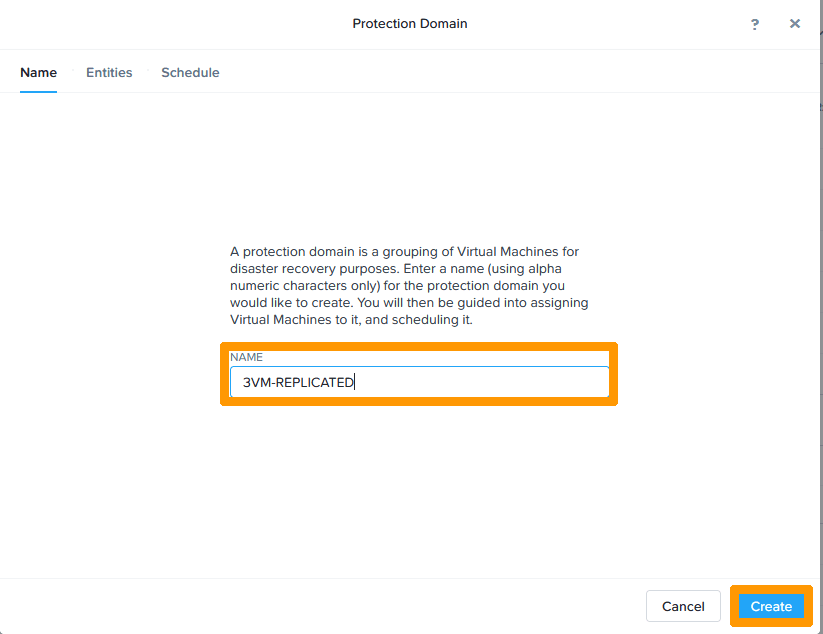
Name the protection domain and click Create.
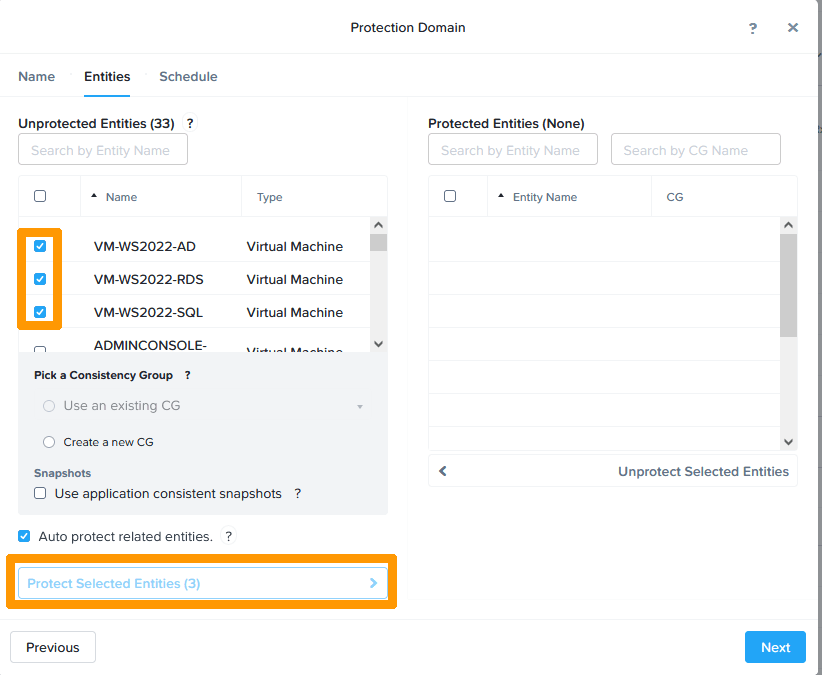
Select three virtual machines and click Protect Selected Entities.
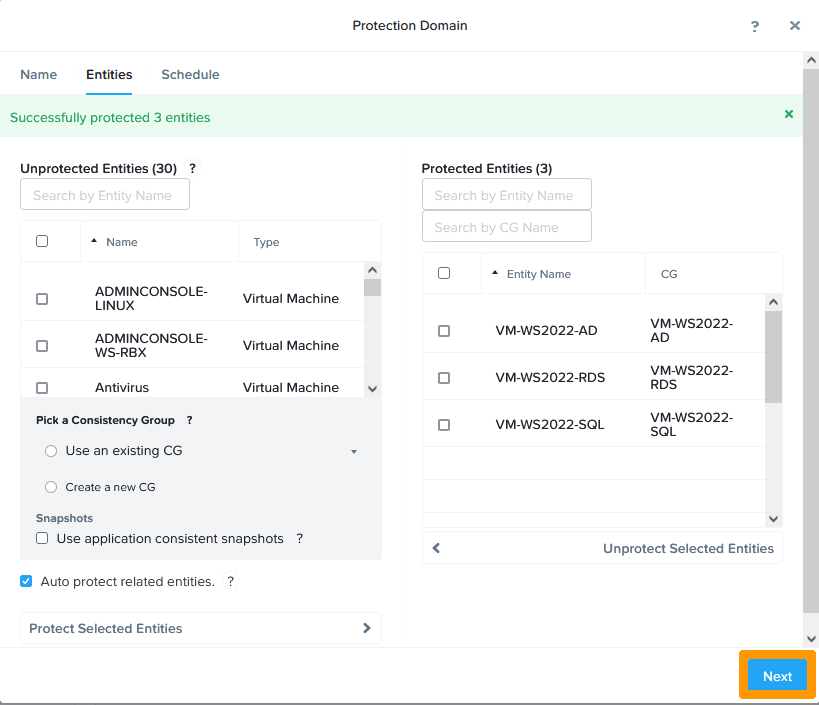
Click Next.
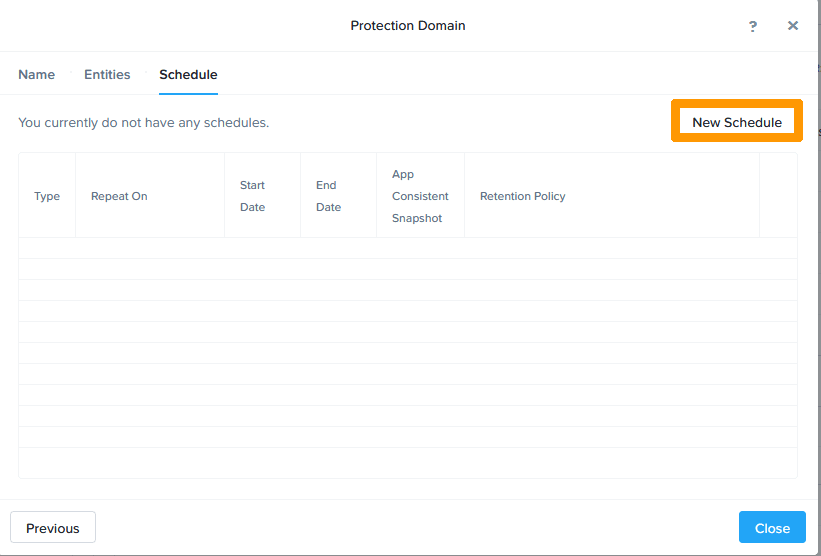
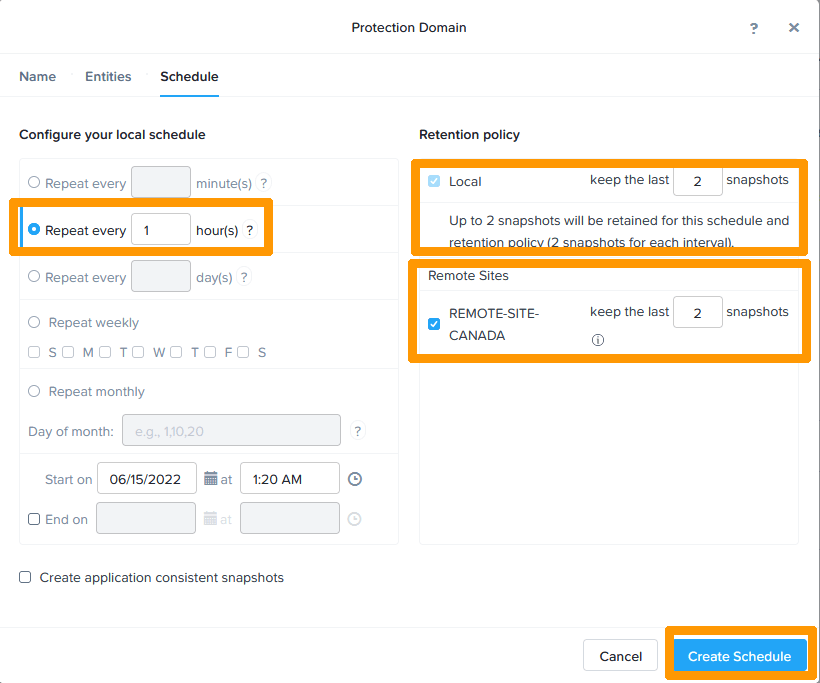
Click New Schedule to configure the schedule.
Modify this option to Configure your local schedule:
- Enter Repeat every
1 hour.
Then enter the retention policies in Retention policy:
- Choose locally and remotely keep the last
2snapshots to keep two snapshots locally and remotely.
Click Create Schedule to commit the schedule.
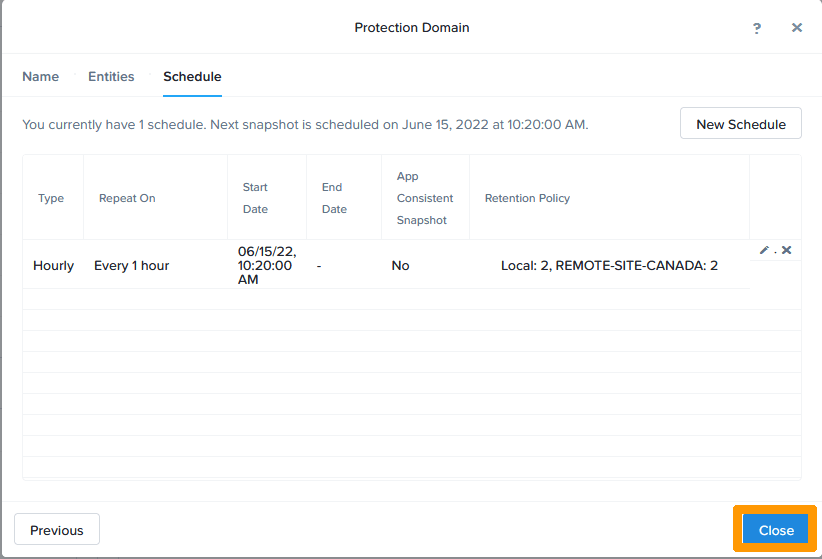
The replication task is created to run hourly. This will be asynchronous replication, which can be used with the OVHcloud Starter pack.
Click Close to close the window.
You can change the schedule to reduce the risk of data loss in the event of a disaster, but replication will switch from asynchronous to NearSync mode, and you will then need to upgrade your license to the OVHcloud Pro or Ultimate packs.
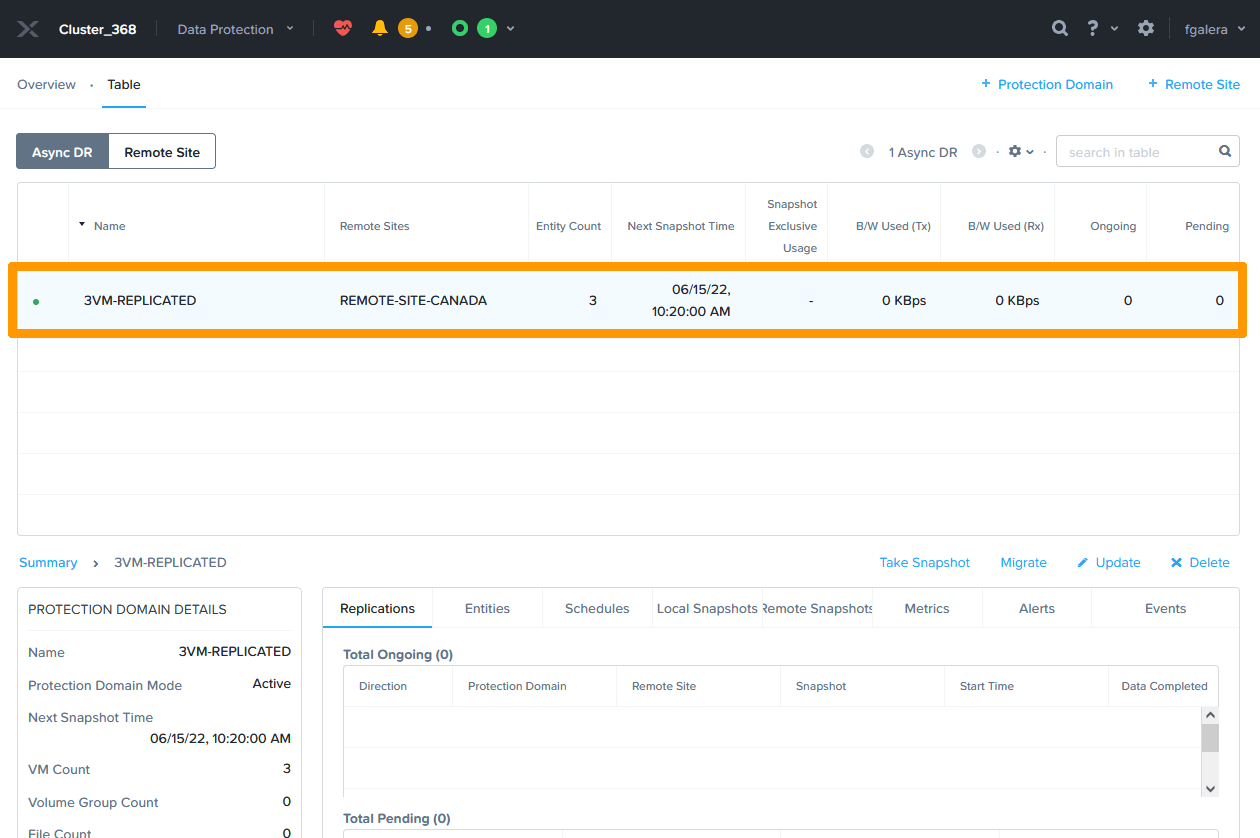
The protection domain is created and appears in the list.
Virtual machine migration
Migrating VMs is an operation to move VMs that are members of a protection domain to the remote site without losing data. Both clusters must be online and communicate correctly with each other.
The migration steps are as follows:
- Stopping virtual machines on the source cluster (if they are turned on).
- Replication of missing data to the destination cluster.
- Deleting virtual machines on the source cluster.
- Disable scheduling.
- Enabling virtual machines on the destination cluster.
- Replication is reversed, the destination becomes the source.
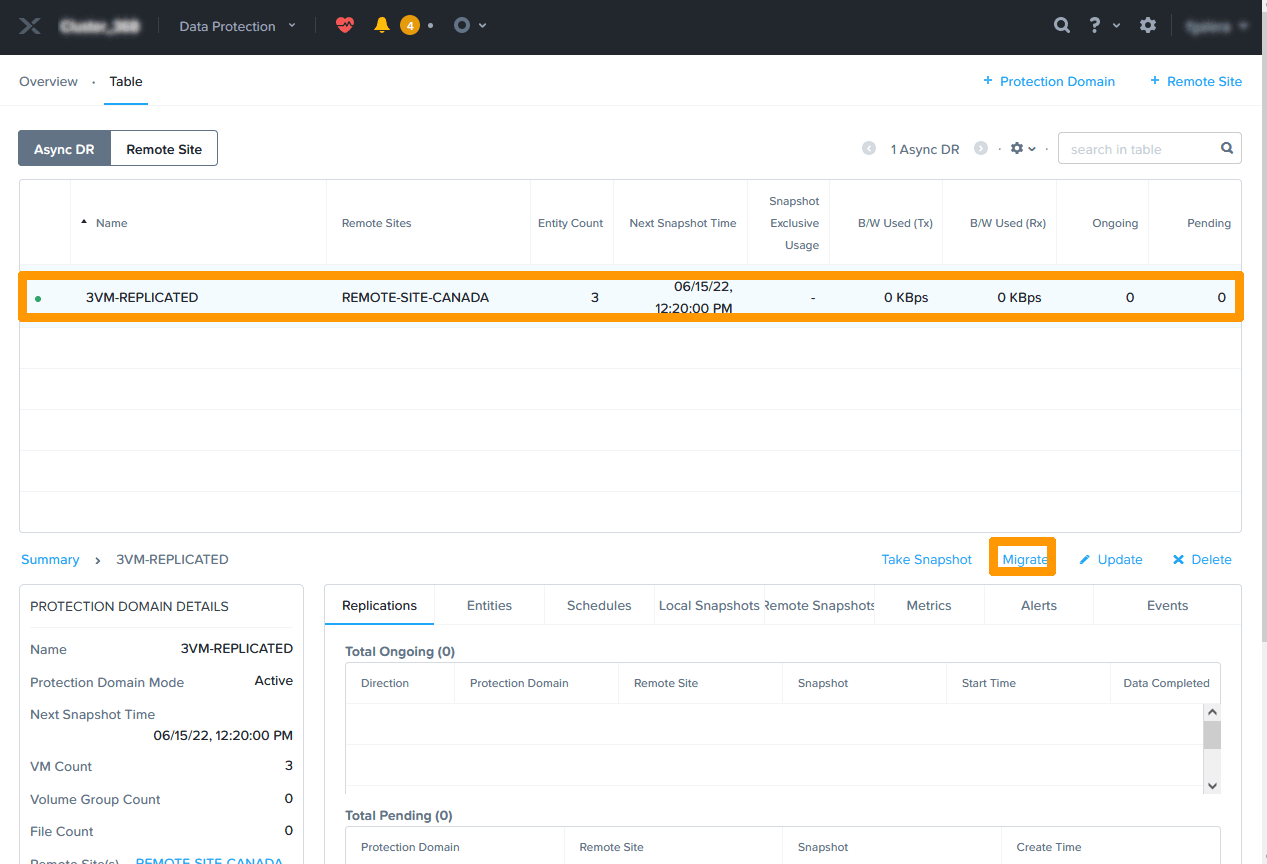
Go to the Prism Element interface where the replicated virtual machines are located.
In the Data Protection dashboard, click Migrate.
Select the remote site, type MIGRATE, and click Migrate.
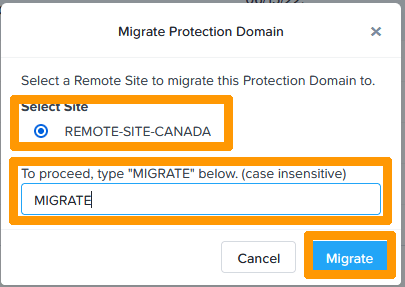
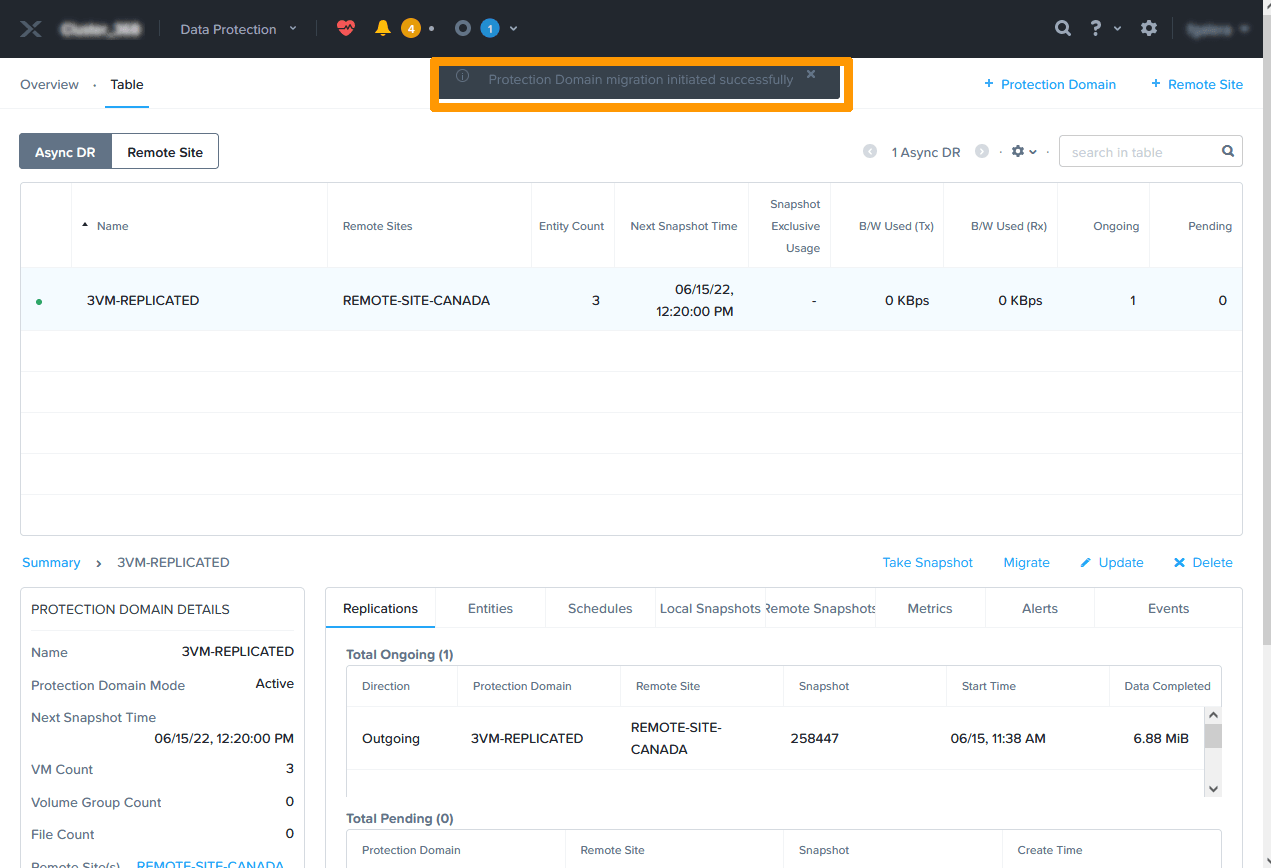
The migration is then launched. It will be completed when the VMs appear at the remote site and are no longer visible at the original site.
Since the migrated virtual machines are turned off, you must start them manually.
Virtual machine failover in case of disaster
If the original site is down, you can enable virtual machines that are members of a protection domain at the destination site.
NOTE: Activation of virtual machines at the remote site will be done with the latest replicated data. For asynchronous replication, the maximum data loss risk is one hour.
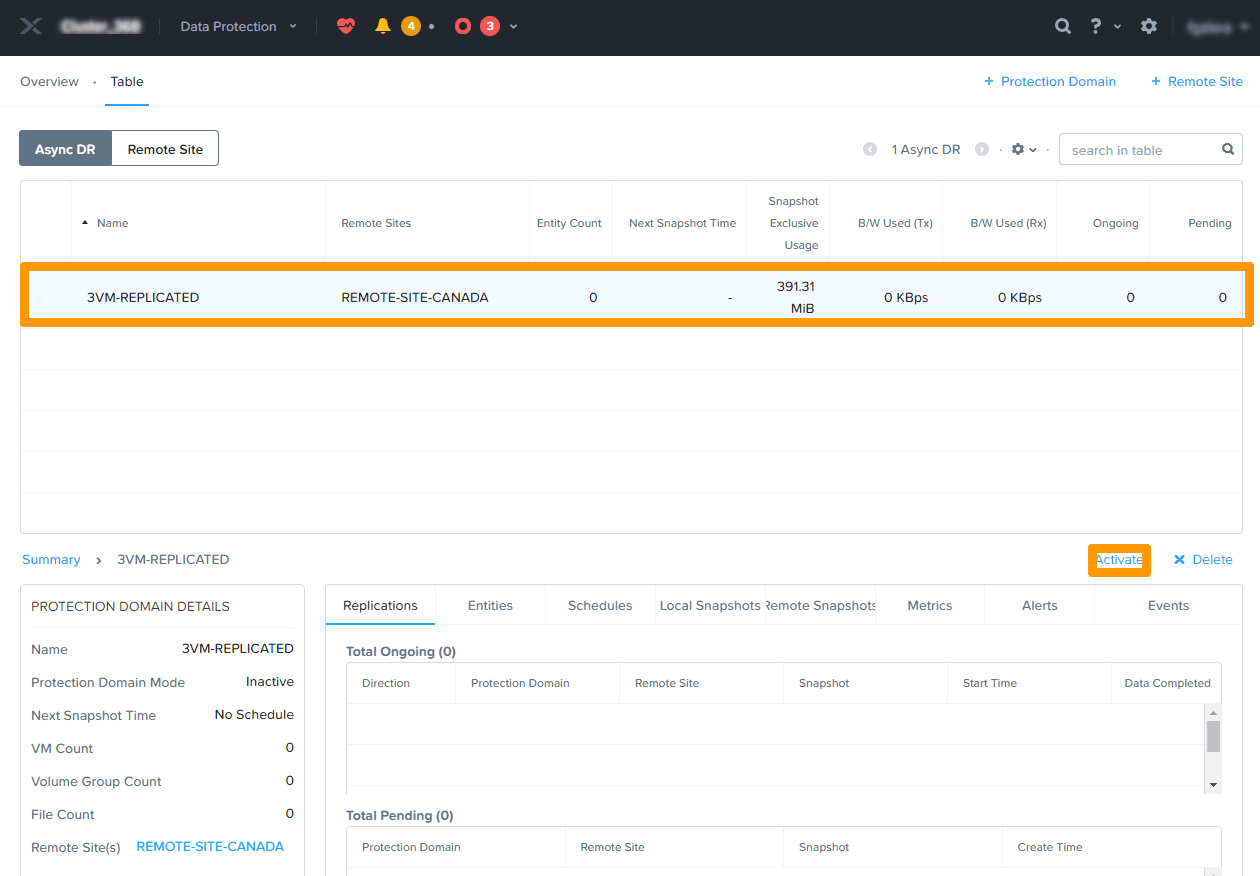
Connect to the functional site with Prism Element.
Go to the Data Protection dashboard.
Select the site to activate and click Activate.
Click Yes.
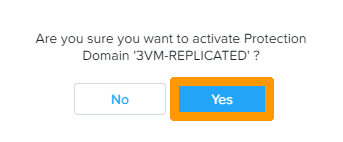
The virtual machines will appear in the Prism Element console in the state of last replication. Data modified after the last valid replication will be lost.
Go further
Browse all the Nutanix guides.
Browse the rest of the OVHcloud US documentation for guides on our other products and services.
Learn more about Nutanix on OVHcloud on the OVHcloud US website.