
Setting up Multicloud Snapshot Technology (MST) on a Nutanix on OVHcloud infrastructure
Find out how to deploy and configure Multicloud Snapshot Technology (MST) on a Nutanix on OVHcloud infrastructure with OVHcloud object storage.
With MST, you can replicate snapshots (UVM/Volume Groups) to S3™*-compatible storage to optimize TCO, improve data mobility, and simplify disaster recovery (DR.) using a zero-compute model.
Overview & advantages
Main features:
- Periodic replication of snapshots to S3™ buckets (typical RPO: 1 hour via the Nutanix DR. infrastructure).
- Model Zero-Compute: No need to maintain compute standby nodes.
- Store recent snapshots on the main cluster; offload older snapshots to object storage.
- Restore anywhere Nutanix Cloud Platform (NCP): cloud, edge, on-prem.
- Native integration with Prism Central and existing DR. workflows.
Functional limits (Instance Small):
- Up to 2000 protected entities.
- 75 Recovery Points per entity.
- 300 TB of supported active data.
Benefits:
- Reduced TCO (reduced/no standby compute, less expensive object storage).
- Mobility: Retrieve workloads on different NCP environments.
- Manageability via Prism.
Requirements
-
A Nutanix cluster in your OVHcloud account
- If not done already, replace the OVHgateway on your cluster
-
Access to the Prism Central interface (only an admin can deploy MST) with:
- AOS 7.3 minimum (in Prism Central,
Infrastructure>Hardware>Clusters) - Prism Central 7.5.1 minimum (in Prism Central,
<User Name>in the top-right corner >About Nutanix)
- AOS 7.3 minimum (in Prism Central,
-
Verify that you have the following resources available in your environment:
- 3 static IP addresses reserved (outside the DHCP range of the subnet MST).
- 4 IP addresses from the DHCP range of the MST subnet (consumed by the 4 MST VMs).
- 3 × Controller VMs: 10 vCPU / 24 GiB RAM each.
- 1 × Load Balancer VM: 2 vCPU / 4 GiB RAM.
Instructions
Prepare the environment
Create the Object Storage container (Bucket)
To create the container, you first need to create a project: Create your first Public Cloud project - OVHcloud.
In the Public Cloud universe, navigate to the Object Storage section and choose the Users tab.
Create a user, e.g., admin-mst.
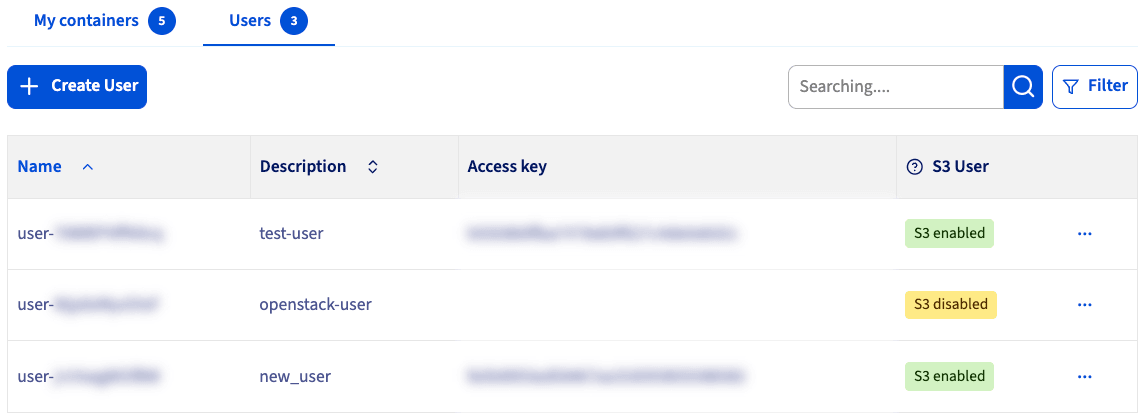
Please note the Access key and Secret key for that user:
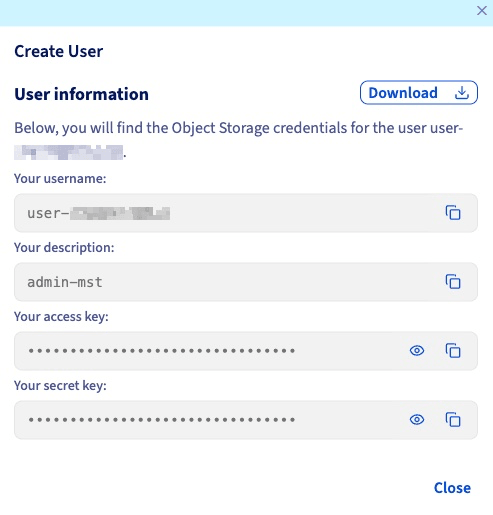
Then create a container (bucket). See our Getting started with Object Storage guide for full instructions.
In this example, a container was created in Hillsboro, since the Nutanix cluster is in Vint Hill. This improves data resilience.
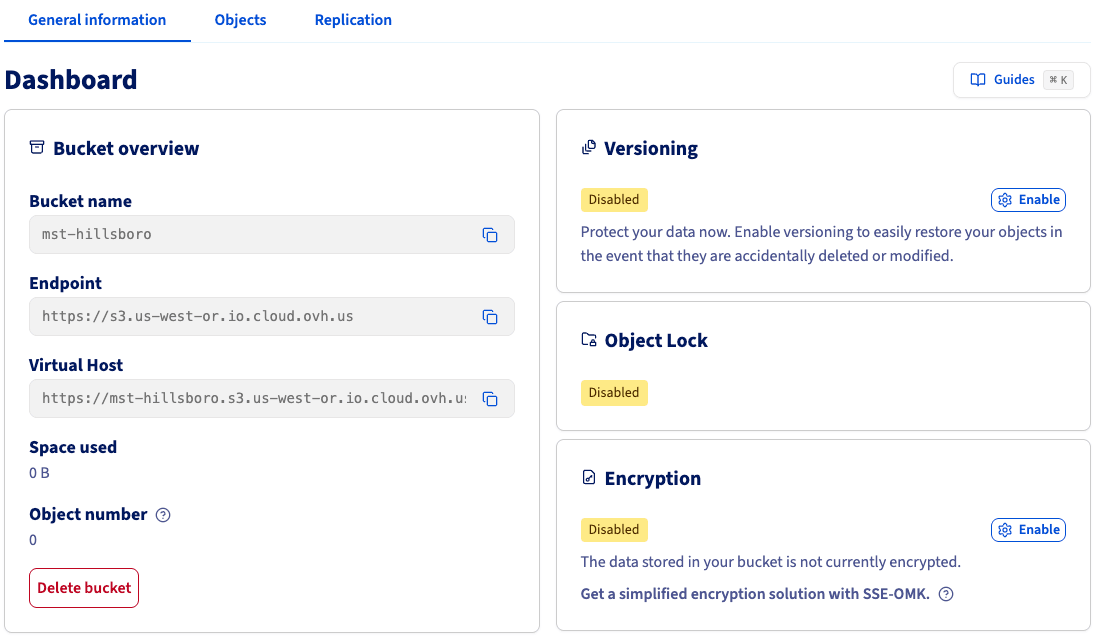
Once you have created the container and the user, you will need to have several pieces of information that are important for continuation:
- The name of your container.
- The URL of the container endpoint: https://s3.us-west-or.io.cloud.ovh.us/,
- The access key for the user you created, and
- The secret key for the user you created.
Activate the Marketplace
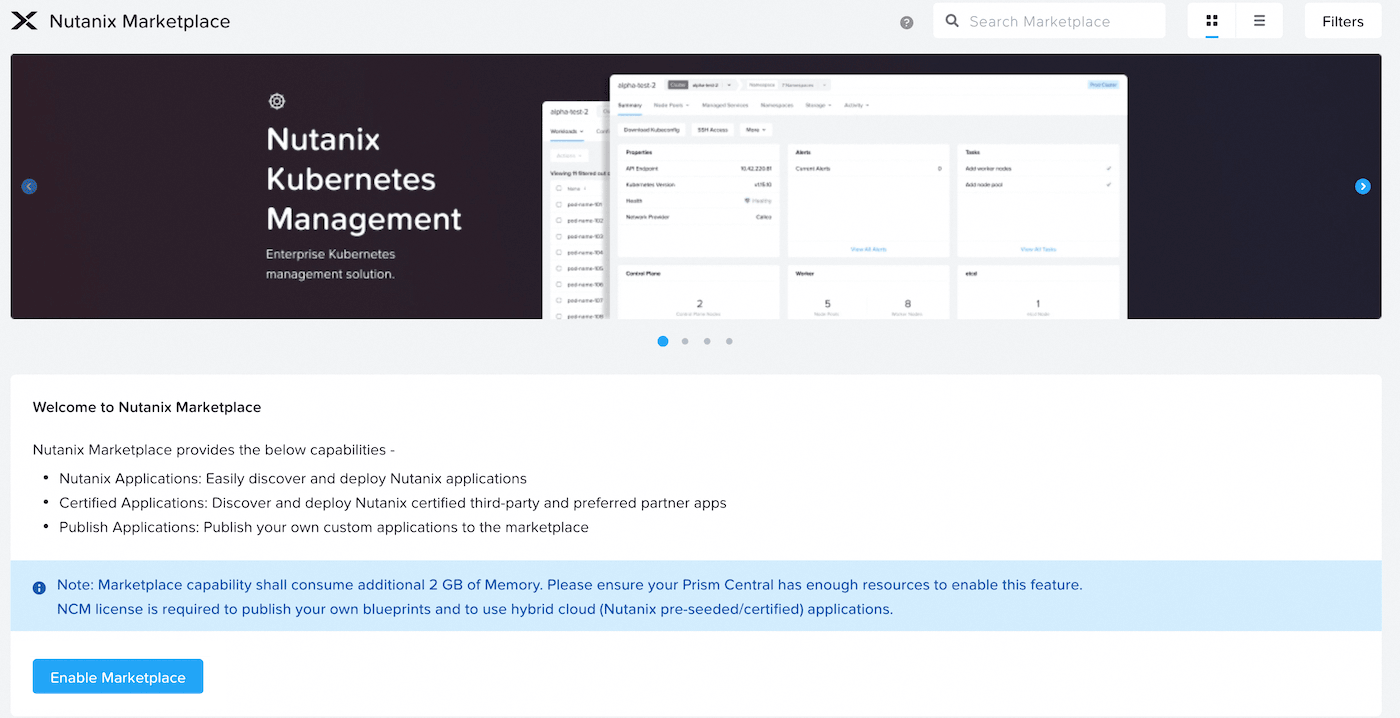
Log in to Prism Central, go to the admin center, then click Enable Marketplace.
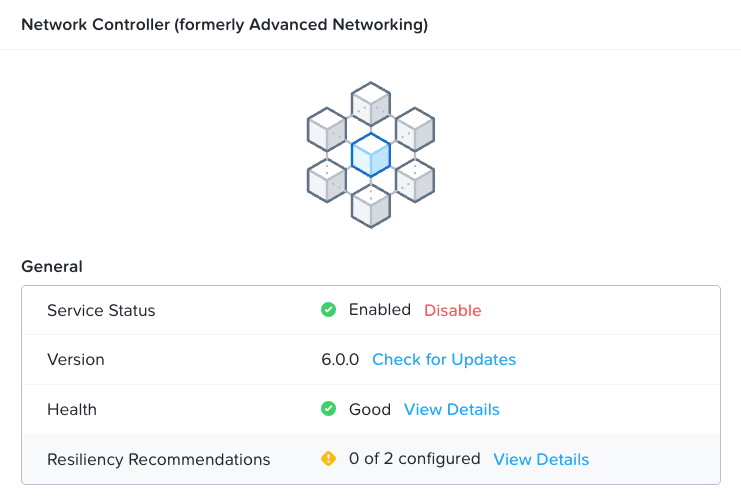
Enable Network Controller
In Infrastructure go to Prism Central Settings, click Network Controller then Enable.
Create a subnet dedicated to MST
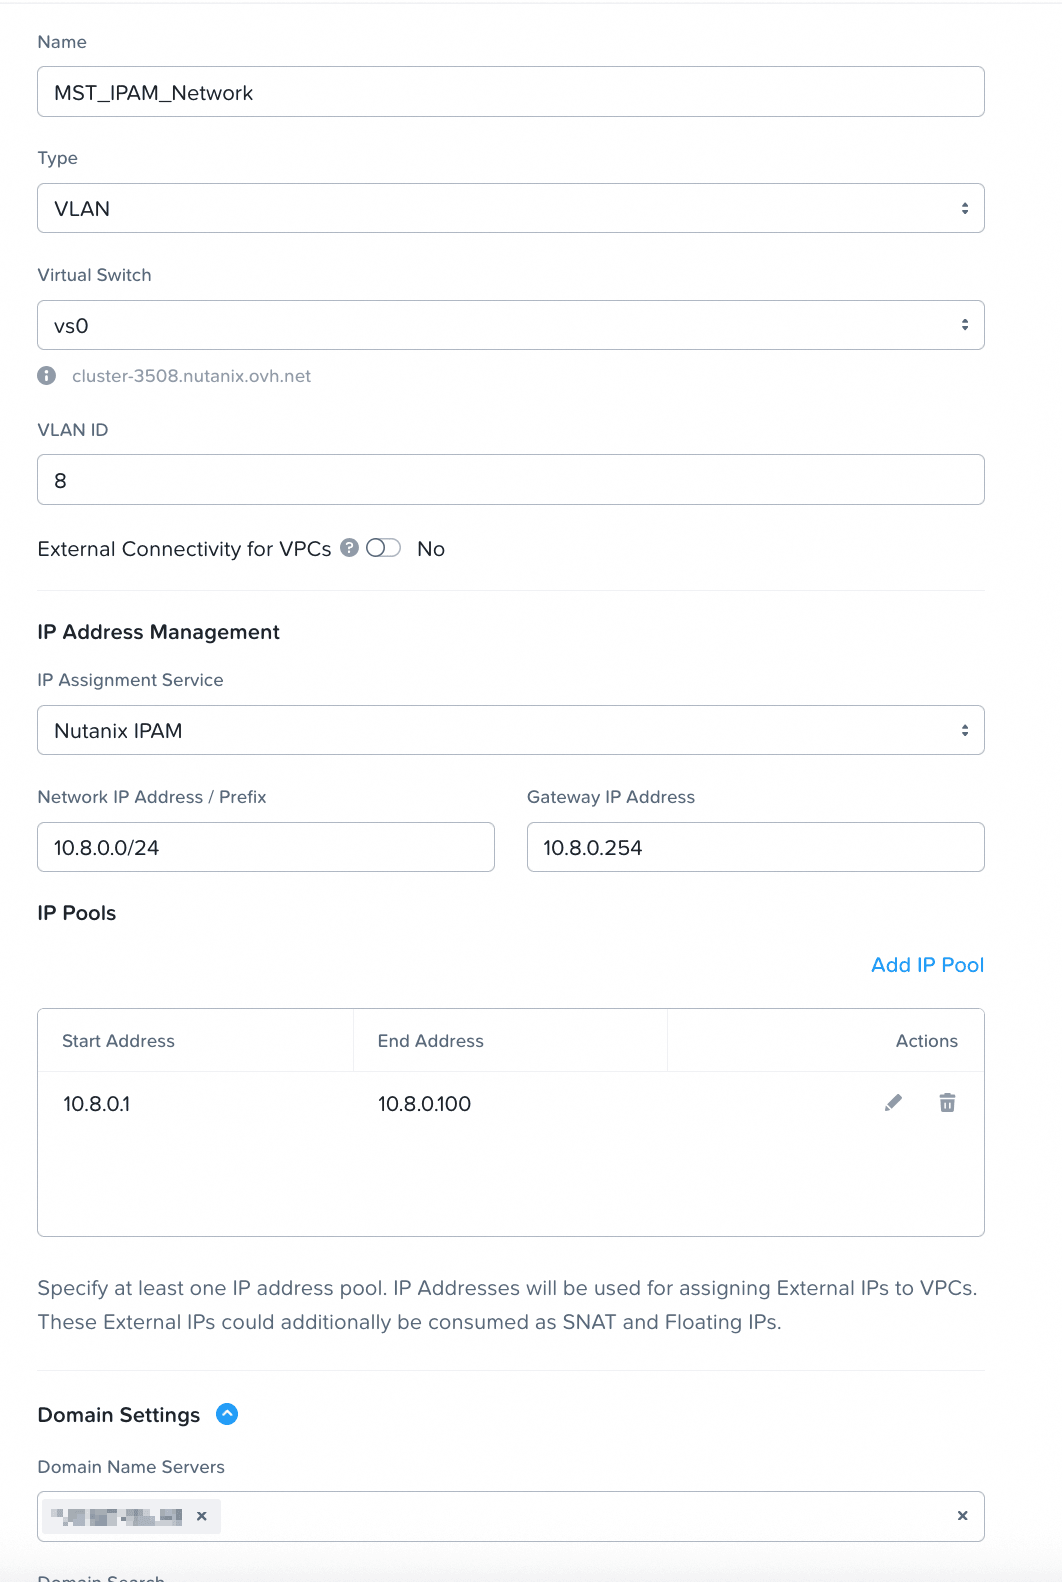
Navigate to Network & Security > Subnets > Create Subnet.
We will create an IPAM subnet with a DHCP for using MST.
NOTE: For the IP Pool, make sure that the three required IP addresses for your MST VMs are outside of the pool's range.
Reconfigure the Gateway
Navigate to Compute > VMs > <your gateway VM>.
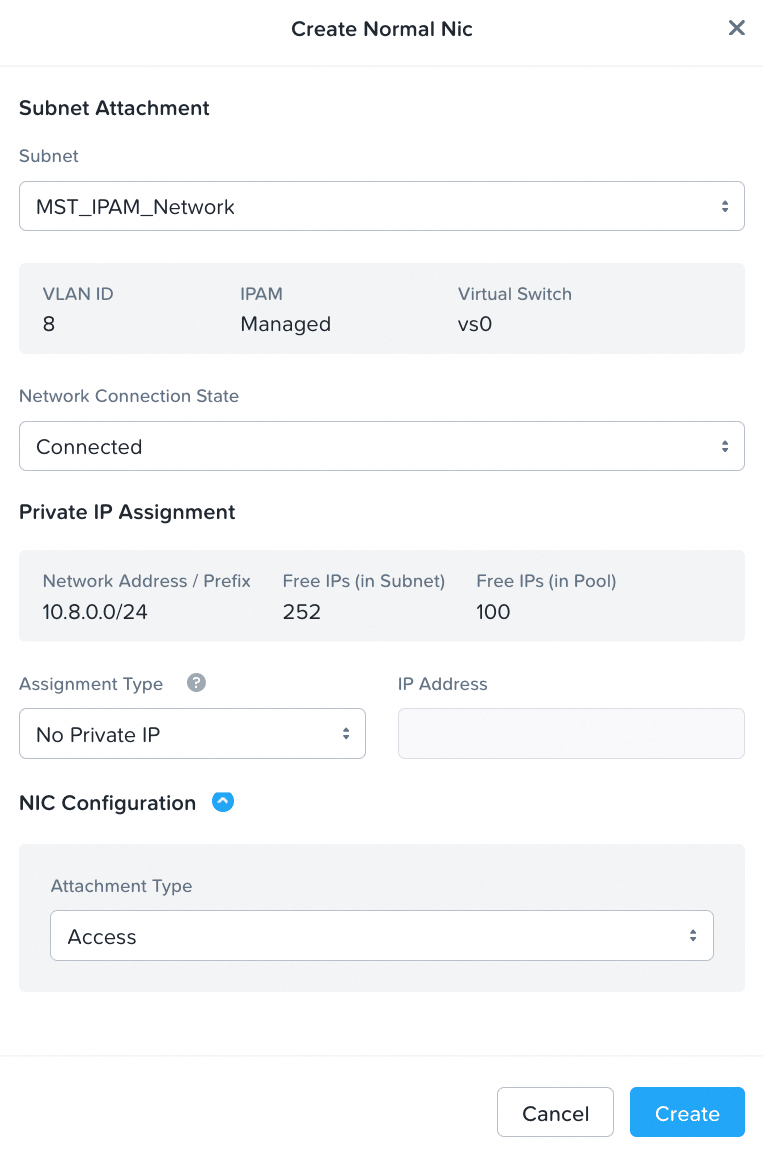
Select the NIC tab and click + Attach to Subnet.
You will need to reconfigure the gateway with the new network.
Add a NIC to your VM:
Then reconfigure your gateway with the IP defined in the IPAM network creation.
For example, on an Alpine VM:
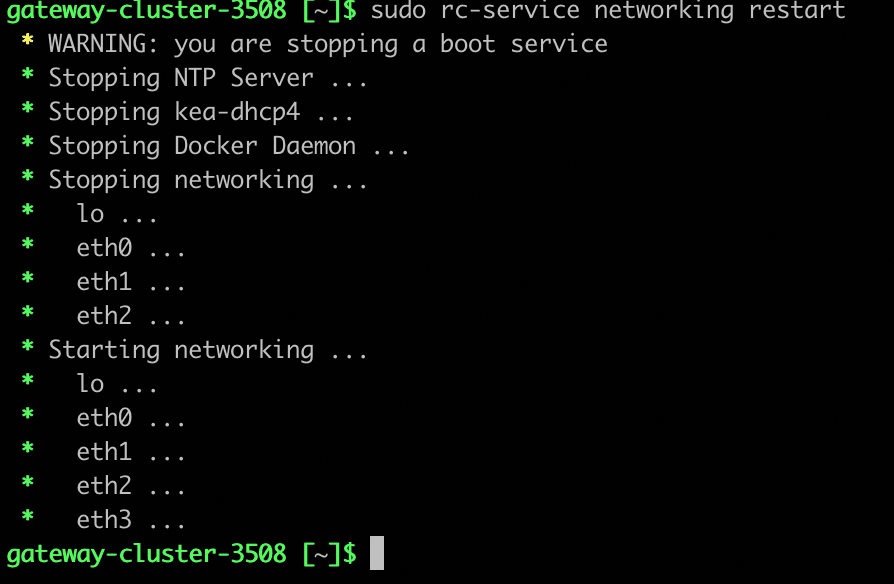
We would add:
Restarting network services:
Deploy Multicloud Snapshot Technology
- Log in to Prism Central as an administrator.
- Go to
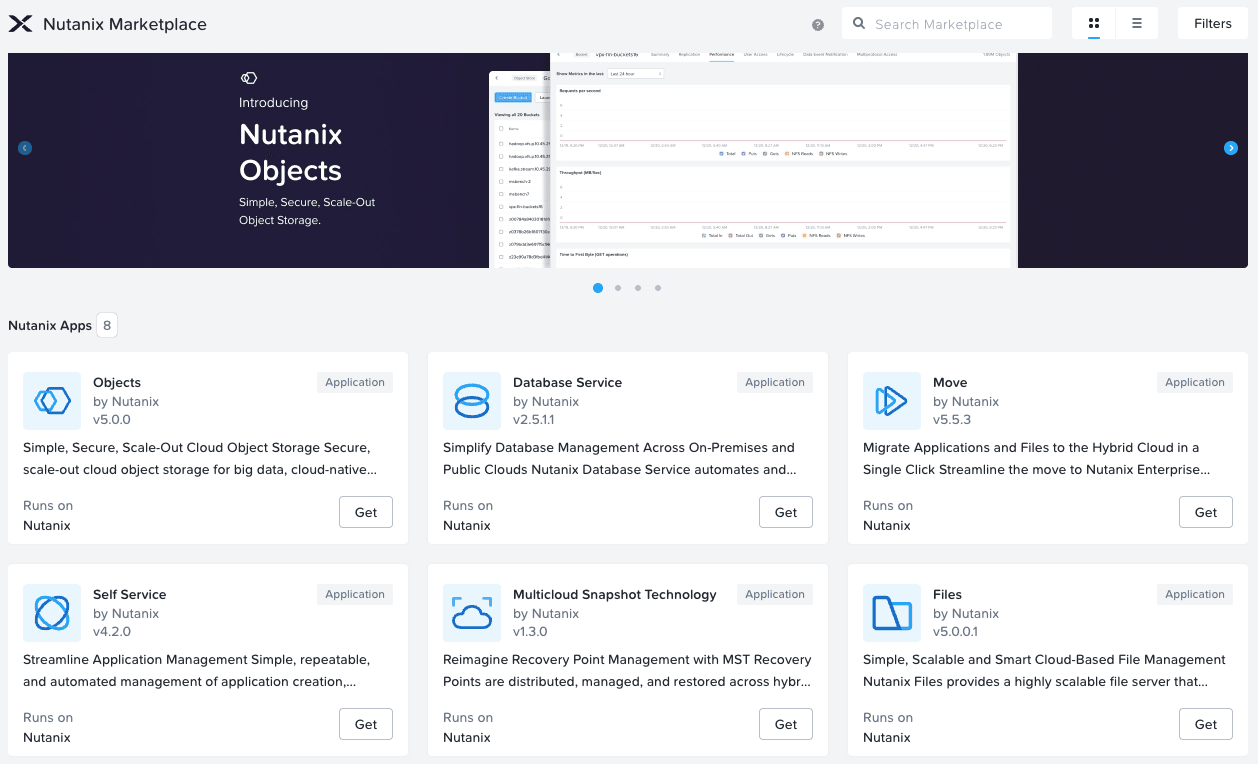
Admin Center>Marketplace. - In Nutanix Apps, click
Getfor Multicloud Snapshot Technology.
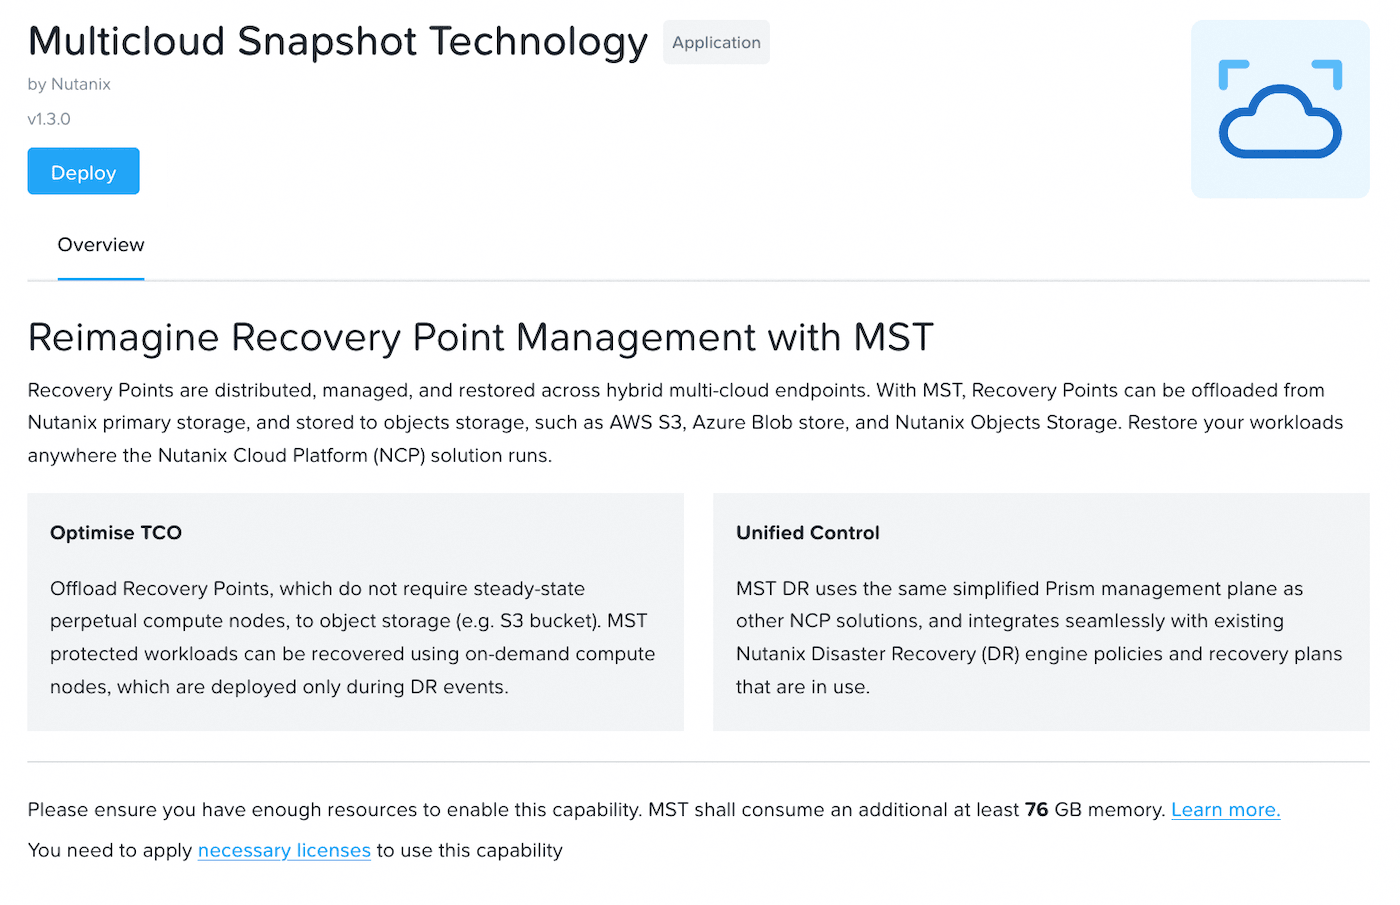
On the introduction page, click Deploy.
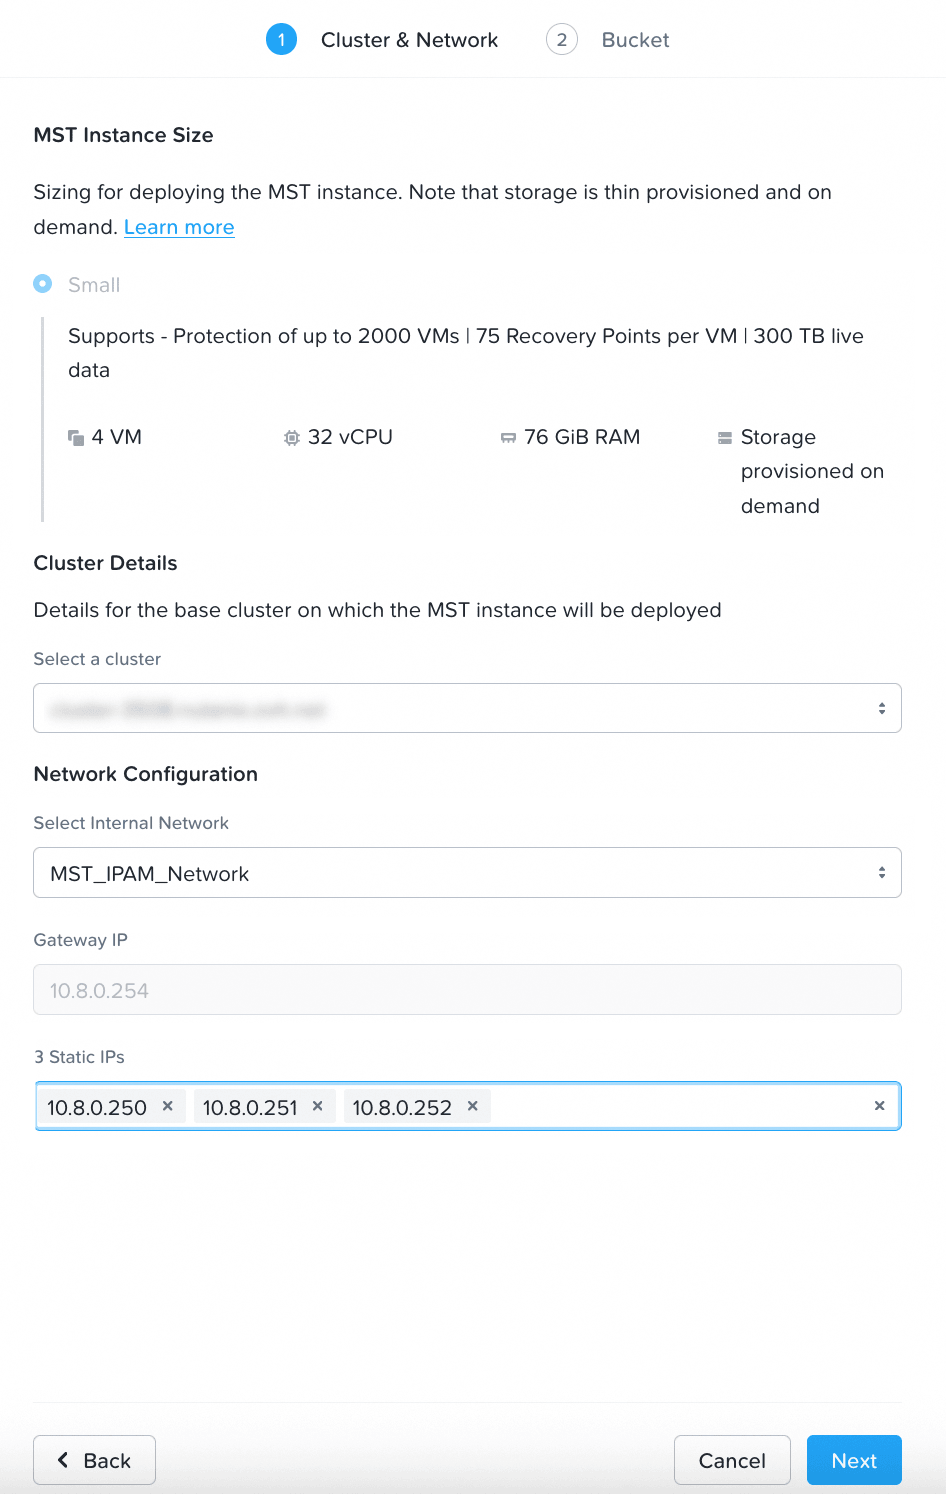
Then configure the MST instance:
- MST Instance Size: Select
Small(or other size if available). - Cluster Details: Choose the target Prism Element cluster.
- Network Configuration: Select the MST subnet created.
- Enter the 3 reserved static IPs (that are outside the DHCP range) in the expected fields.
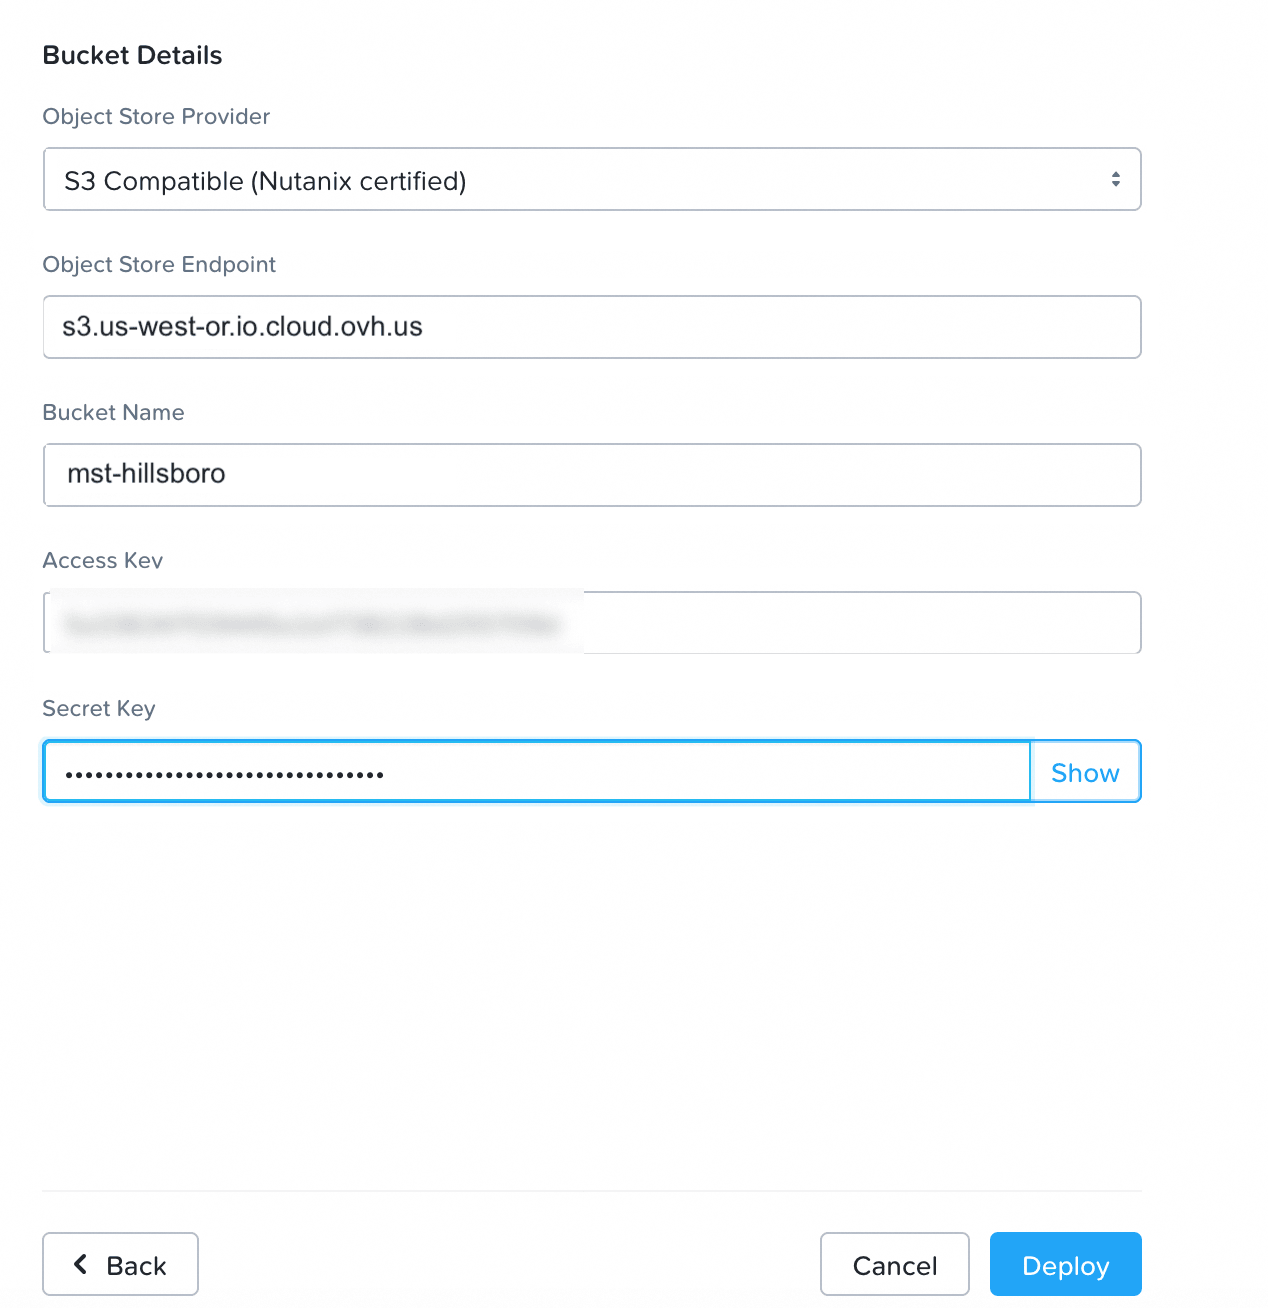
- Object Store Provider: Select
S3 Compatible (Nutanix certified). - Object Store Endpoint: Enter your container's endpoint URL, in our example
s3.us-west-or.io.cloud.ovh.us. - Bucket Name: Enter the name of your container. In our example, mst-hillsboro.
- Access Key: Enter your container’s
Access Key. - Secret Key: Enter the
Secret Keyof your container.
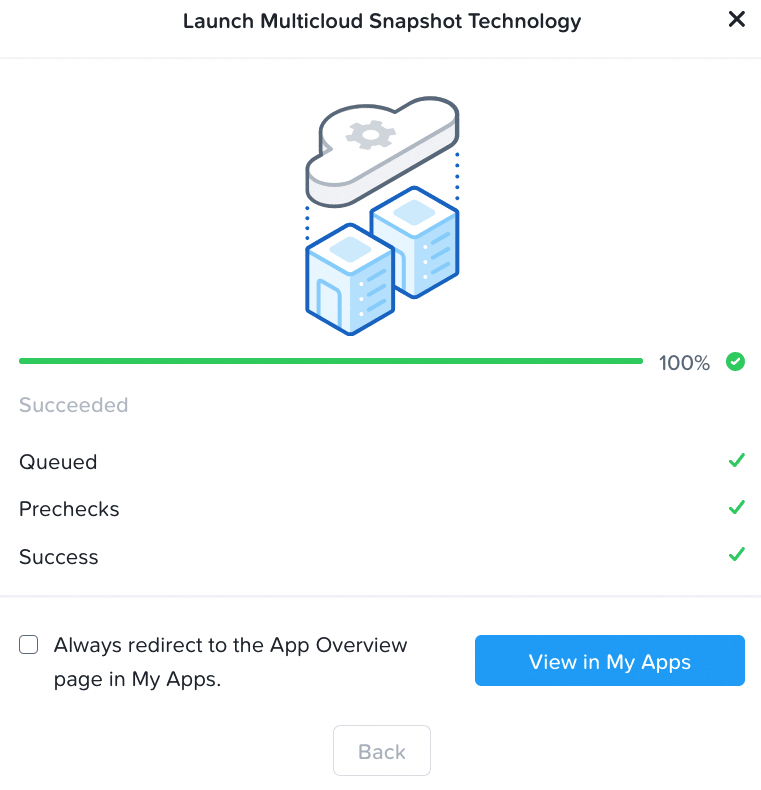
Launch the deployment.
Disaster Recovery: Use and configuration
Once you have deployed an MST and connected it to your Object Storage bucket, you can configure how your workloads are protected and restored.
Entity protection
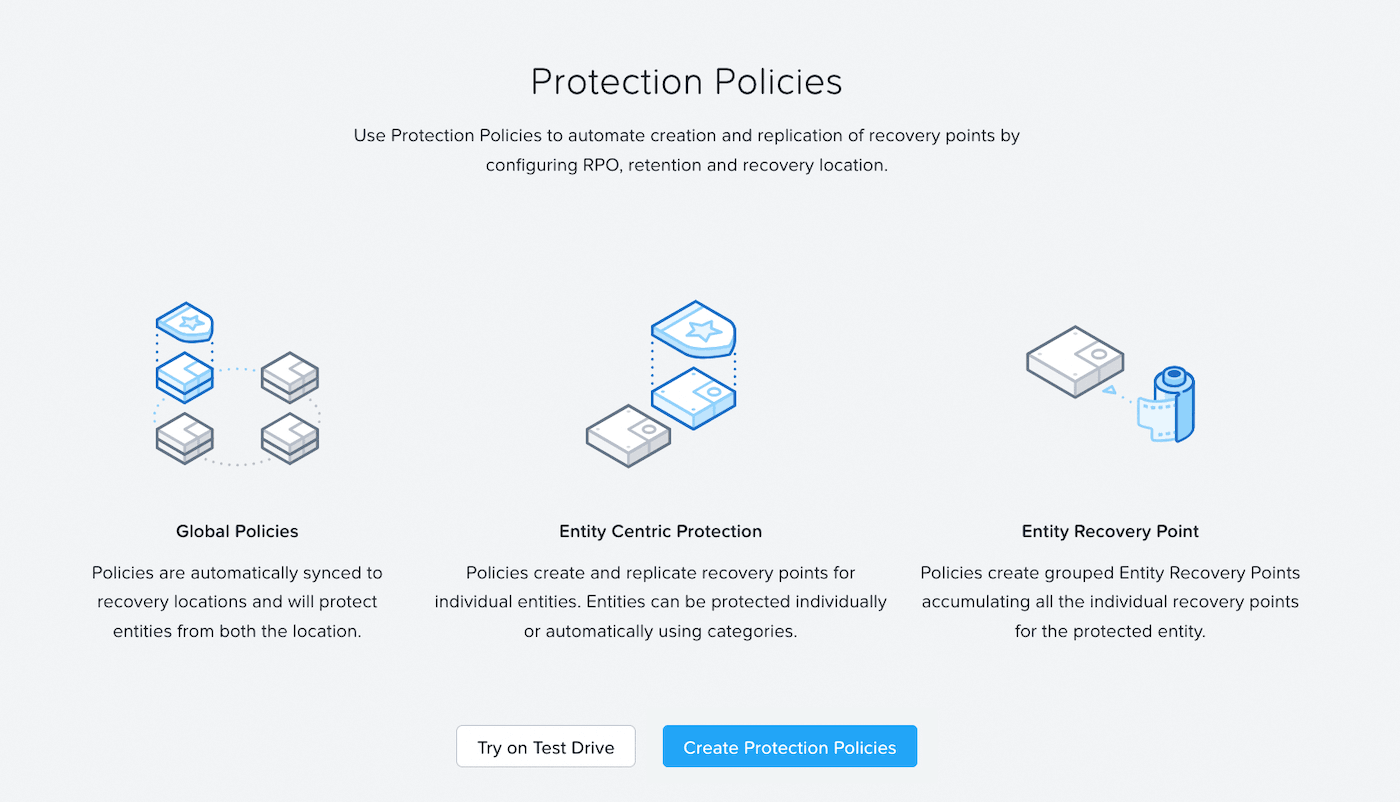
From Prism Central, go to Protection Policies and click Create Protection Policies.
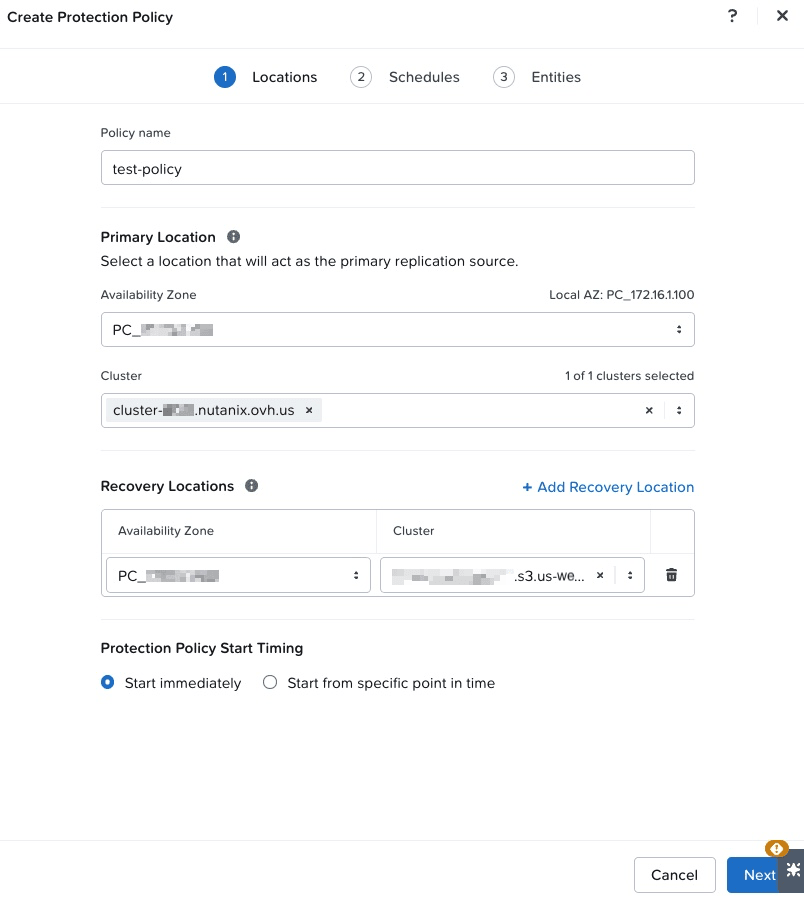
Define the Policy name and enter your cluster in the Primary location field.
In the Recovery Location box, keep Local AZ and select the container (Bucket) previously configured.
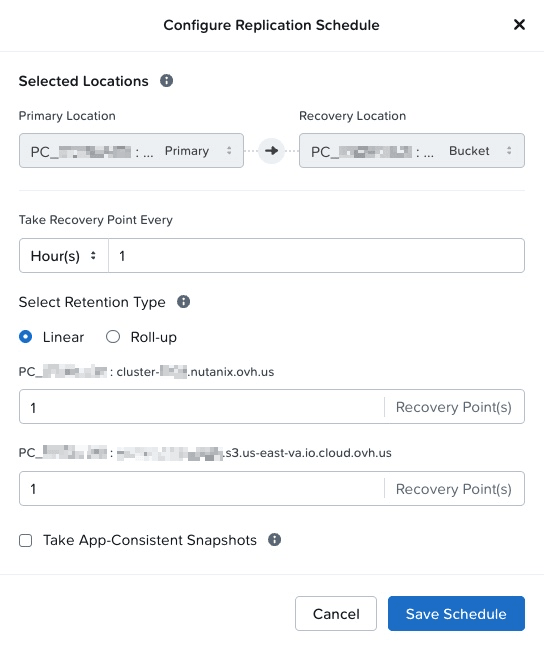
On the next screen, click Configure to the right of the replication rule.
Specify the following:
- The frequency of snapshots (every hour by default).
- The number of Recovery Points to keep locally.
- The number of Recovery Points to keep on the OVHcloud S3™ container.
There is an optional third step to create protection groups, if you desire.
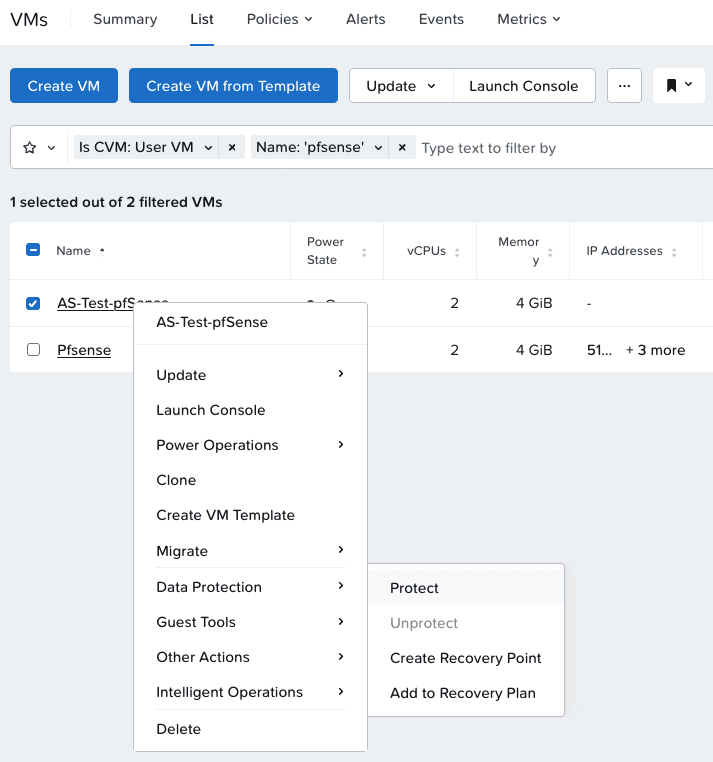
From here, navigate to VMs to select the VMs you want to protect.
- If you are protecting a single VM: Right-click on the VM's name, choose
Data Protection, and thenProtect. - If you are protecting multiple VMs: Choose the action
...menu from the toolbar, chooseData Protection, and thenProtect.
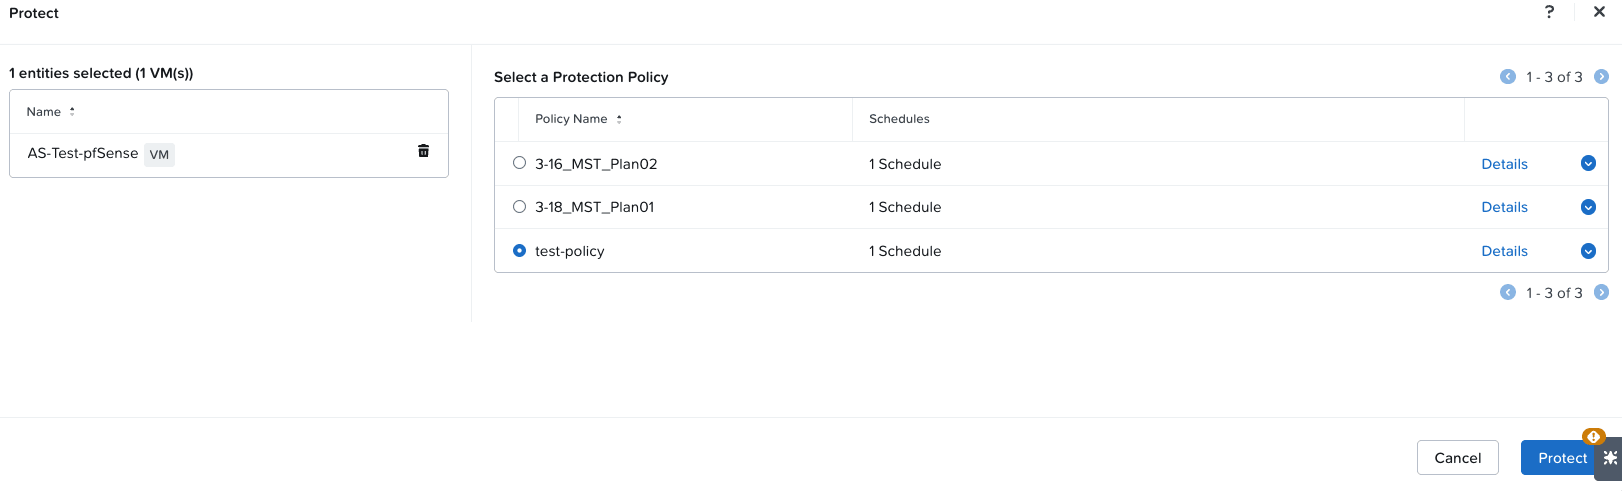
Then select the Protection Policy you created earlier:
Restoration
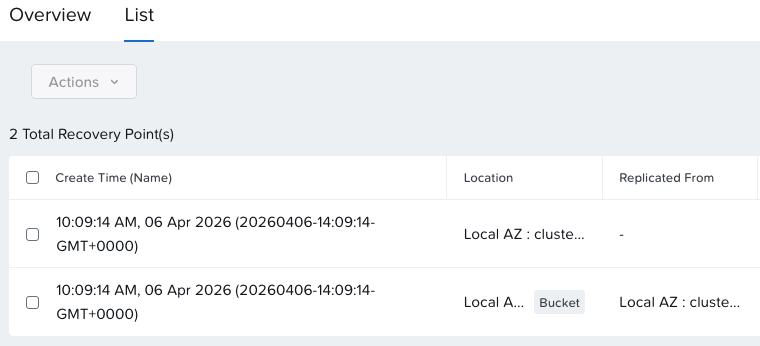
To restore a VM, navigate to Data Protection > VM Recovery Points and select a Recovery Point available in the bucket.
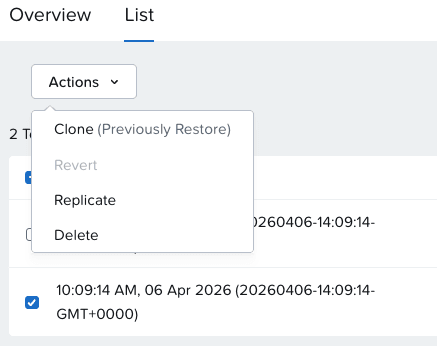
From here, use the Actions menu and choose Clone.
Typical use cases
- Disaster Recovery (DR): Total loss of the source cluster → deployment of VMs on another Nutanix cluster linked to the same OVHcloud bucket.
- Workloads migration: Move an application to another site (edge or cloud) by importing snapshots from the bucket.
Go further
Nutanix Reimagines Business Continuity for Hybrid Multicloud Users
Cloud Clusters (NC2) Hosted - Deploying Multicloud Snapshot Technology
Browse all the Nutanix guides.
Browse the rest of the OVHcloud US documentation for guides on our other products and services.
Learn more about Nutanix on OVHcloud on the OVHcloud US website.
If you need training or technical assistance to implement our solutions, contact your sales representative or click on this link to get a quote and ask our Professional Services experts for a custom analysis of your project.
*S3 is a trademark filed by Amazon Technologies, Inc. OVHcloud's service is not sponsored by, endorsed by, or otherwise affiliated with Amazon Technologies, Inc.