
Setting up a Virtual Machine using Additional IPs and Hyper-V over a vRack
Learn how to install Hyper-V, associate a virtual switch, and configure a VM to work with Additional IPs over a vRack.
This article discusses additional IPv4 configuration over a vRack. You can also configure Additional IPv6 addresses on your vRack using this guide.
Requirements
- A vRack-compatible dedicated server with Windows Server installed
- An ISO for the OS that will be installed on your VM (CentOS 7 will be used as an example in this guide)
- A vRack delivered to your OVHcloud account
- An Additional IP block of 4 or more IPs
- Access to the OVHcloud Control Panel
This feature might be unavailable or limited on servers of the Eco product line.
Please visit our comparison page for more information.
Instructions
This guide assumes that you have already installed Windows Server, connected via Remote Desktop, and have already assigned your dedicated server and IP block to a vRack. For more information on these steps, please refer to steps 1 through 4 in our guide: Configuring the vRack on your dedicated servers.
Installing Hyper-V
The first step you will need to do is install Hyper-V.
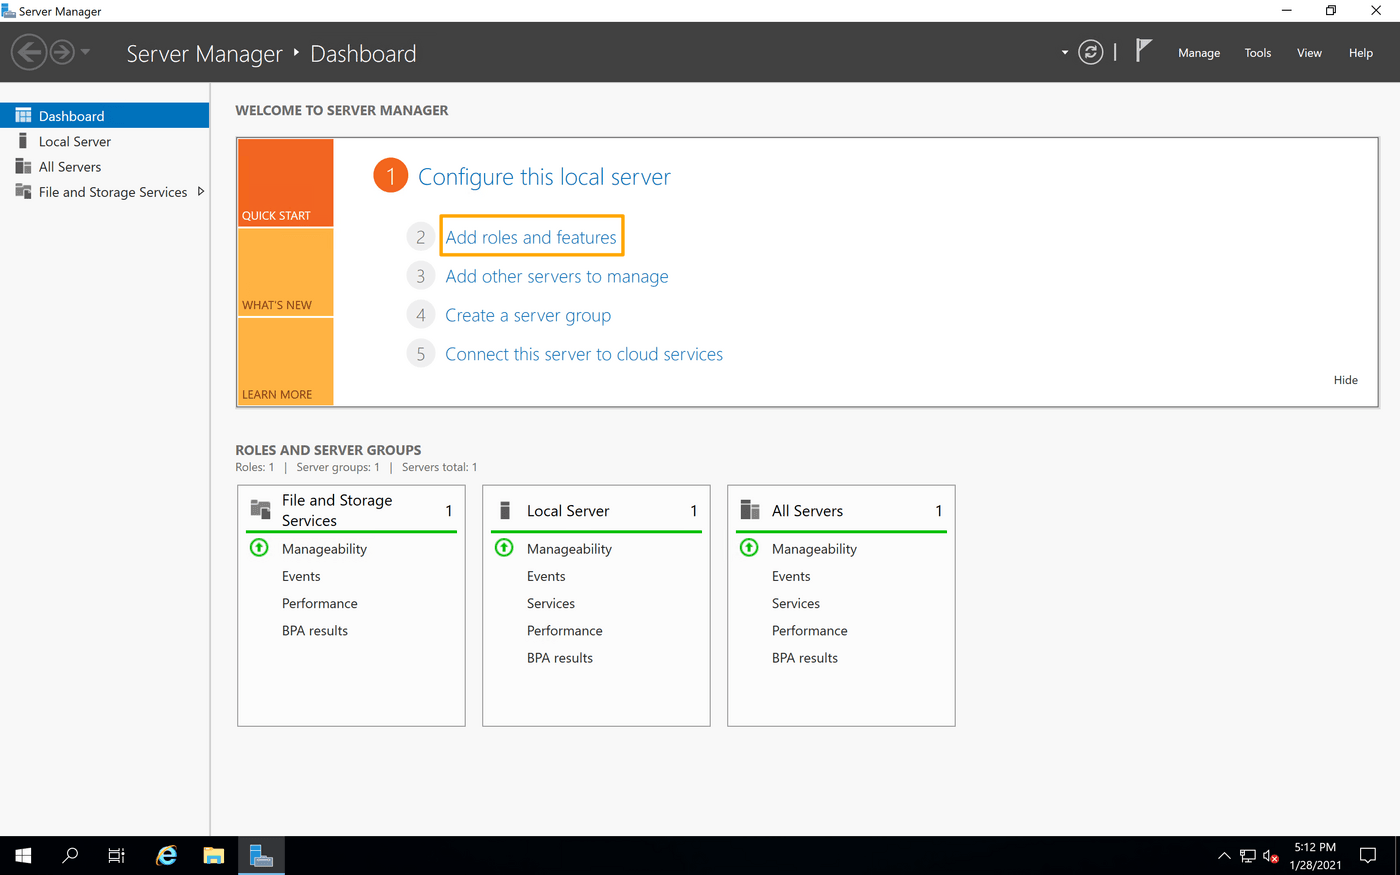
In the Server Manager, click Add roles and features.
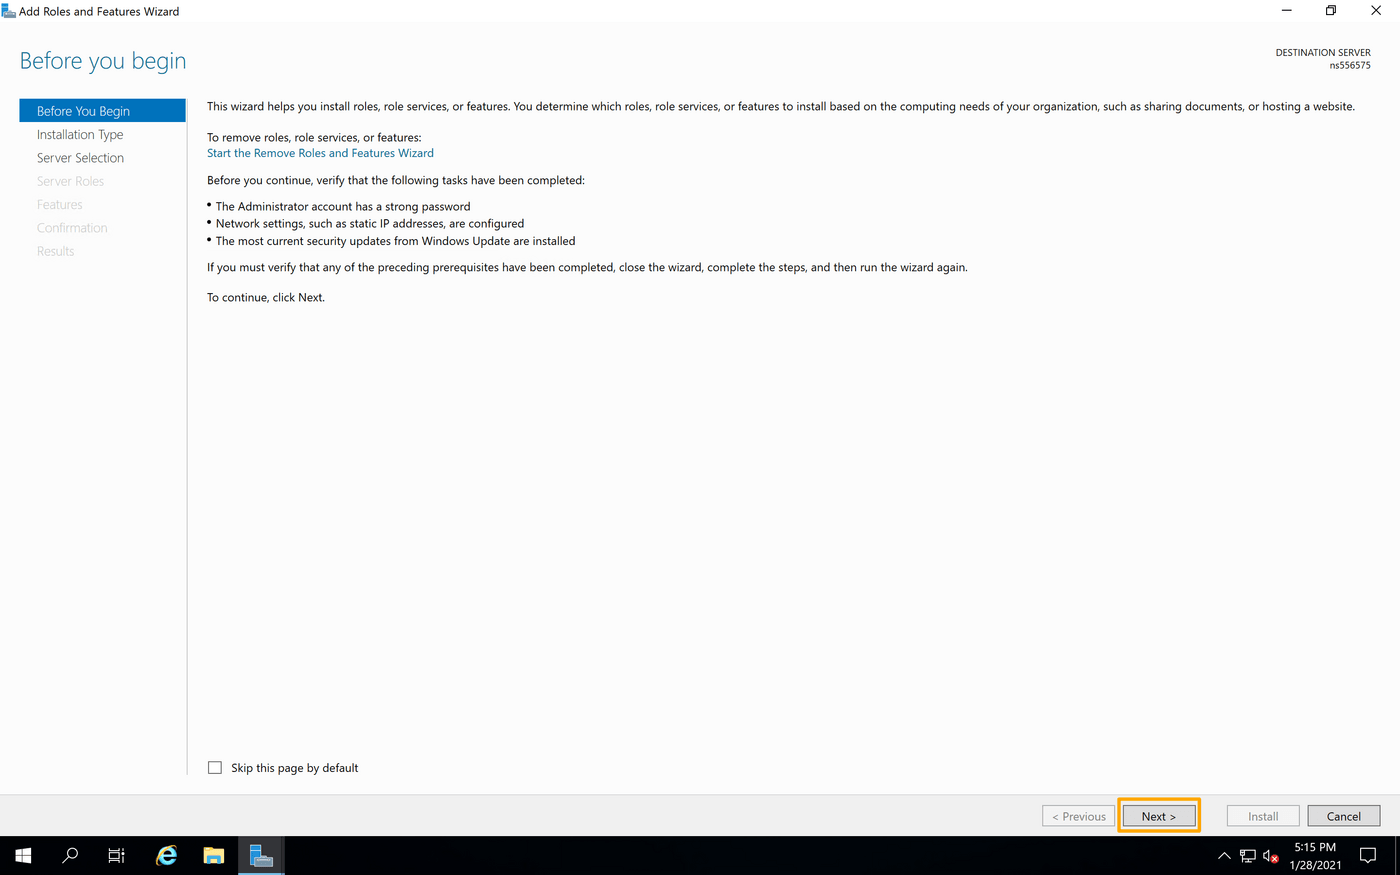
On the Wizard, click Next to proceed to the next page.
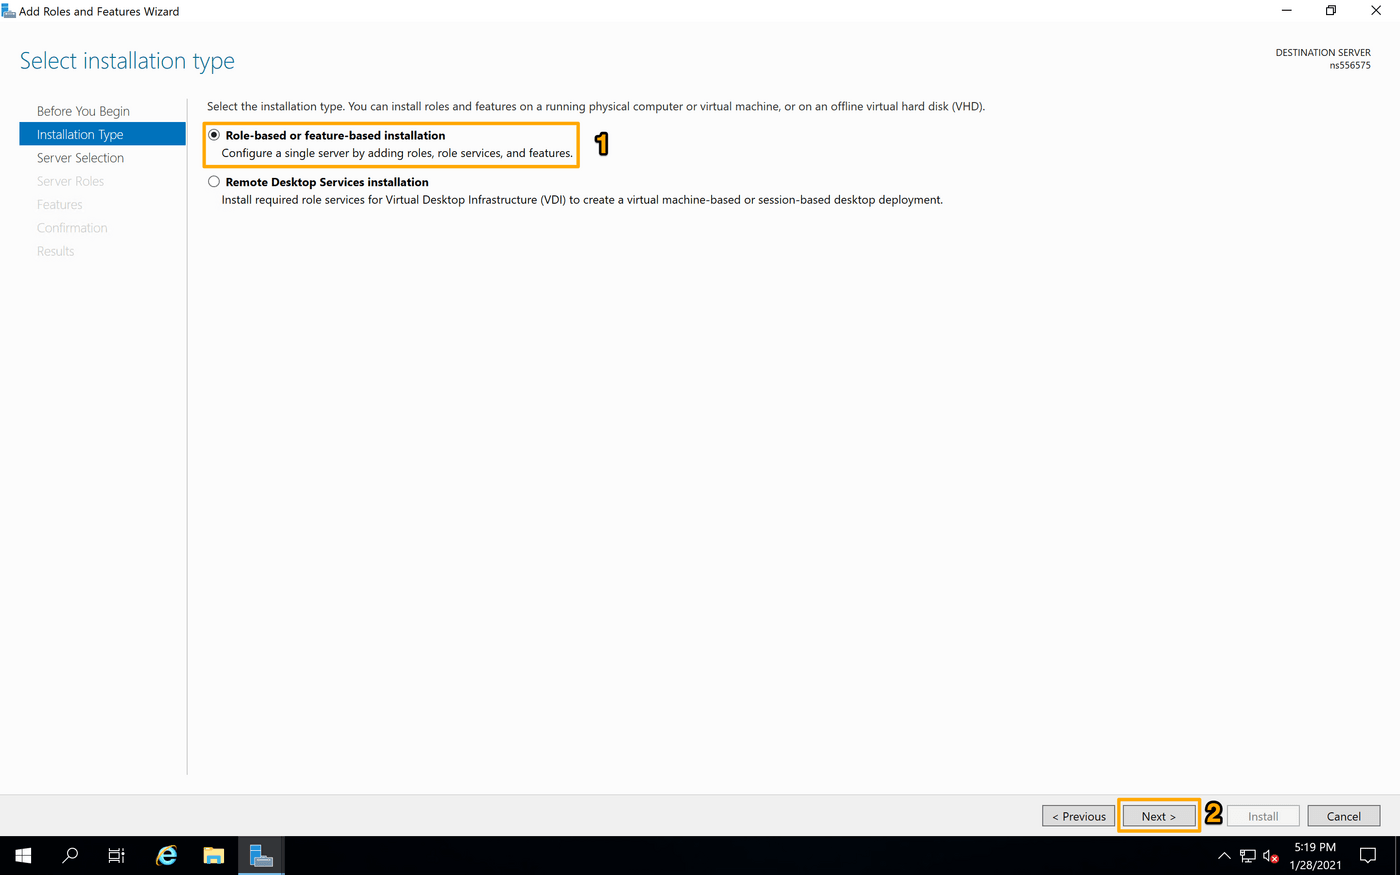
Make sure "Role-Based or feature-based installation" is selected and click Next.
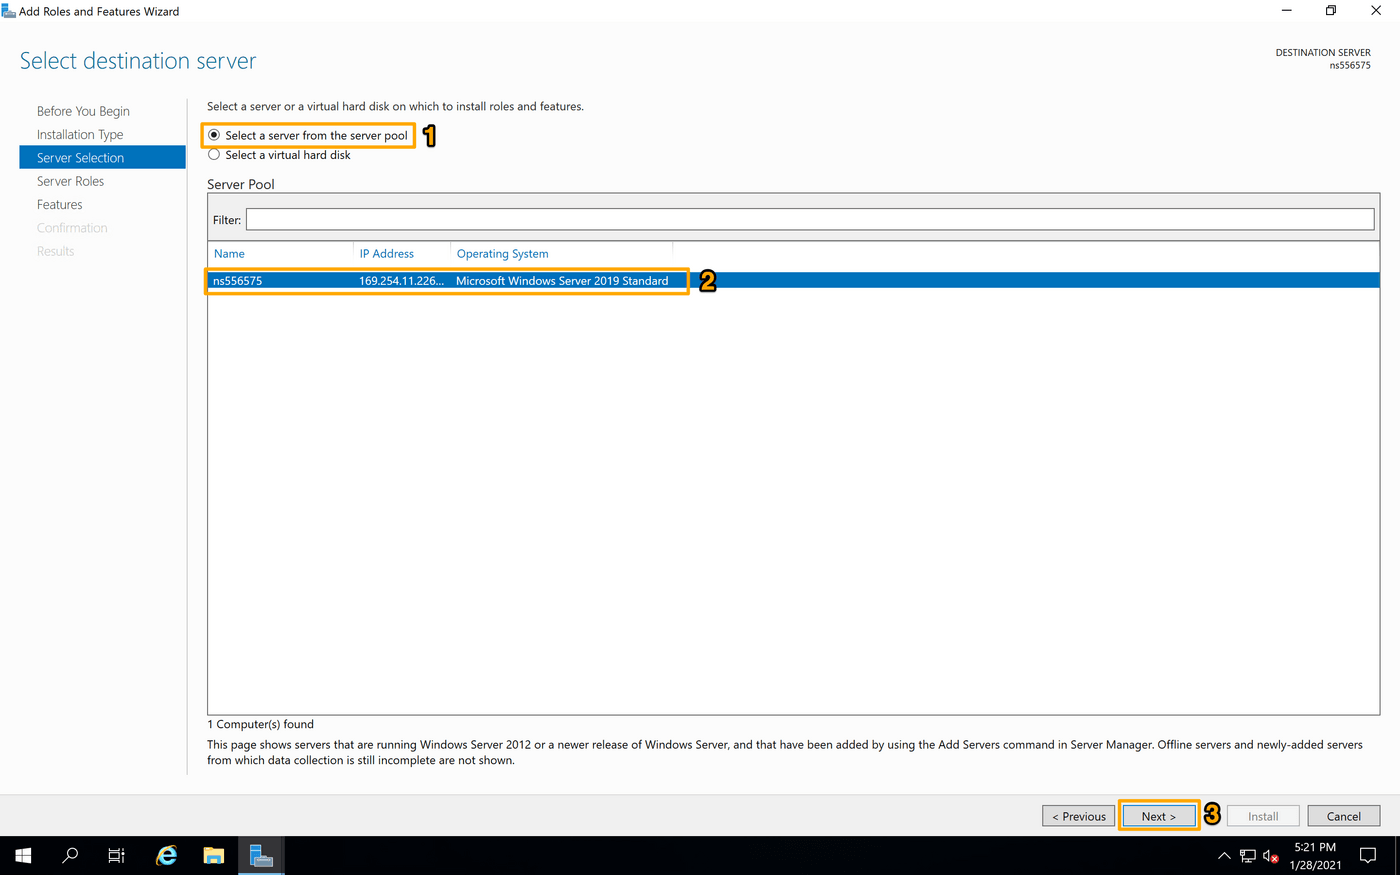
Ensure that "Select a server from the server pool" is selected and that the server you are working on is selected on the list. Then click Next.
In the server roles list, check "Hyper-V" and then click Next.
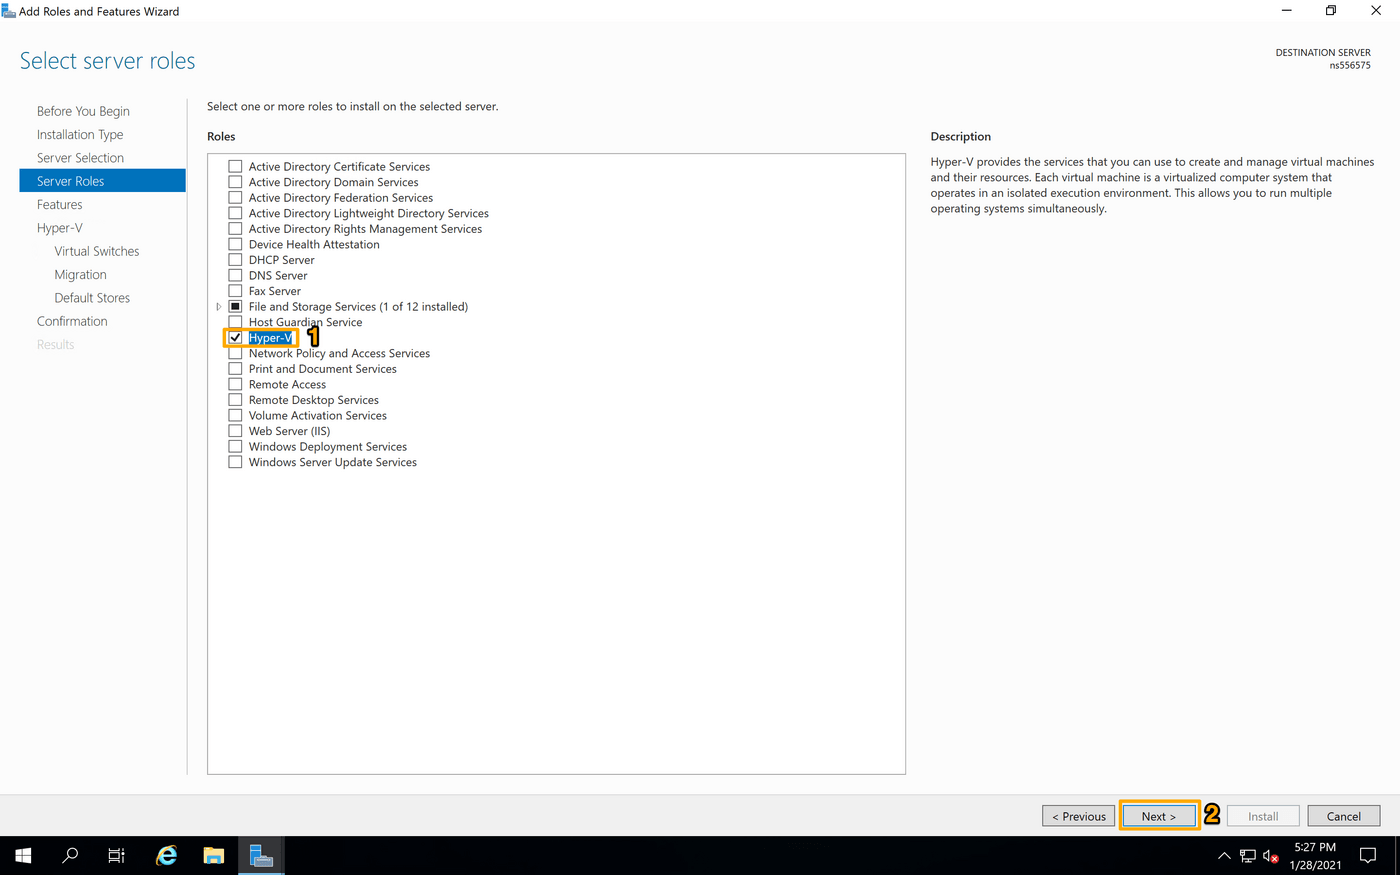
On the "Features" page, you can simply click Next.
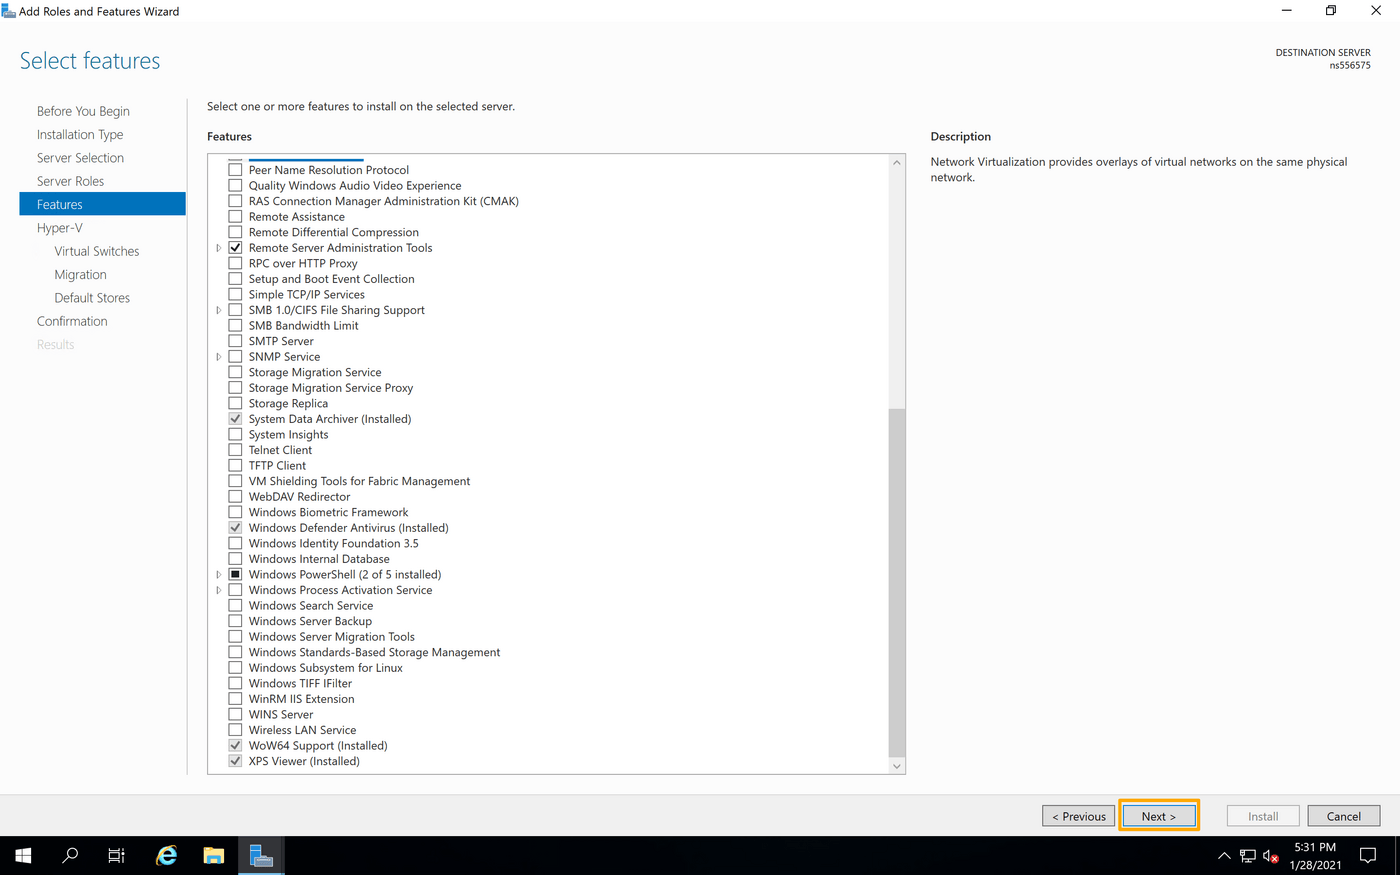
Next, you are asked to identify which network connection on your server you want to use for the virtual switch.
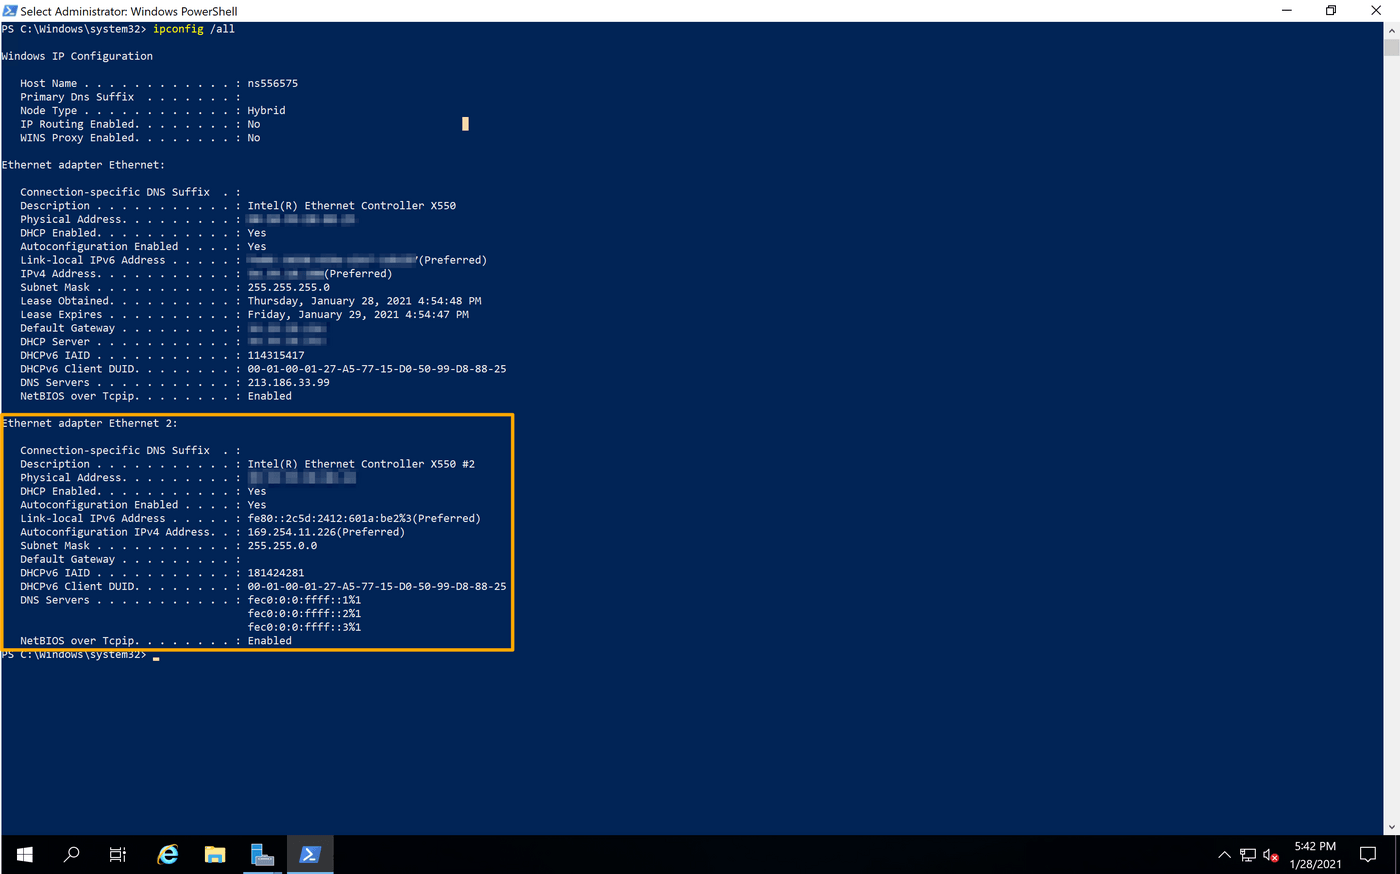
To do this, open a Command Prompt or PowerShell and execute the command ipconfig /all.
Note that, in our example, Ethernet 2 is the interface used for the vRack. However, the vRack NIC may be a different interface in your configuration. The correct one to select will be the interface that does not have the server's main IP address or has a self-assigned IP (169.254.x.x).
Once you have this information, go back to the 'Add Roles and Features Wizard' and click Next.
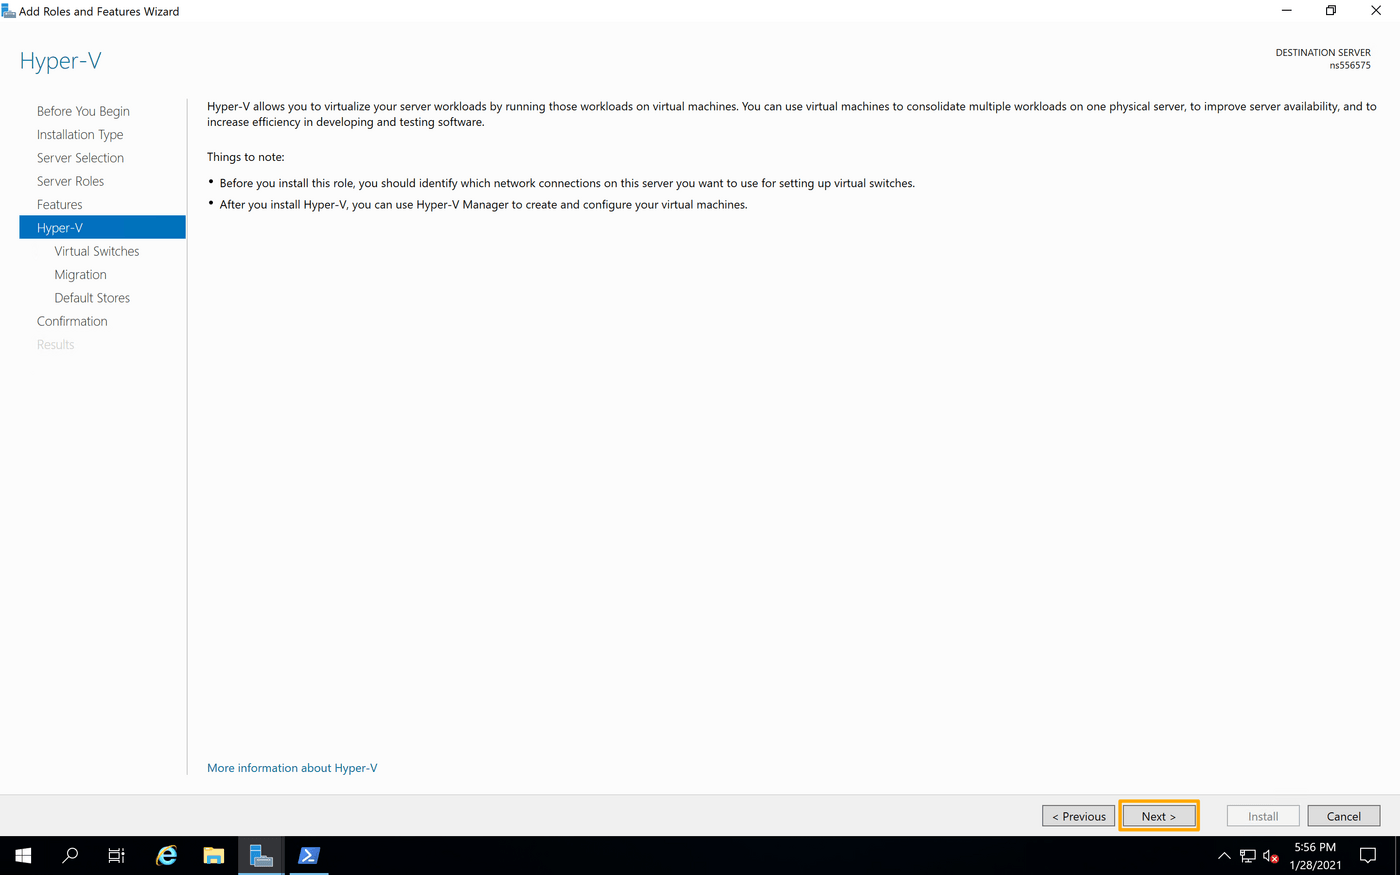
Now select the adapter for the vRack that you identified in the Command Prompt or PowerShell, and click Next.
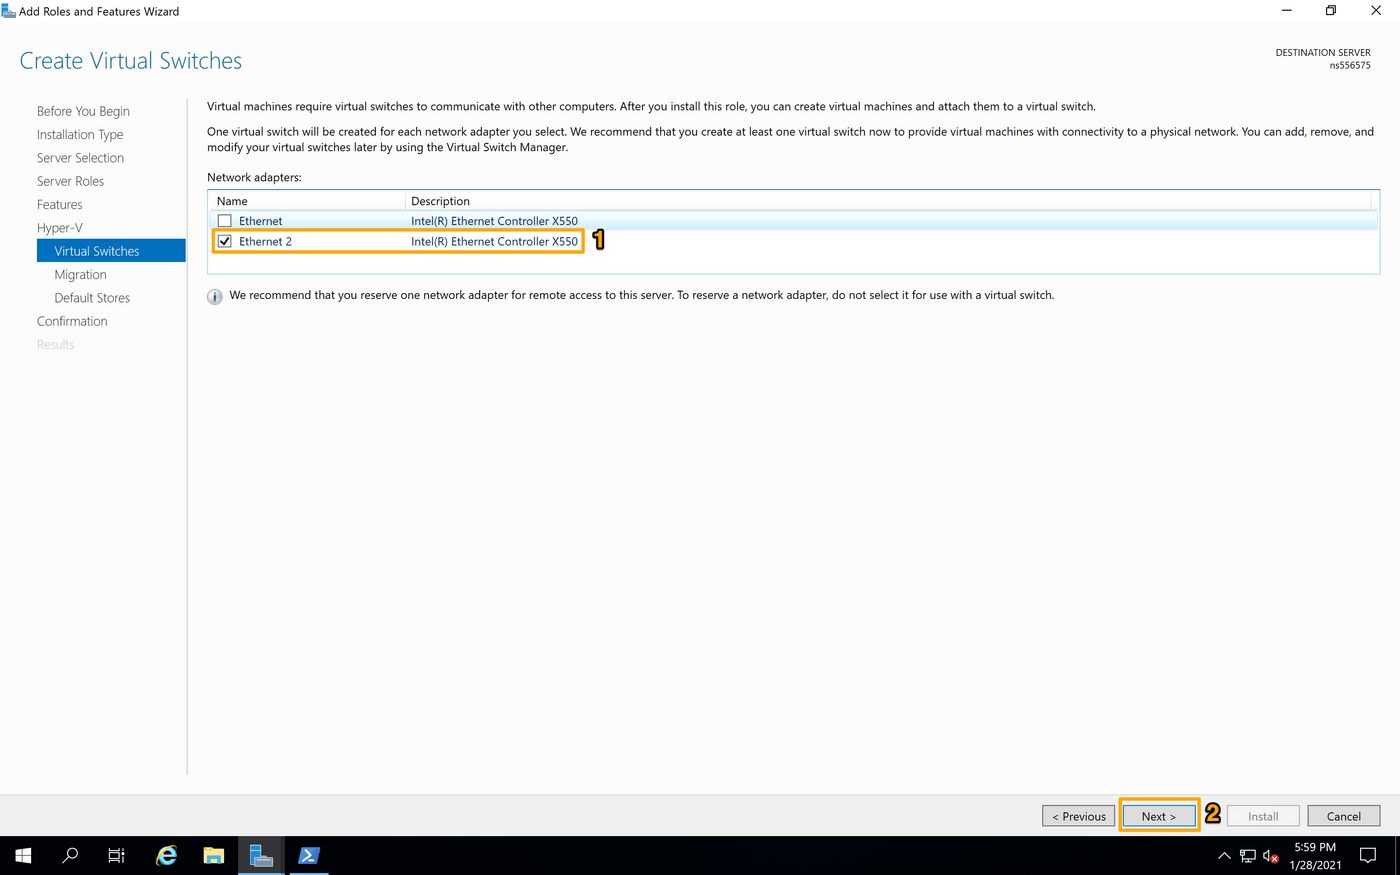
The next two pages are for choosing migration and storage options. You can configure those as you please.
Once you reach the confirmation page, check "Restart the destination server automatically if required" and click Yes, then Install.
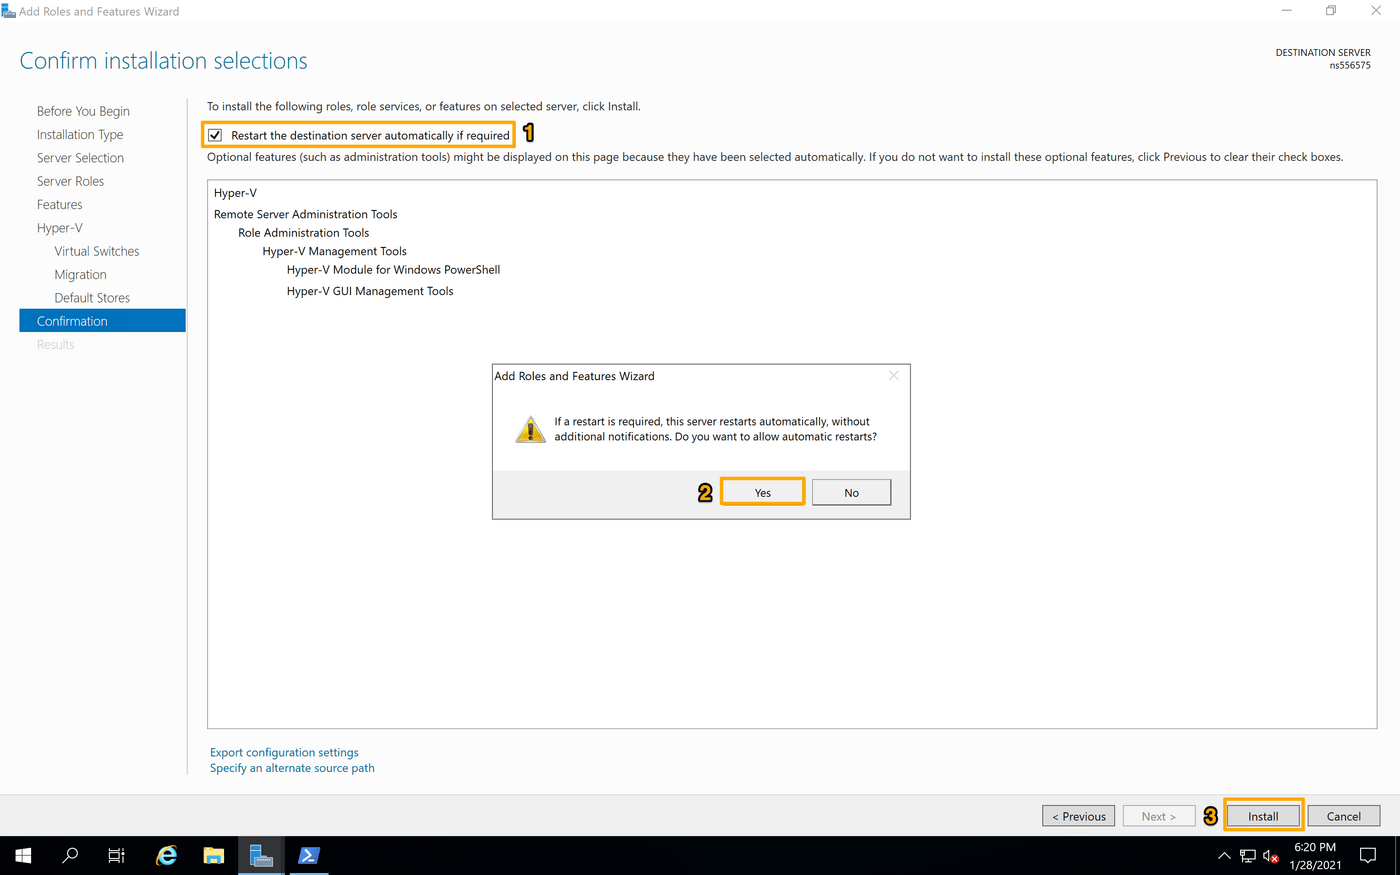
Hyper-V will now install, and the server should reboot.
Creating and Configuring a VM
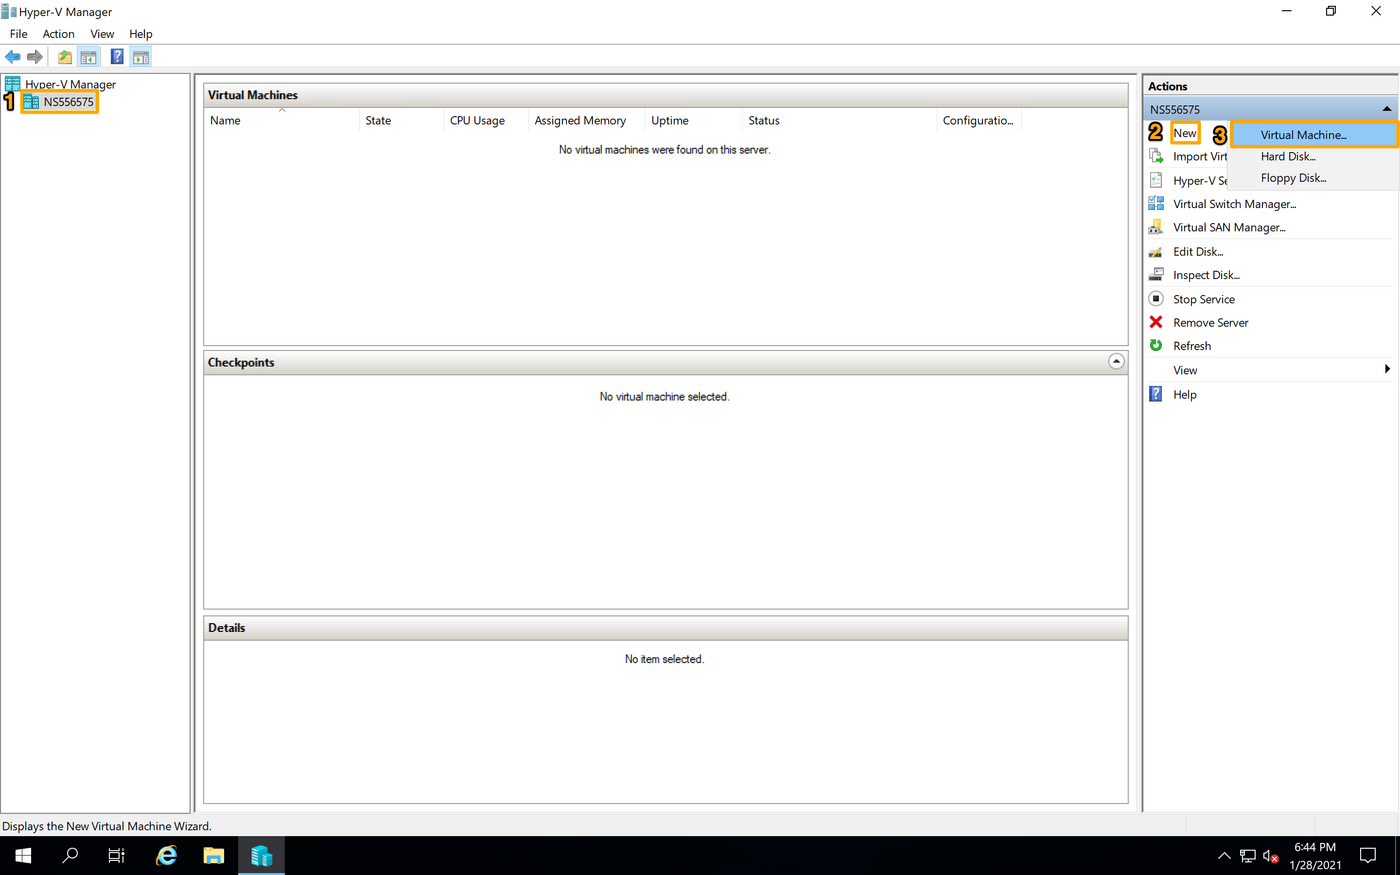
Once the server has rebooted, log in and open Hyper-V Manager.
Select your server on the left and click New. Select "Virtual Machine" in the context menu.
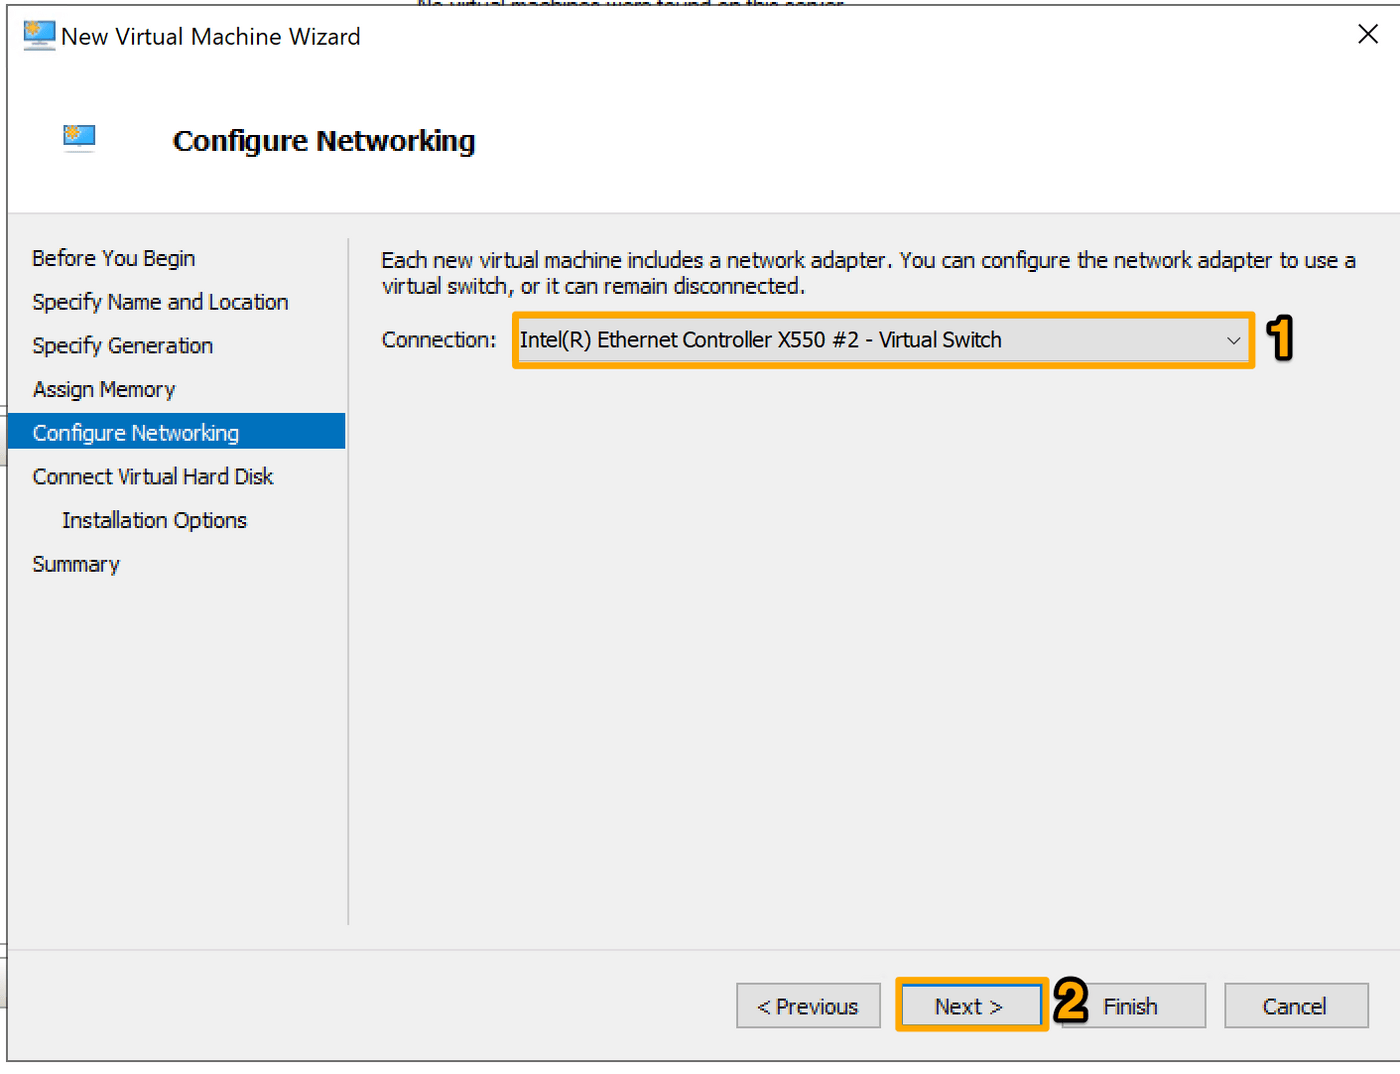
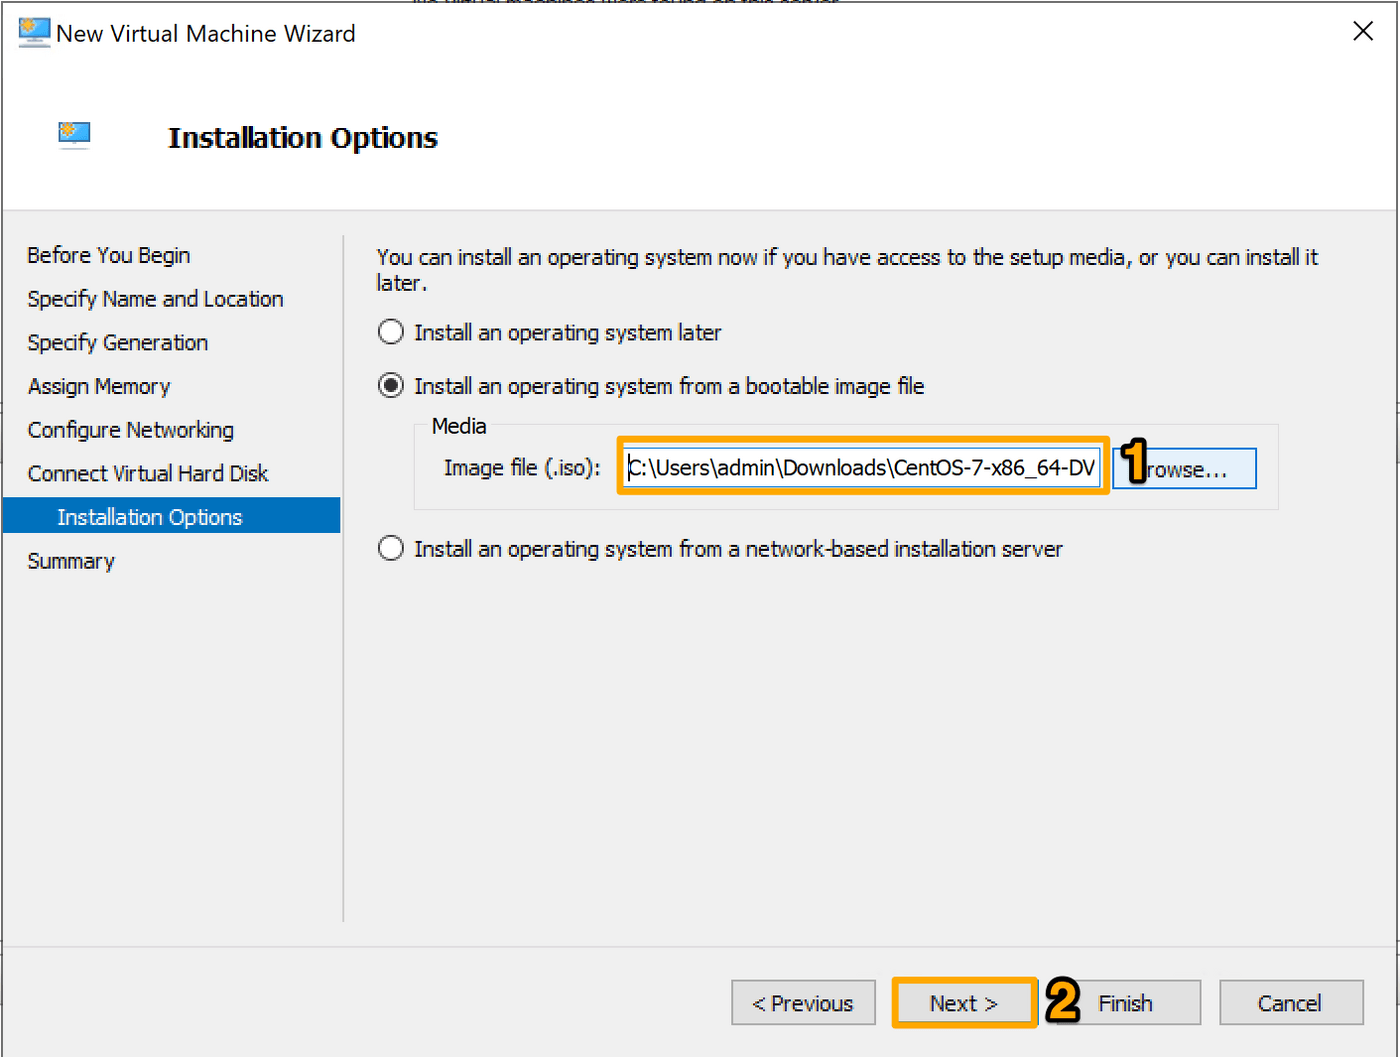
In the "New Virtual Machine Wizard", you can configure the VM as you please. When you reach the "Configure Networking" step, make sure to select the virtual switch. Once selected, click Next to continue.
In the "Installation Options" section, be sure to add the ISO for the operating system you are going to install. Click Next to continue.
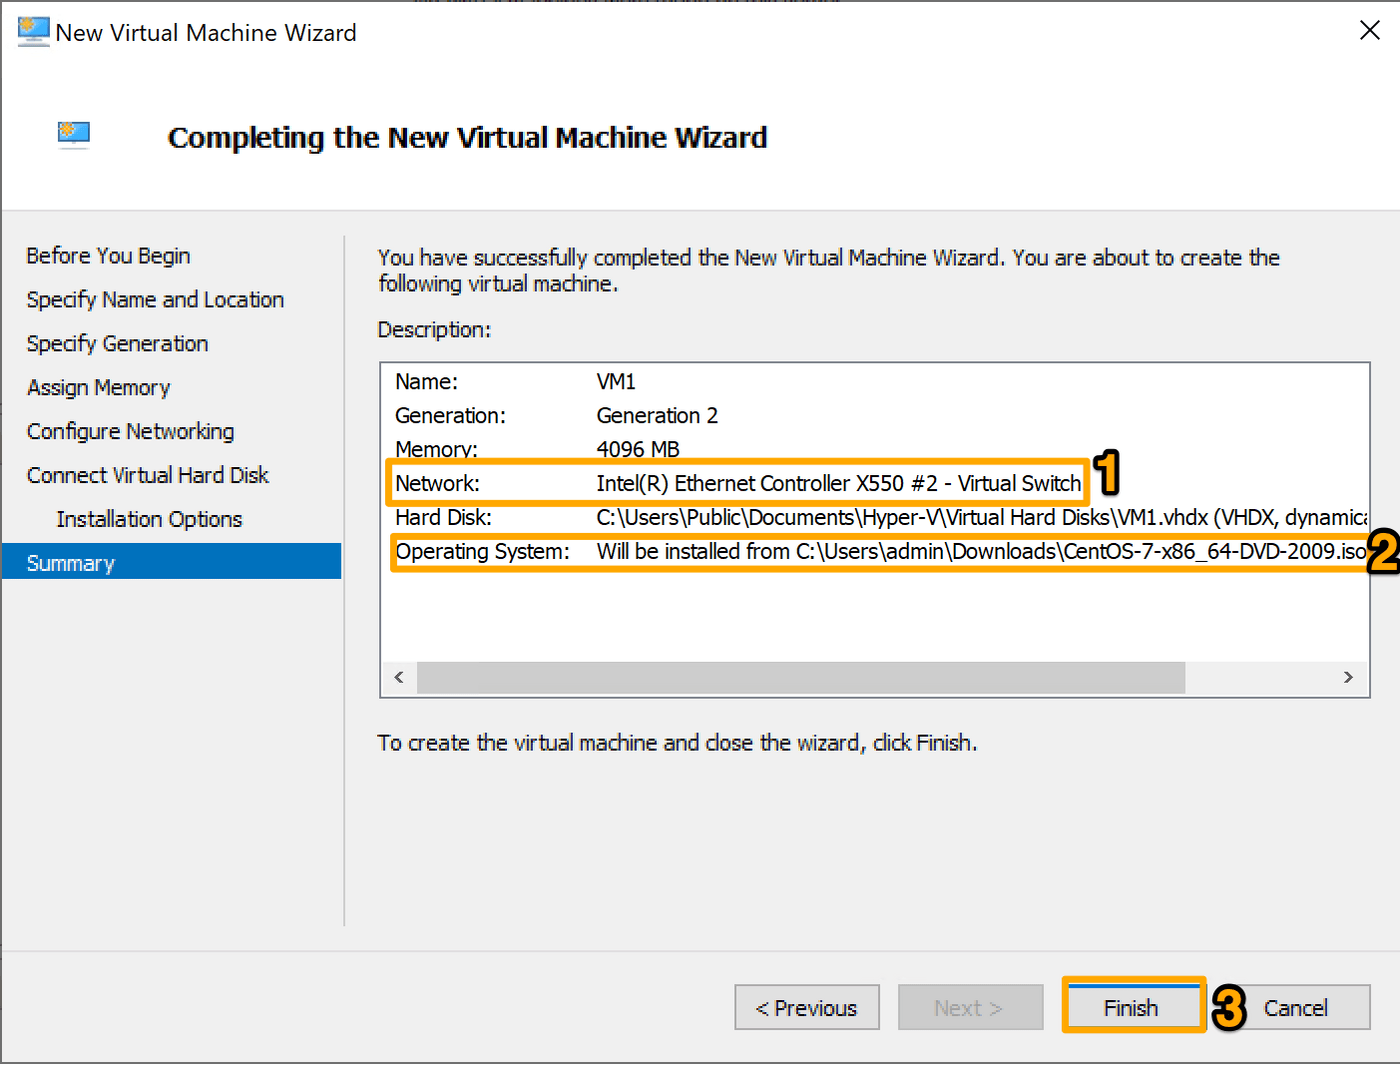
When you reach the "Summary" page, ensure that the "Network" (Virtual Switch) and "Operating System" settings are correct, and click Finish.
Installing the OS and Configuring the IP
When you start the virtual machine, the OS installation should launch automatically. If not, you will likely get the following error message:
"The unsigned image's hash is not allowed (DB)"
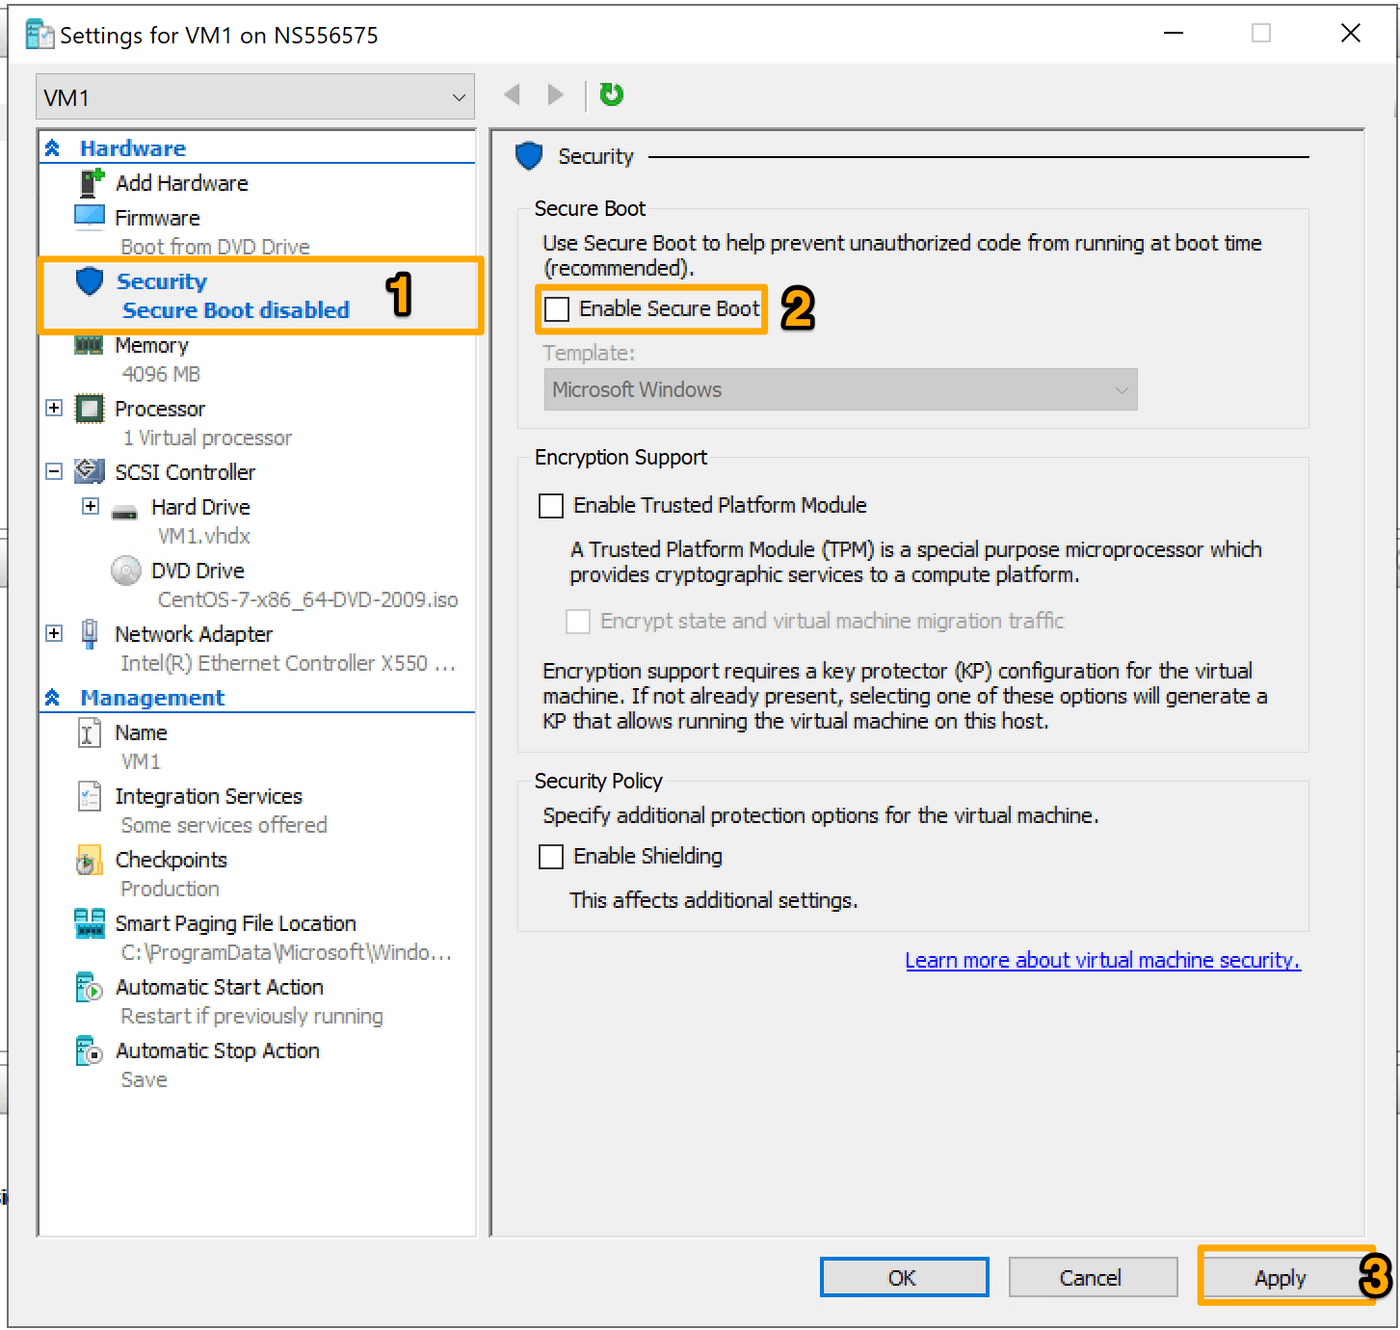
If this occurs, you will need to disable "Secure Boot".
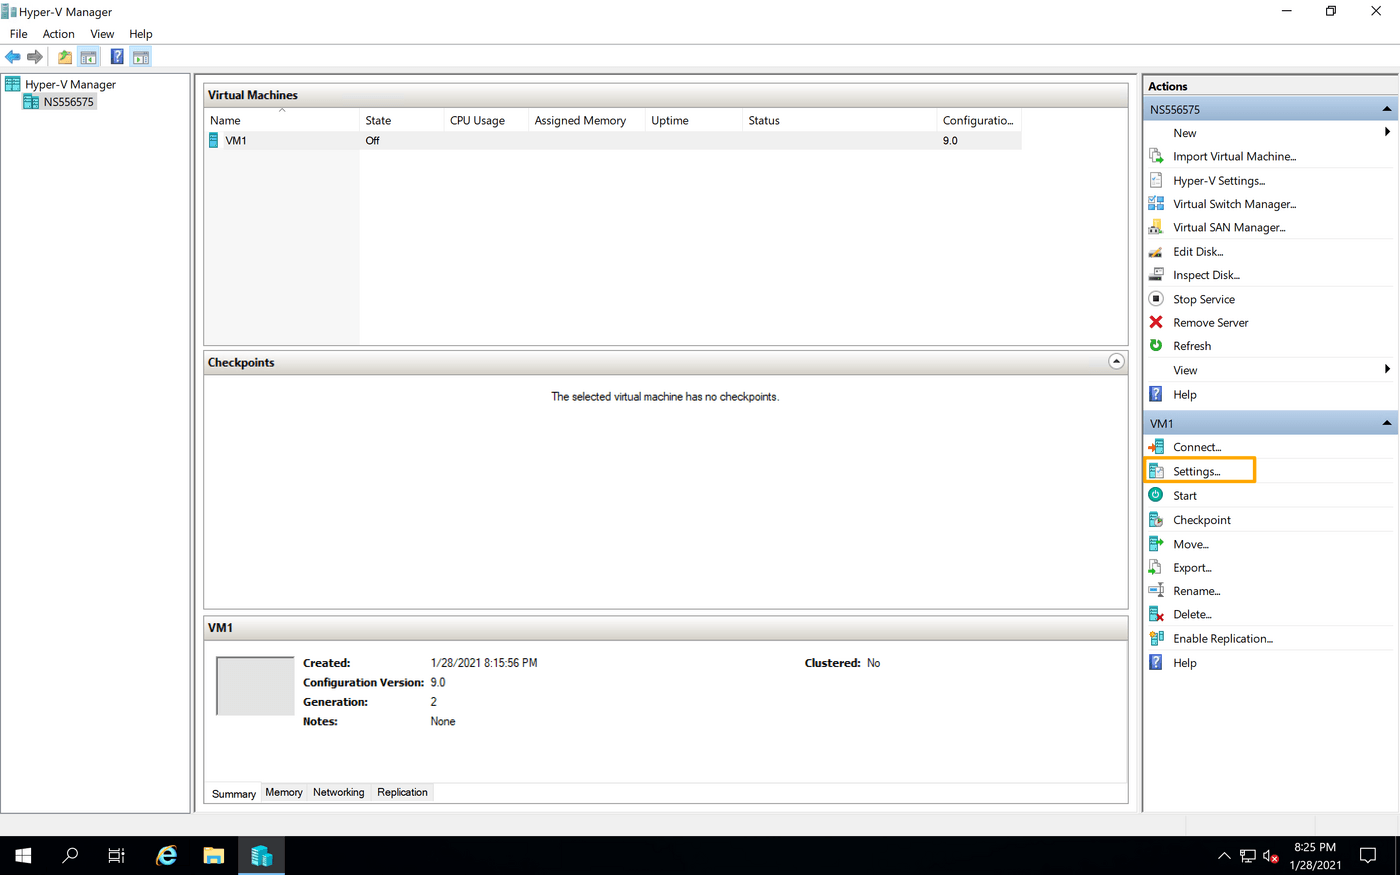
Turn off the VM and click on Settings.
Next, open the "Security" section, deselect "Enable Secure Boot", then click Apply.
Once done, start the Virtual Machine again.
Configure the operating system as you prefer.
As for the networking settings, you will need to set a static IP.
In our example, the IP block assigned to the vRack is 192.xxx.xxx.80/29. The following is the breakdown of the block:
192.xxx.xxx.80 - Network Address (Reserved - Not usable)
192.xxx.xxx.81 - First usable IP
192.xxx.xxx.82
192.xxx.xxx.83
192.xxx.xxx.84
192.xxx.xxx.85 - Last usable IP
192.xxx.xxx.86 - Default Gateway (Reserved - Not usable)
192.xxx.xxx.87 - Broadcast Address (Reserved - Not usable)
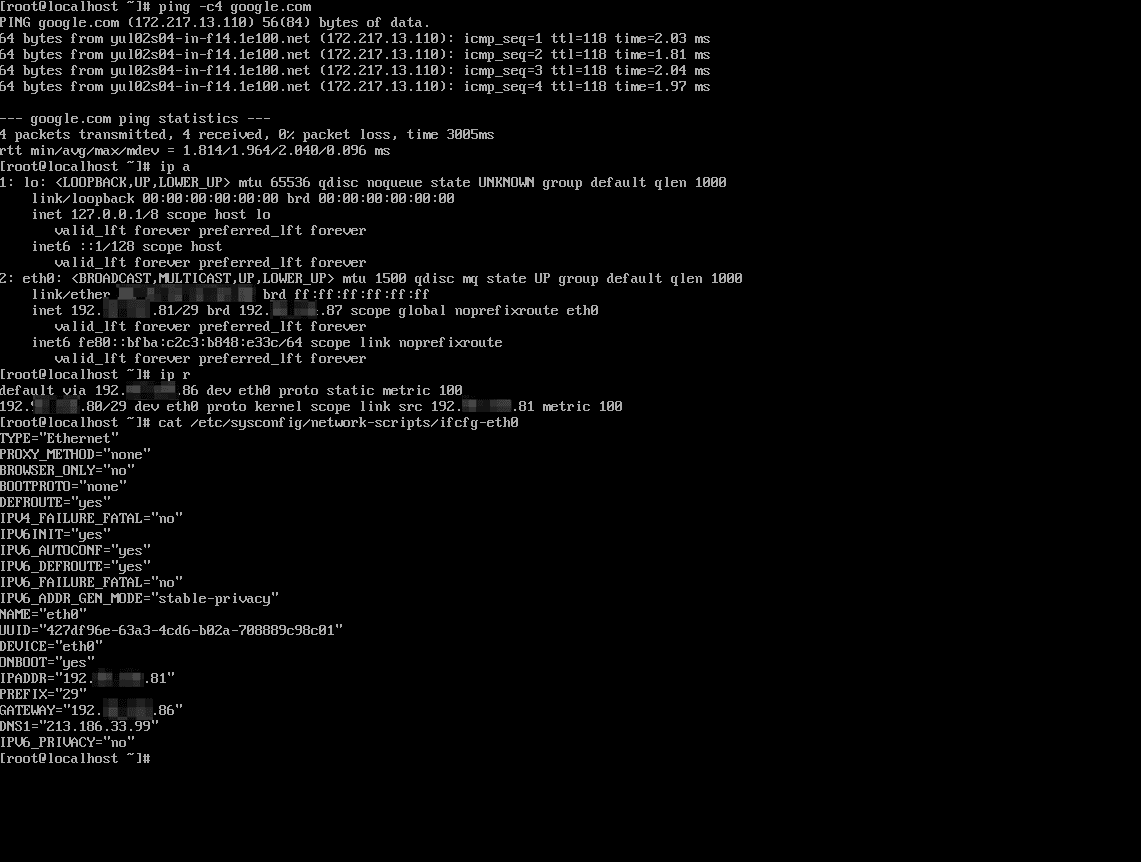
Using 192.xxx.xxx.81 for this example, the configuration should look like the following:
Address: 192.xxx.xxx.81
Subnet Mask: 255.255.255.248
Gateway: 192.xxx.xxx.86
DNS: 213.186.33.99 (You can put another DNS if you wish.)
Once the OS is installed, it should have a network connection established.
You can also see in the example below how the ifcfg-eth0 file should appear.
Go further
Browse all the Dedicated Servers guides.
Browse the rest of the OVHcloud US documentation for guides on our other products and services.
Learn more about Dedicated Servers on the OVHcloud US website.