
How to Create a VM in Proxmox VE
With Proxmox VE, creating your own VMs is a seamless process. This article will show you how to get started with creating VMs to build your Proxmox environment.
Prerequisites
- An ISO Image
Topics
Step One - Uploading an ISO to Proxmox VE
The first step when creating a VM in any hypervisor is to make sure we have the ability to install an OS on the VM. Proxmox makes uploading your ISO easy to achieve directly from the UI. To begin, click local from the side panel on the left-hand side of your screen.
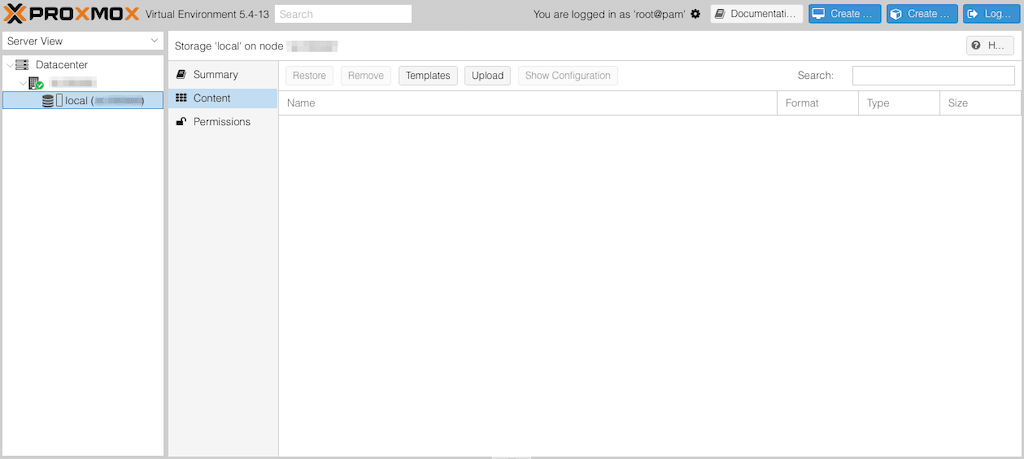
Next, under the "Content" section, click the Upload button at the top of the screen.
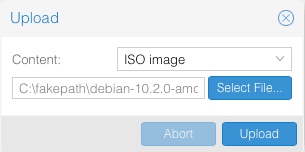
Click the Select File... button on the popup and choose the ISO you would like to upload from your local drive. Then click the Upload button.
The time it takes for your ISO to upload will be dependent upon the speed of your network and the size of the ISO. Once the upload is complete, you are ready to create your VM in Proxmox.
Step Two - Creating a VM in Proxmox VE
To create a VM in Proxmox VE, click Create VM at the top of the screen.
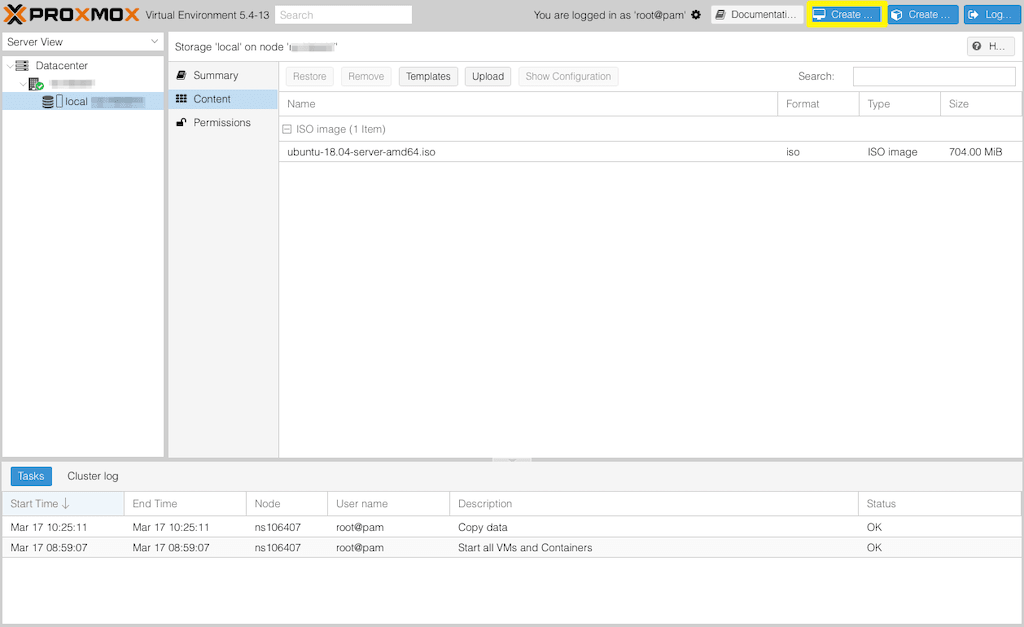
This will bring up the following pop-up window.
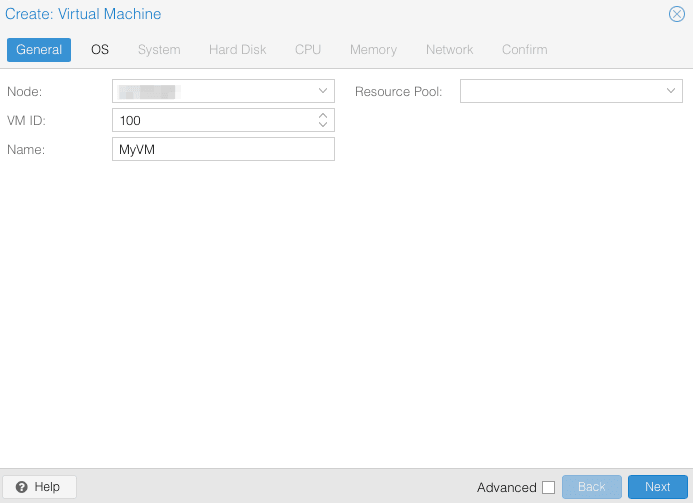
Give your VM a name and then click the Next button. On the OS tab, choose your ISO image to install your OS.
NOTE: In our example, we will be using Ubuntu 18.04 LTS.
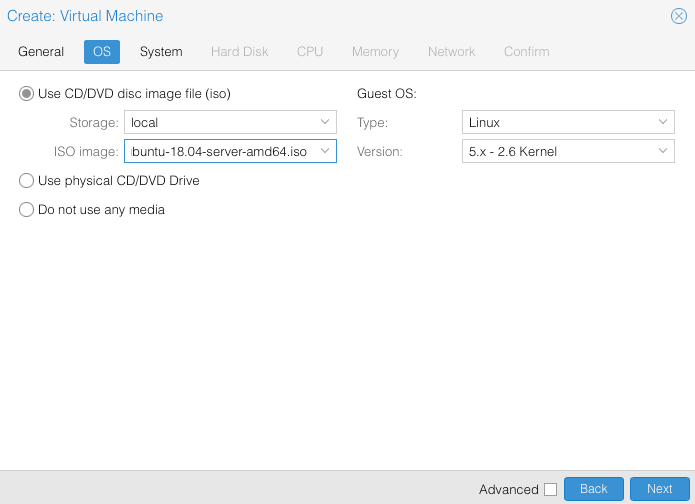
Once you have chosen your operating system, click Next. You can also click Next on the System tab for most use cases. On the Hard disk tab, choose how much storage space your need for your VM.
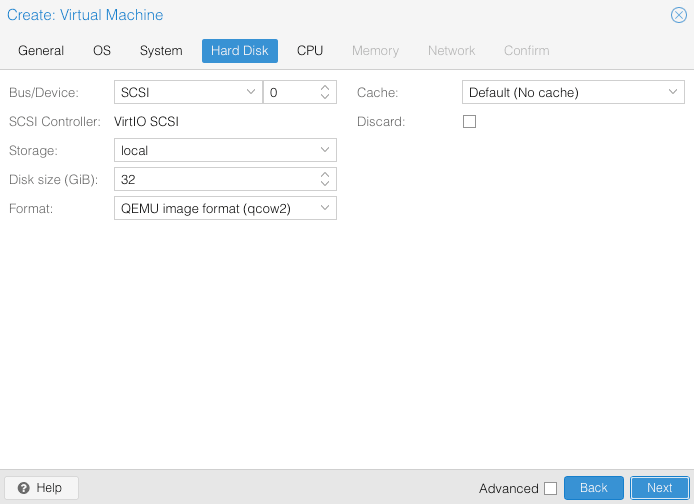
Once you have selected the hard disk space that you need, click the Next button. On the CPU tab, choose the number of cores you need for your VM.
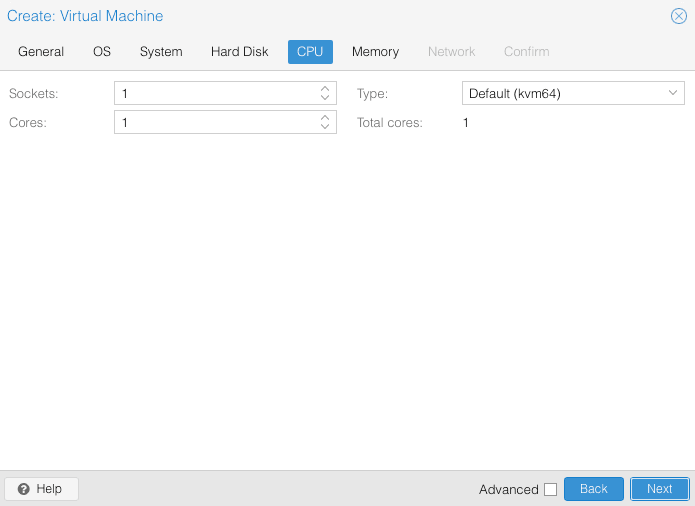
Once you have set your CPU settings, click Next. On the Memory tab, select how much RAM you wish to allocate to your VM.
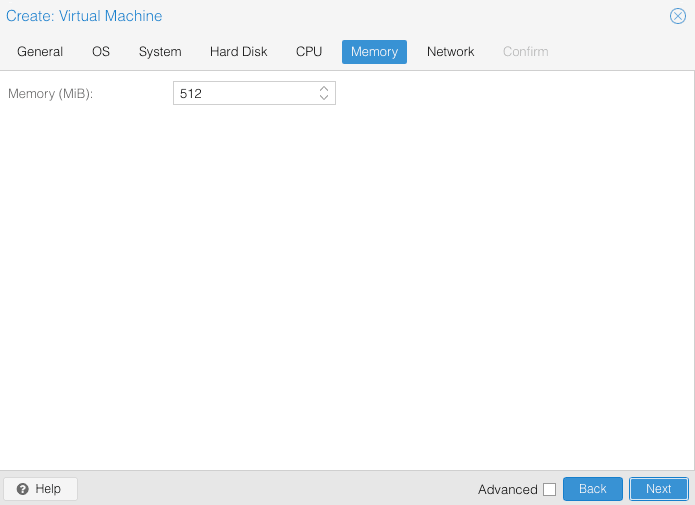
Click Next to advance to the Network tab. For networking information, please check out our How to Connect a VM to the Internet Using Proxmox VE article. Once you reach the Confirm tab, ensure the information is correct and then click Finish. Your VM will be created with the parameters you have chosen.
Step Three - Installing an OS in Proxmox VE
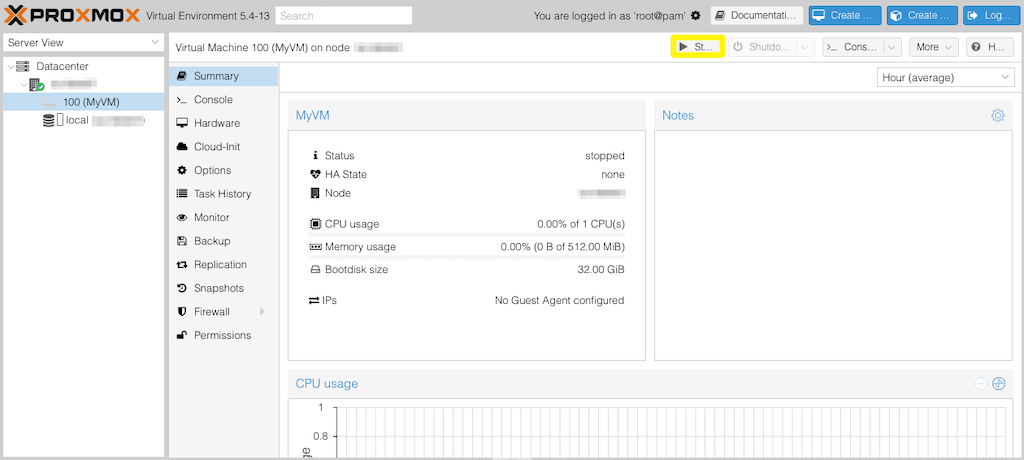
The actual installation of the OS will differ depending on the OS you choose. However, you can easily begin the installation in Proxmox VE's user interface. To begin, choose your VM from the "Server View" panel on the left-hand side of your screen. Start the VM by clicking the Start button at the top of the screen.
Once the VM has started, click the Console button at the top of the screen and select the noVNC console.
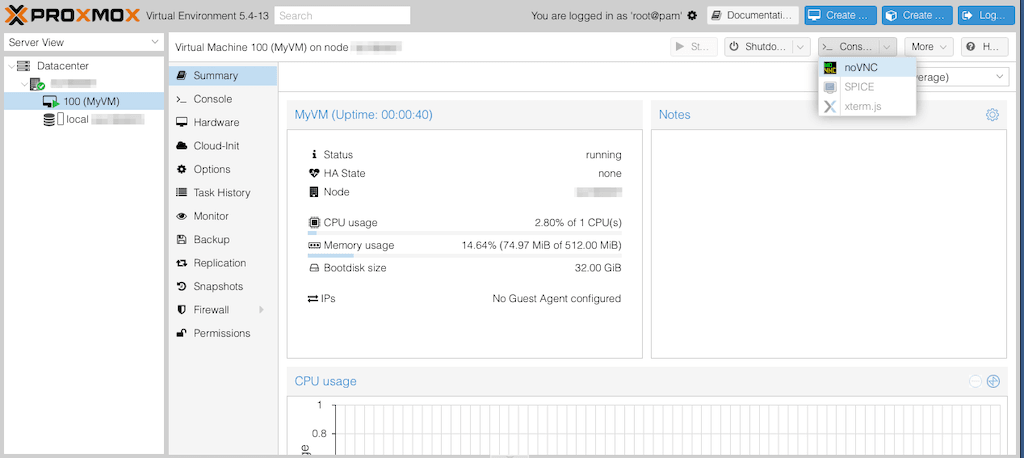
After this, follow your operating system's installation instructions.
Conclusion
Having read this guide, you should be able to create a VM from scratch using nothing but Proxmox VE and an ISO image. To learn more about what you can do with VMware ESXi 6.5 and the VMs you create inside of it, please check out our How to Connect a VM to the Internet Using Proxmox VE article.