
Replacing Prism Central from Small Mode to X-Large Mode
NOTE:
- This guide is only intended for customers who are in Bring Your Own License mode on their Nutanix cluster. If you are not in this configuration, contact the OVHcloud support teams to change the size of your Prism Central.
- Before you make any changes, you must unregister your Prism Central license on your Nutanix portal.
Requirements
- A Nutanix cluster in your OVHcloud account
- Access to the OVHcloud Control Panel
- You must be connected to the cluster via Prism Central
- You need to know the Prism Element admin password (when deploying a Nutanix cluster by OVHcloud, this password is created in the same way as Prism Central, but can be changed later)
Overview
NOTE: OVHcloud provides services for which you are responsible for their configuration and management. You are therefore responsible for their proper functioning.
This tutorial is designed to help you as much as possible with common tasks. If you are having difficulty performing these actions, please contact a specialized service provider. OVHcloud cannot provide you with technical support in this regard.
You can deploy Prism Central in one of three custom sizes:
- Small with 6 vCPU, 26GB of memory and 500GB of storage per virtual machine.
- Large with 10 vCPU, 44 GB of memory and 2500GB of storage per virtual machine.
- X-Large with 14 vCPU, 60GB of memory and 2500GB of storage per virtual machine.
By default, Prism Central is deployed on Nutanix by OVHcloud on a single virtual machine in Small mode.
When redeploying a cluster from the OVHcloud Control Panel, you can configure Prism Central with one or three virtual machines in small mode only.
Instructions
We will look at how to replace Prism Central in Small mode on a single virtual machine with a Prism Central in X-Large mode and then extend Prism Central on three virtual machines for more resilience.
The Nutanix cluster remains operational during this operation but the features that require Prism Central will be removed.
Configuring SSH access to Prism Element with the OVHcloud Load Balancer
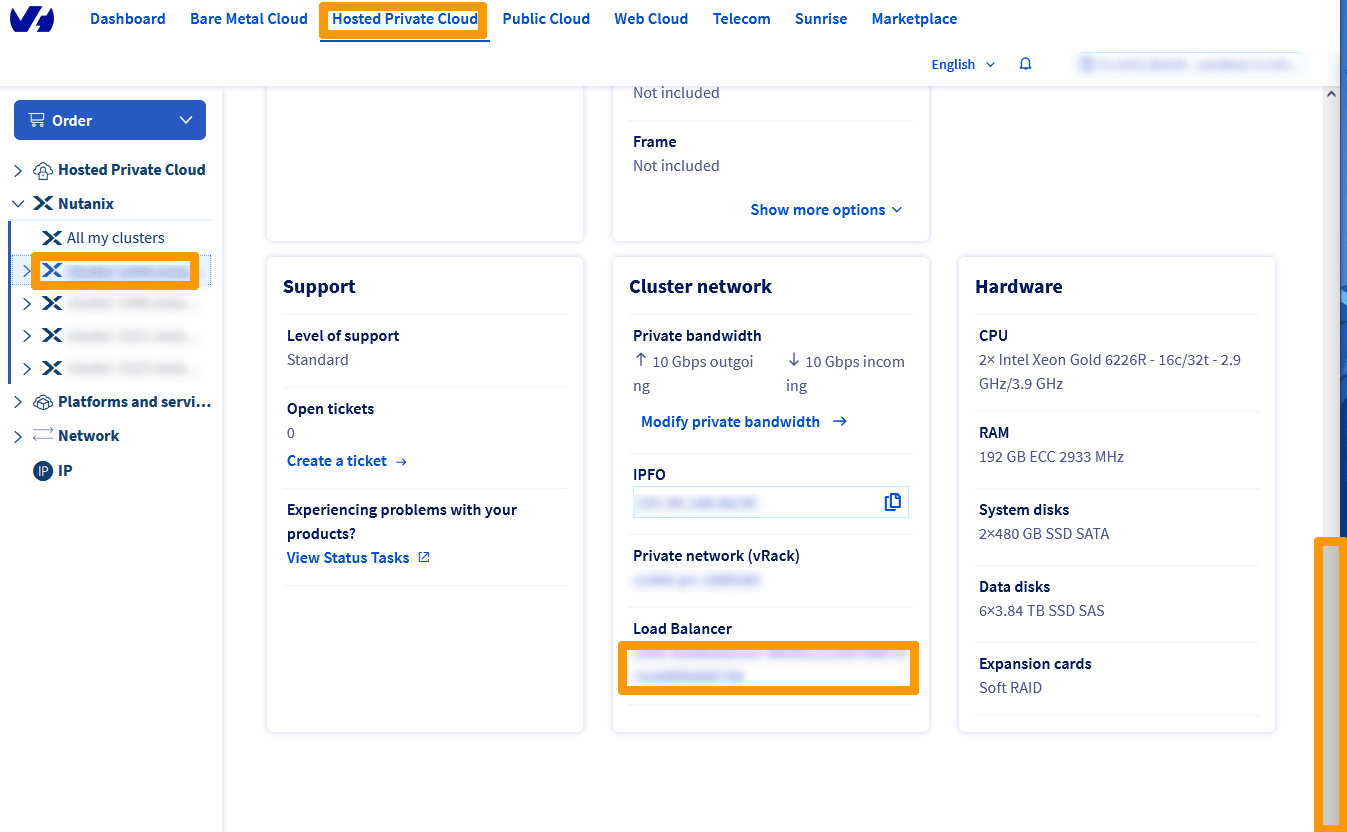
Go to the OVHcloud Control Panel, choose the Hosted Private Cloud tab at the top, then click on your Cluster on the left in the Nutanix category, scroll down the window, and click on the Load Balancer associated with your cluster.
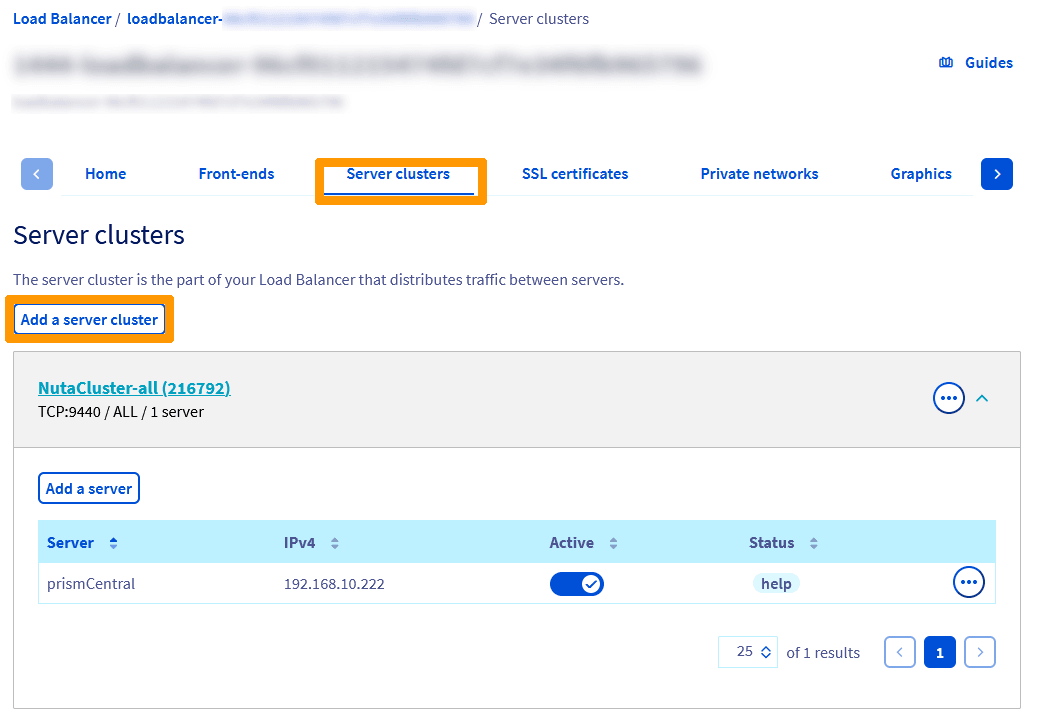
In the configuration pages for your Load Balancer, go to the Server clusters tab and click Add a server cluster.
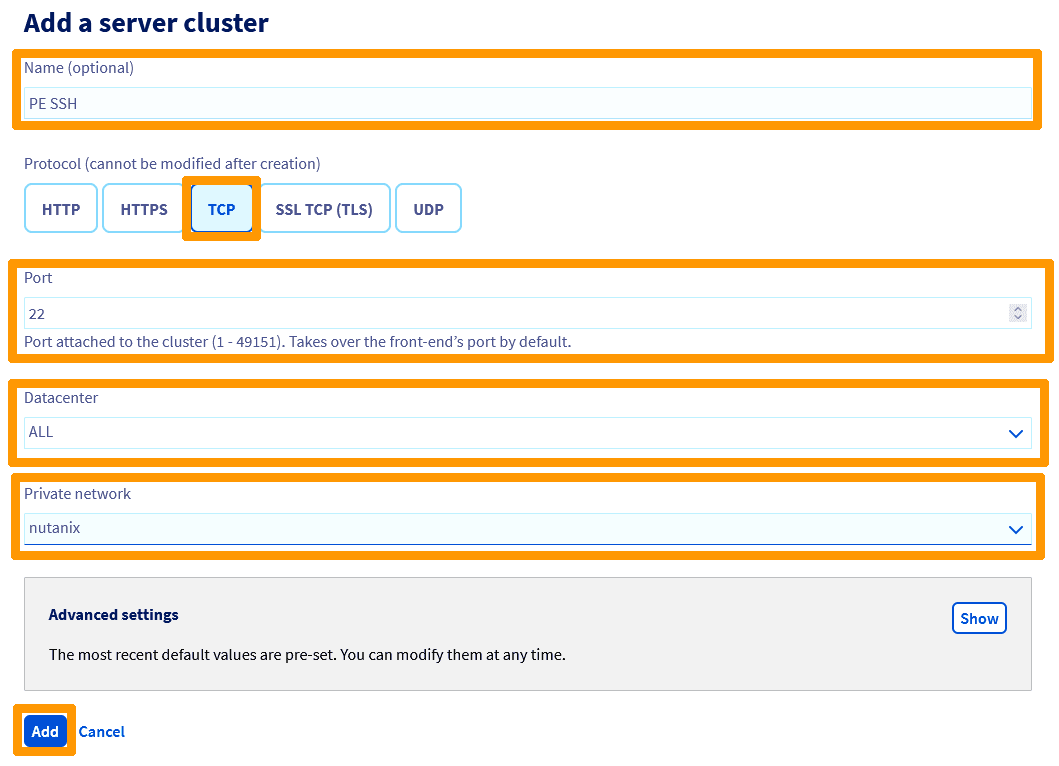
Enter this information :
- Name (optional):
PE SSH. - Protocol:
TCP. - Port:
22. - Datacenter:
ALL. - Private network:
nutanix.
Then click Add.
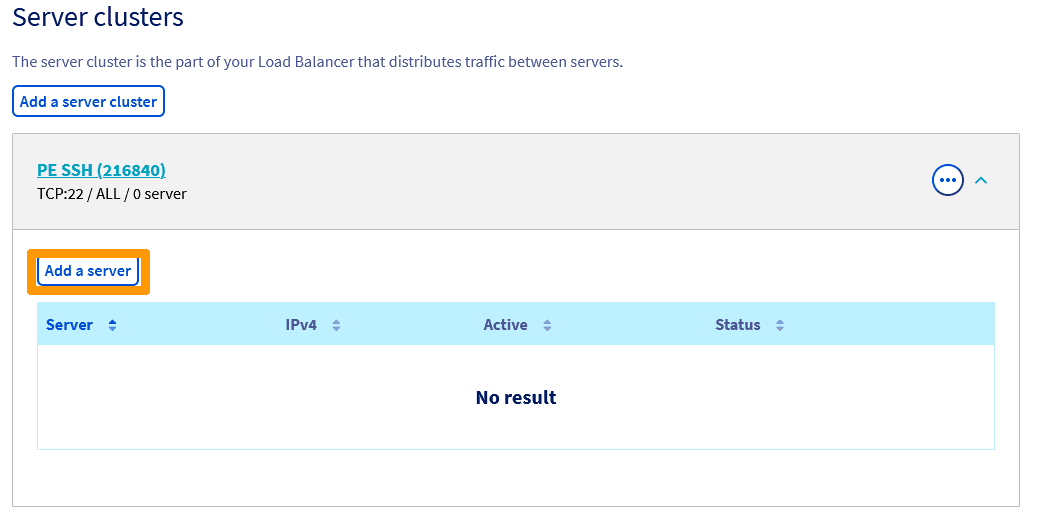
Within the server cluster, click Add server.
Fill in these values :
- Name (Optional):
PE SSH. - IPv4 address:
Private IP address of Prism Element. - Port:
22.
And click Add.
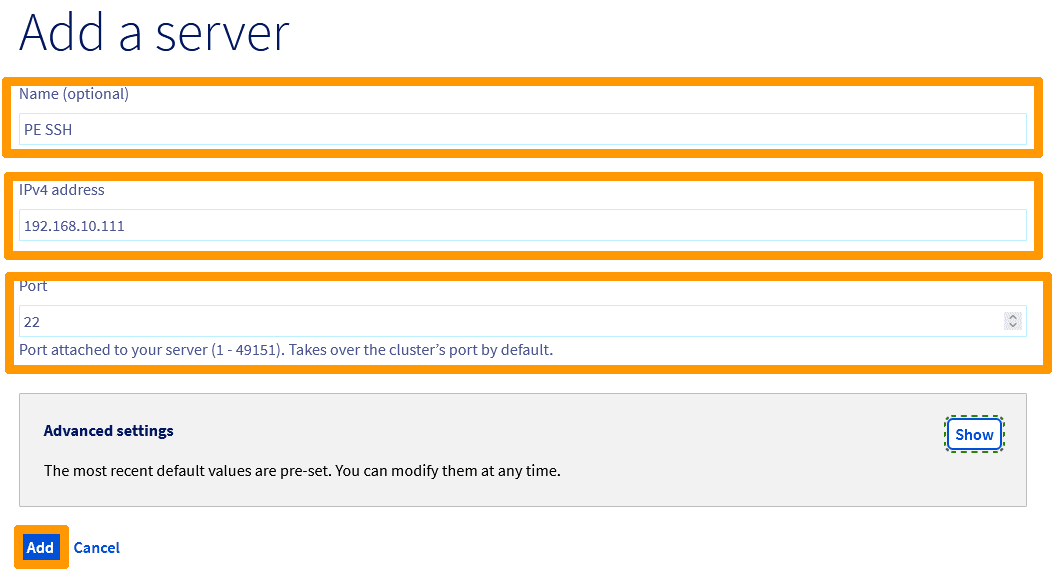
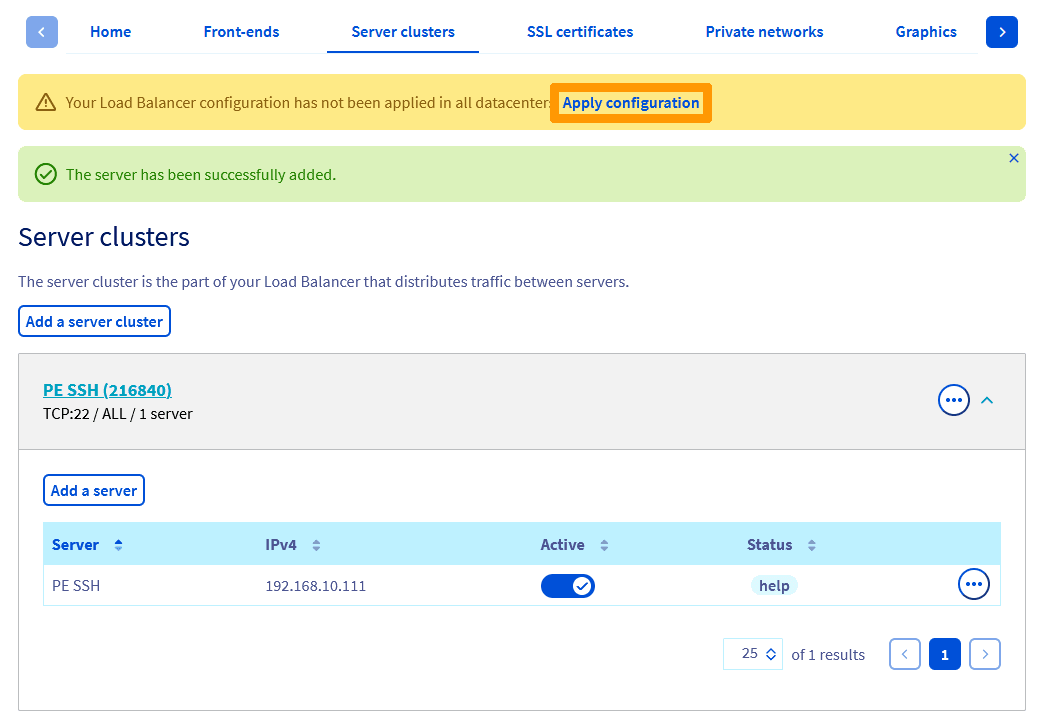
Click Apply configuration to the right of the warning message Your load balancer configuration has not been applied in all datacenters.
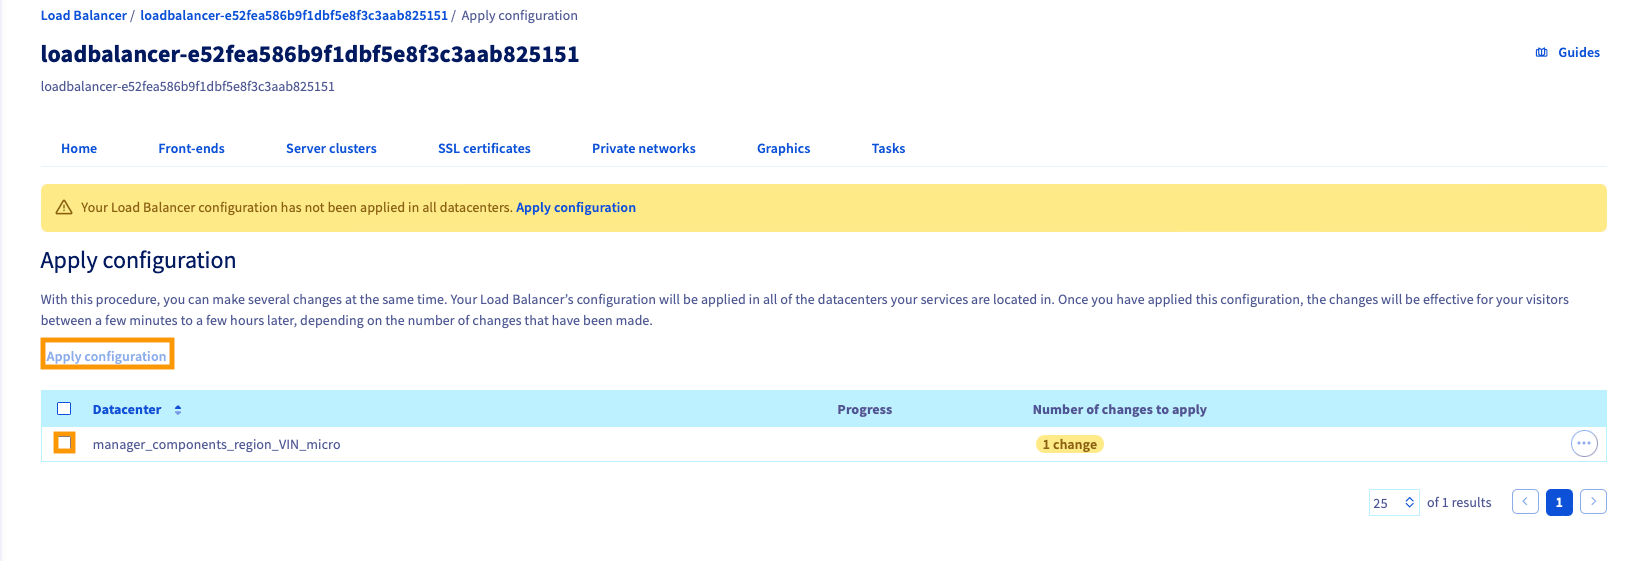
Select your location and click on Apply configuration.
Select your location again and click Apply configuration.
Go to the Tasks tab to see the progress of the configuration change.
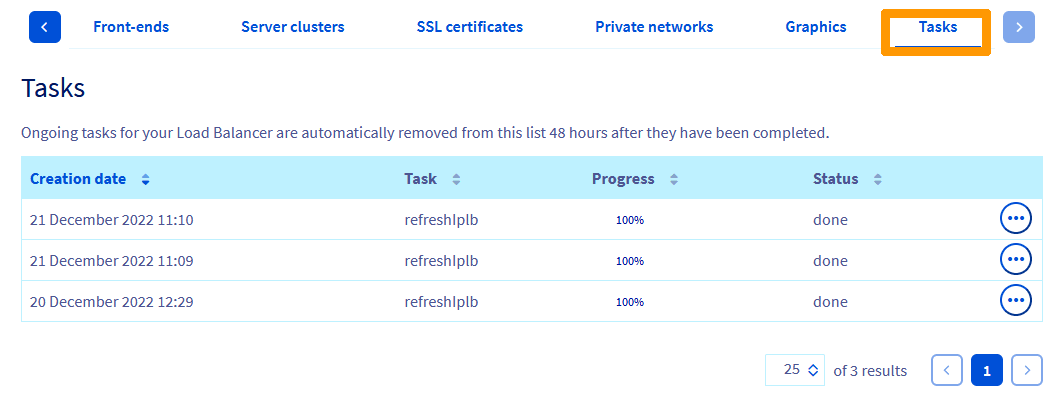
When the task is finished, go to the Front-ends tab and click Add a Front-end.
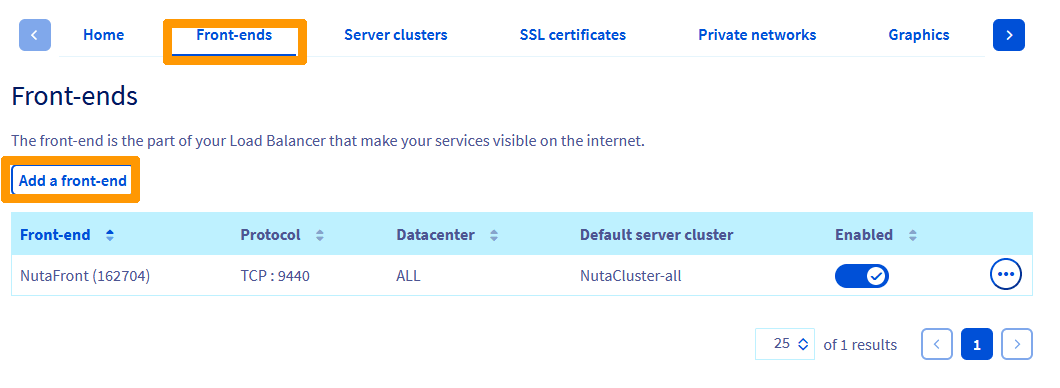
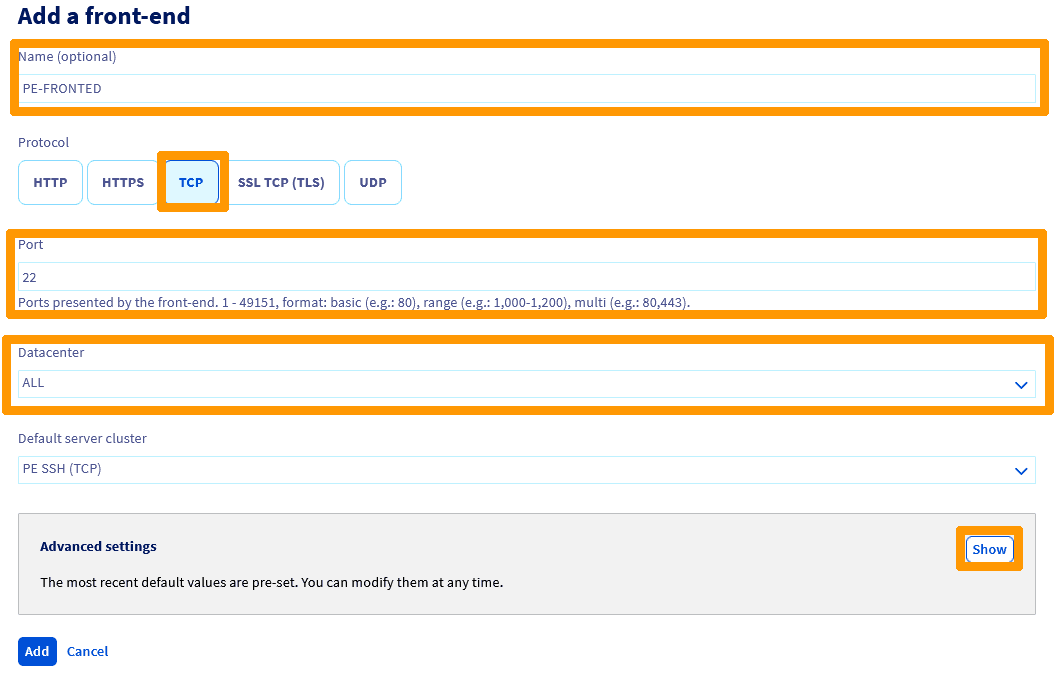
Enter the following information:
- Name(Optional):
PE-FRONTEND. - Protocol: TCP
- Port:
22. - Datacenter:
ALL.
Then click Show.
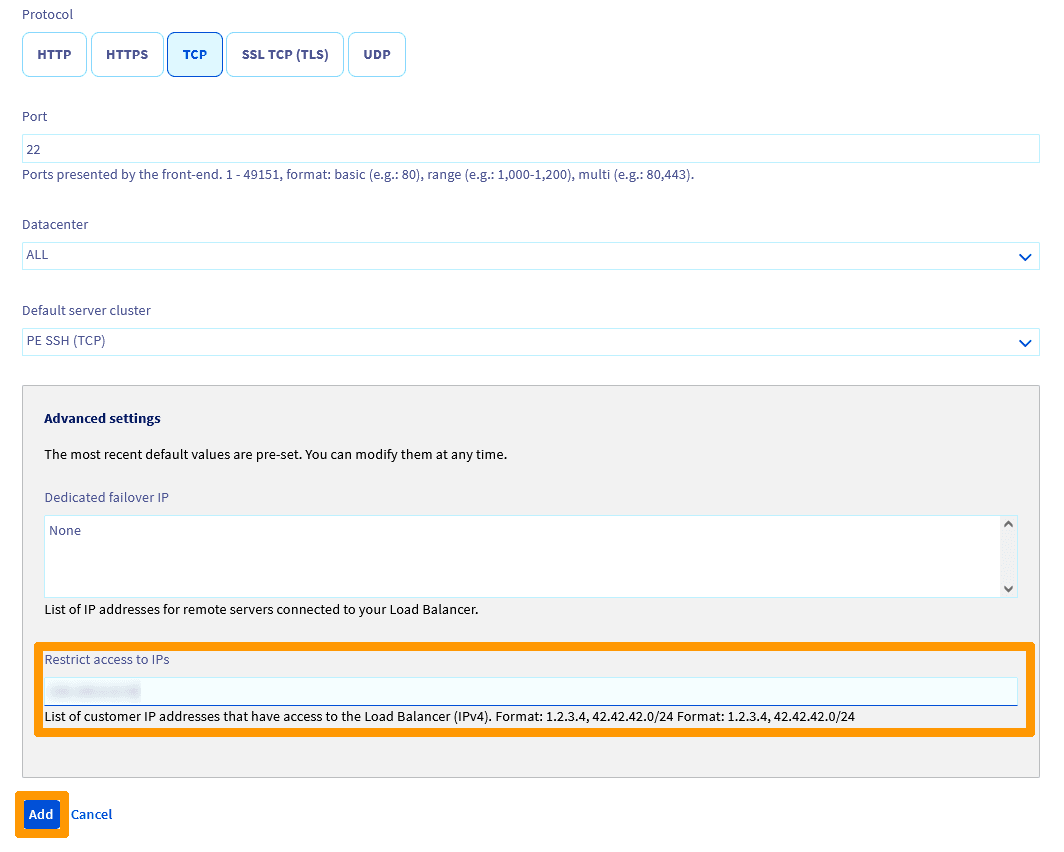
In the Restrict access to IPs option, enter the network or IP address that will have access permission to Prism Element in SSH with this format XX.XX.XX.XX or XX.XX.XX.XX/XX.
Click Add.
Click Apply configuration to the right of the warning message Your load balancer configuration has not been applied in all datacenters.
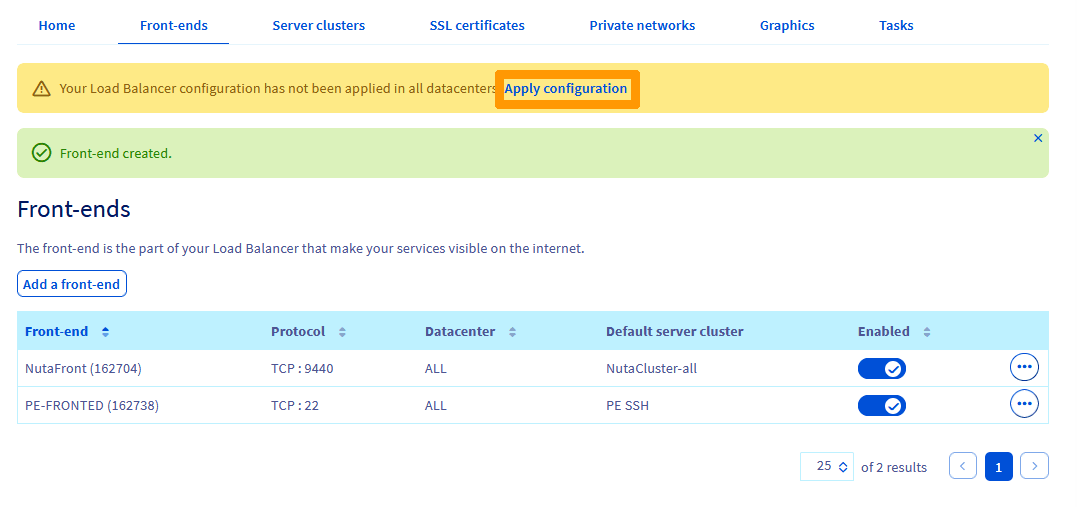
Select your site and click Apply configuration.
Select your site again and click on Apply configuration.
Go to the Tasks tab to see the progress of the configuration change.
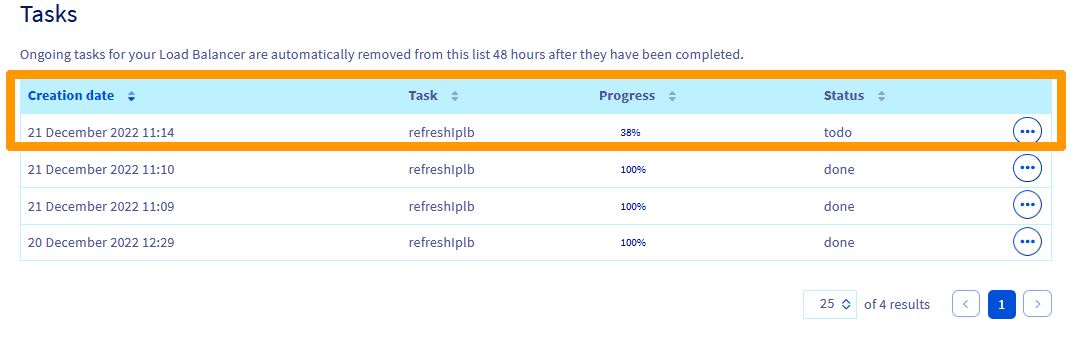
You have finished configuring the Load Balancer. You can now log in via SSH to the Prism Element console, with this information :
or:
Replacing the Prism Central virtual machine with an X-Large machine
Run these commands after you have modified the following information:
- \<Prism-Central-Private-IP-address>: Private IP address of Prism Central
- \<Prism-Element-Admin-Password>: Prism Element admin account password
- \<Prism-Central-VM-Name>: Prism Central VM name
Next, connect to an AHV host in the cluster with this command.
Run this command to retrieve the UUID of your default storage, once you have modified the following information:
- \<Prism-Element-Password>: Prism Element admin account password.
- \<Prism-Element-IP>: Private IP address of Prism Element.
Next, run this other command to retrieve the UUID of your cluster’s administration network, with the same elements you modified for the previous command:
Create a file named PrismCentralXlarge.json with the information below:
Replace these items in the file:
- \<Prism-Central-Password>: Password for the future Prism Central virtual machine.
- \<Default-Container-UUID>: UUID of the default storage retrieved earlier.
- \<Prism-Central-Private-IP-Address>: Private IP address of Prism Central.
- \<Nutanix-Network-Admin-UUID>: Nutanix Cluster Administration Network UUID.
- \<Nutanix-Network-Admin-mask>: Nutanix cluster administration network subnet mask.
- \<Nutanix-Network-Admin-Gateway>: Nutanix cluster administration network default gateway.
Run this command to deploy your Prism Central virtual machine in X-Large mode, once you changed these settings:
- \<Prism-Element-Password>: Prism Element admin account password.
- \<Prism-Element-Private-IP-Address>: Private IP address of Prism Element.
NOTE: Wait thirty minutes for this virtual machine to deploy.
Enter the following command by editing these options to create a pcregister.json file:
- \<Prism-Central-Password>: Prism Central Password.
- \<Prism-Central-Private-IP-Address>: Private IP address of Prism Central.
Run this command to save Prism Element into your new Prism Central virtual machine, after changing these settings:
- \<Prism-Element-Password>: Prism Element admin account password.
- \<Prism-Element-Private-IP-Address>: Private IP address of Prism Element.
Prism Element is now saved in the new Prism Central.
Migration of Prism Central to three virtual machines
Now that Prism Element is attached to your Prism Central virtual machine, you will connect to Prism Central and extend Prism Central to three virtual machines.
Log in to Prism Central with the URL provided during deployment.
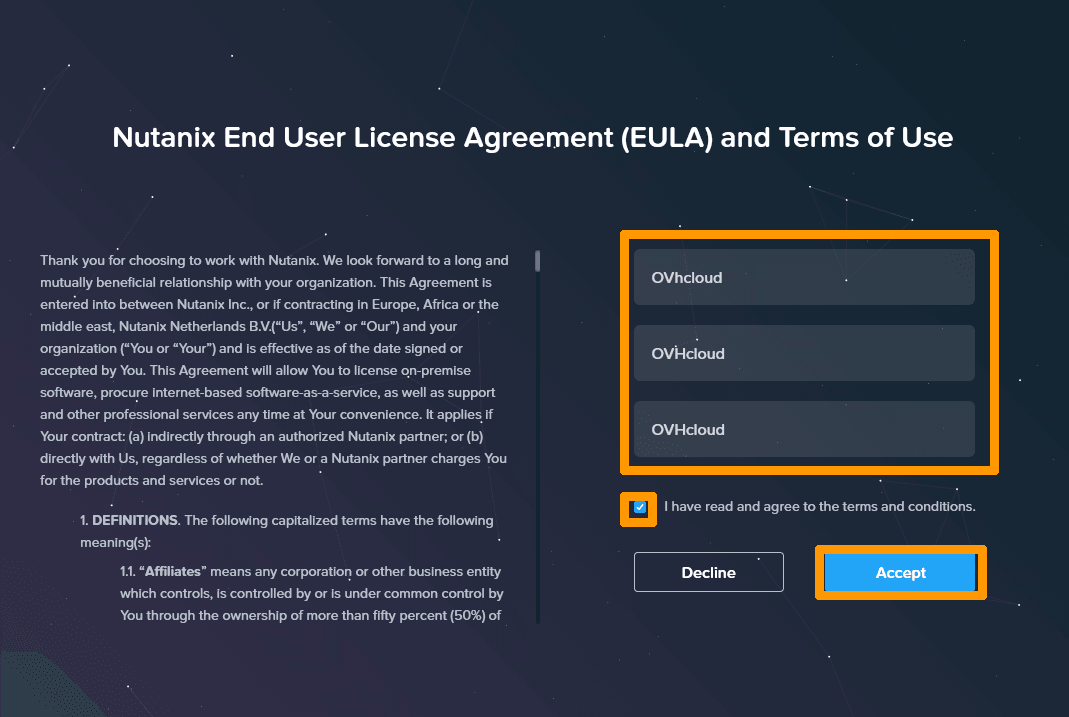
Enter your Personal Information, check the box I have read and agree to the terms and conditions and click Accept.
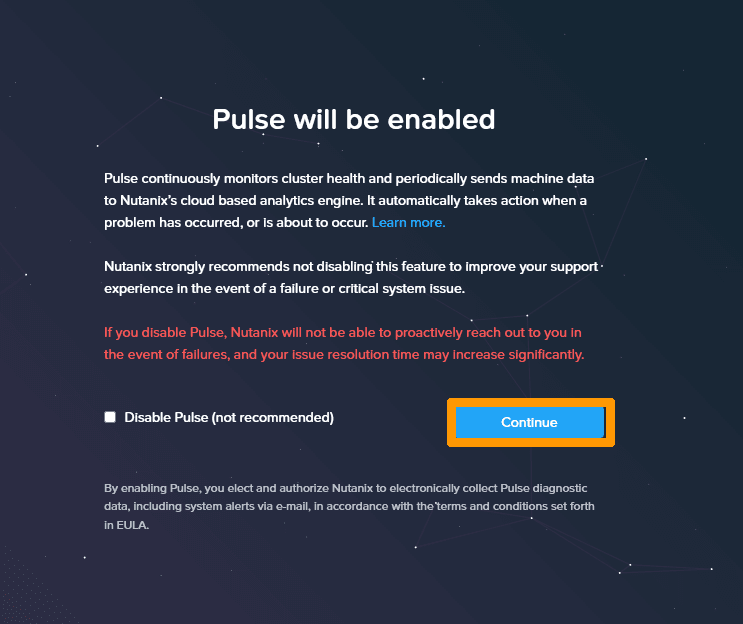
Click Continue when prompted to activate Pulse.
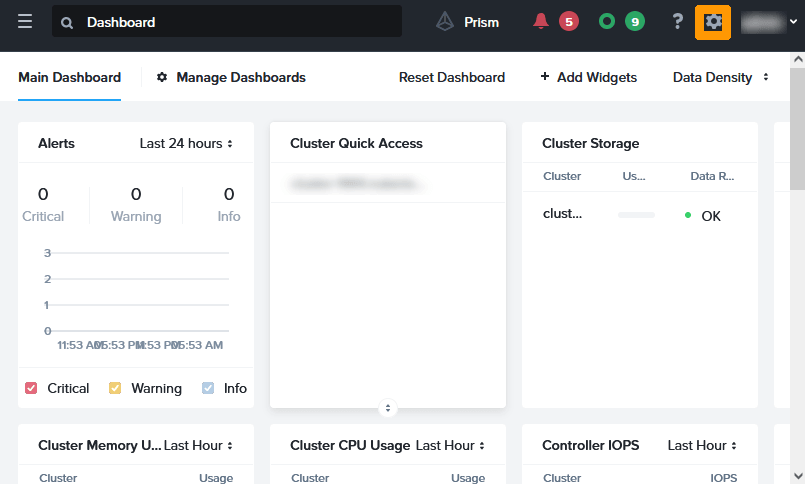
Click the Prism Central configuration gear icon.
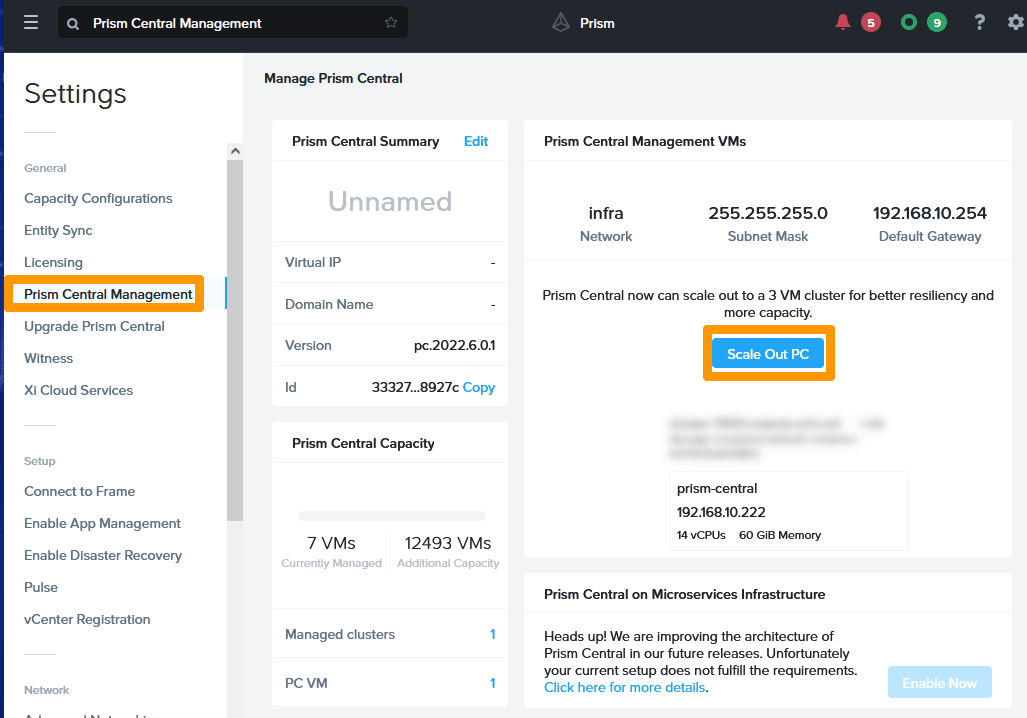
Click Prism Central Management to the left and click Scale Out PC.
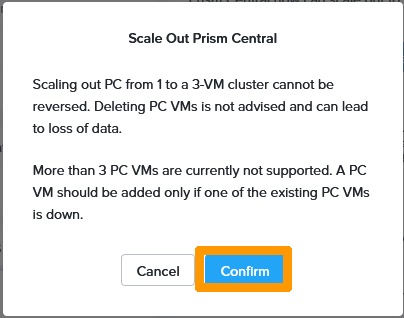
Click Confirm.
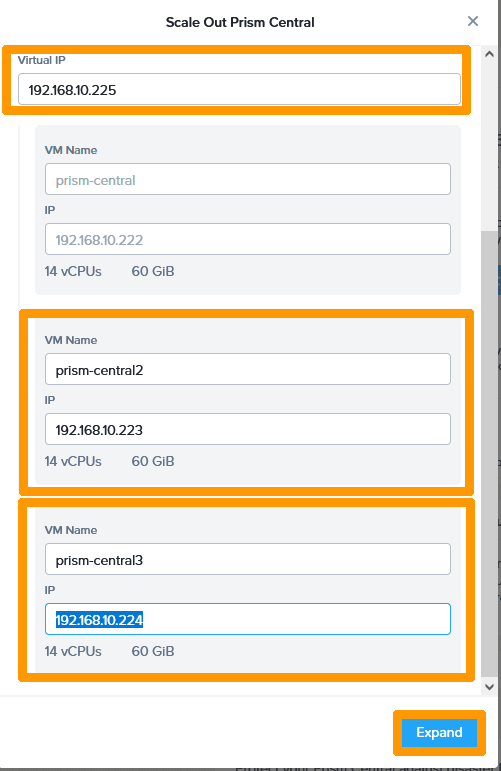
The expansion of Prism Central requires three additional private IP addresses, one for the virtual IP address and two for the new virtual machines.
Scroll through the window and enter this information:
- Virtual IP: Prism Central virtual private IP address.
- VM Name: Name of the second Prism Central virtual machine.
- IP: Private IP address of the second virtual machine.
- VM Name: Name of the third Prism Central virtual machine.
- IP: Private IP address of the third virtual machine.
Click Expand.
NOTE: Please wait while the expansion is in progress; it may take around thirty minutes.
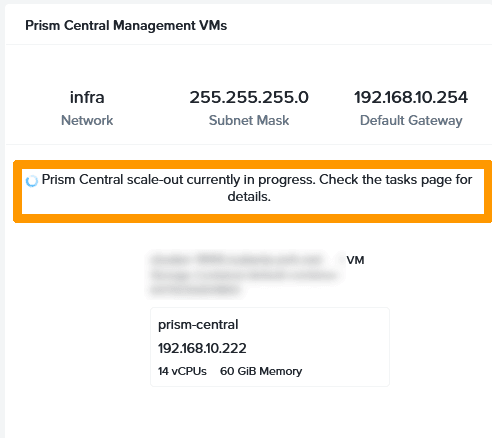
When the expansion is complete, the configuration appears in Prism Central with one virtual IP address and three IP addresses for each virtual machine.
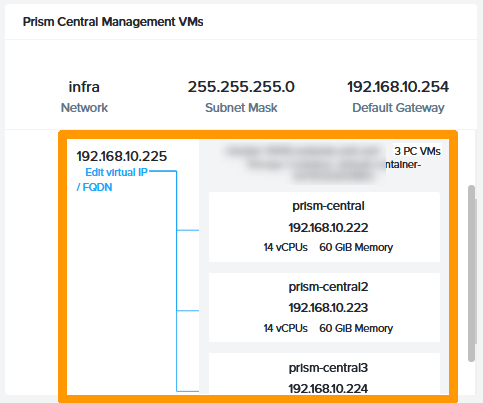
Modifying the Load Balancer to point to the Prism Central virtual IP address
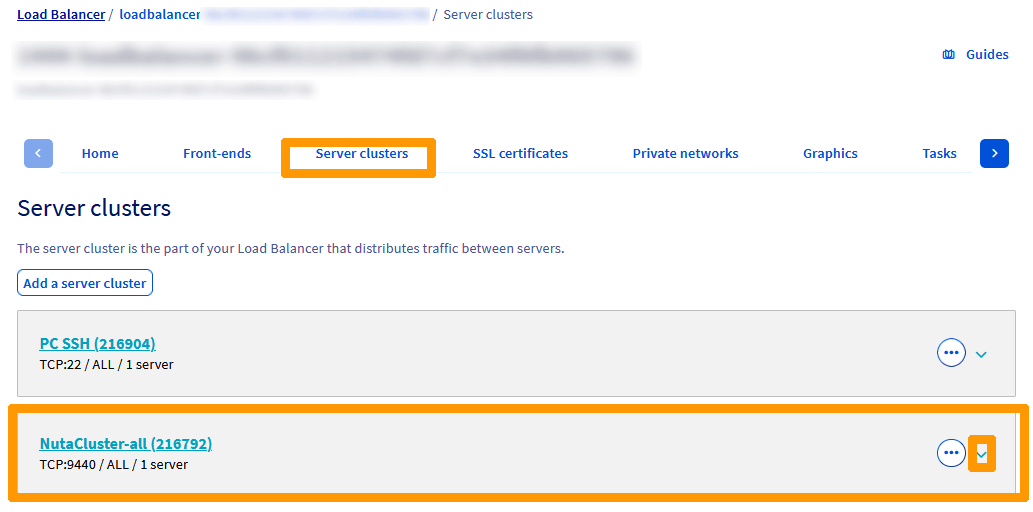
We will replace the IP address of the Prism Central URL with the new virtual IP address through the OVHcloud Load Balancer configuration.
Go to the Server clusters tab, go to NutaClusterAll, and click on the down arrow icon to view the servers.
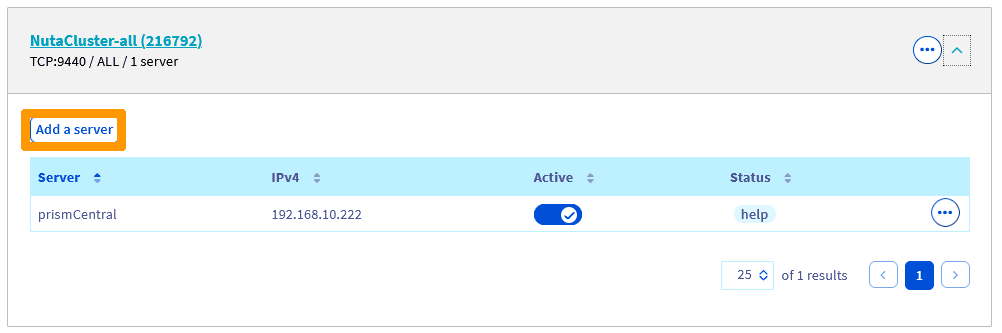
Click Add Server.
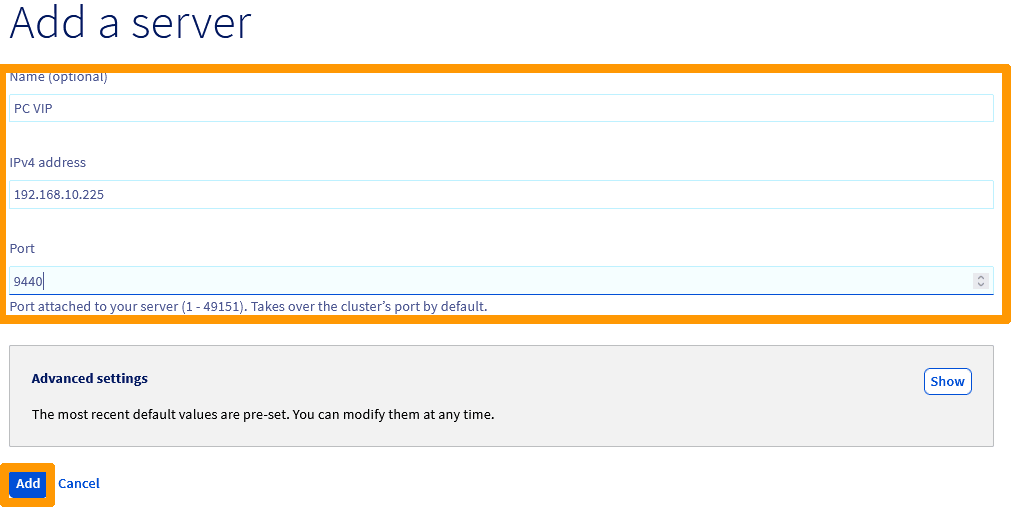
Enter this information :
- Name (Optional): PC VIP as Prism Central Virtual IP address.
- IPv4 address: Virtual Private IP address
- Port: 9440.
Click Add.
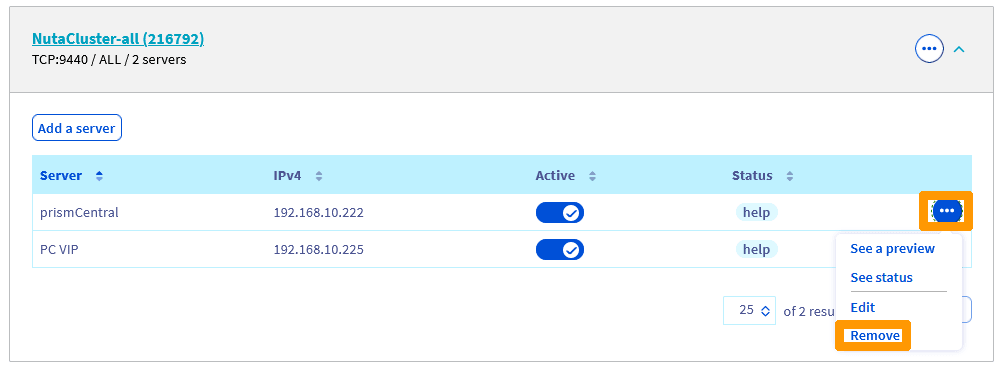
Click the ... configuration icon to the right of the prismCentral server and choose Remove from the menu.
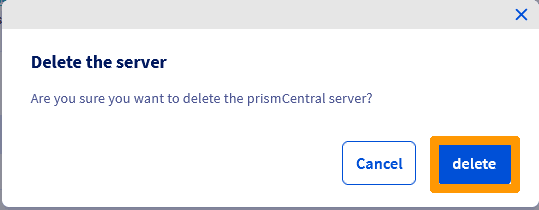
Click delete.
Click Apply Configuration.

Select your location and click Apply Configuration.
Select your location again and click Apply Configuration.
Go to the Tasks tab to see the progress of the changes. The task will be completed when its status is done.
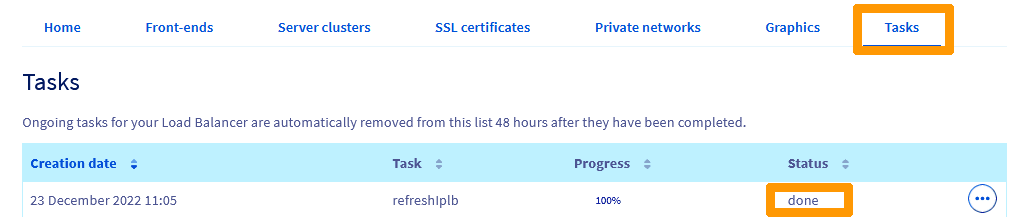
You now have Prism Central in X-Large mode with three virtual machines.
Go further
Browse all the Nutanix guides.
Browse the rest of the OVHcloud US documentation for guides on our other products and services.
Learn more about Nutanix on OVHcloud on the OVHcloud US website.