
How to create and configure an additional disk on an instance
You can create additional disks for your Public Cloud instances. This can be useful in cases where:
- You want to increase your storage capacity without changing the instance model.
- You want to have highly available, high-performance storage.
- You want to move your storage and data to another instance.
- You want to prepare the environment if you want to use Terraform.
Requirements
- A Public Cloud instance in your account
- Administrative (sudo) access to your instance via SSH (Linux) or RDP (Windows)
OVHcloud Control Panel Access
- Direct link: Public Cloud Projects
- Navigation path:
Public Cloud> Select your project
Instructions
The different types of volumes
OVHcloud offers three types of Block Storage volumes, each tailored to specific needs in terms of performance, capacity, and cost. These solutions enable you to attach persistent storage volumes to your instances, guaranteeing a high level of reliability and availability.
For more information about the types of volumes, please visit our website.
You can no longer order High Speed (Gen1) volumes via the OVHcloud Control Panel. They have been replaced by High Speed Gen2 volumes at the same price, with better performance for volumes above 100 GB. High Speed volumes remain available via the API, Terraform, and OpenStack.
Existing High Speed volumes remain supported. You can also change your Block Storage volume type to migrate them to Gen2.
All volume types are also available in an encrypted version (LUKS). These volumes ensure data confidentiality without impacting performance. They are available through the OVHcloud Control Panel as well as via the tools presented in the next section, by specifying the types <volume_type>-luks.
Adding a new volume
Via the OVHcloud Control Panel
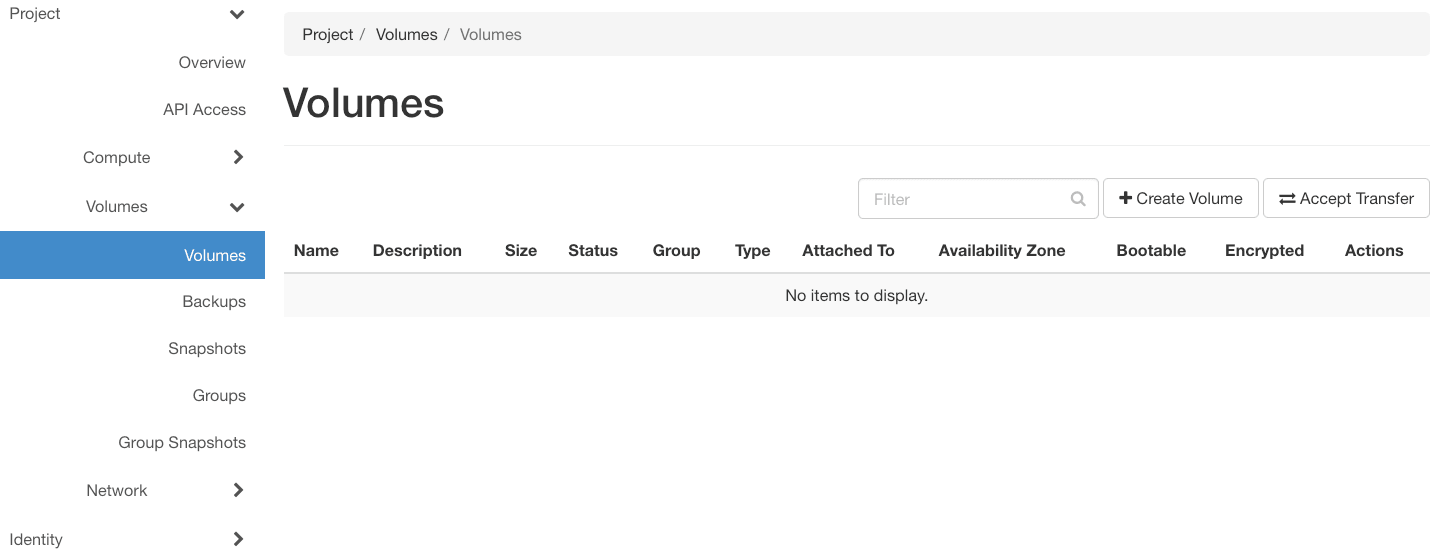
Open Block Storage in the left-hand menu under Storage and click Create a volume.
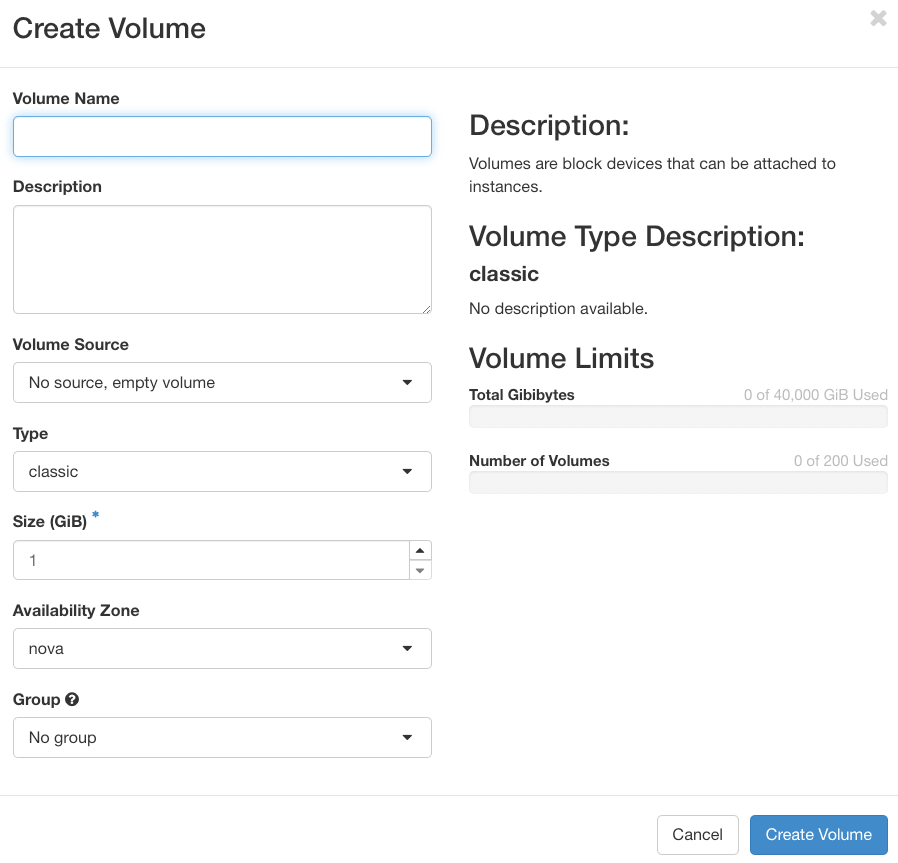
On the following screen, choose your configuration settings:
Select a region: Select the location for your block storage volume. For more information about Local Zones, see this guide.
NOTE: Your volume must be created in the same region as the instance to which you wish to attach it. If you create it in another region, you can delete it and recreate it in the correct region.
Volume type: Choose your volume type and select your encryption level. More information about the types of volumes is available on our website.
From here, complete your volume's configuration by selecting the Volume capacity and Volume name, and then clicking Create the volume.
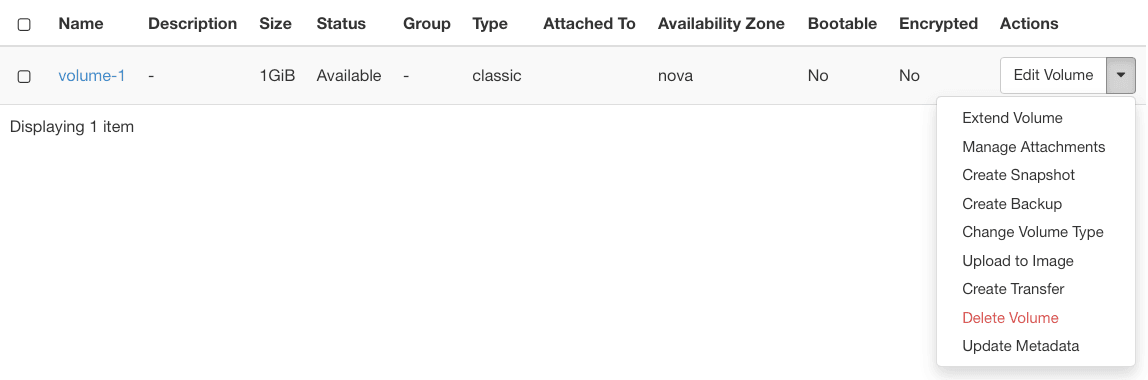
Once your new disk is available, click the more options ... button to the right of the disk and select Attach to instance.
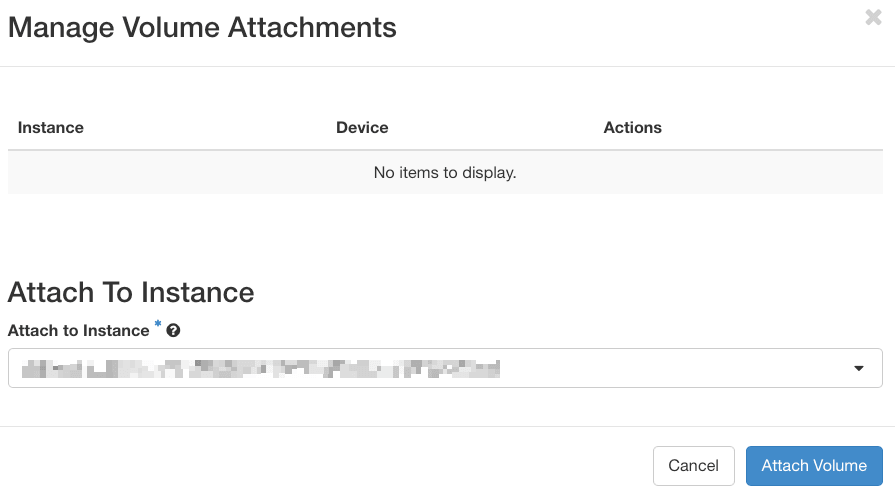
In the pop-up window, choose an available instance and click Confirm. If no instances are available it is because you do not have an instance in a region matching that of the additional disk.
The process may take a few minutes to complete.
NOTE: Navigating away from the page during creation may interrupt the process.
Configuring the new disk
The examples below presume you are logged in as a user with elevated permissions.
Using Linux
Establish an SSH connection to your instance, then use the command below to list the attached disks.
sda in this example refers to the default disk of the instance. The additional disk will then be labeled sdb.
Create a partition on the additional disk using the commands below.
If your additional disk is less than 2TB:
If your additional disk is larger than 2TB:
Format partition sdb1:
Mount the partition:
Verify the mount point:
The mount is not persistent after reboot. To automate mounting, edit the fstab file.
Retrieve the UUID of the new volume:
Open /etc/fstab:
Add the line below, replacing the UUID with your own:
Save and exit the editor. The disk will mount automatically after each reboot.
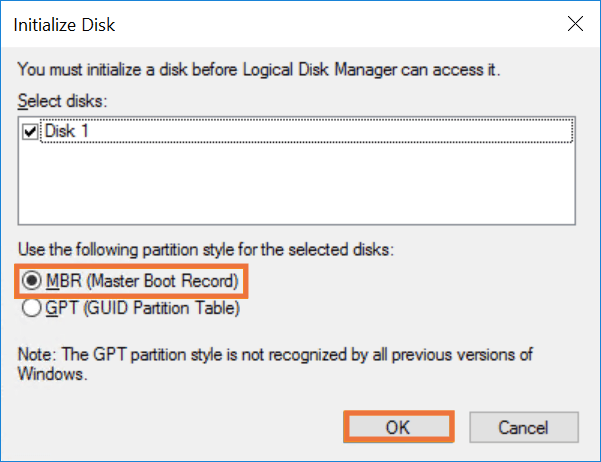
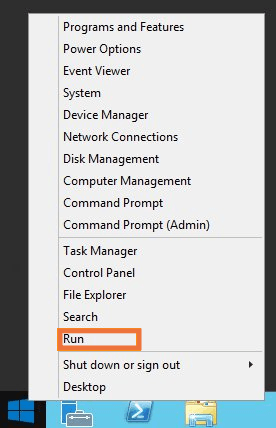
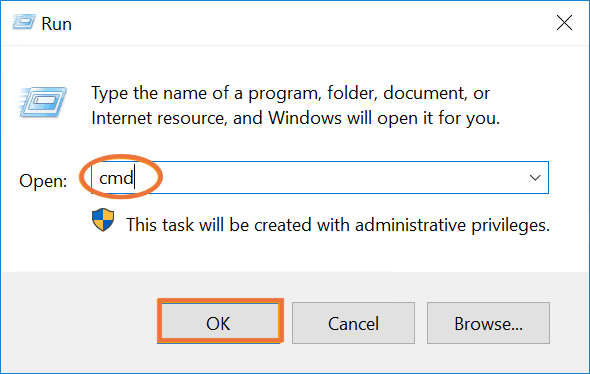
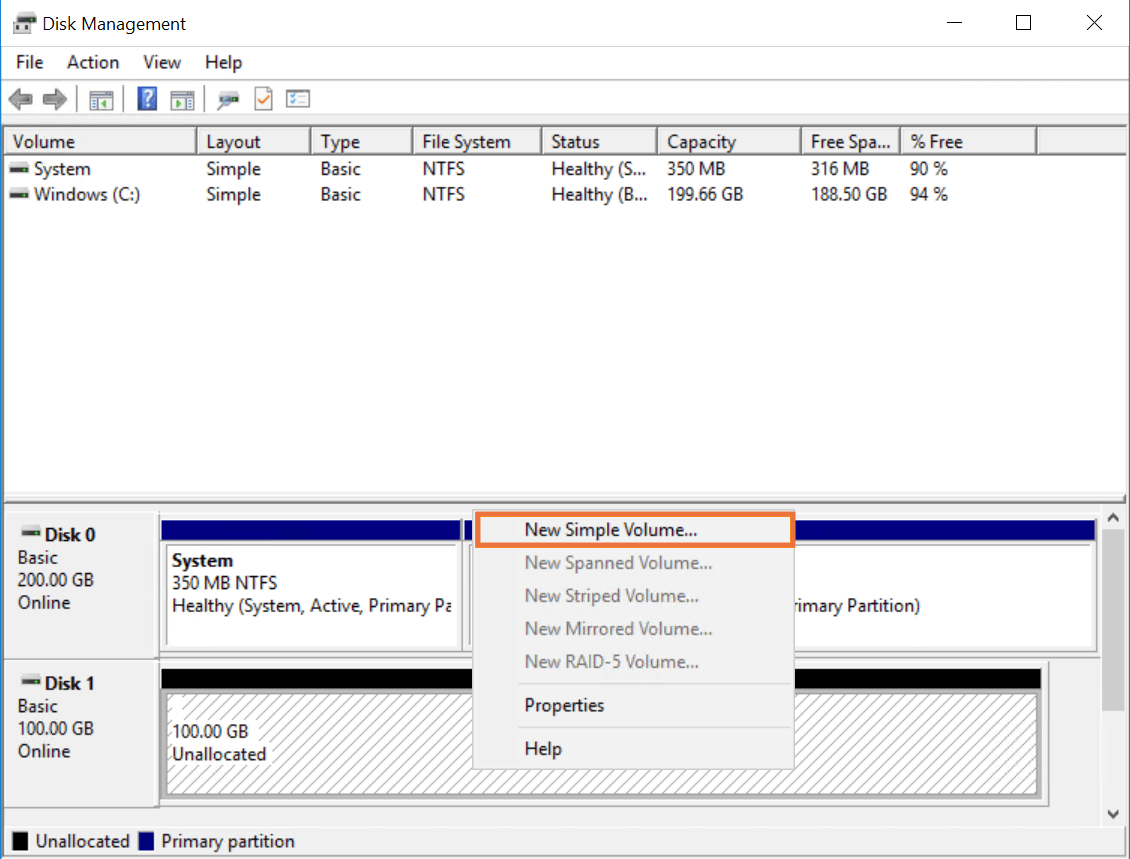
Detach a volume
Before detaching a volume, unmount in the operating system.
NOTE: An error message may appear if you have software or processes running on the additional disk. In this case, it is recommended to stop all processes before continuing.
Here is how to unmount the volume from the operating system before detaching it from the instance:
On Linux
Connect via SSH, then list the attached disks.
Unmount the partition:
Remove the device ID from the fstab; otherwise the partition remounts after reboot.
Save and exit the editor.
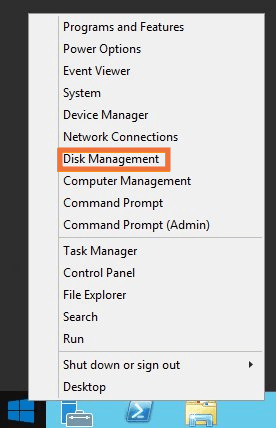
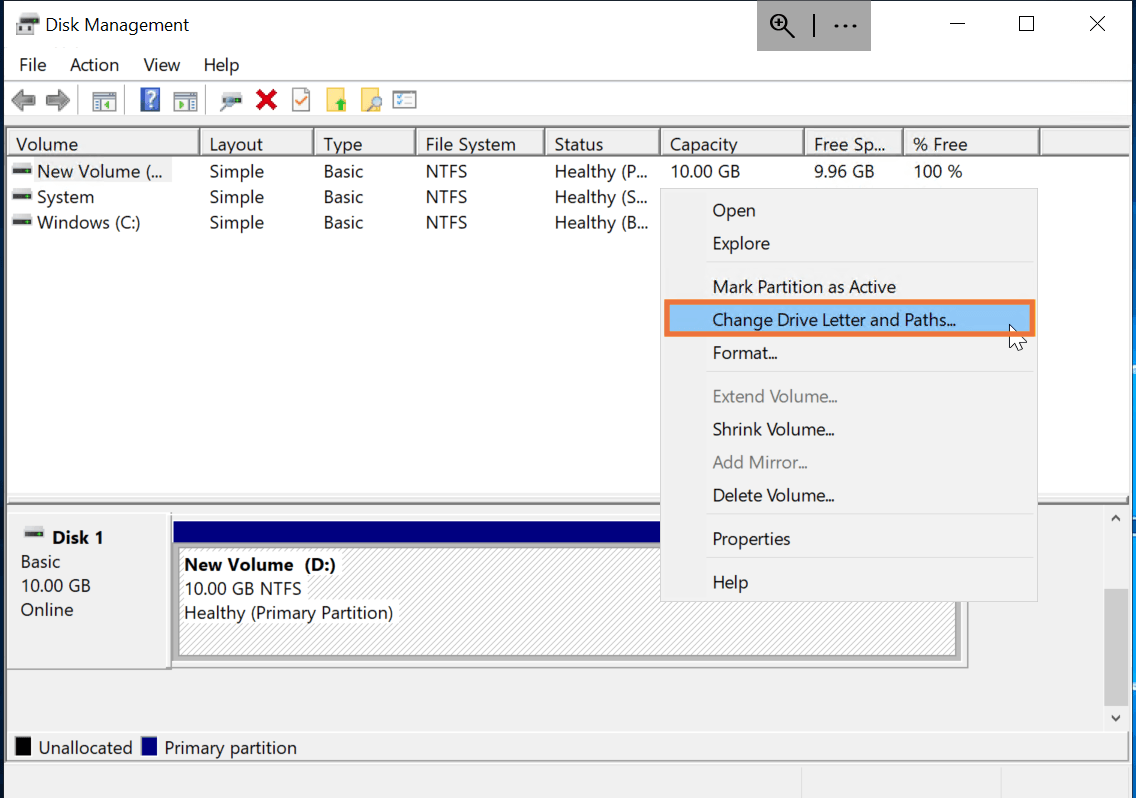
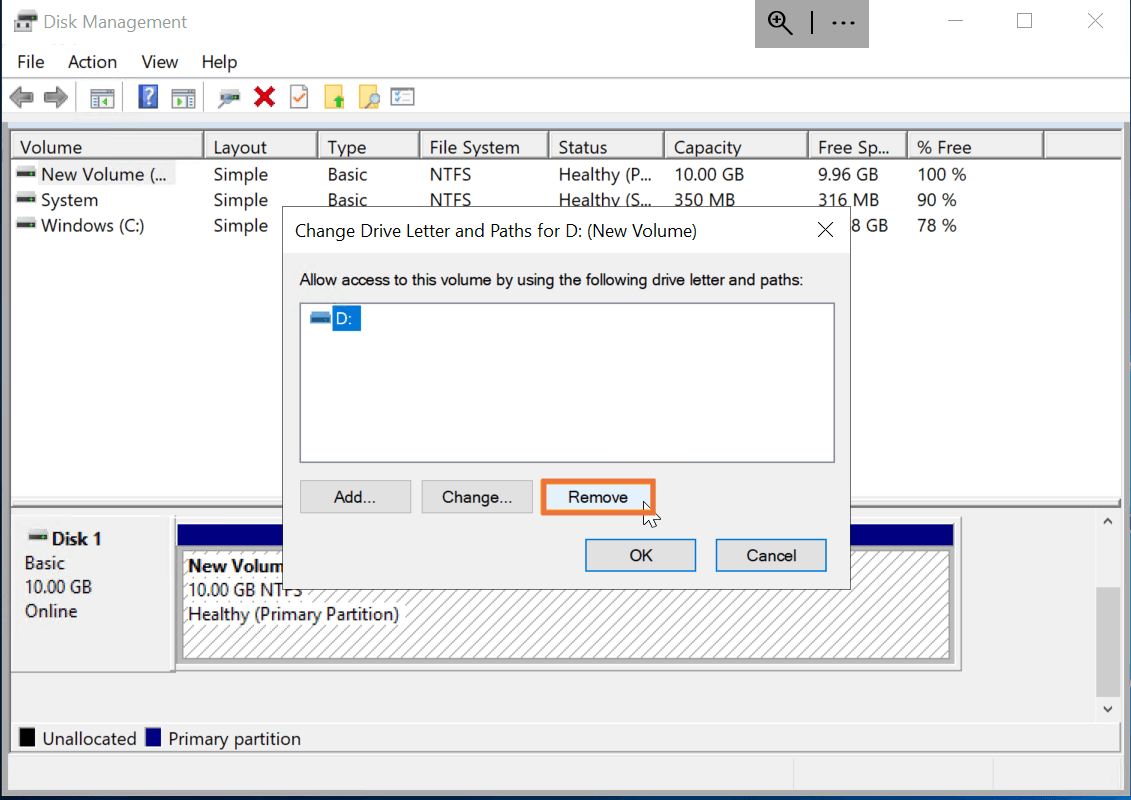
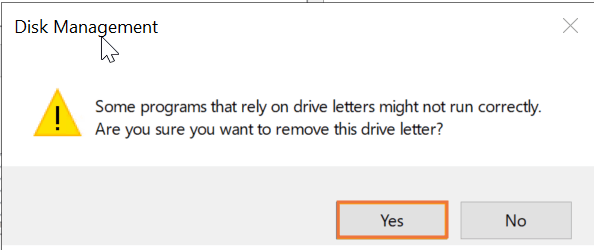
Finally, we will detach the volume from the instance:
Via OVHcloud Control Panel
Open Block Storage in the left-hand menu under Storage.
Click the more options ... button next to the corresponding volume and select Detach from instance.
NOTE: You can also cancel your Block Storage volume using this menu.
Click Confirm in the pop-up window to start the process.
Go further
Browse all the Block Storage guides.
Browse the rest of the OVHcloud US documentation for guides on our other products and services.
Learn more about Block Storage on the OVHcloud US website.