
How to use automated backups on a VPS
Learn about the Automated backup option for your OVHcloud VPS.
The Automated backup option for VPS offers a convenient way to have complete system backups available from the OVHcloud Control Panel without having to connect to the server to create and restore them manually. Additionally, this feature allows you to mount a backup and access its files remotely.
Before applying a backup strategy, we recommend consulting the product page for pricing comparisons and further details.
Requirements
- Access to the OVHcloud Control Panel
- A Virtual Private Server in your OVHcloud account
- Administrative access (sudo) via SSH to your VPS (optional)
Content Overview
When you order a VPS, a single daily Automated backup is included as a free service option. This standard backup option allows you to:
- Mount and restore the daily backup.
- Set the time of day this backup will be created.
For more flexibility with your backups, you can activate the Premium Automated Backup option.
NOTE: This feature is currently unavailable for Virtual Private Servers in Local Zones.
Instructions
From the OVHcloud Control panel, navigate to the Virtual private servers page via the Bare Metal Cloud menu.
How to upgrade to Premium Automated Backup
Upgrading to Premium Automated Backup enhances your Automated backup option to a 7-day rolling daily backup. This allows you to revert to older backup versions compared to the 24-hour rotation of the standard option.
After selecting your VPS, click the Automated backup tab and then:
Order a premium backup ->(for services ordered after August 7, 2025)Enable Automated Backup(for services ordered before August 7, 2025)
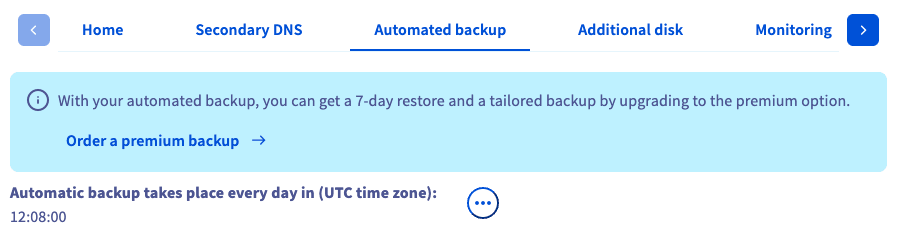
Take note of the pricing information, then click Order. You will be guided through the order process in a separate window
How to configure the backup time
You can change the time of day at which the backup will take place.
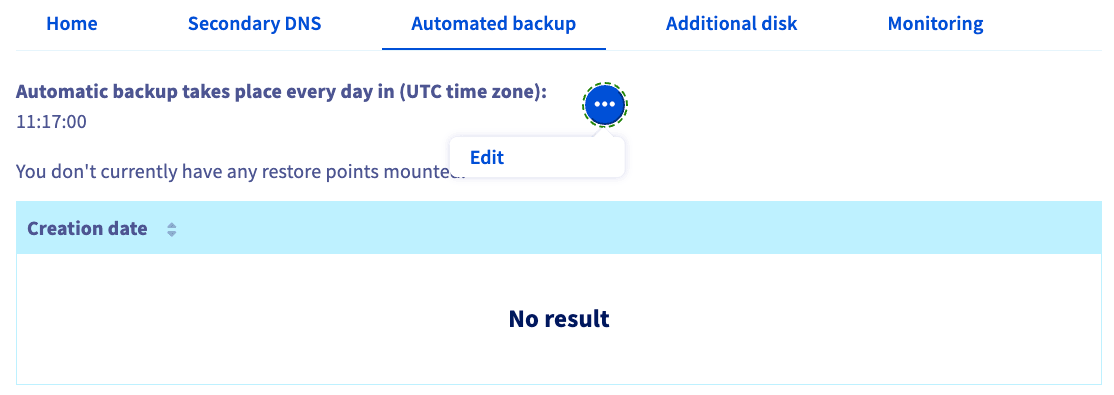
Click on ... above the table and then on Edit.
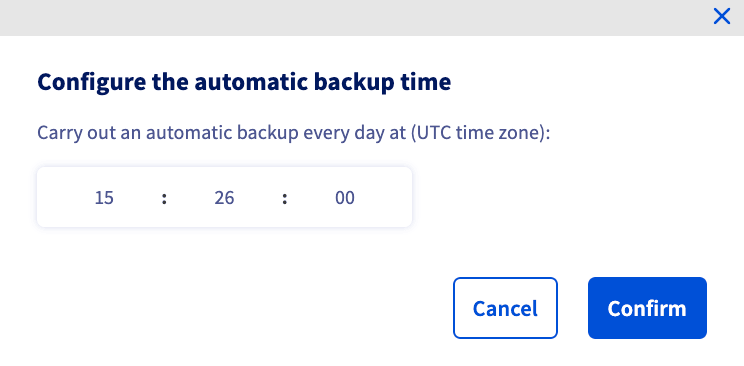
In the window that appears, edit the time of day (24-hour UTC standard). Click on Confirm.
Once confirmed in the Control Panel, the change will come into effect after 24 to 48 hours.
How to restore a backup from the OVHcloud Control Panel
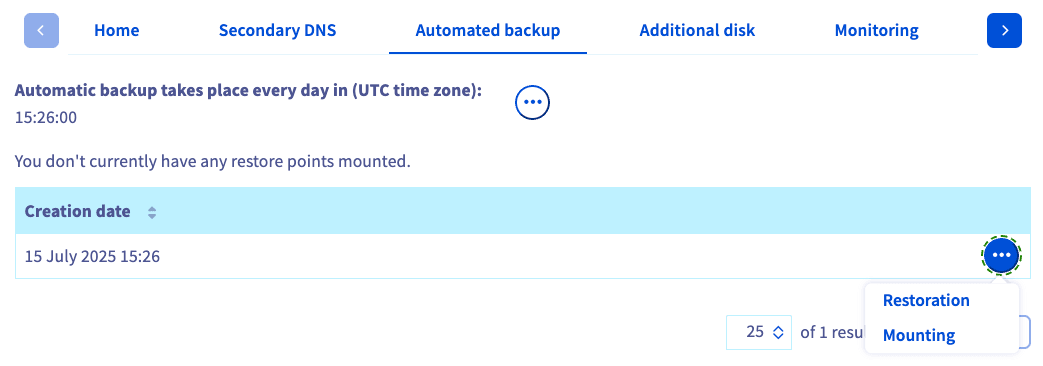
After selecting your VPS, click on the Automated backup tab. Click the more options ... button next to the backup you would like to restore and select Restoration.
If you recently changed your root password, make sure to tick the option "Modify the root password on restoration" in the pop-up window to preserve your current root password and click on Confirm. You will receive an email as soon as the task is complete. The restoration might take a while, depending on the disk space used.
WARNING: Please note that the automated backups will not include your additional disks.
How to mount and access a backup
It is not necessary to completely overwrite your existing service with a restoration. The "Mounting" option allows you to access the backup data to retrieve your files.
NOTE: OVHcloud provides services for which you are responsible for their configuration and management. You are therefore responsible for their proper functioning.
This tutorial is designed to help you as much as possible with common tasks. If you are having difficulty performing these actions, please contact a specialized service provider. OVHcloud cannot provide you with technical support in this regard.
Click on ... next to the backup you need to access and select Mounting.
When you use this option, a read-write copy of the backup is created and mounted. The original backup will remain available unchanged for future restorations.
After the process is completed, you will receive an email. You can now connect to your VPS and access the partition where your backup is located.
Using Secure Shell
First, connect to your VPS via SSH.
You can use the following command to verify the name of the newly attached device:
Here is a sample output of this command:
In this example, the partition containing your backup filesystem is named "sdb1". Next, create a directory for this partition and define it as the mountpoint:
You can now switch to this folder and access your backup data.
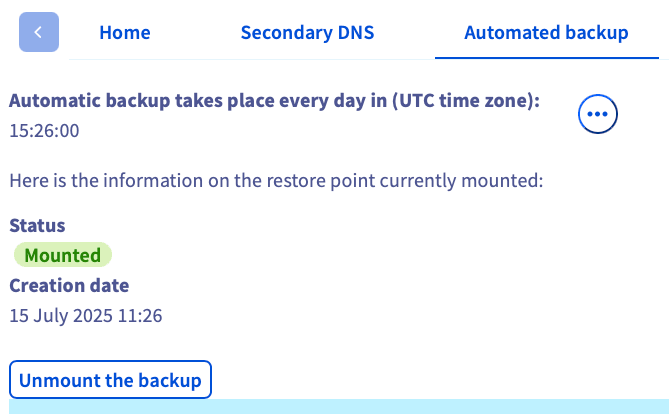
Remember to unmount the backup once you have finished using it. Click on the button Unmount the backup in the Automated backup tab, then confirm in the popup window.
Best practice for using Automated backups
The Automated Backup functionality is based on VPS snapshots. We recommend that you follow the steps below to prevent any issues before using this option.
Configuring the QEMU agent on a VPS
Snapshots are instantaneous images of your running system (“live snapshot”). To ensure the availability of your system when the snapshot is created, the QEMU agent is used to prepare the filesystem for the process.
The required "qemu-guest-agent" agent is not installed by default on most distributions. Moreover, licensing restrictions may prevent OVHcloud from including it in the available OS images. Therefore, it is best practice to verify and install the agent in case it is not activated on your VPS. Connect to your VPS via SSH and follow the instructions below, depending on your operating system.
Debian-based distributions (Debian, Ubuntu)
Use the following command to check whether the system is properly set up for snapshots:
The expected output is:
If the output is different (for example, "No such file or directory"), install the latest version of the package:
Reboot the VPS:
Start the service to ensure it is running:
Troubleshooting automated backups
Aborting a snapshot
If your scheduled backups are causing downtime on your VPS, you can cancel the backup using the following API call.
Uninstalling the QEMU agent
NOTE: On Windows VMs, QEMU is not installed by default, so no action is required.
If the QEMU agent is installed on your OS by default and you are experiencing downtime during your automated backups, you can disable QEMU as a troubleshooting step in determining the reason for downtime. Removing these packages will not impact OpenStack or VPS functionality.
To complete this process on Linux, use the following commands.
Identify QEMU packages:
Remove the QEMU packages:
Go further
Browse all the Virtual Private Servers guides.
Browse the rest of the OVHcloud US documentation for guides on our other products and services.
Learn more about VPS on the OVHcloud US website.