
Kafka® - Getting started
Learn how to successfully configure Cloud Analytics with Kafka® via the OVHcloud Control Panel.
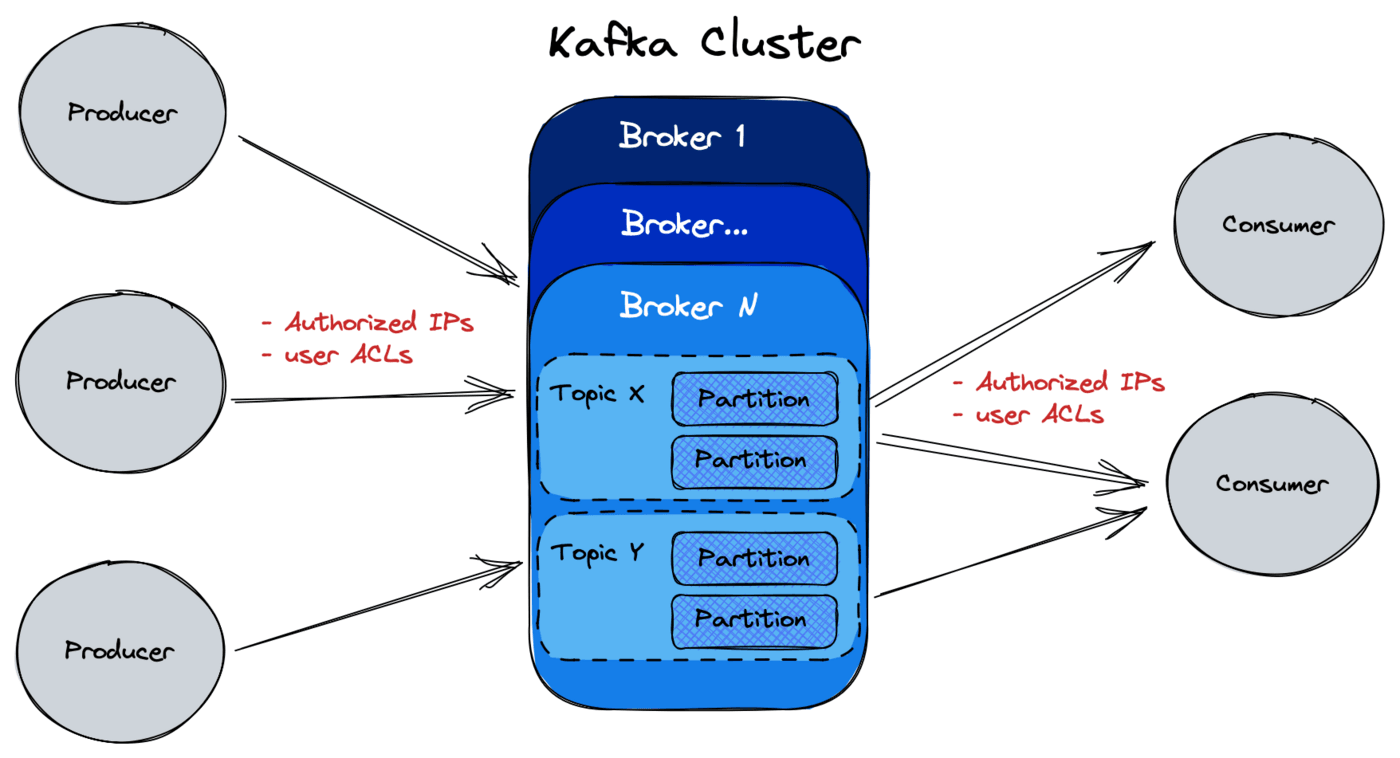
Apache Kafka® is an open-source and highly resilient event-streaming platform with three main capabilities:
- write or read data to/from stream events;
- store streams of events;
- process streams of events.
You can get more information on Kafka® from the official Kafka® website.
Requirements
- Access to the OVHcloud Control Panel
- A Public Cloud project in your OVHcloud account
Instructions
Subscribe to the service
From the OVHcloud Control Panel, navigate to the Data Streaming section via the Public Cloud menu.
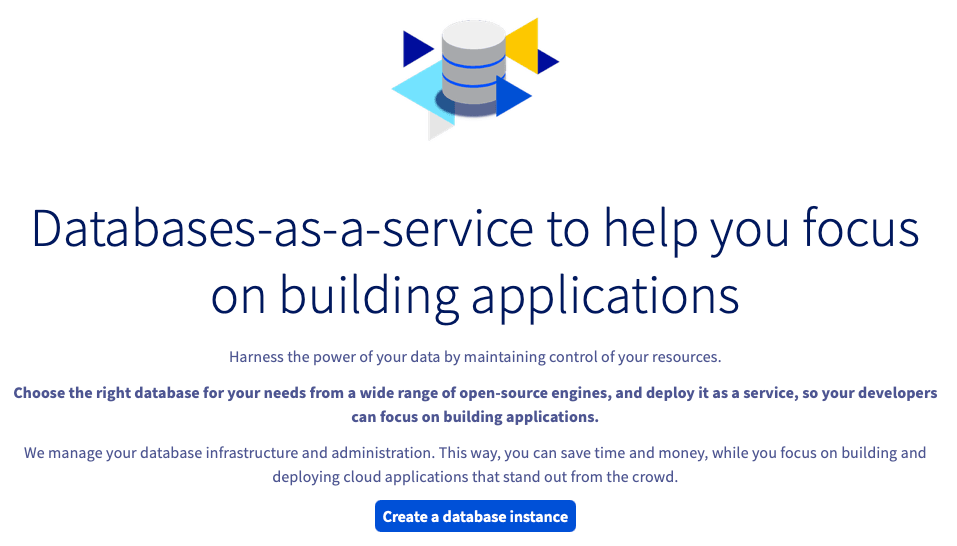
Click the Create a database instance button (click + Create a service if your project already contains services).
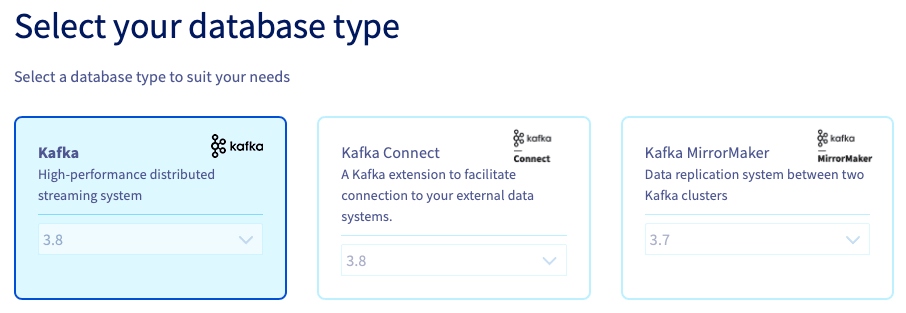
Step 1: Select your database type
Click on the type of engine you want to use and then select the version to install from the respective drop-down menu.
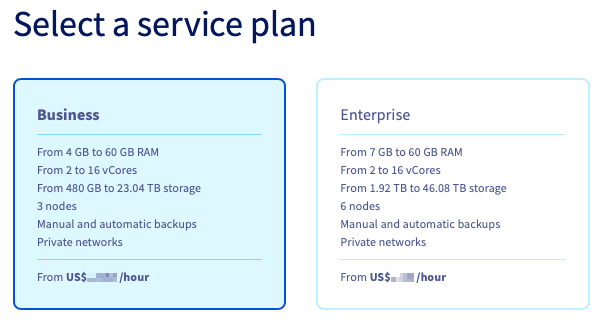
Step 2: Select a service plan
In this step, choose an appropriate service plan. If needed, you will be able to upgrade the plan after creation.
Please visit the capabilities page for detailed information on each plan's properties.
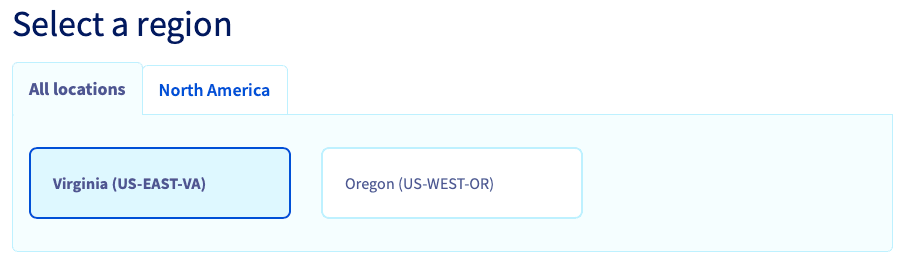
Step 3: Select a region
Choose the geographical region of the datacenter where your service will be hosted.
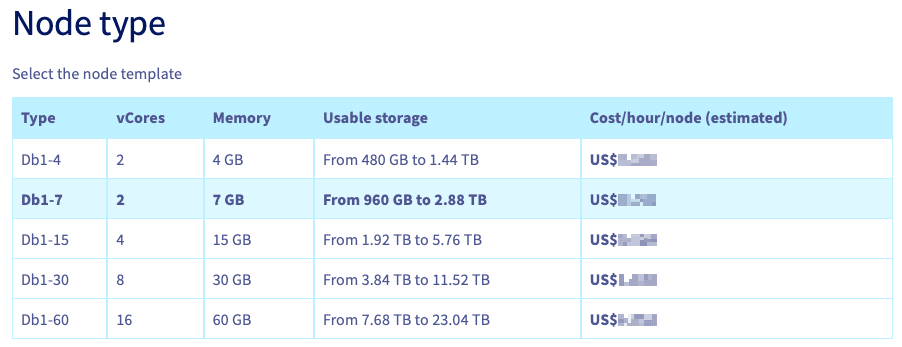
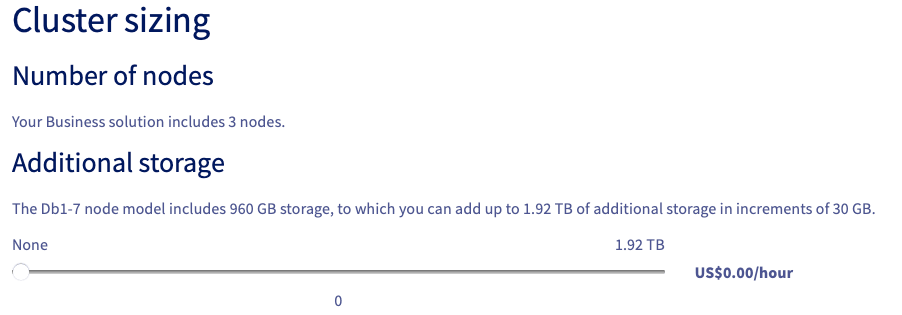
Step 4: Node type and cluster sizing
You can increase the number of nodes and choose the node template in this step. The minimum and maximum number of nodes depends on the solution chosen in step 2.
Please visit the capabilities page for detailed information on hardware resources and other properties of the engine installation.
Take note of the pricing information.
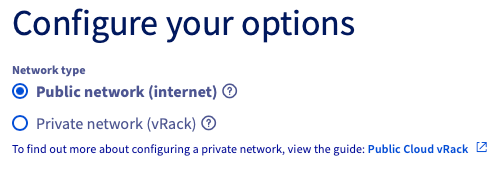
Step 5: Configure your options
You can decide to attach your service to a public or private network.
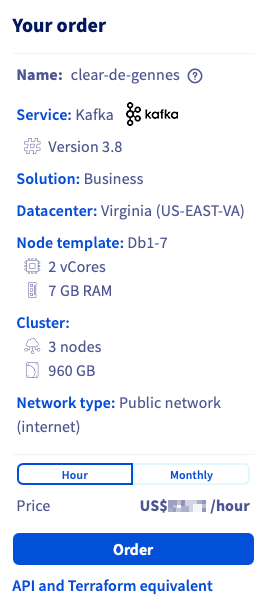
Step 6: Review and confirm
The panel on the right side of the page will display a summary of your order and the OVHcloud API and Terraform equivalents of creating this engine instance.
In a matter of minutes, your new Apache Kafka® service will be deployed. Messages in the OVHcloud Control Panel will inform you when the streaming tool is ready to use.
Configure the Apache Kafka® service
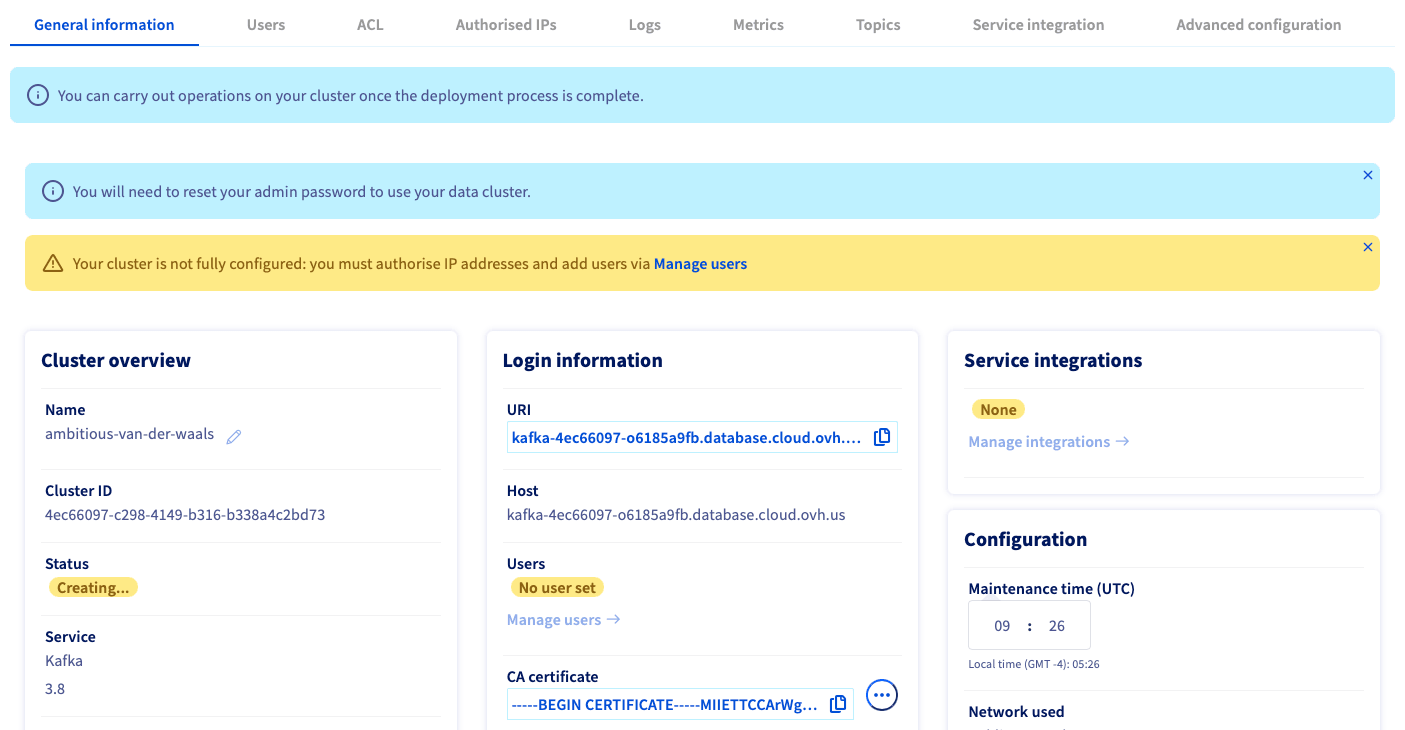
Once the Cloud Analytics with Kafka® service is up and running, you will have to define at least one user and one authorized IP to fully connect to the service (as producer or consumer).
The General information tab should inform you to create users and authorized IPs.
Step 1 (mandatory): Set up a user
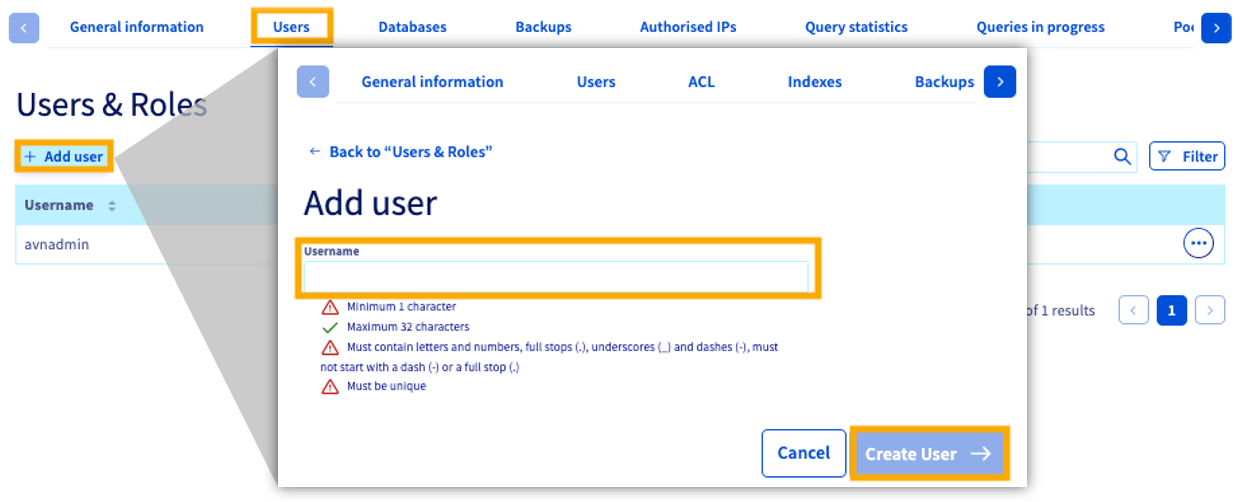
Switch to the Users tab. An admin user is preconfigured during the service installation. You can add more users by clicking the Add User button.
Enter a username, then click Create User.
Once the user is created, the password is generated. Please keep it secure as it will not be shown again.
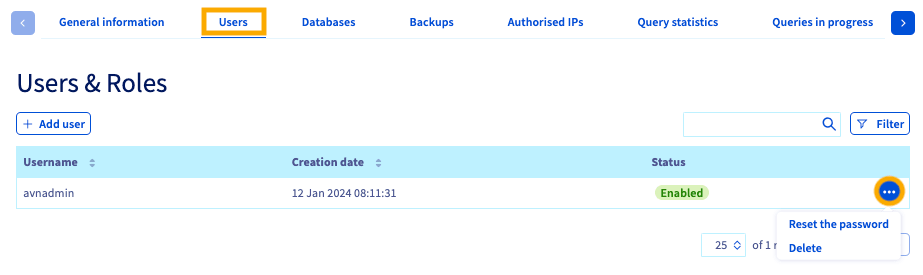
Passwords can be reset for the admin user or changed afterward for other users in the Users tab.
Step 2 (mandatory): Configure authorized IPs
NOTE: For security reasons, the default network configuration doesn't allow any incoming connections. It is thus critical to authorize suitable IP addresses to successfully access your Kafka® cluster.
Switch to the Authorized IPs tab. At least one IP address must be authorized here before you can connect to your service. It can be your laptop IP, for example.
Clicking on + Add an IP address or IP block (CIDR) opens a new window in which you can add single IP addresses or blocks to allow access to the service.
You can edit and remove service access via the more options ... button in the IP table.
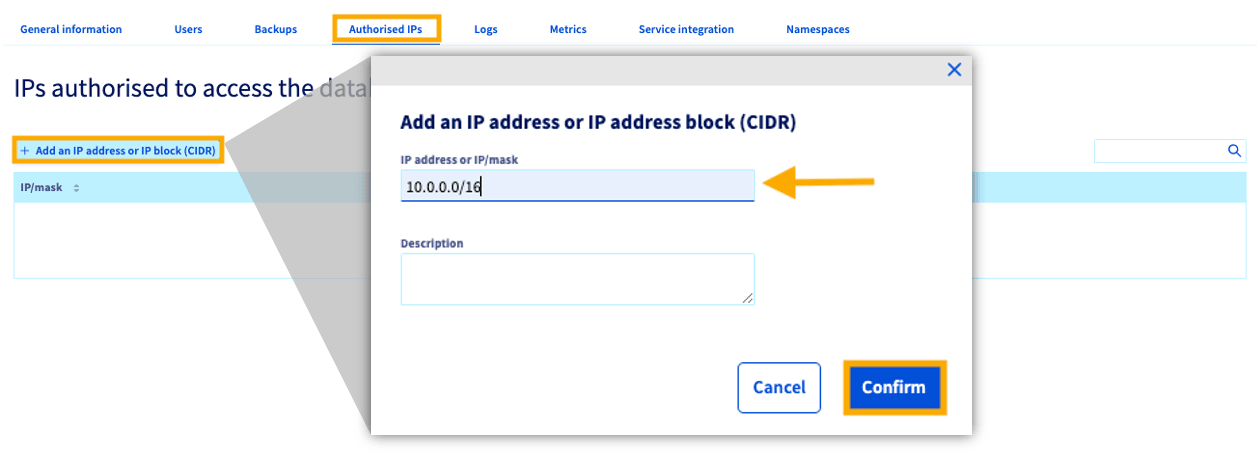
If you don't know how to get your IP, please visit a website like www.WhatismyIP.com. Copy the IP address shown on this website and keep it for later.
Congratulations! Your Apache Kafka® service is now fully accessible!
Optionally, you can configure access control lists (ACL) for granular permissions and create something called topics, as shown below.
Optional: Create Kafka® topics
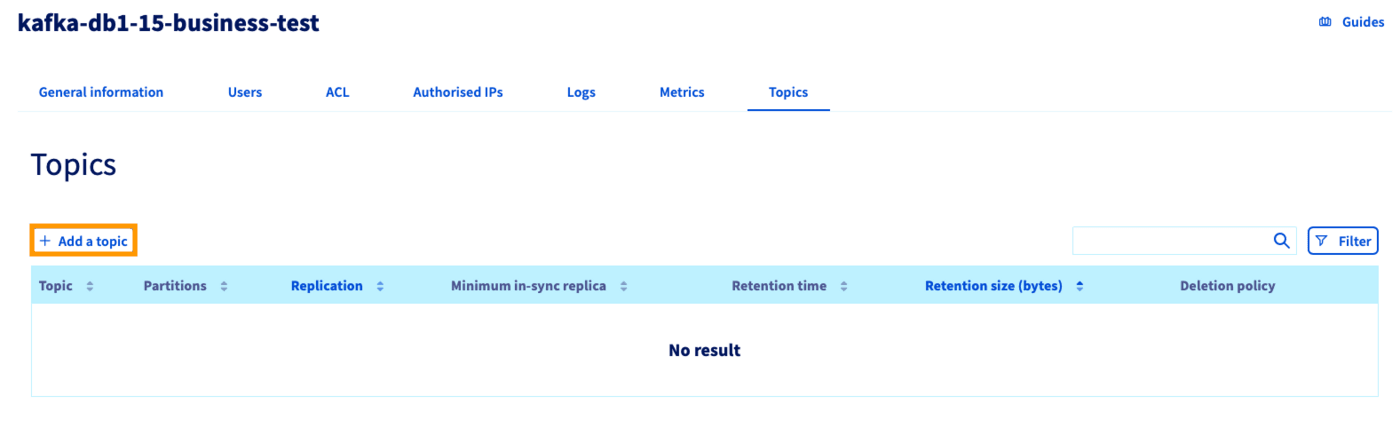
Topics can be seen as categories, allowing you to organize your Kafka® records. Producers write to topics and consumers read from topics.
To create Kafka® topics, click on the Add a topic button:
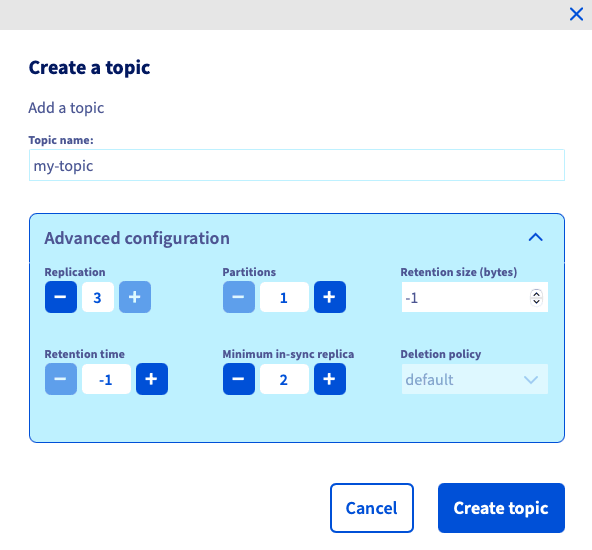
In advanced configuration you can change the default value for the following parameters:
- Replication (3 brokers by default)
- Partitions (1 partition by default)
- Retention size in bytes (-1: no limitation by default)
- Retention time in hours (-1: no limitation by default)
- Minimum in-sync replica (2 by default)
- Deletion policy
Optional: Configure ACLs on topics
Cloud Analytics with Kafka® supports access control lists (ACLs) to manage permissions on topics. This approach allows you to limit the operations that are available to specific connections and to restrict access to certain data sets, which improves the security of your data.
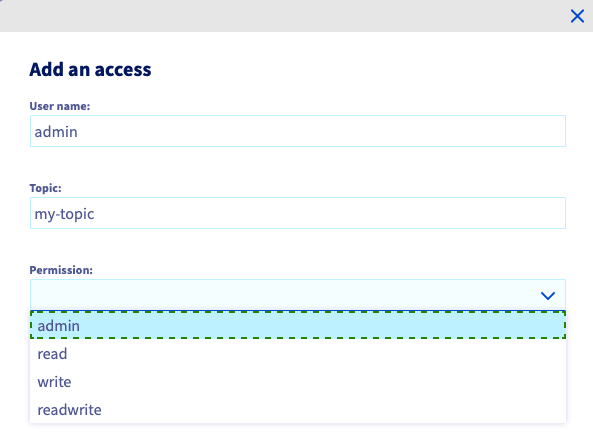
By default the admin user has access to all topics with admin privileges. You can define some additional ACLs for all users/topics by clicking the Add a new entry button:
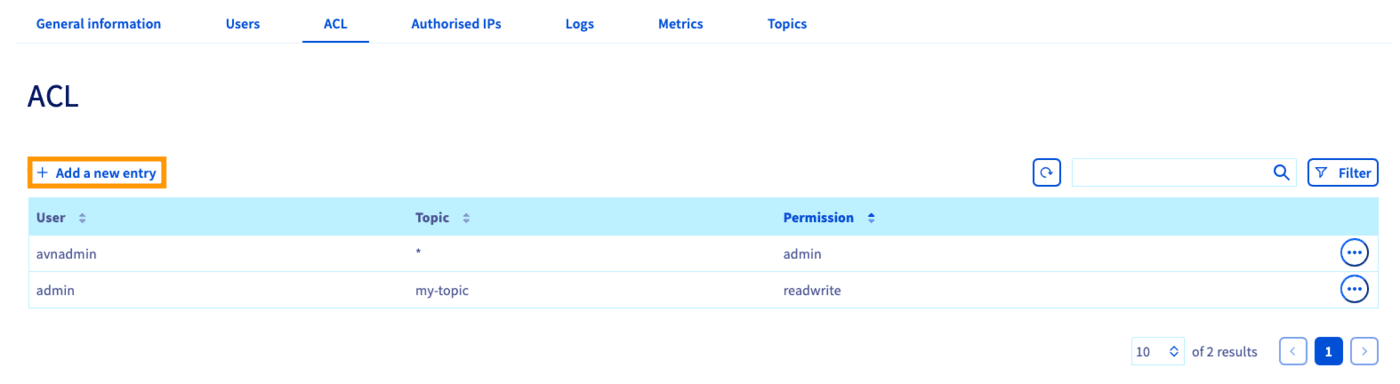
For a particular user, and one topic (or all with '*'), define the ACL with the following permissions:
- admin: full access to APIs and topic
- read: allow only searching and retrieving data from a topic
- write: allow updating, adding, and deleting data from a topic
- readwrite: full access to the topic
Write permission allows the service user to create new indexes that match the pattern, but it does not allow the deletion of those indices.
When multiple rules match, they are applied in the order listed above. If no rules match, access is denied.
First CLI connection to your Kafka® service
NOTE: Verify that the IP address visible from your browser application is part of the "Authorised IPs" defined for this Kafka® service.
Check also that the user has granted ACLs for the target topics.
Download server and user certificates
To connect to the Apache Kafka® service, it is required to use server and user certificates.
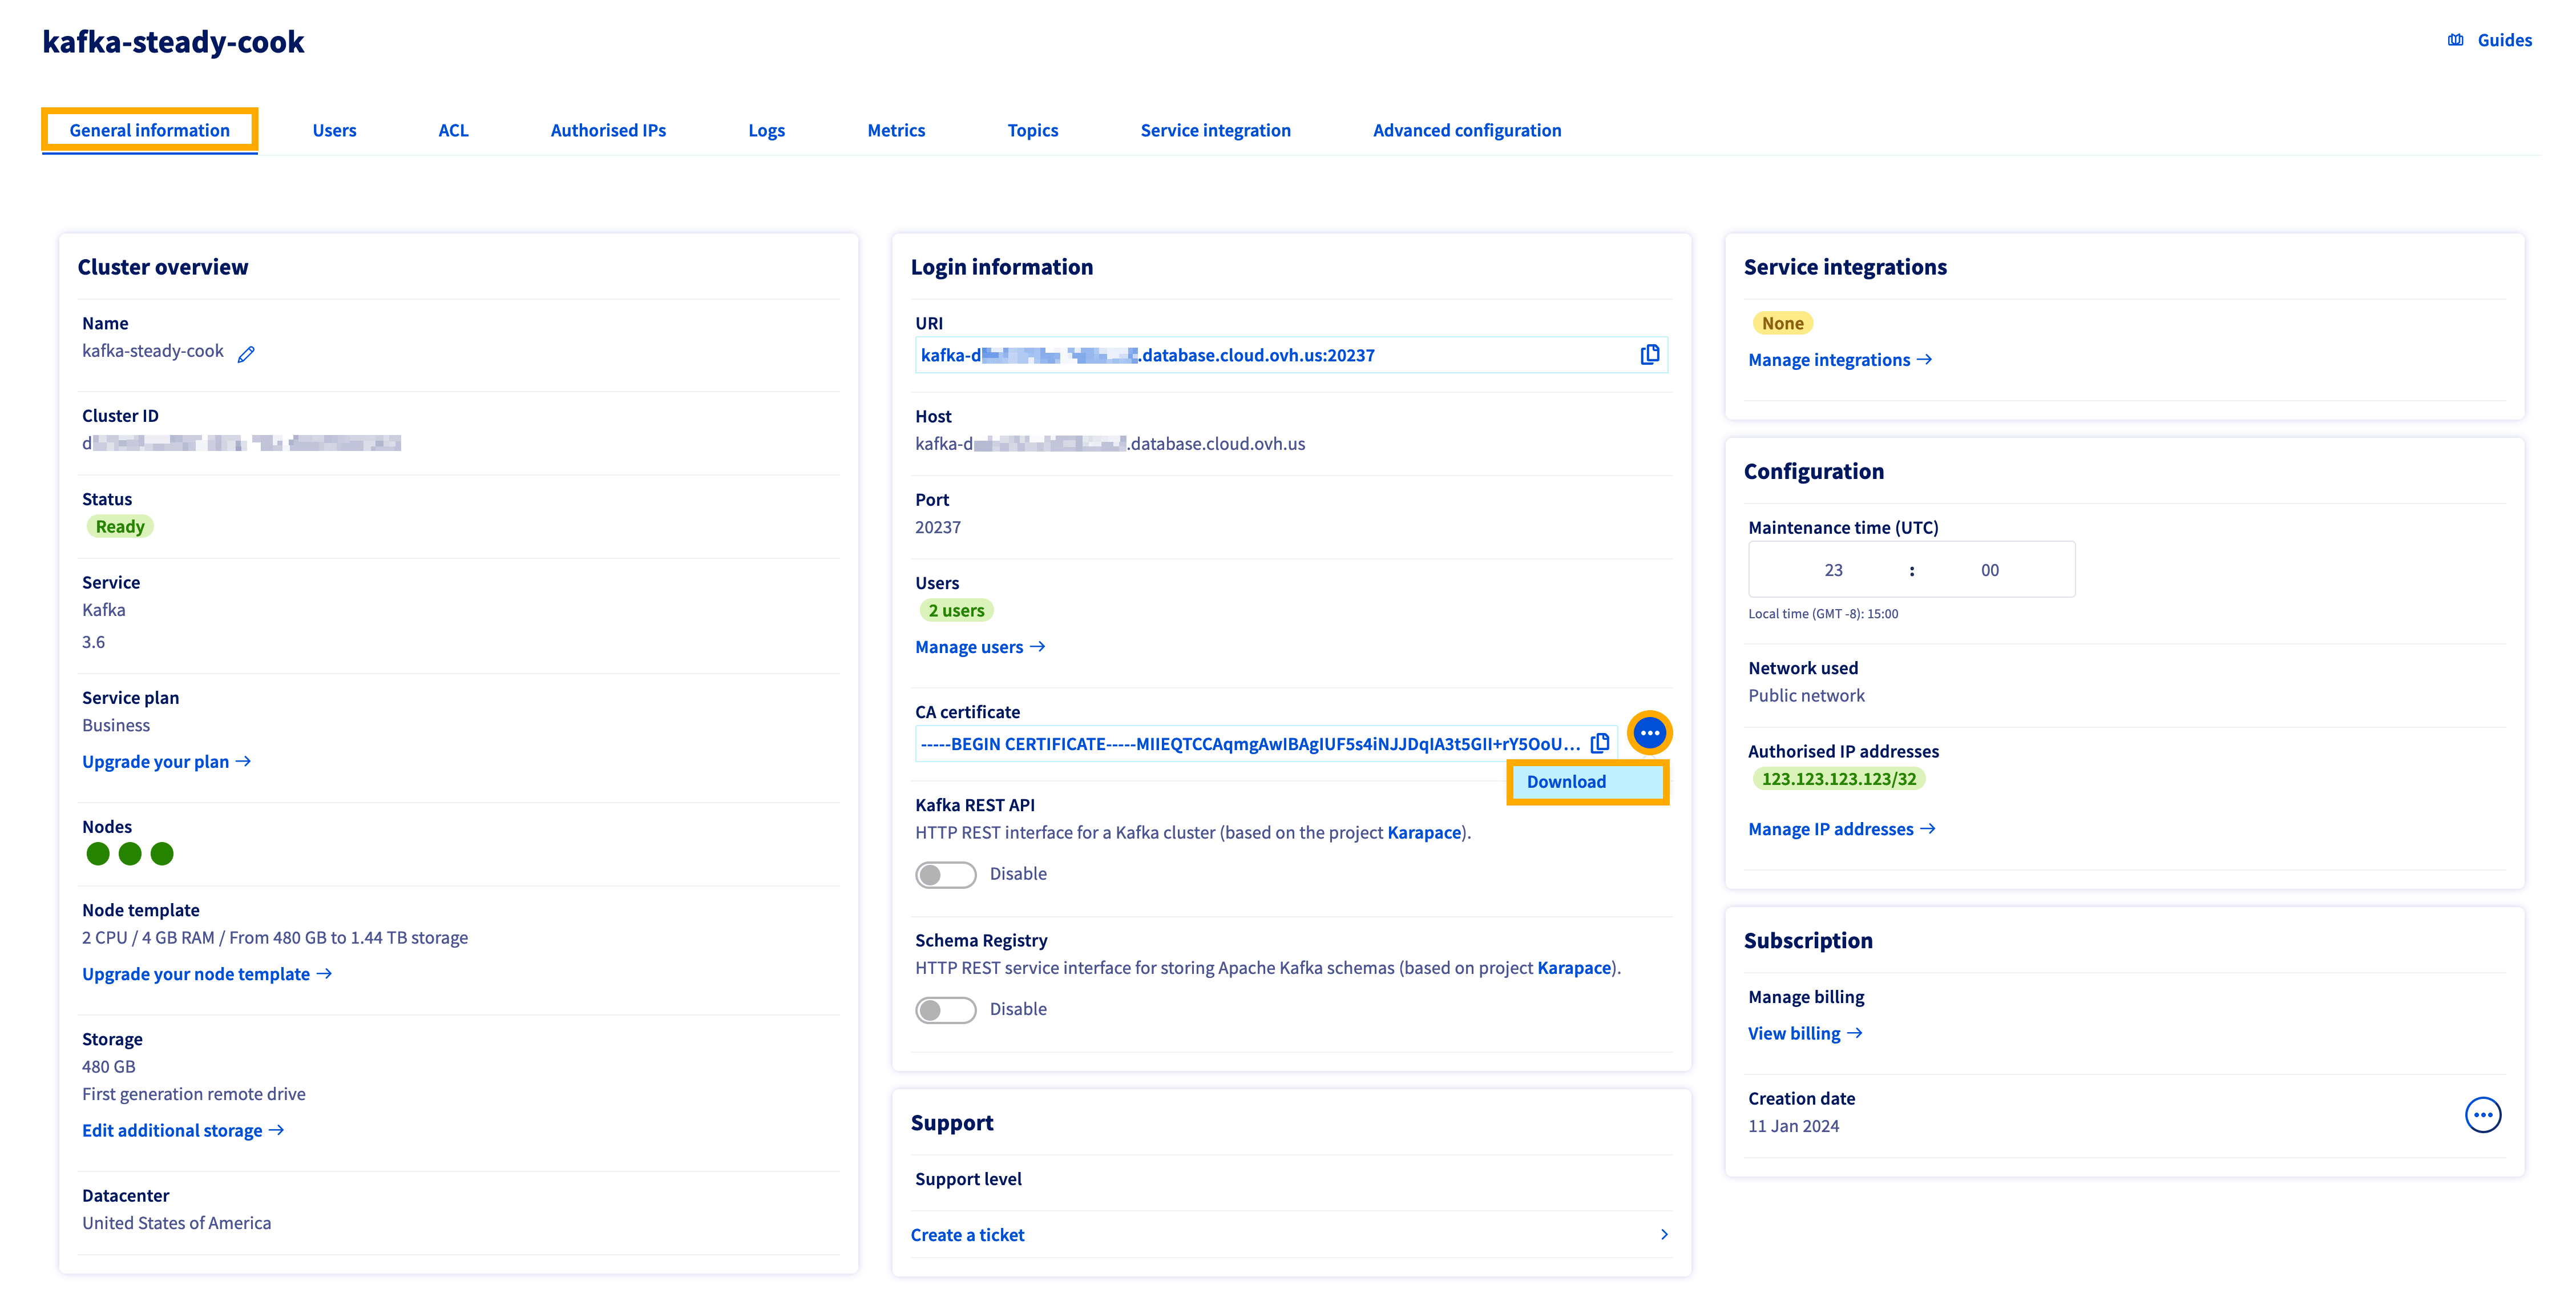
1 - Server certificate
The server CA (Certificate Authority) certificate can be downloaded from the General information tab. Select the bmore options ... button and click Download.
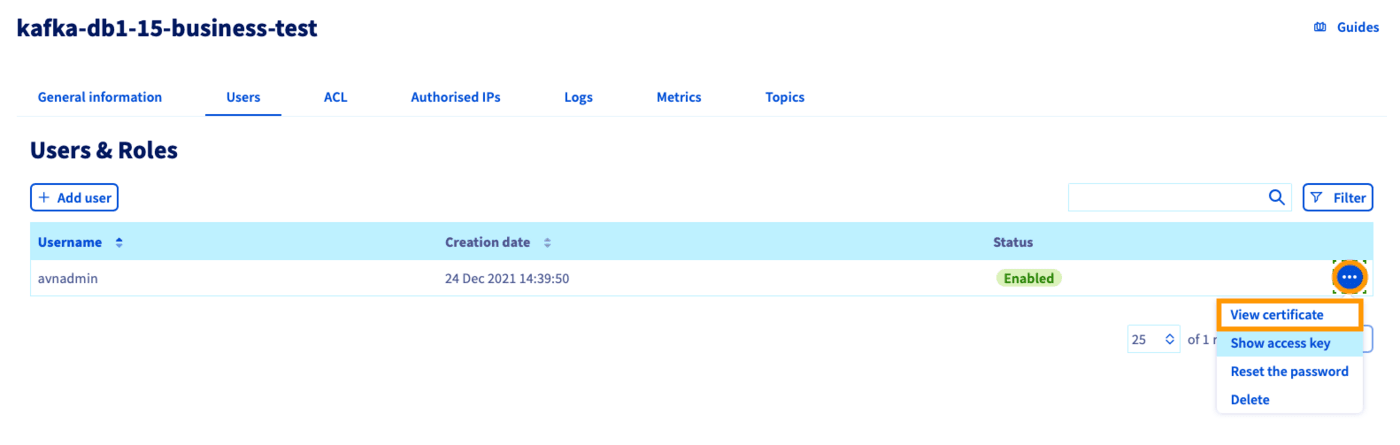
2 - User certificate
The user certificate can be downloaded from the Users tab. Select the more options ... button and click View certificate.
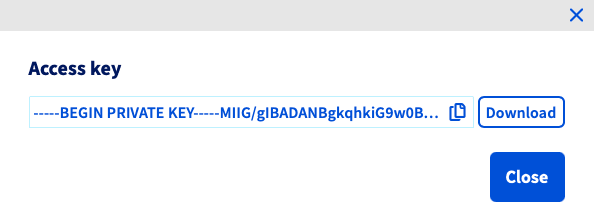
3 - User access key
Also, download the user access key.
Install an Apache Kafka® CLI
As part of the Apache Kafka® official installation, you will get different scripts that will also allow you to connect to Kafka® in a Java 8+ environment: Apache Kafka® Official Quickstart.
We propose to use a generic producer and consumer client instead: Kcat (formerly known as kafkacat). Kcat is more lightweight since it does not require a JVM.
Install Kcat
For this client installation, please follow the instructions available at Kafkacat Official GitHub.
Kcat configuration file
Let's create a configuration file to simplify the CLI commands to act as Kafka® Producer and Consumer:
kafkacat.conf:
In our example, the cluster address and port are kafka-f411d2ae-f411d2ae.database.cloud.ovh.us:20186, and the previously downloaded CA certificates are in the /home/user/kafkacat/ folder.
Change these values according to your own configuration.
Kafka® producer
For this first example, let's push the "test-message-key" and its "test-message-content" to the "my-topic" topic.
Depending on the installed binary, the CLI command can be either kcat or kafkacat.
Kafka® consumer
The data can be retrieved from "my-topic".
Depending on the installed binary, the CLI command can be either kcat or kafkacat.
Congratulations! You now have an up-and-running Apache Kafka® cluster, fully managed and secured. You can push and retrieve data easily via CLI.
Go further
Some UI tools for Kafka® are also available:
Visit the GitHub examples repository to find out how to connect to your service with several languages.
Browse all the Analytics guides.
Browse the rest of the OVHcloud US documentation for guides on our other products and services.
Learn more about Cloud Analytics on the OVHcloud US website.
OVHcloud Managed Databases and Analytics:
- Grafana® is a registered trademark of Grafana Labs and is used with the permission of Grafana Labs. OVH SAS and its subsidiaries are not affiliated with or endorsed by Grafana Labs.
- Kafka® is a registered trademark of The Apache Software Foundation and has been licensed for use by OVHcloud, who has no affiliation with and is not endorsed by The Apache Software Foundation.
- MongoDB® is a registered trademark of MongoDB, Inc.
- MySQL® is a registered trademark of Oracle and/or its affiliates.
- PostgreSQL® is a registered trademark of the PostgreSQL Community Association of Canada.