
Configuring the vRack on your dedicated servers
Learn how to configure the vRack on two or more dedicated servers.
The OVHcloud vRack (virtual rack) allows multiple servers to be grouped (regardless of number and physical location in our data centers) and connects them to a virtual switch within the same private network. Your servers can communicate privately and securely with each other, within a dedicated VLAN.
Requirements
- A vRack service activated in your account
- Two or more dedicated servers (compatible with vRack)
- Administrative access (root) to the server via SSH or RDP
- A private IP address range of your choice
OVHcloud Control Panel Access
- Direct link: vRack
- Navigation path:
Bare Metal Cloud>Network>vRack Private Network
NOTE: This feature might be unavailable or limited on servers of the Eco product line.
Please visit our comparison page for more information.
Instructions
Step 1: Ordering the vRack
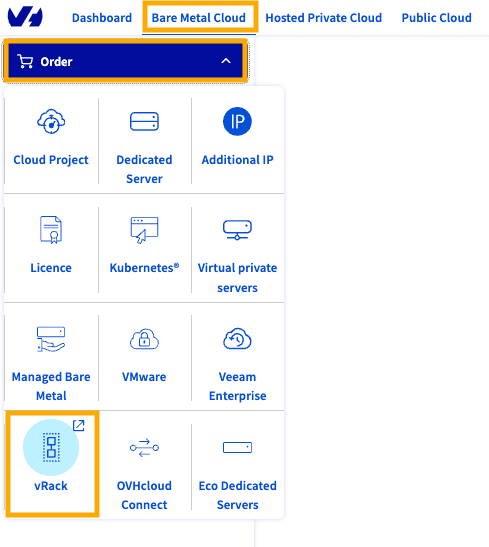
Once you are connected to the OVHcloud Control Panel, go to the Bare Metal Cloud menu and click on the Order button. Under this menu, click on vRack.
You will be redirected to another page to validate the order; it will take a few minutes for the vRack to be set up in your account.
Step 2: Adding your servers to the vRack
Using the Network menu
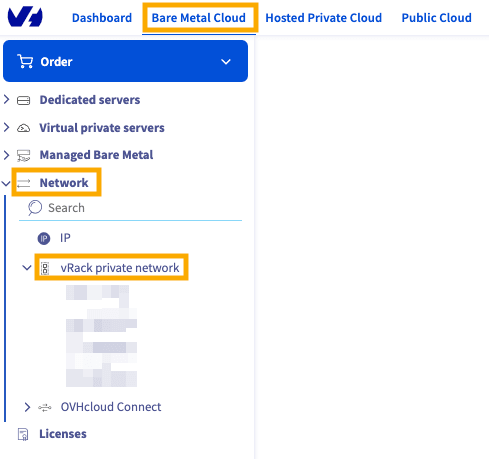
Once the vRack is activated in your account, go to the Bare Metal Cloud section of your OVHcloud Control Panel, click on Network, and open the vRack menu.
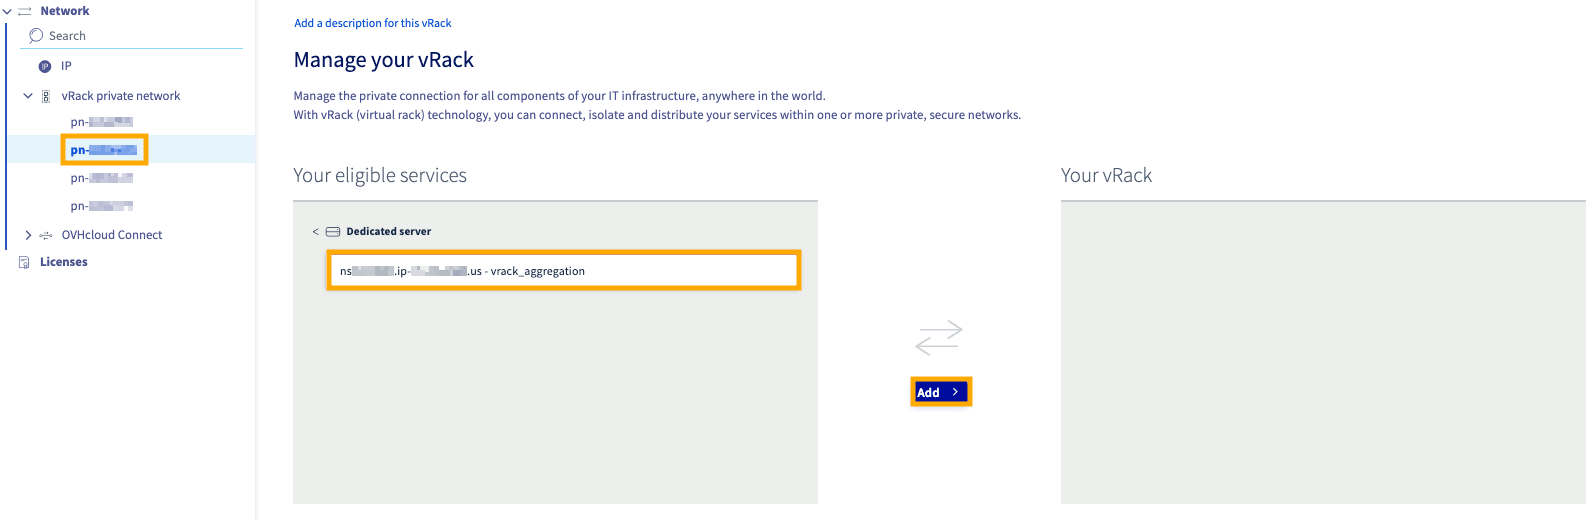
Select your vRack from the list to display the list of eligible services. Click on each server you want to add to the vRack, and then click the Add button.
Using the Dedicated servers menu
Alternatively, from the OVHcloud Control Panel:
- Select
Bare Metal Cloudfrom the top navigation bar. - From the left-side menu, click
Dedicated serversand choose your server. - Select the
Network interfacestab. - Locate the Private interface, click the more options
...button to the right of it, and selectAttach a vRack private interface.
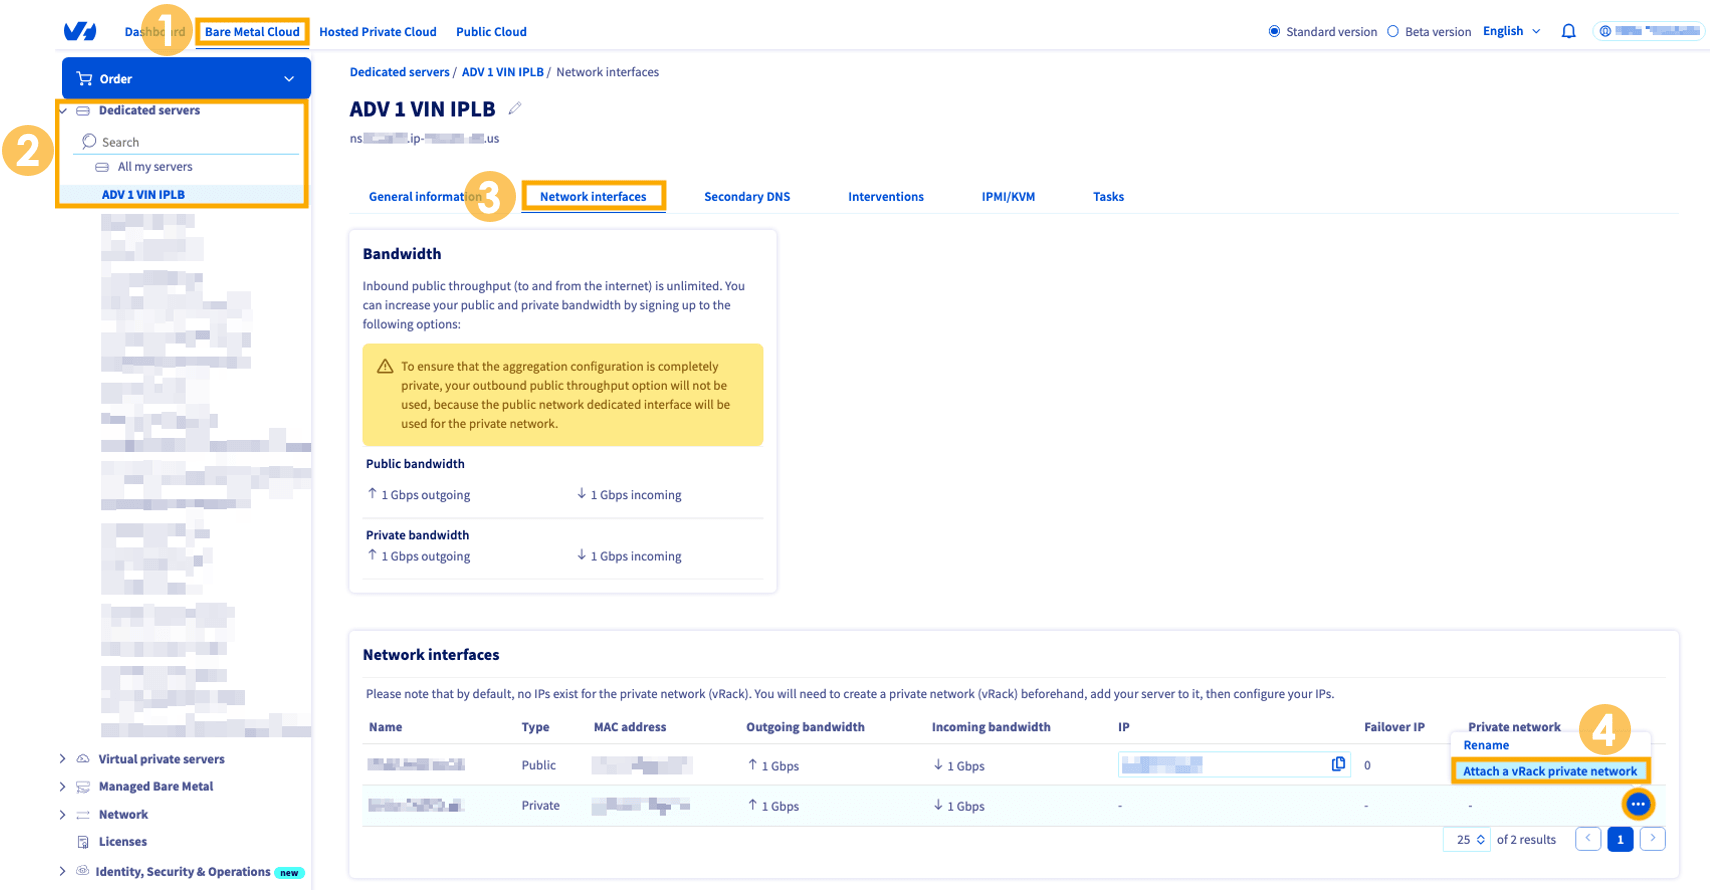
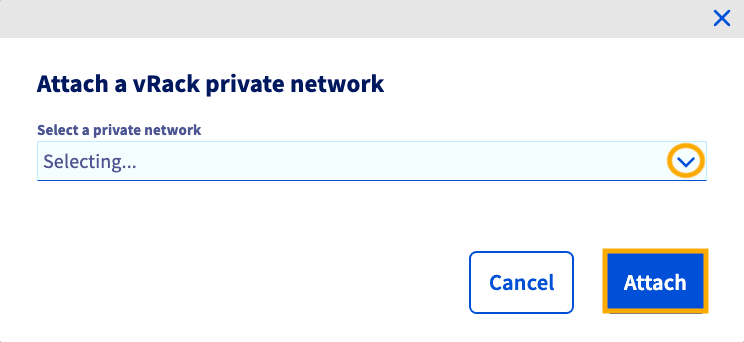
In the pop-up window, select ▼ the vRack network you wish to attach, and then click Attach.
Step 3: Configuring your network interfaces
The following sections contain the configurations for the most commonly used recent distributions/operating systems. The first step is always to log in to your server via SSH or an RDP session (for Windows). The examples below presume you are logged in as a user with elevated permissions (Administrator/sudo).
Concerning different distribution releases, please note that the proper procedure to configure your network interface as well as the file names may have been subject to change. We recommend consulting the manuals and knowledge resources of the respective OS versions if you experience any issues.
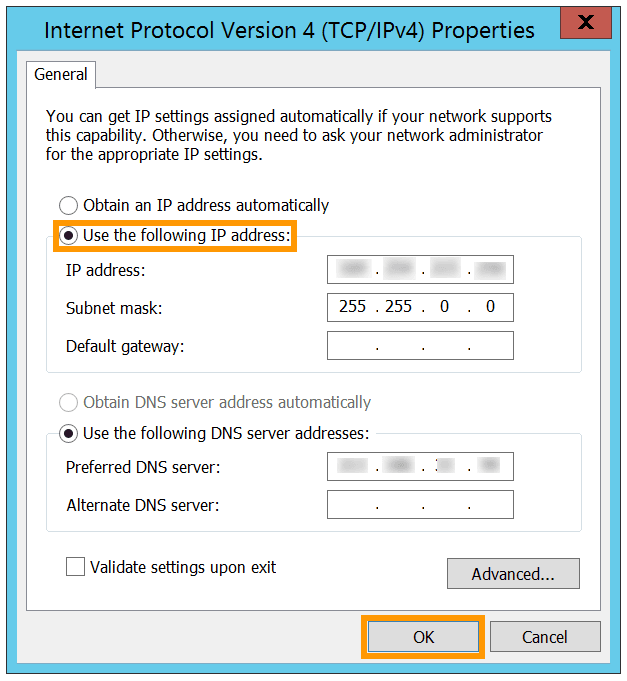
For this example, the configuration details below will have the IP address range 192.168.0.0/16 (Subnet mask: 255.255.0.0).
You can use any private IP range of your choice and any address within that range.
Identifying the vRack interface
The network interface names of your servers are not always the same. Whenever used in the following examples, replace NETWORK_INTERFACE with the appropriate interface name.
The sure way to verify the correct interface for the vRack is to check the tab Network interfaces of your server in the OVHcloud Control Panel. In the table at the bottom, take note of the MAC address(es) of the Private interface.
If there are two private MAC addresses, you will want to use the one with the lowest alphanumeric value.
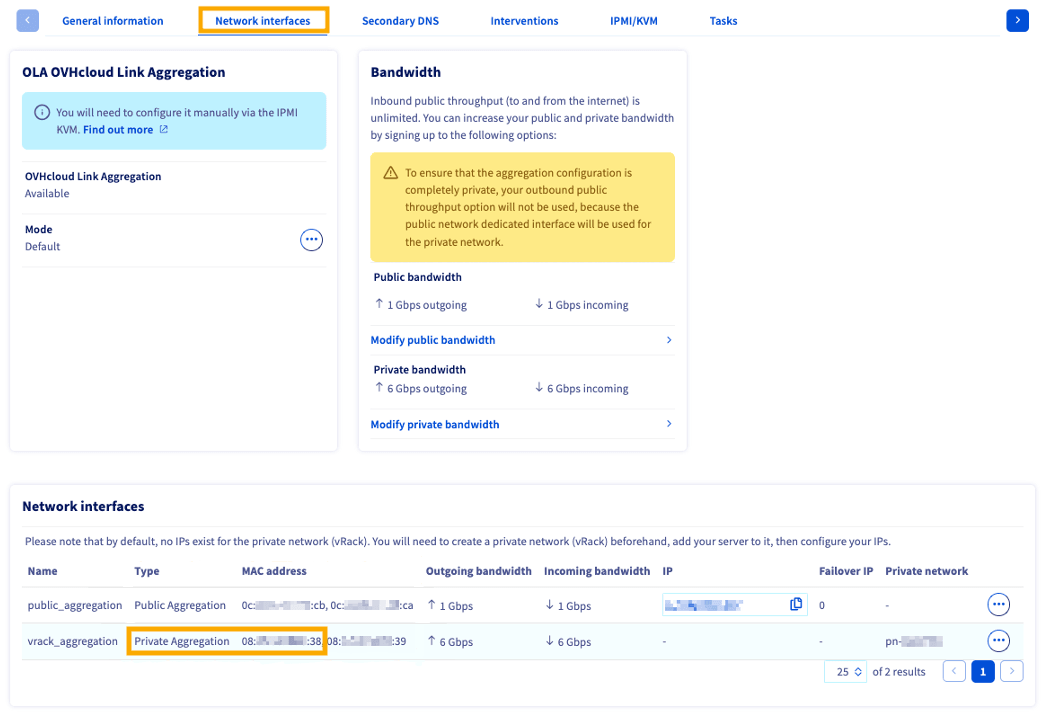
Once connected to your server via SSH, you can list your network interfaces with the following command:
In the line that begins with link ether, you can verify that this interface matches the Private interface listed in your OVHcloud Control Panel. Use this MAC address to replace NETWORK_INTERFACE in the configurations below (example: eth1).
Configuration examples
Click the tab that corresponds to your distribution.
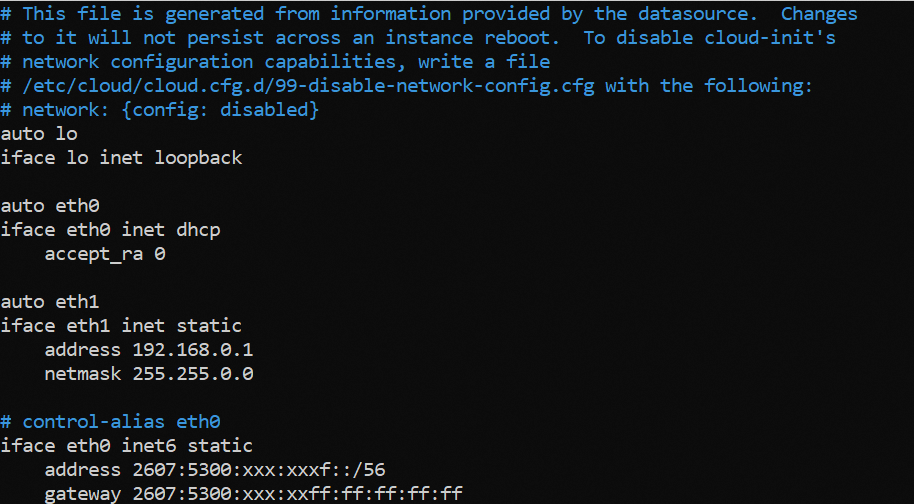
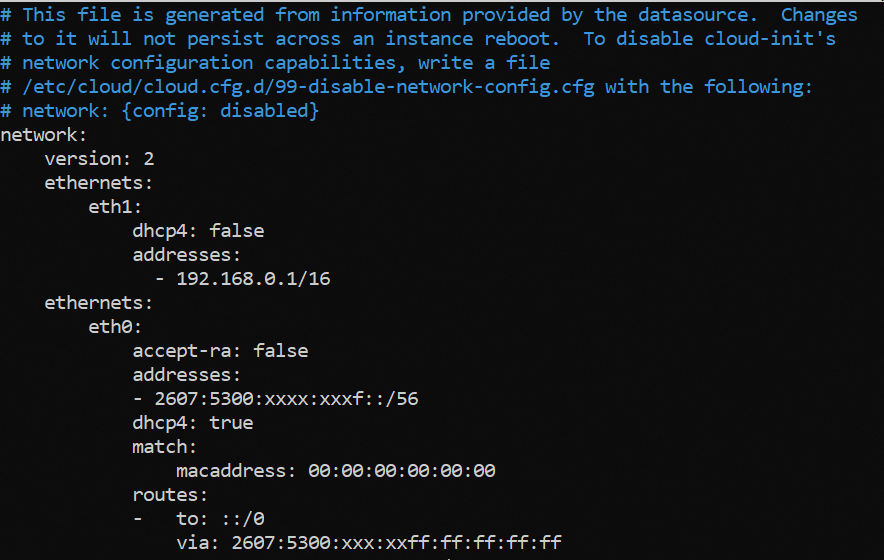
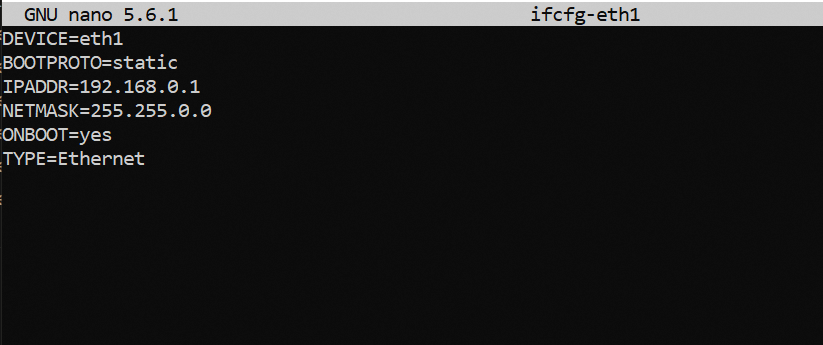
Using a text editor of your choice, open the network configuration file located in /etc/network/interfaces.d for editing. Here the file is called 50-cloud-init.
Add the following lines to the existing configuration, replace NETWORK_INTERFACE, IP_ADDRESS and NETMASK with your own values:
Example:
Save your changes to the config file and exit the editor.
Restart the networking service to apply the configuration:
Repeat this process for your other server(s) and assign an unused IP address from your private range. Once you have done this, your servers will be able to communicate with each other on the private network.

Go further
Browse all the Dedicated Servers guides.
Browse the rest of the OVHcloud US documentation for guides on our other products and services.
Learn more about Dedicated Servers on the OVHcloud US website.
Article Contributor(s):
- Suhail R
- Ashley Osei