
How to Configure and Use Nutanix Flow
Nutanix Flow is available on all Nutanix on OVHcloud offers. This option secures the network in one or more clusters managed by Prism Central
Learn how to use Nutanix Flow for network security within a Nutanix cluster.
Instructions
Log in to Prism Central.
To connect to a Nutanix cluster, if required, see the Go further section in this guide.
Enabling Nutanix Flow
Click the gear in the top right to change the settings.
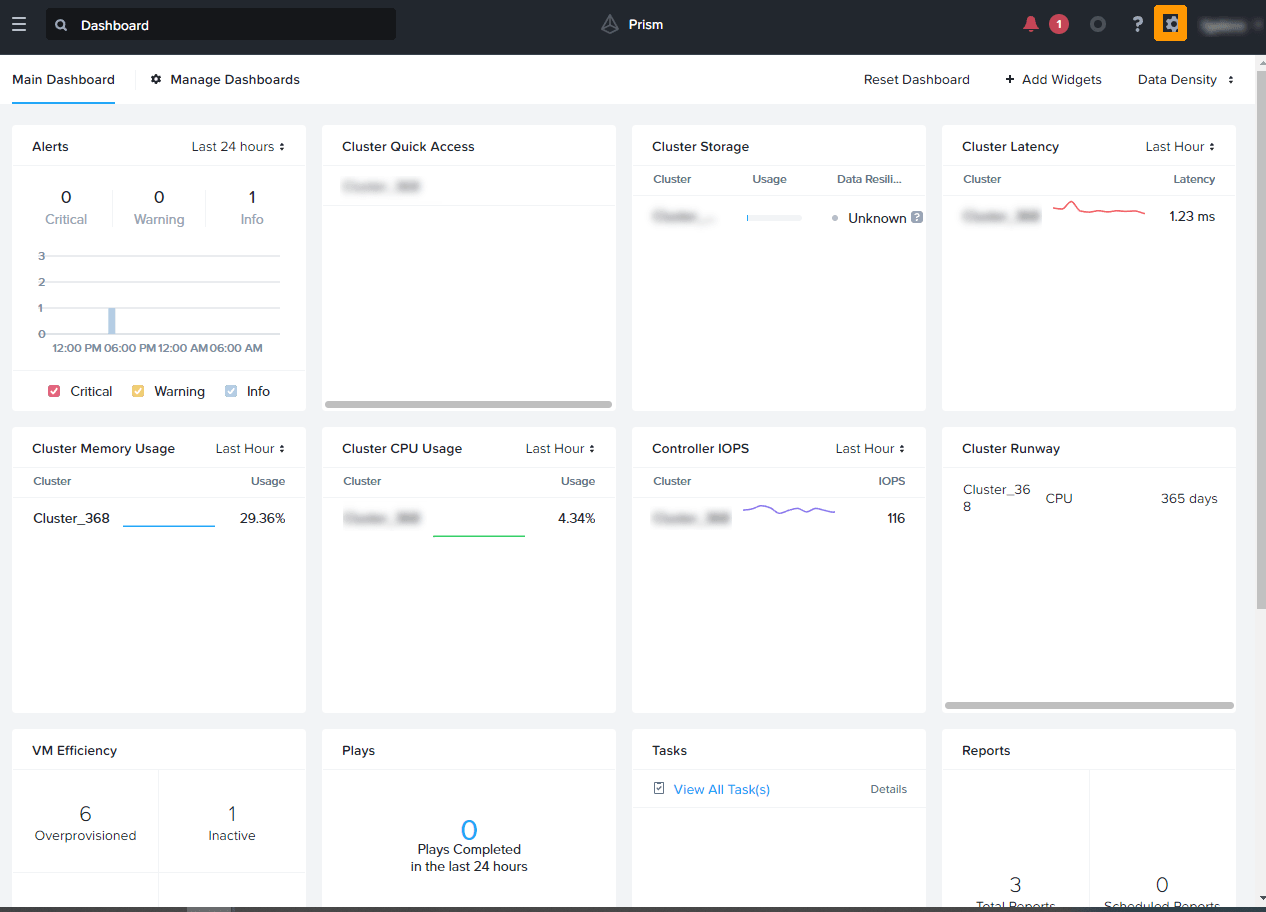
Scroll down through the settings. Under the Flow submenu, click Microsegmentation.
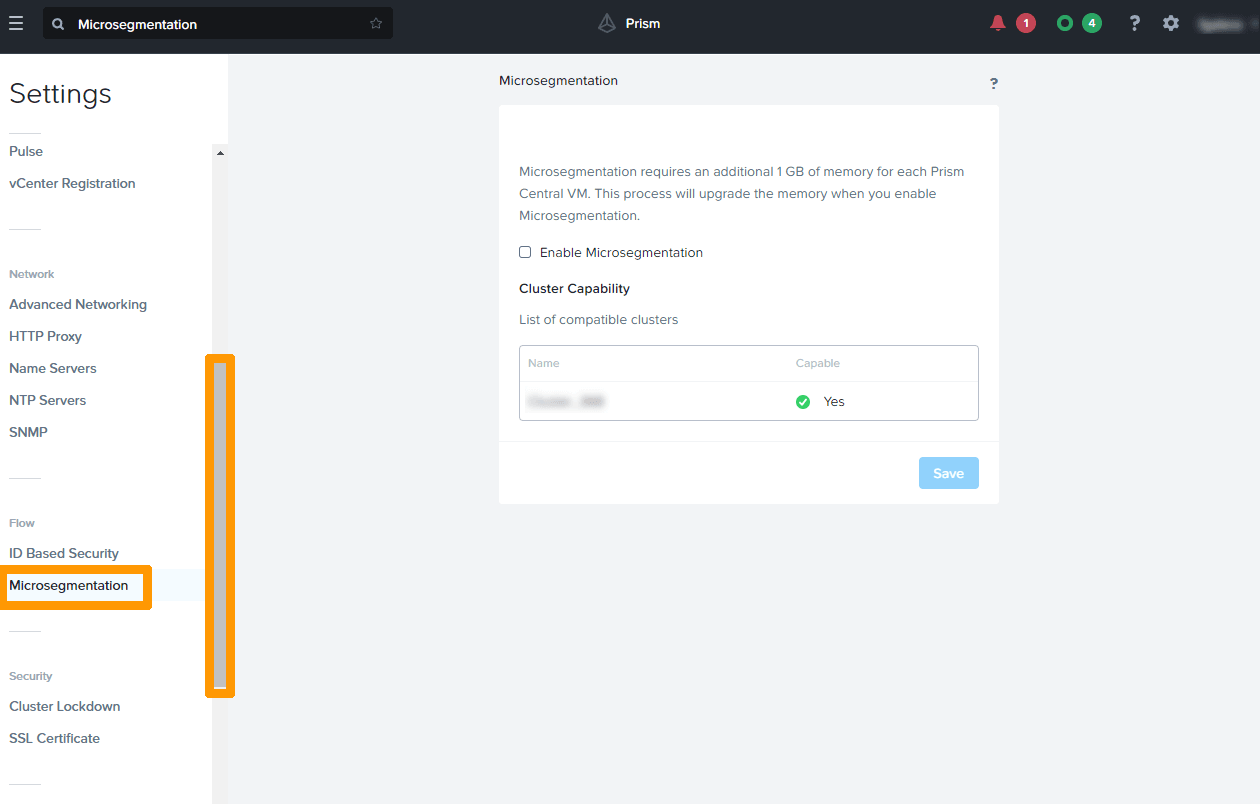
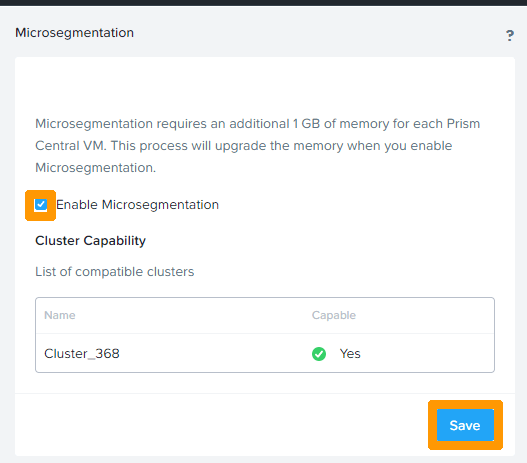
Select the Enable Microsegmentation checkbox and click Save.
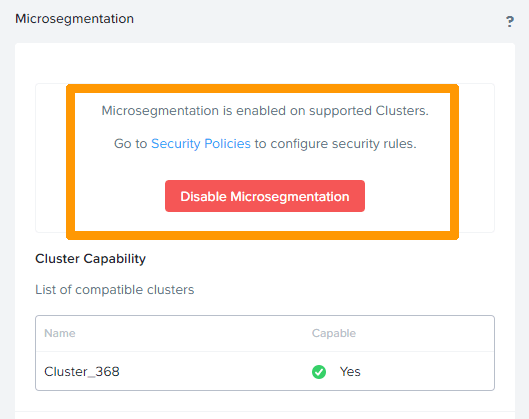
Microsegmentation is enabled. You can always disable it.
Category configuration
A category is an object that can contain one or more values.
When installing a cluster, some categories already exist and can be modified, and other categories can be added.
Entities, such as virtual machines, subnets, or images, can be among the categories used for a tool like Flow, for example.
Creating a category
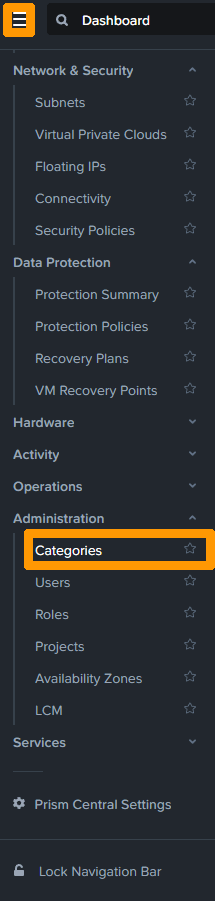
From the main menu, click the Administration heading, then click Categories.
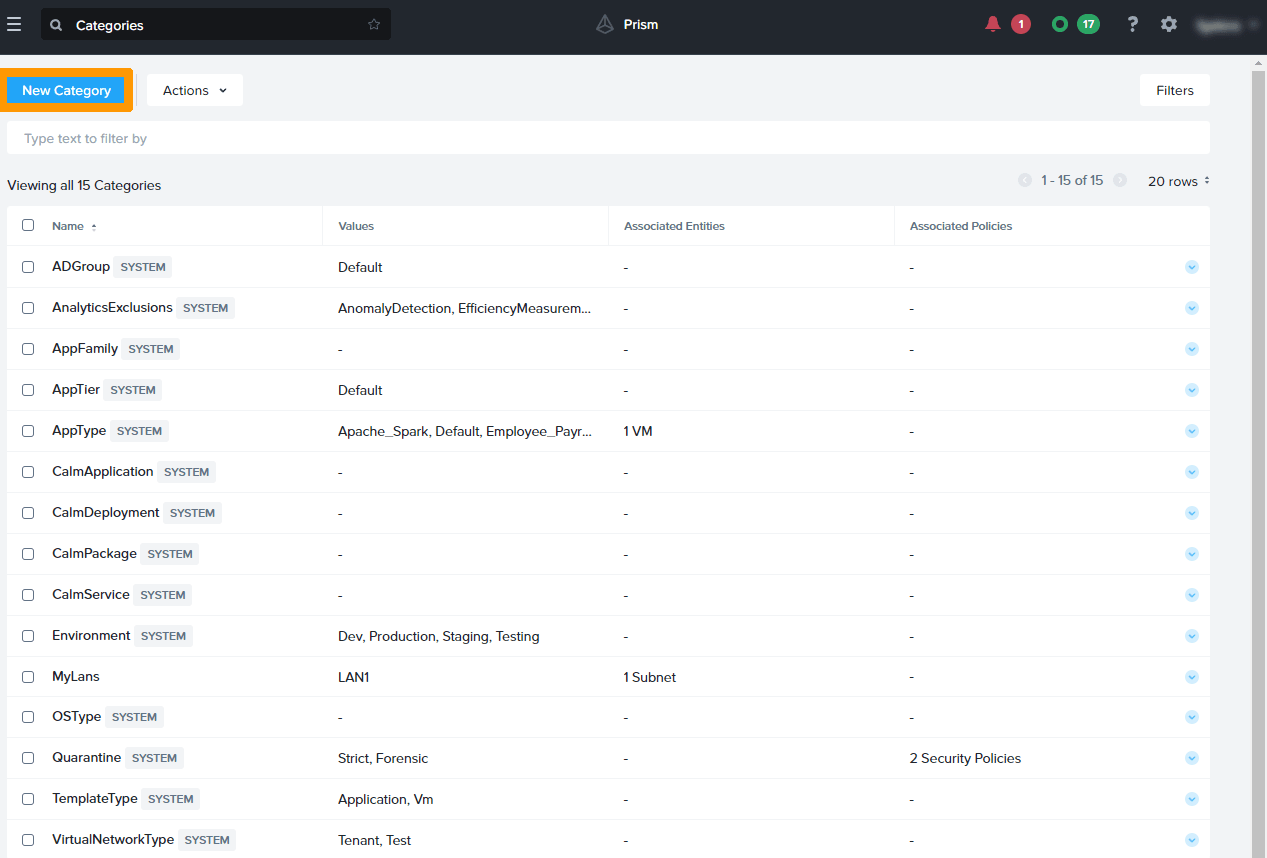
Click New Category.
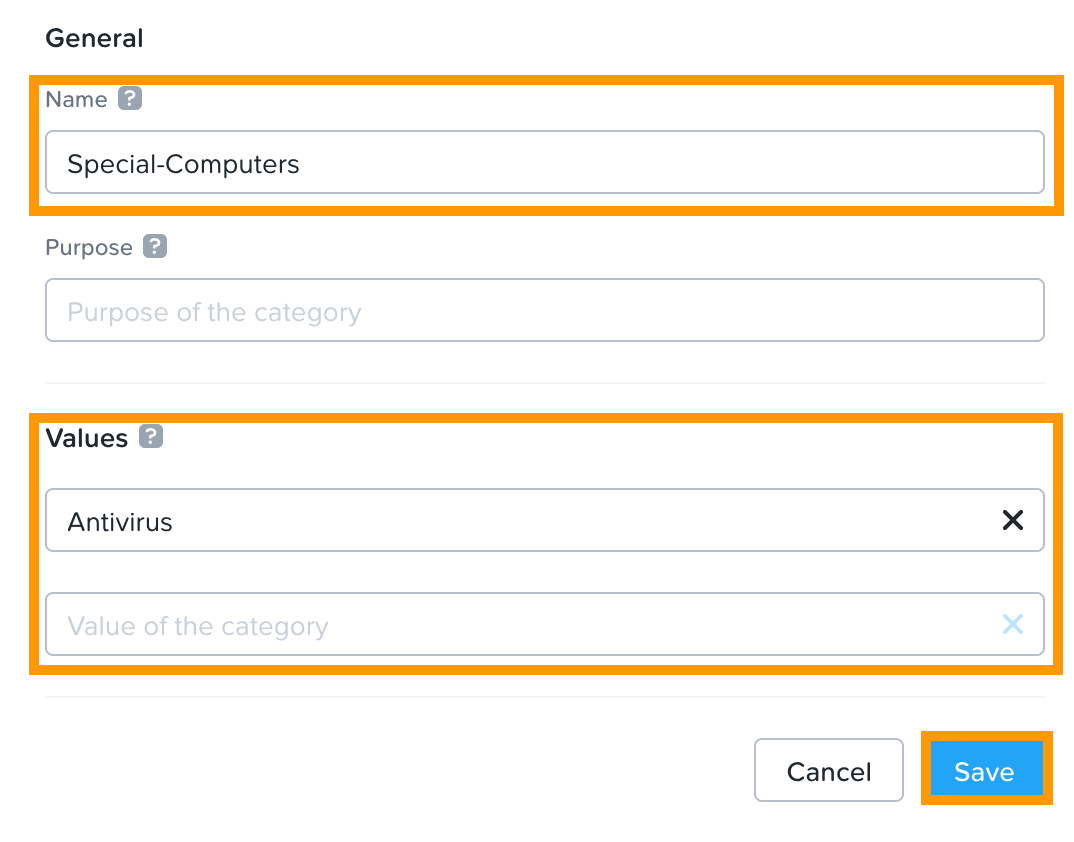
Type the name of the category in the Name box.
Type the name(s) of the value(s) you want associated with that category in the Values box.
Then, click Save.
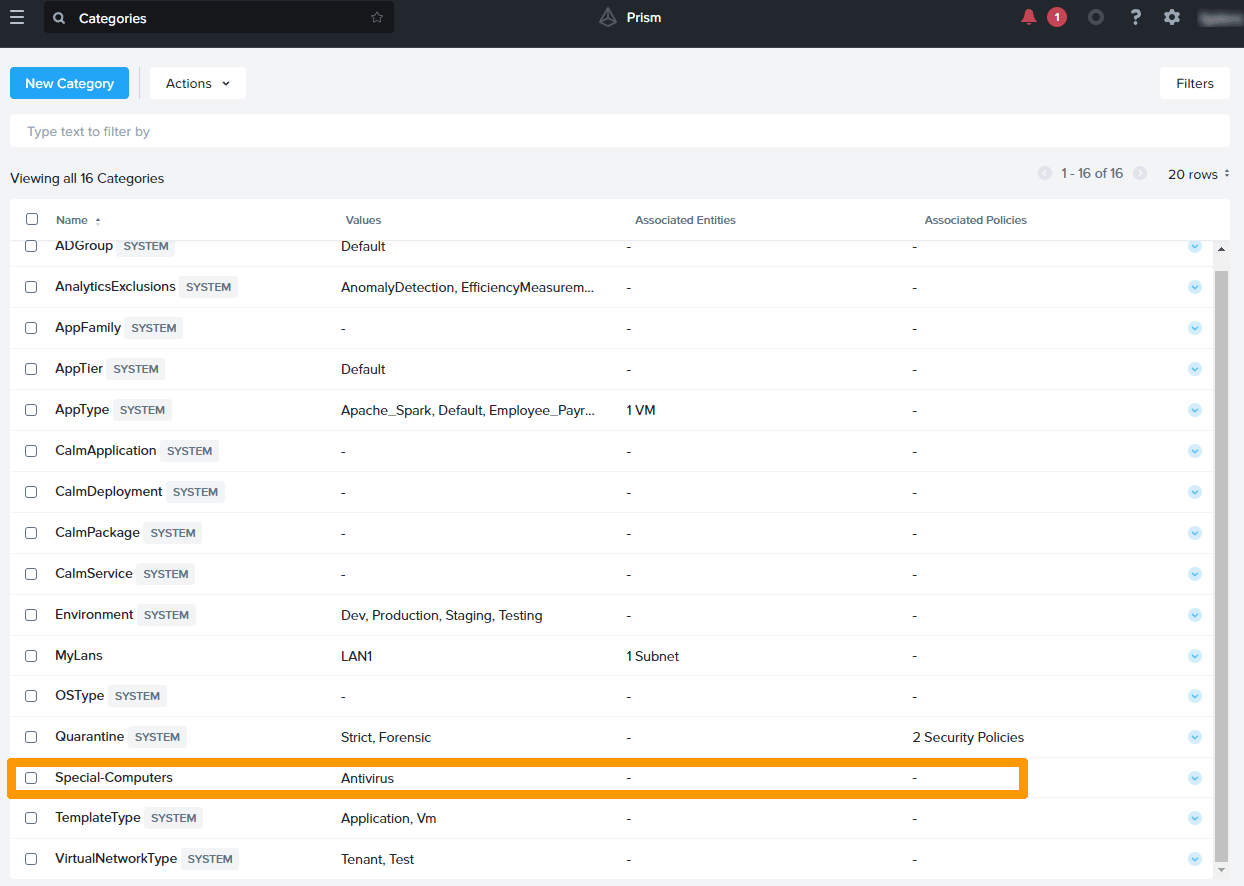
The new category appears in the category list.
Modifying a Category
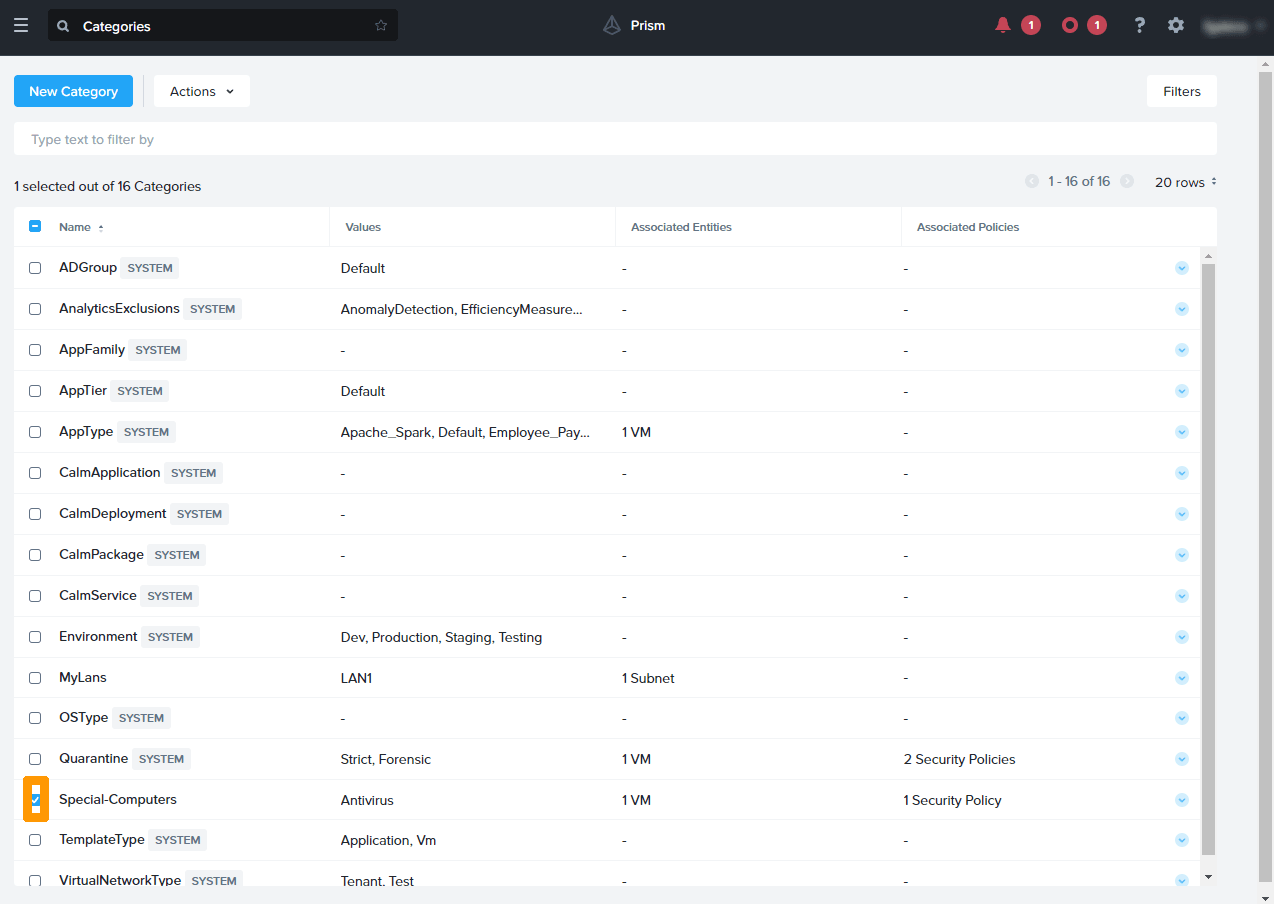
Select the Special-Computers category.
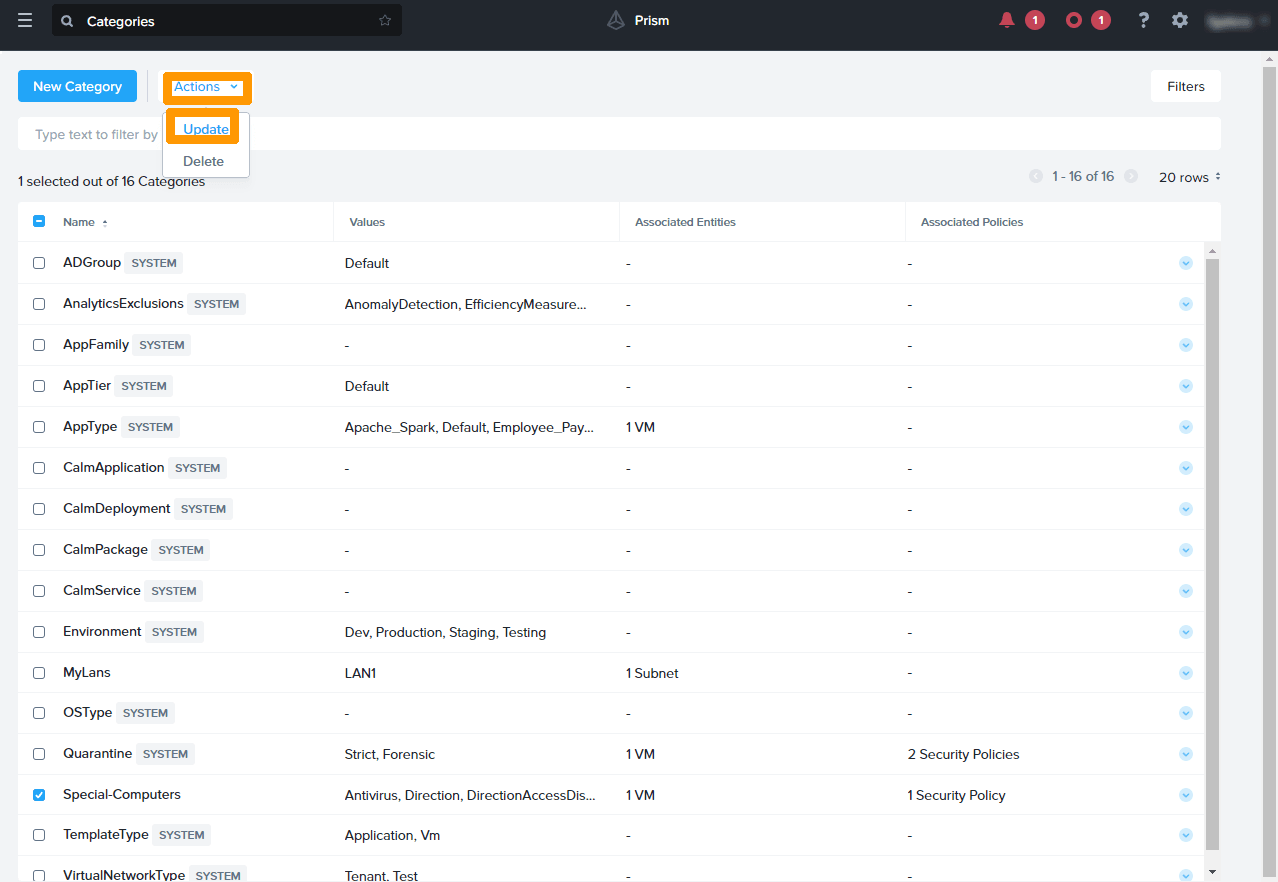
In the Actions menu, click Update.
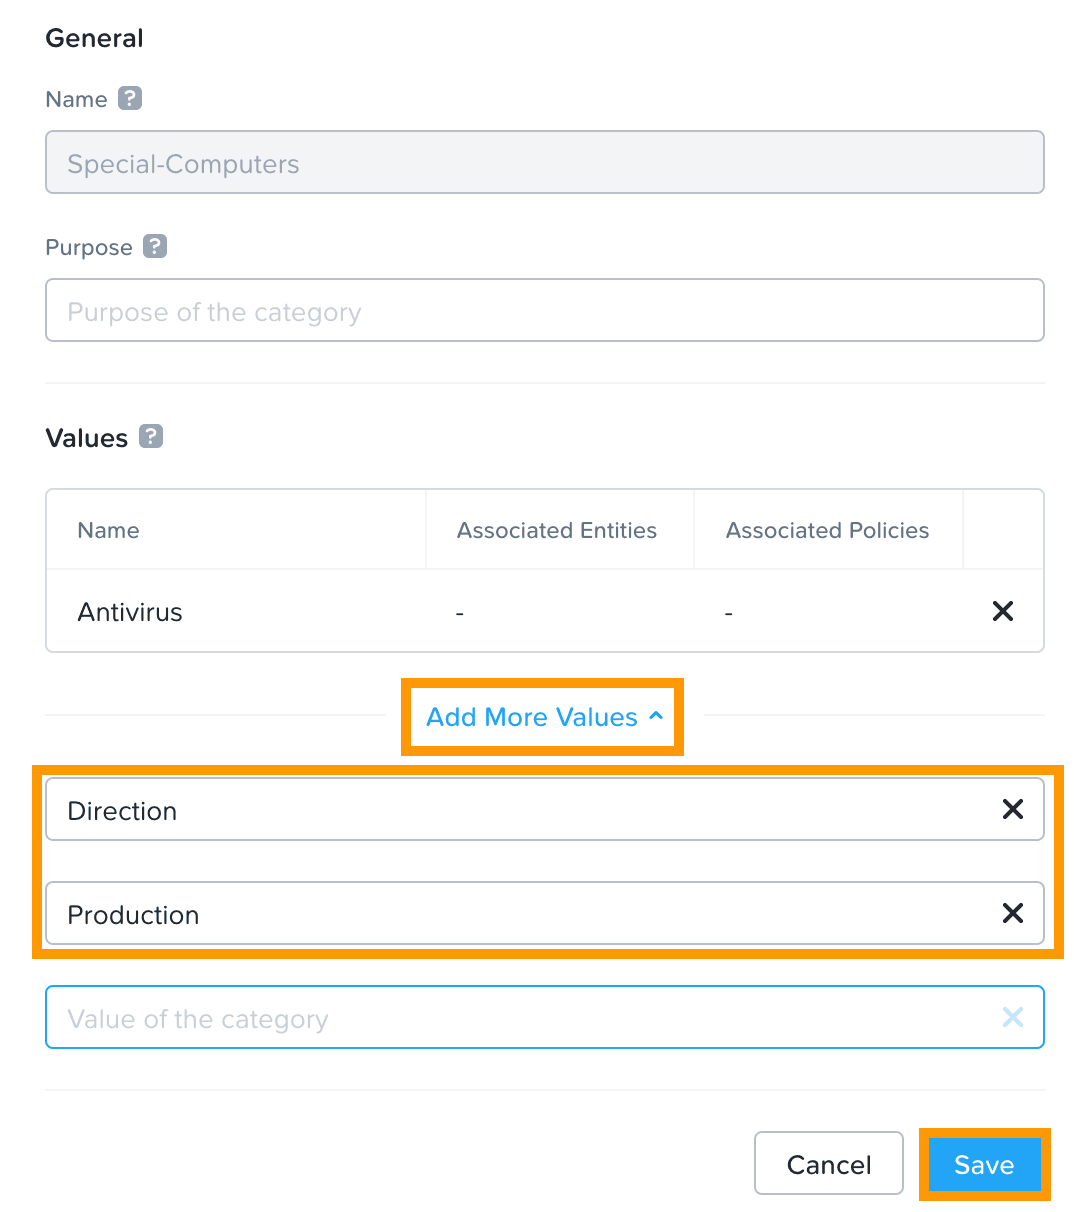
Click Add More Values. Add the name(s) of the other value(s) you want to include.
Click Save.
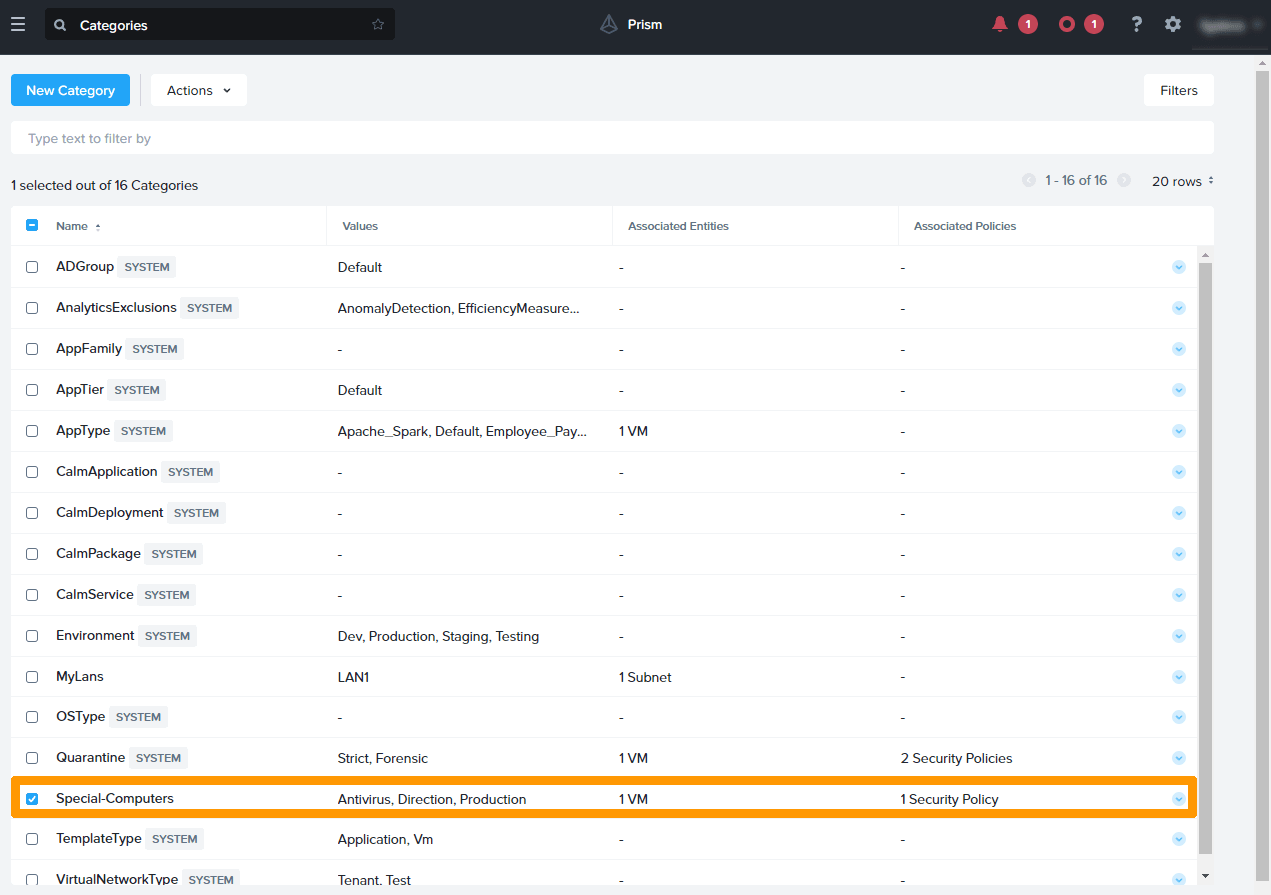
The category is visible in the category dashboard with these two new values.
Assigning a Category to a Virtual Machine
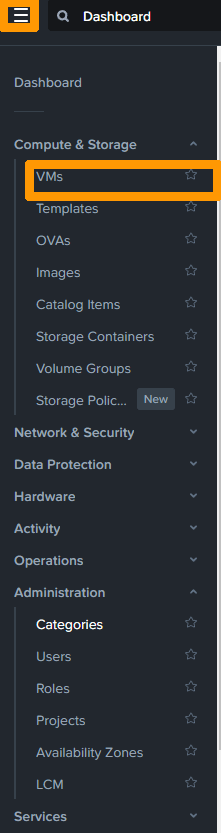
In the main menu, under Compute & Storage click VMs.
Select the virtual machine by selecting the checkbox to the left of its name.
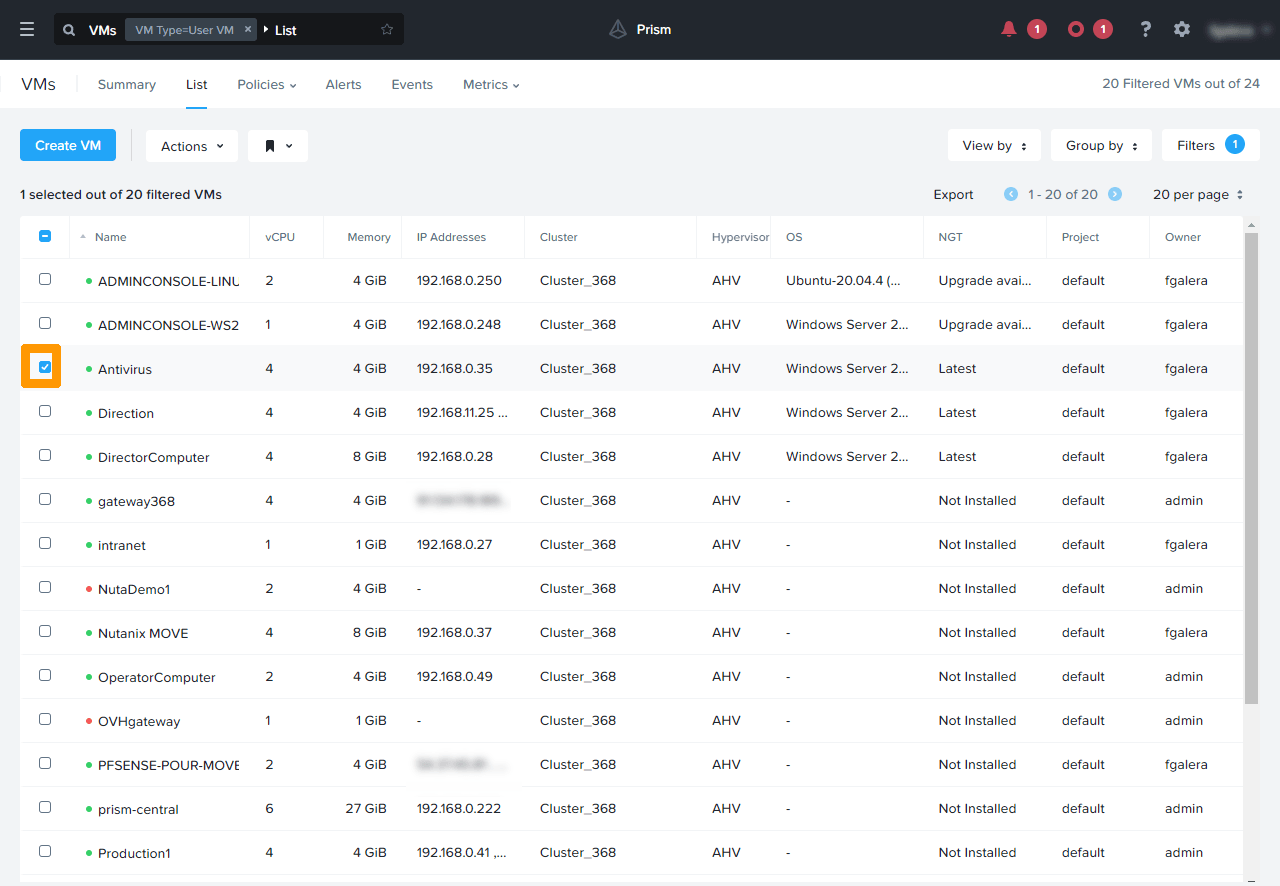
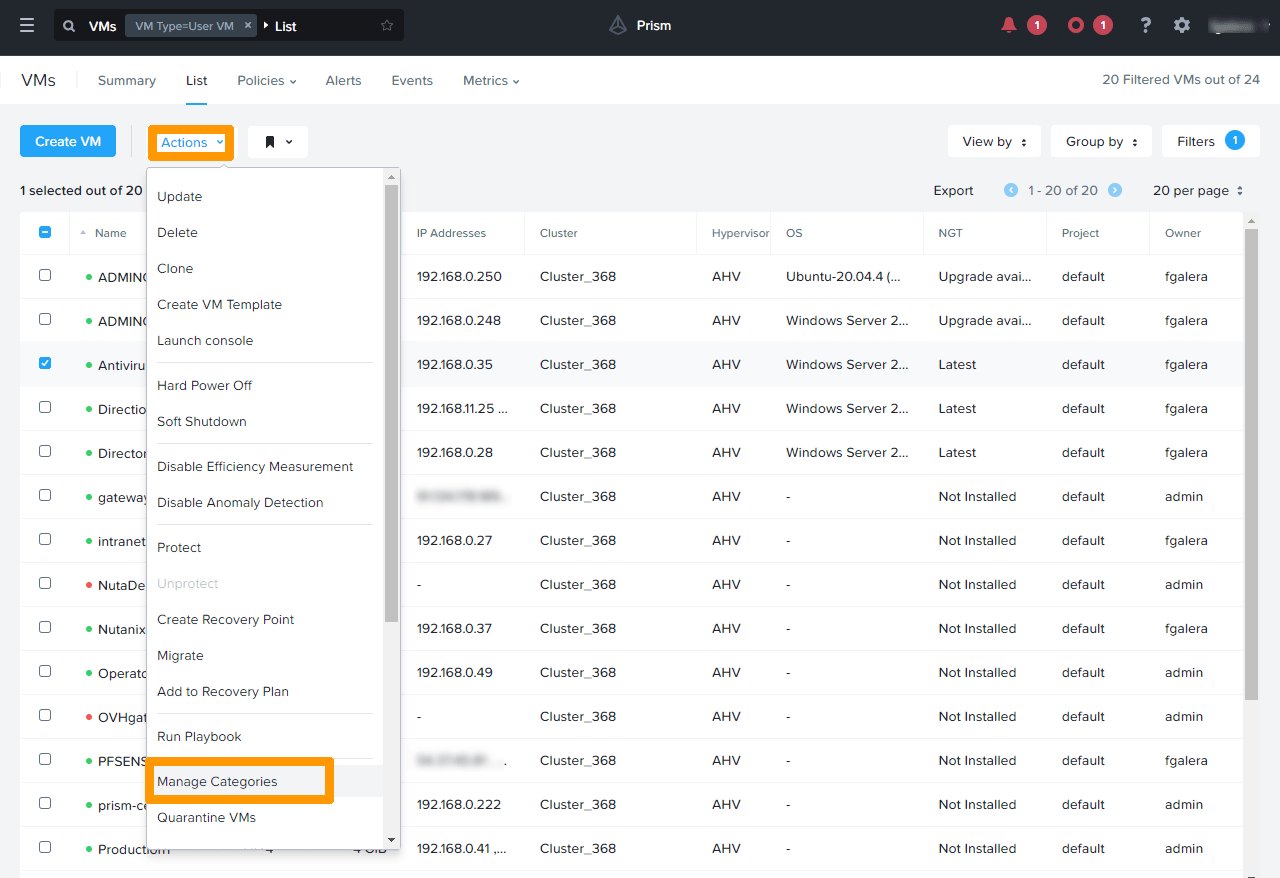
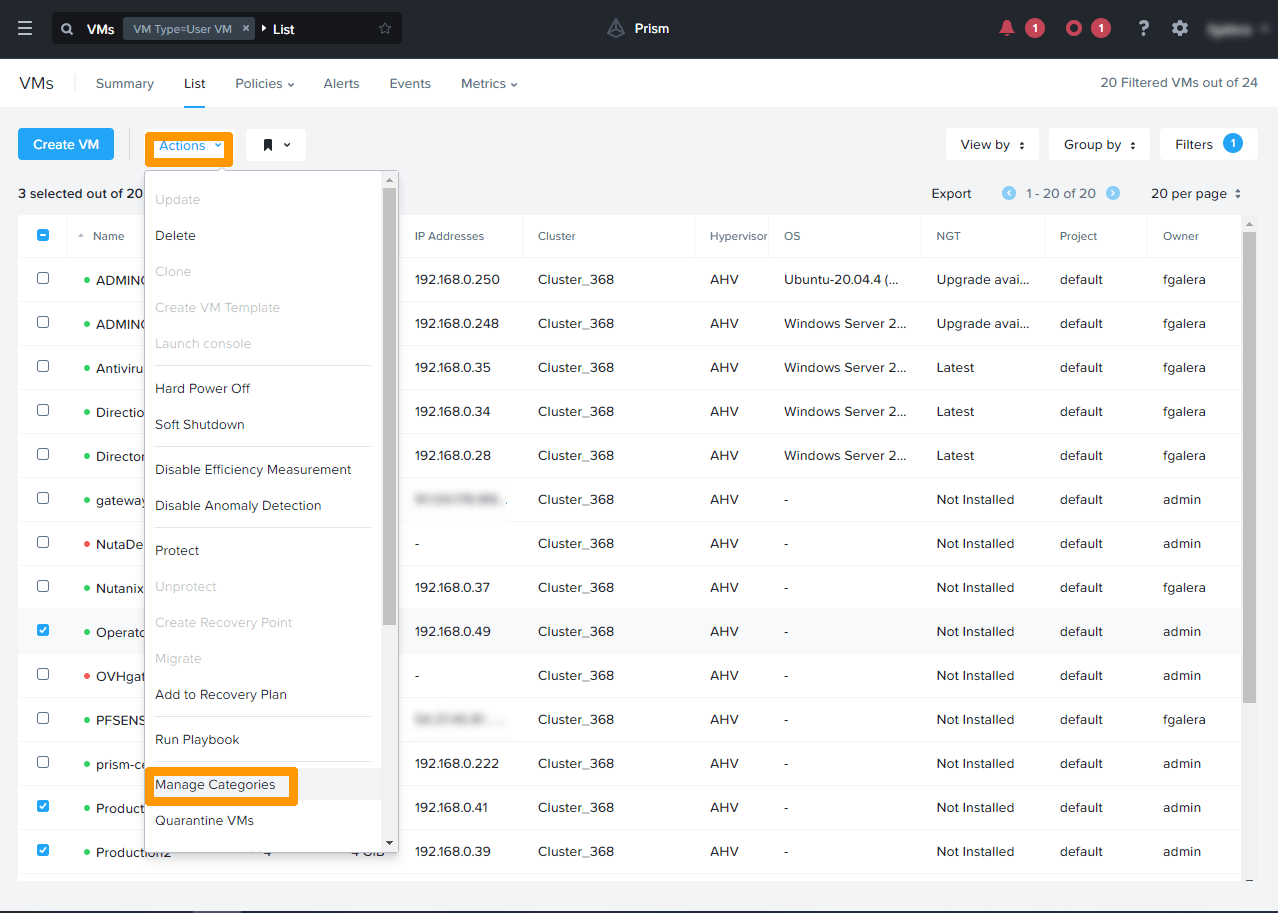
Click Actions, then click Manage Categories.
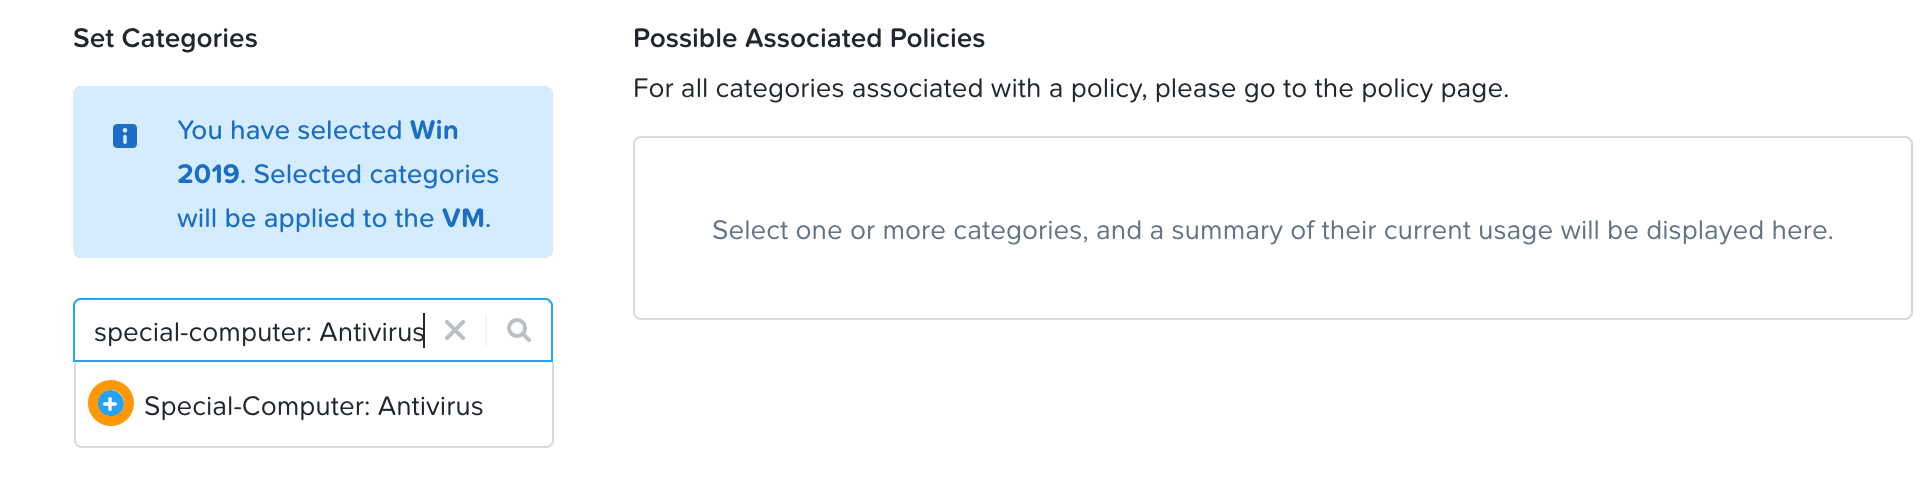
Type categoryName:value and click the + sign.
Click Save to save the virtual machine to a category.
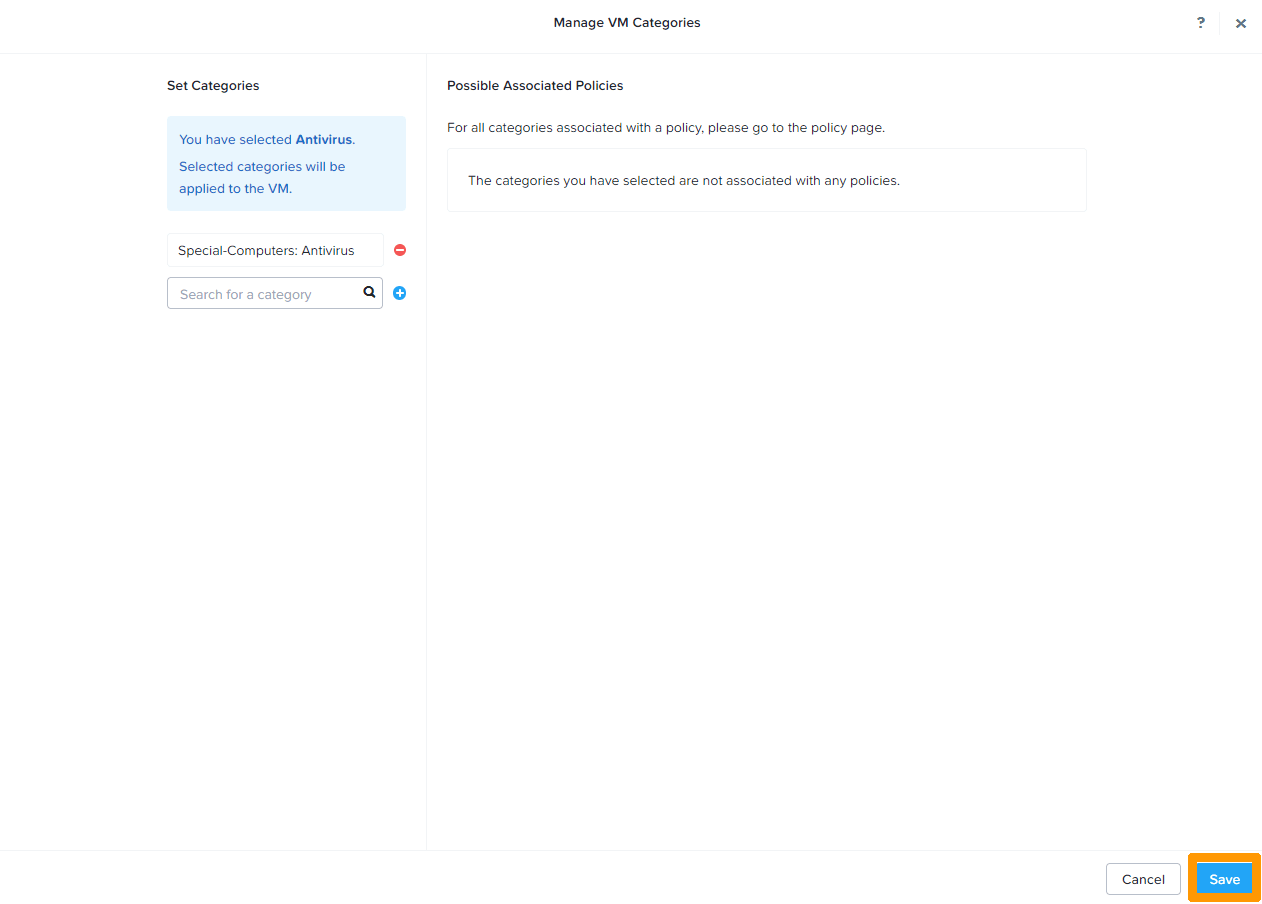
Assigning a category to multiple VMs
Select three virtual machines using the checkboxes on the left.
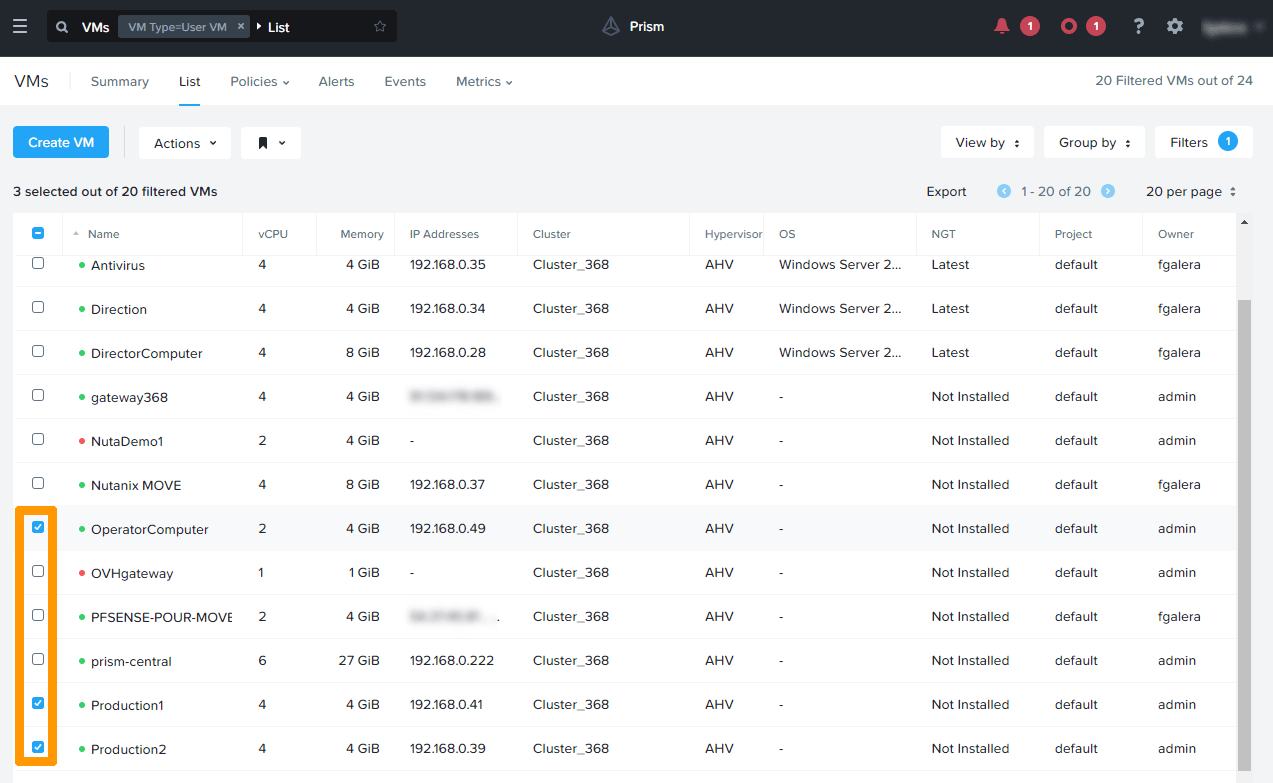
Click the Actions menu and select Manage Categories.
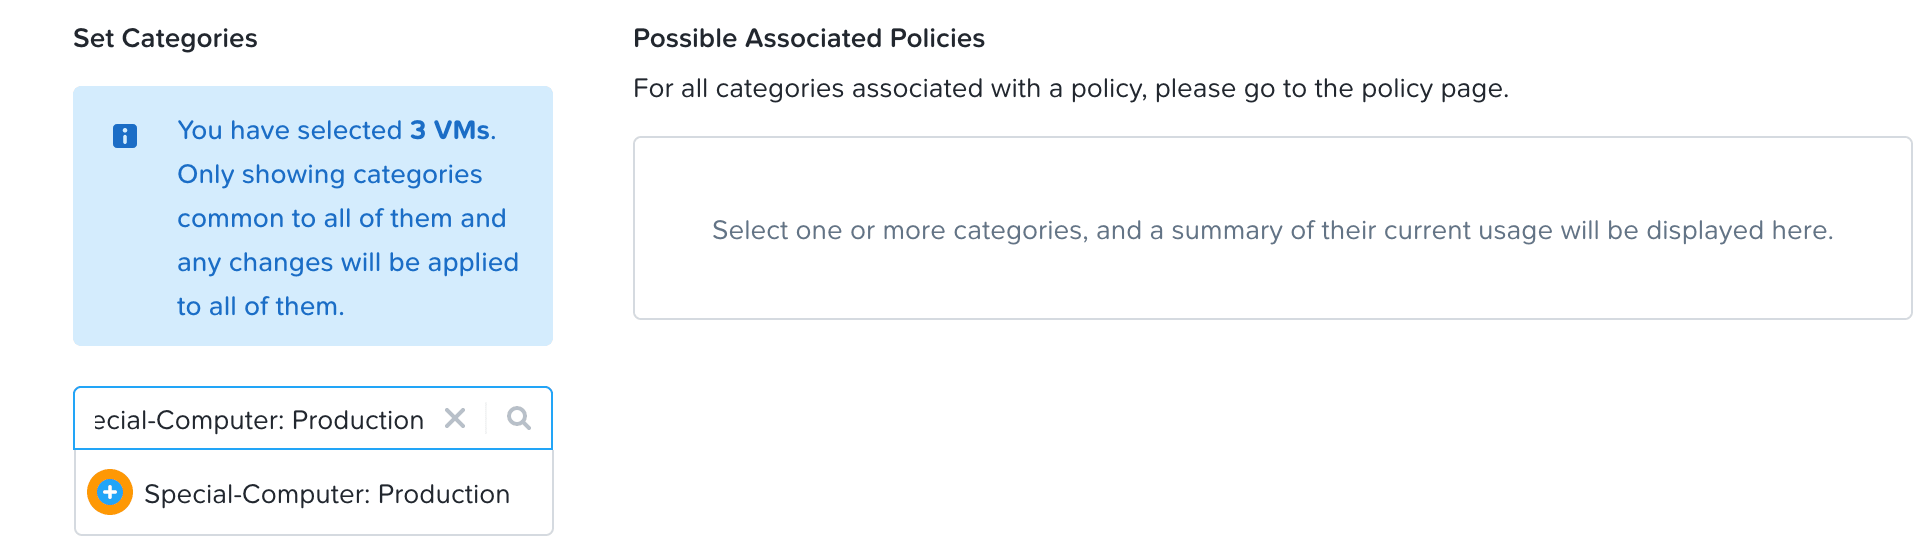
Type categoryName:value and click +.
Click Save.
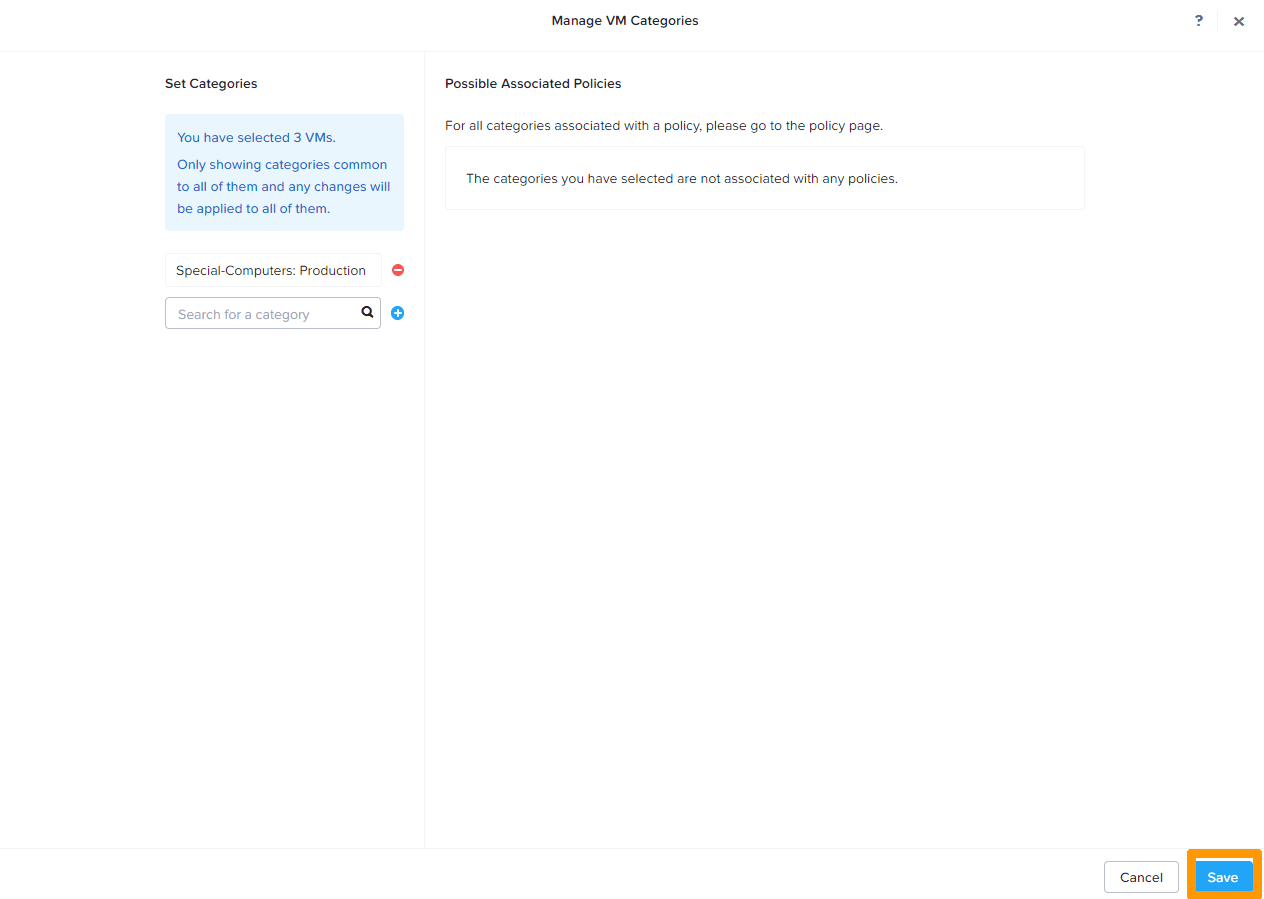
Assigning a Category to Subnets
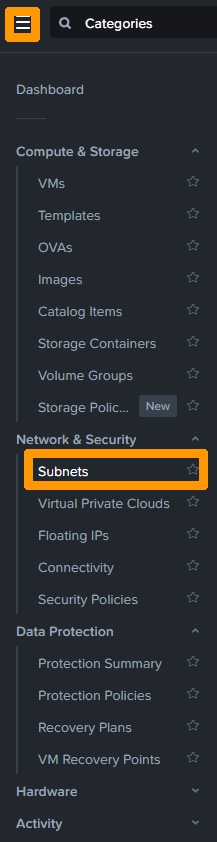
From the main menu, under Network & Security click Subnets.
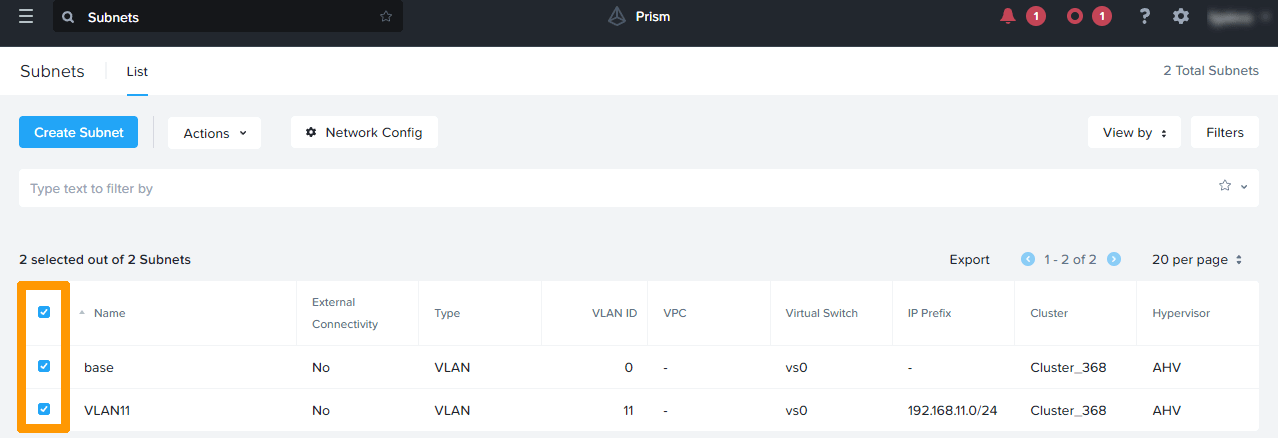
Select the subnets by checking the boxes to the left of their names.
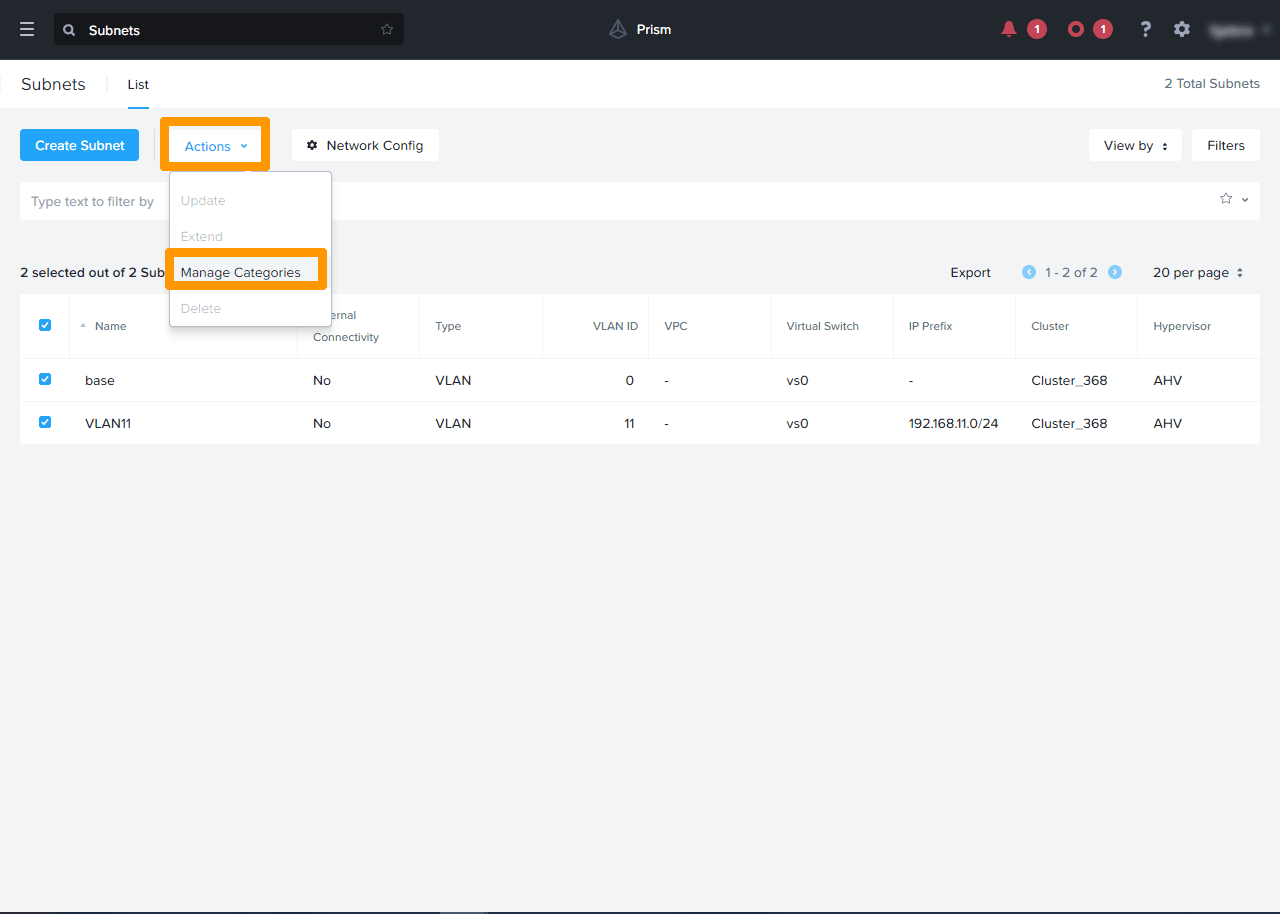
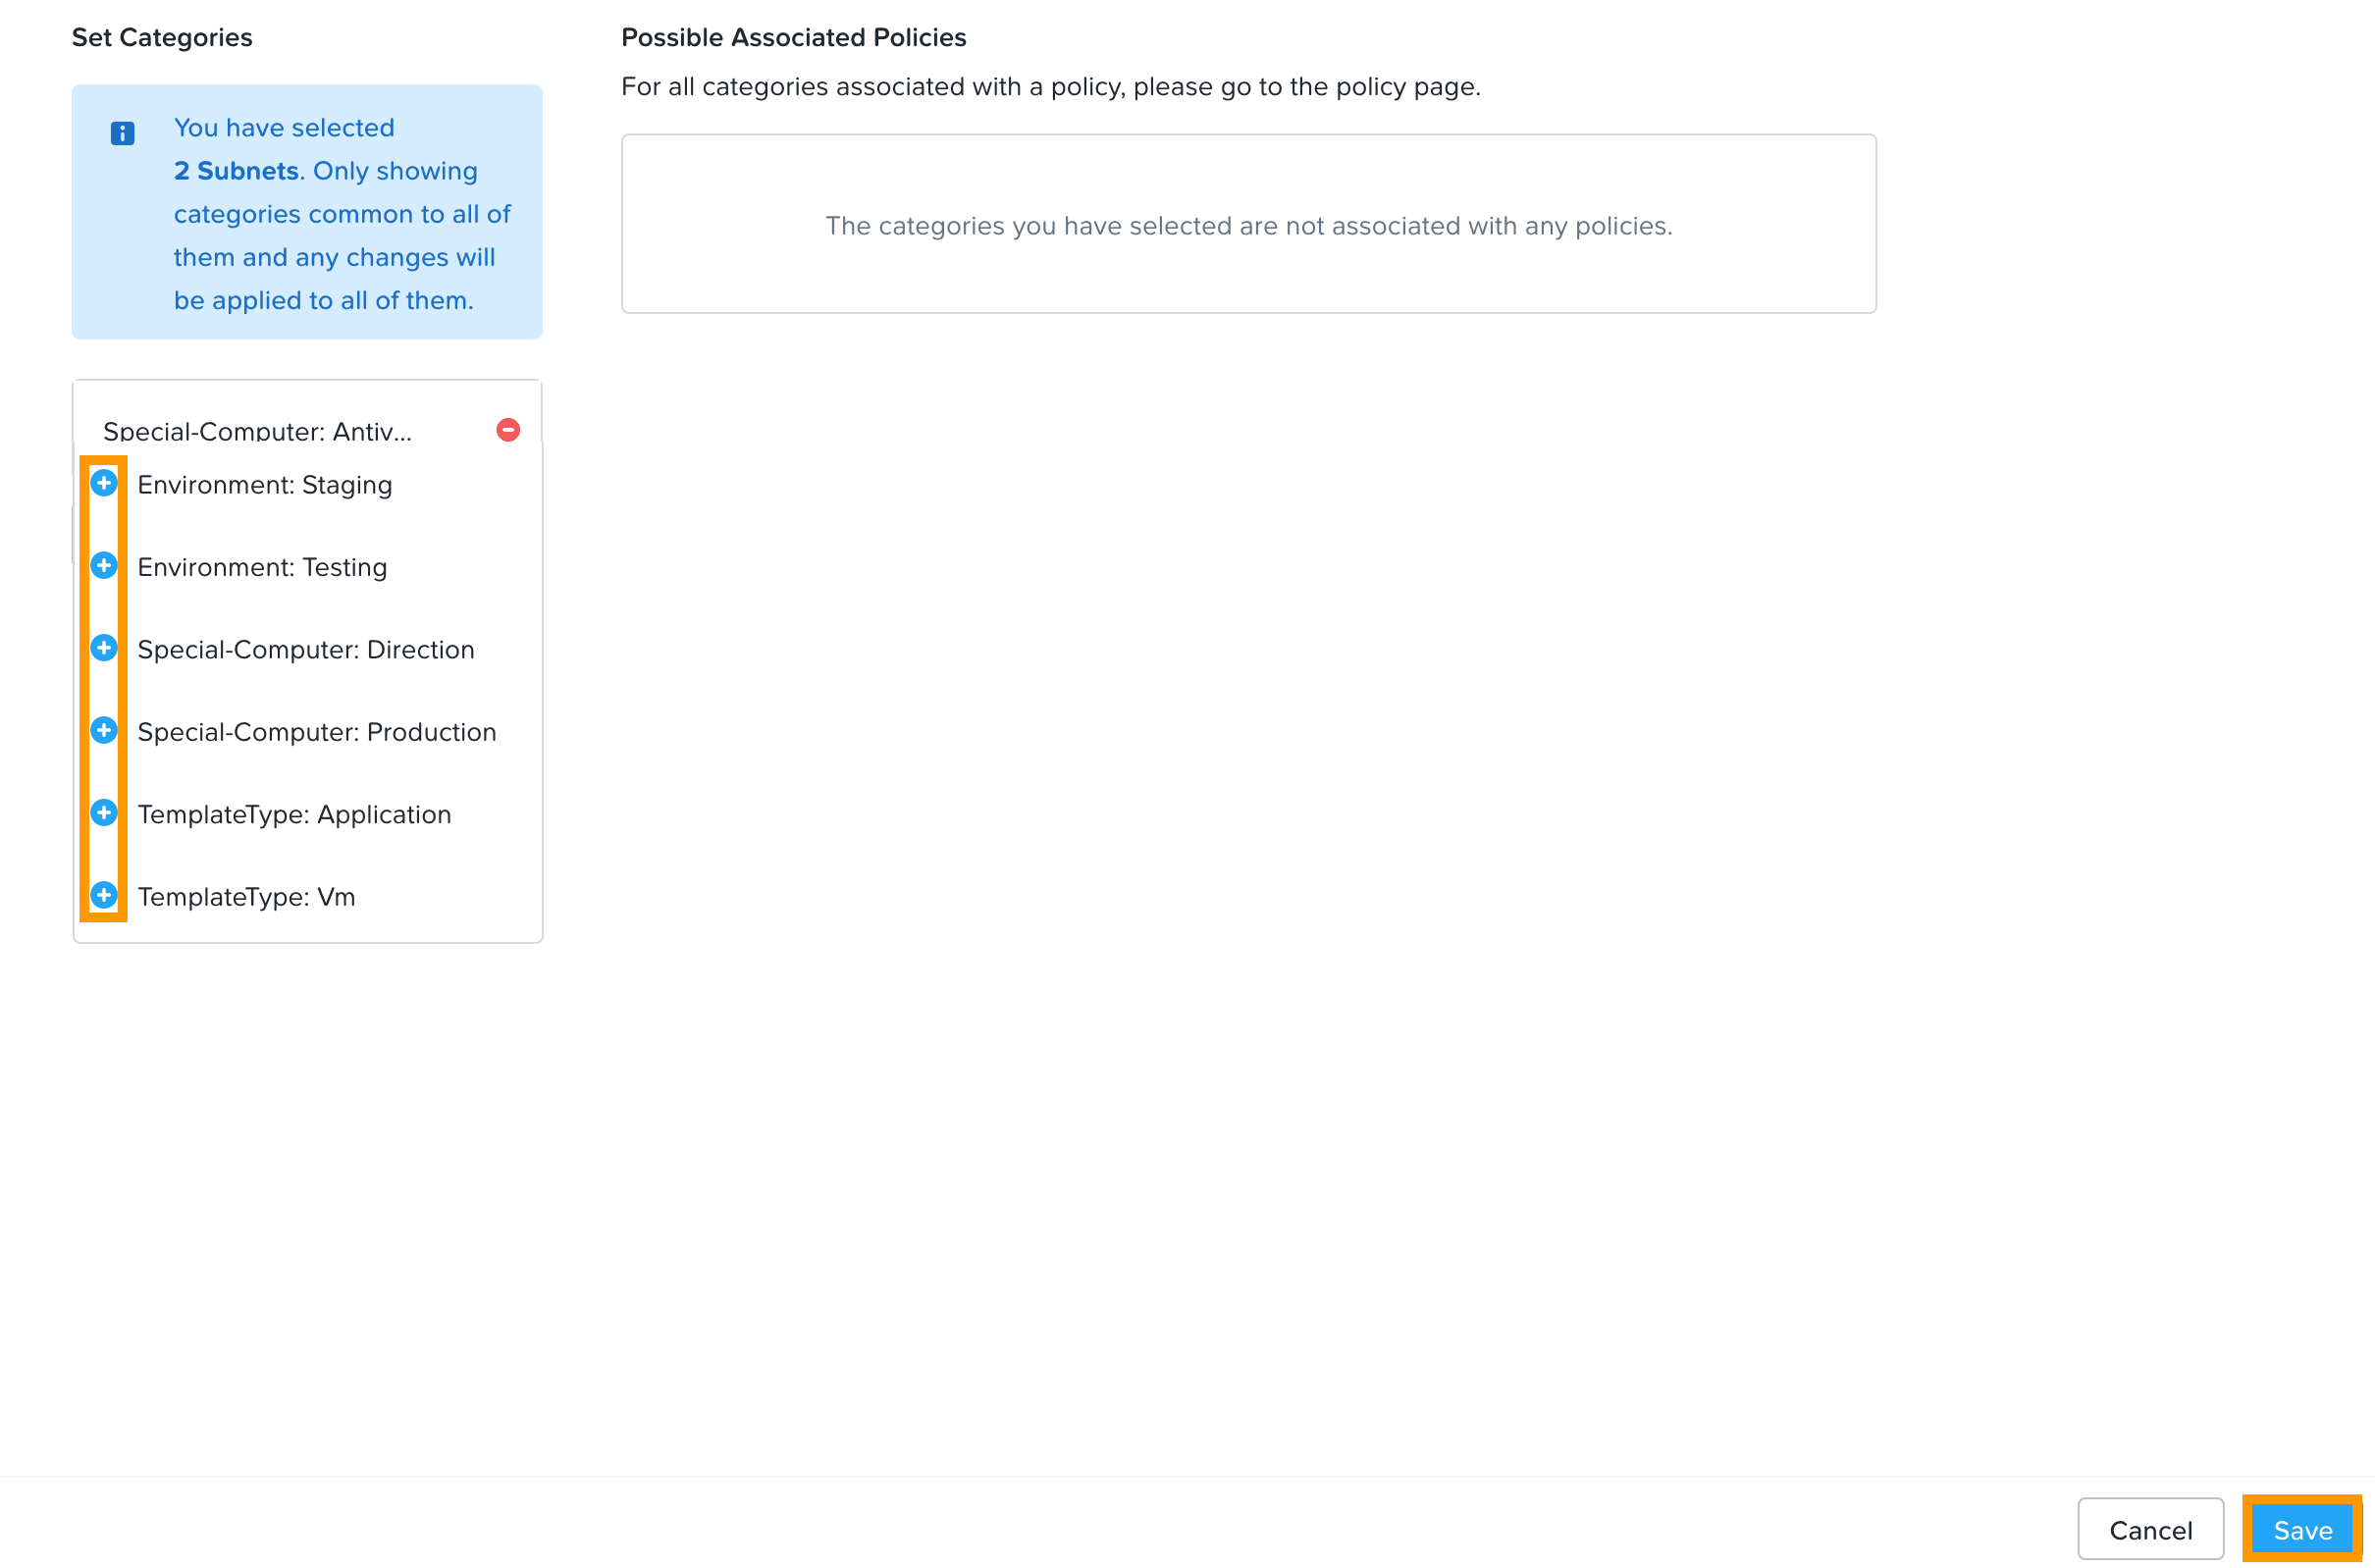
Click the Actions menu and select Manage Categories.
Choose a category by clicking the + sign to the left of its name. Then click Save.
Network quarantine management
Network quarantine allows you to isolate a virtual machine from the entire network, or allow it restricted access to certain repair tools that are on the network.
VM quarantine
In the main menu, under Compute & Storage click VMs.
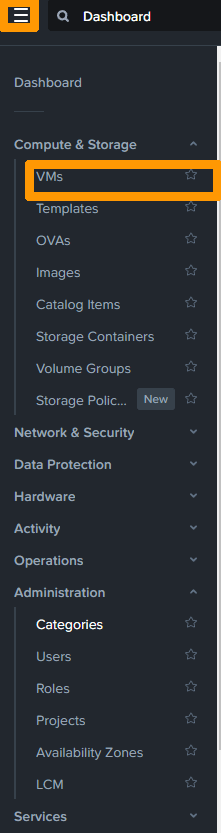
Select the virtual machine by ticking the box to the left.
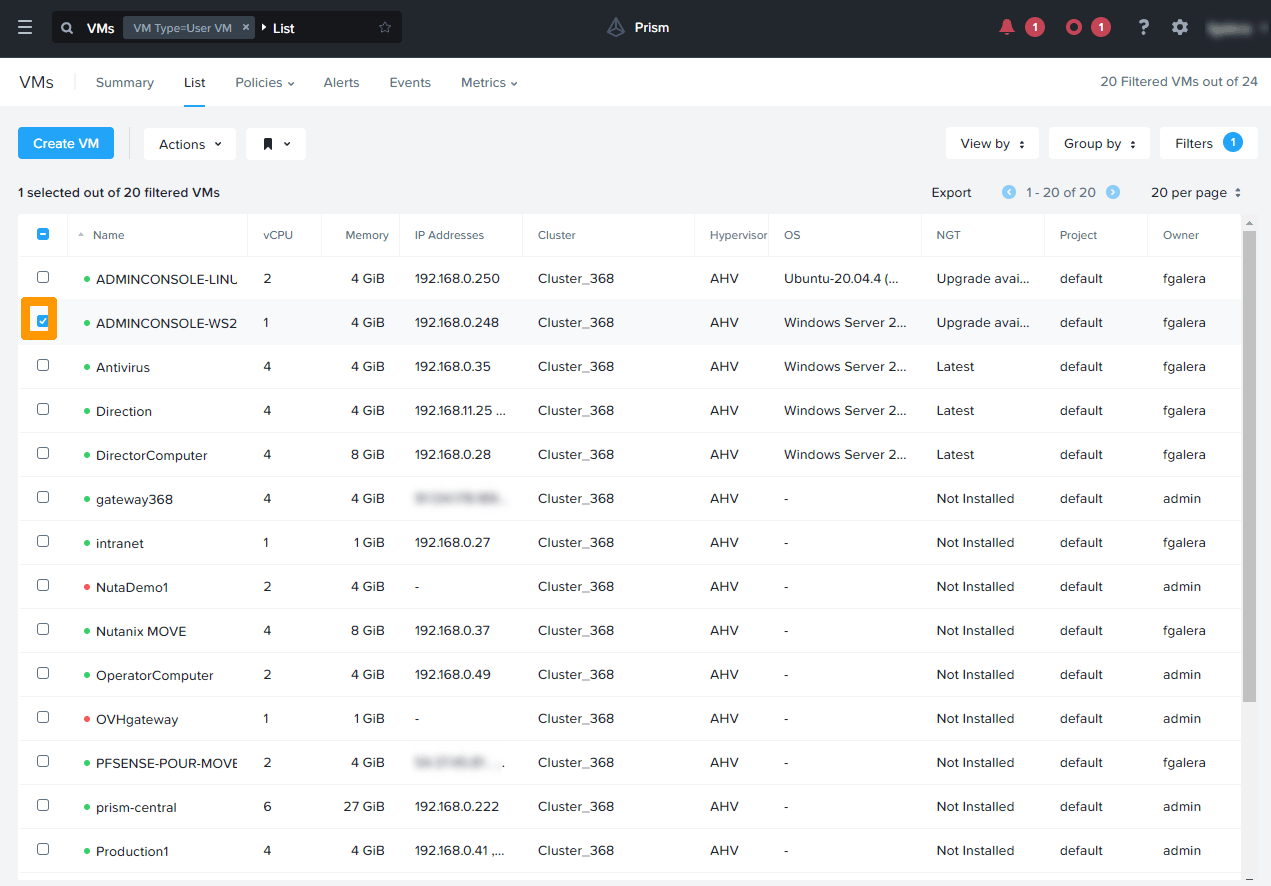
Click Actions and choose Quarantine VMs from the menu.
Select Forensic in Quarantine Method and click Quarantine.
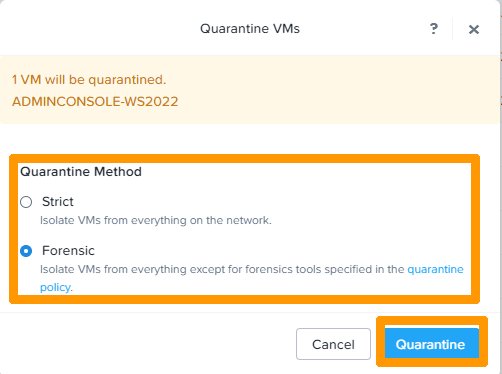
The virtual machine is now in quarantine.
Customizing the network quarantine
There are currently no blockages affecting the quarantined virtual machine. Follow these instructions to configure the quarantine.
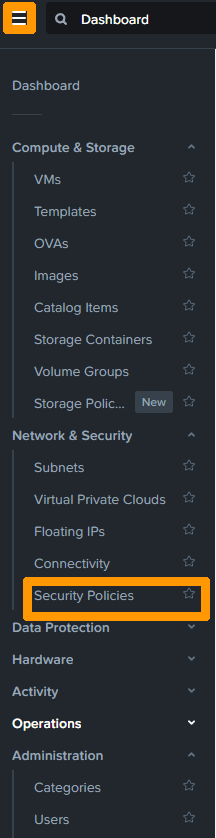
From the main menu, select the Network & Security submenu, then click Security Policies.
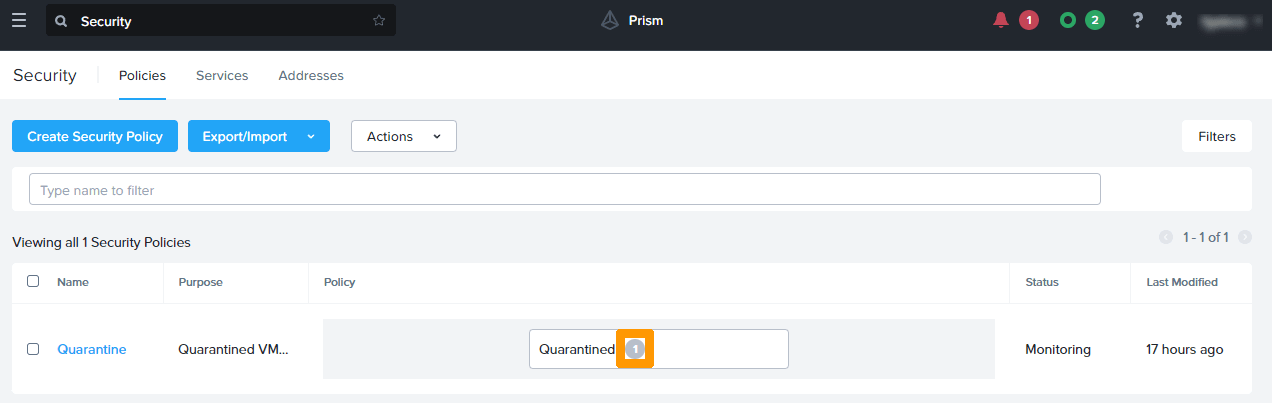
Click the number next to Quarantined to view the quarantined virtual machines.
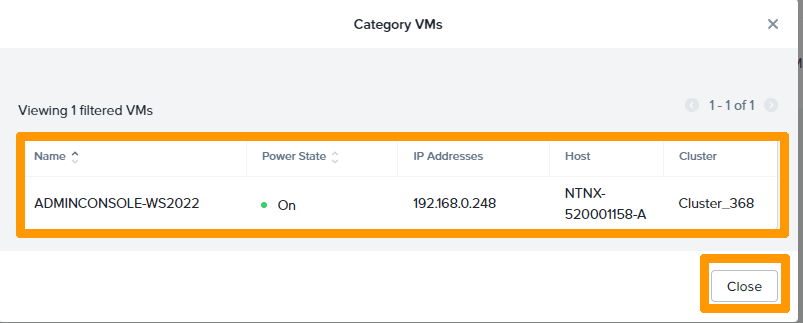
The list of quarantined VMs appears in the Name column. Click Close to return to the previous menu.
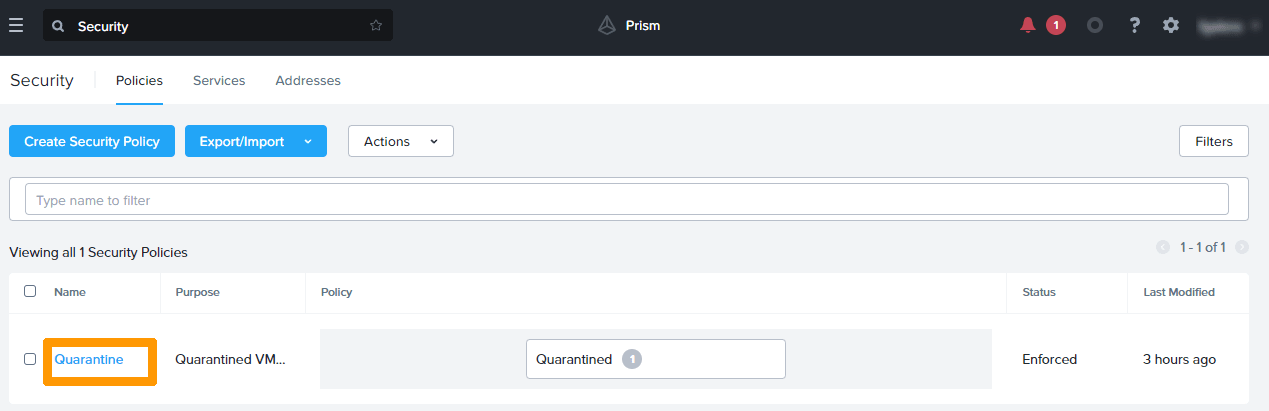
Click Quarantine below the Name column to edit the rule.
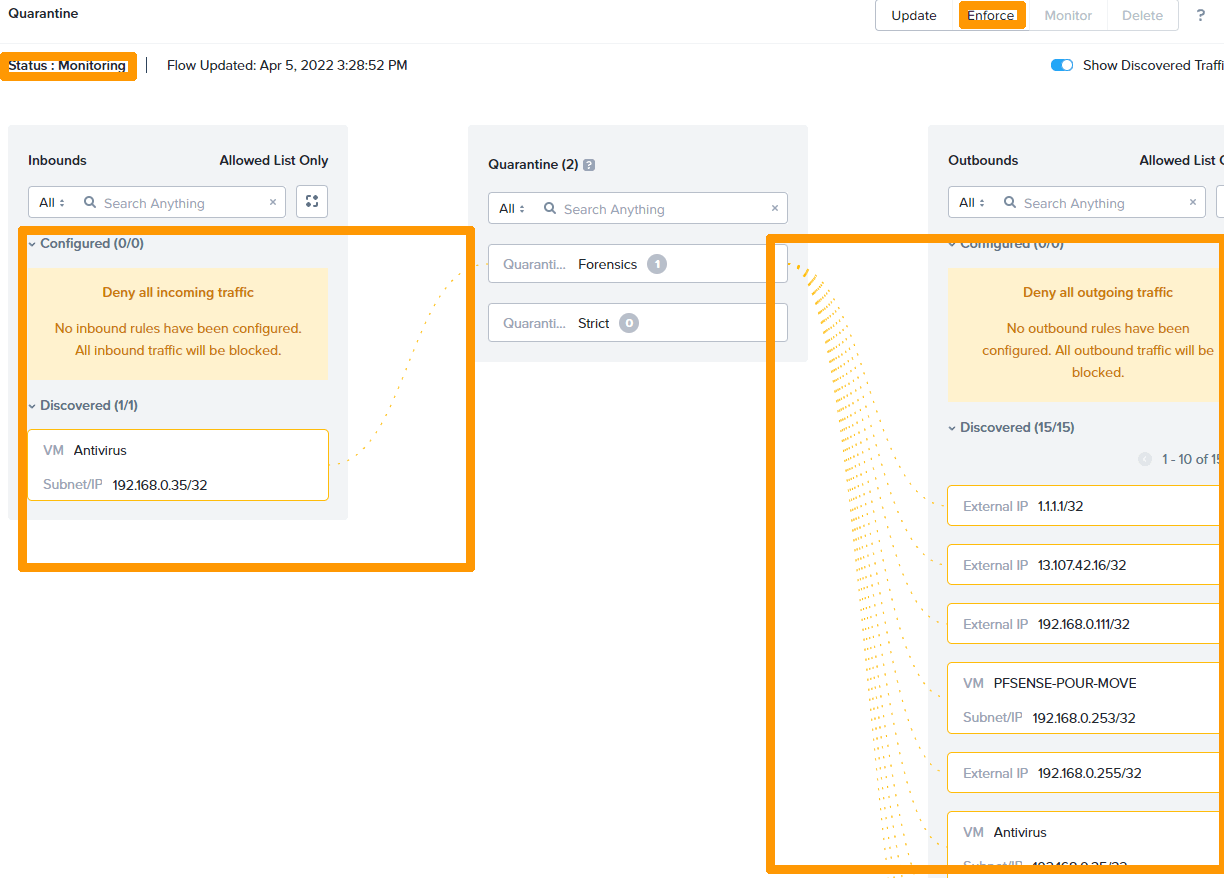
The rule status is in monitoring mode, as shown in the top left-hand corner.
Traffic is not blocked, but monitored. Connections between the quarantined VMs and the rest of the network are represented by orange lines attached to rectangles representing the IP address of the source or destination.
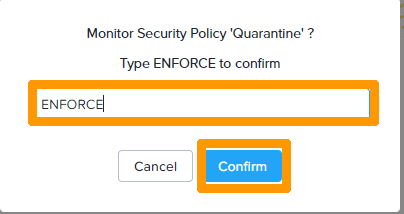
Click Enforce in the top right-hand corner to switch from Monitoring mode to Enforcing mode with traffic blocking.
Type ENFORCE and click Confirm.
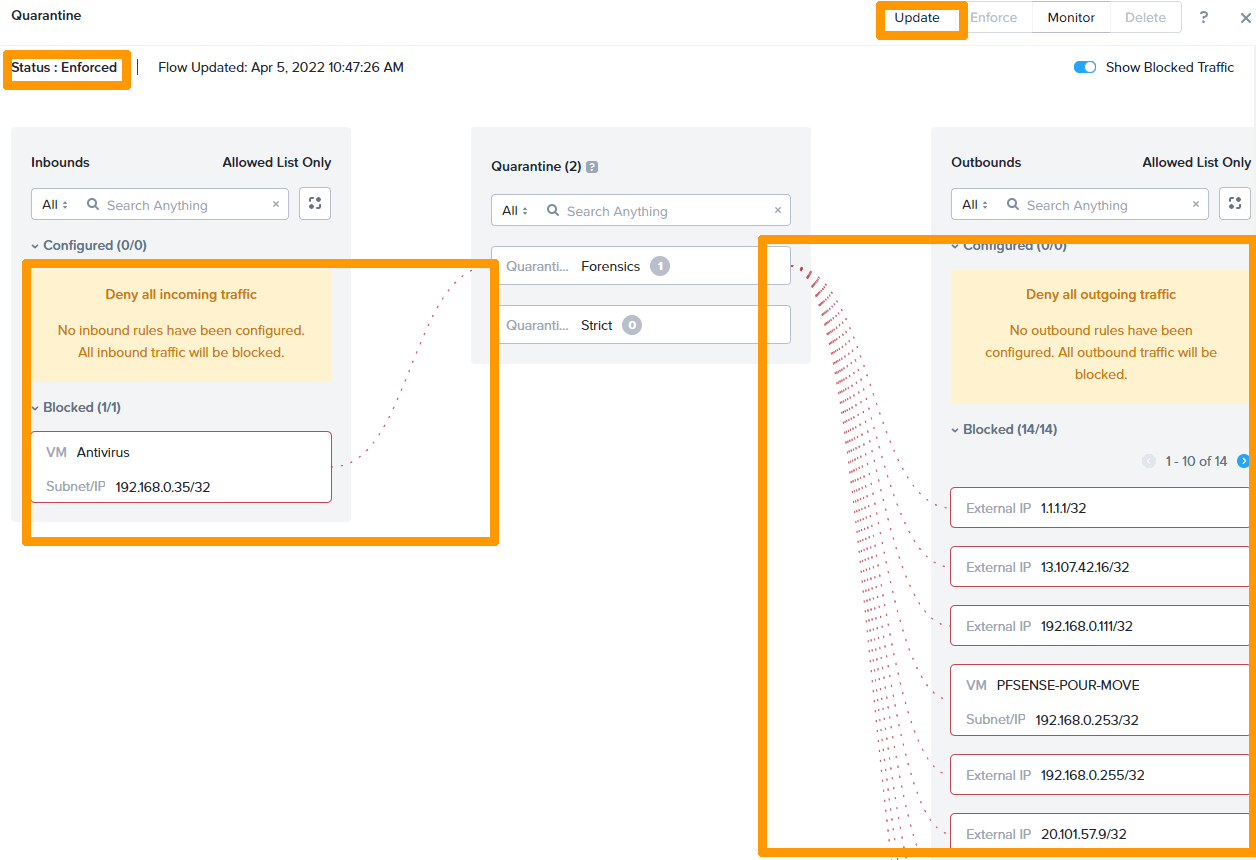
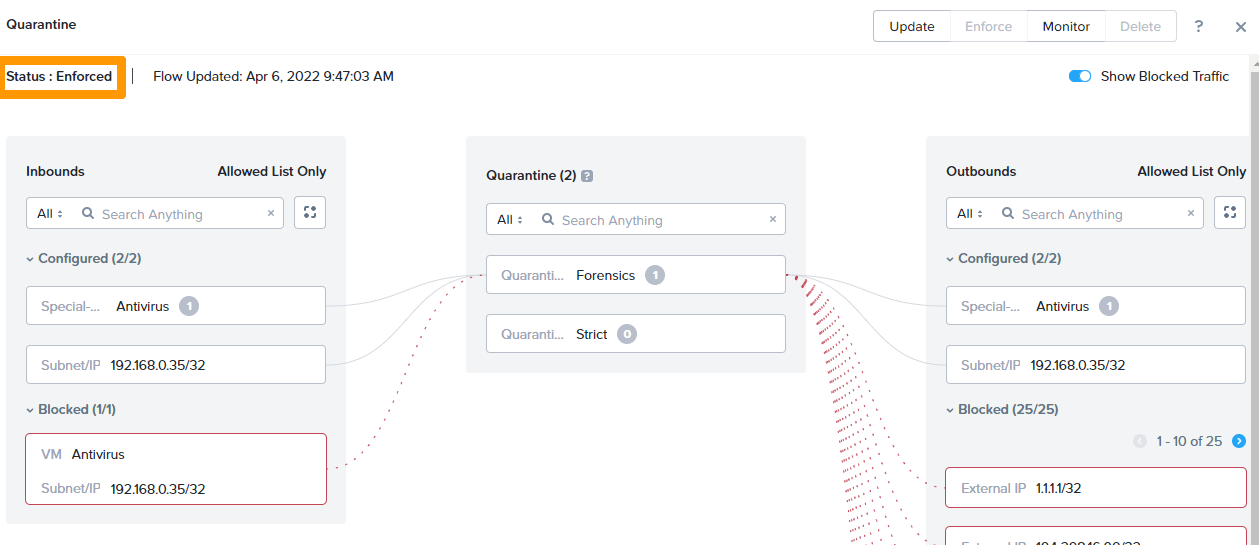
The rule status is now Enforced.
Traffic is blocked. We see attempts to access VMs in quarantines via red dotted lines to blocks containing the IP address of the VM.
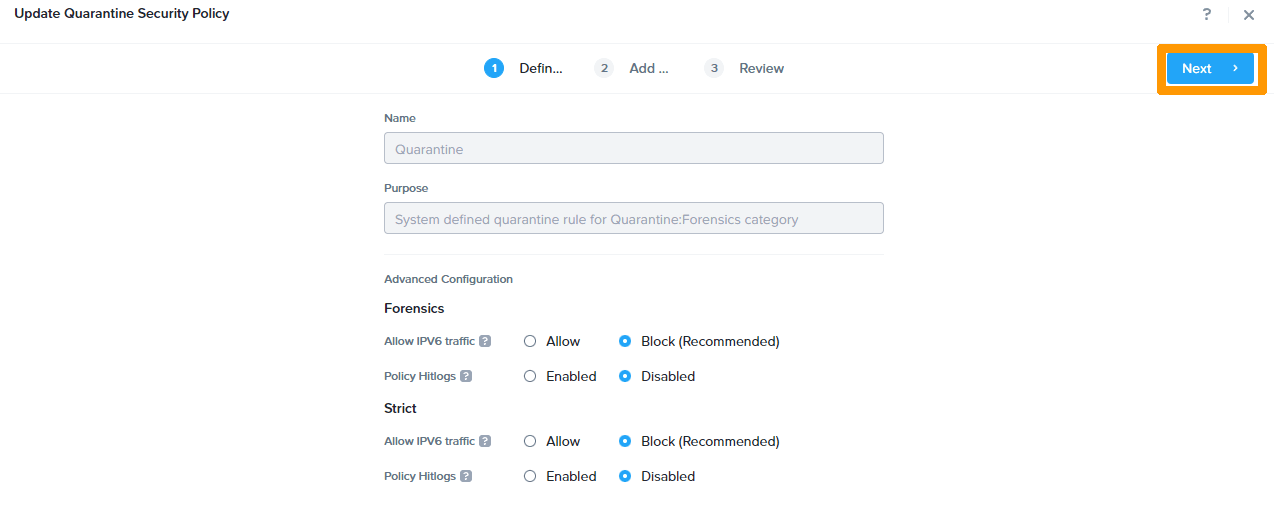
Click Update in the top right-hand corner to edit the rule to allow certain network streams.
Click Next.
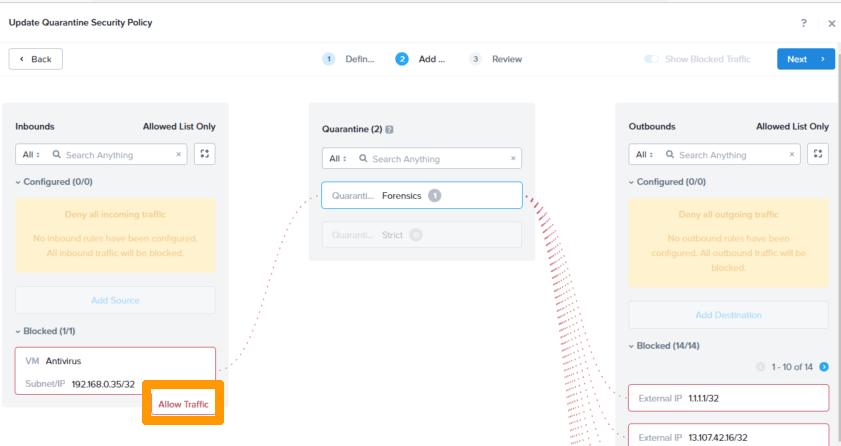
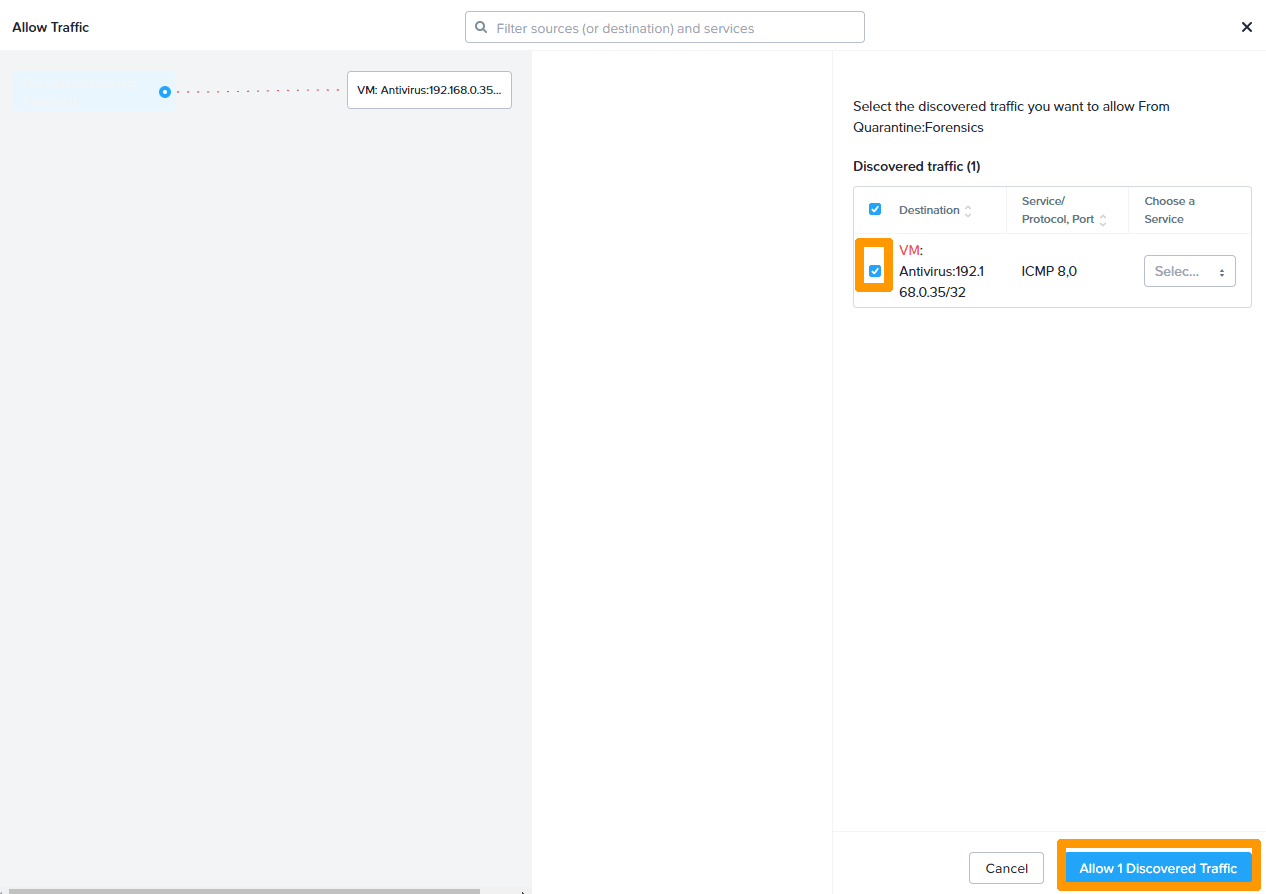
Move your mouse over an incoming connection attempt and click Allow Traffic.
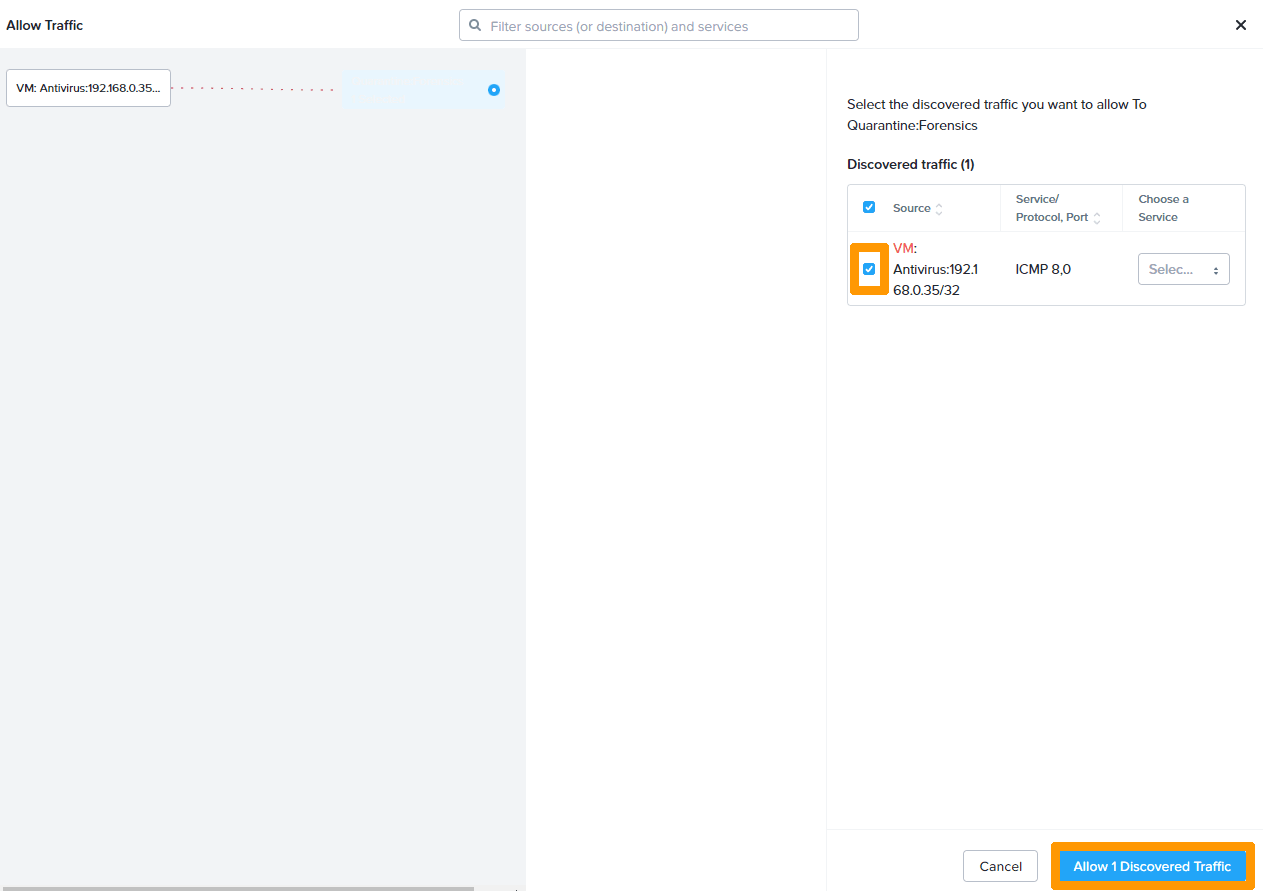
Select the checkbox to the left of the Source to select the incoming discovered traffic, then click Allow 1 Discovered Traffic to allow only the discovered traffic, such as ICMP below.
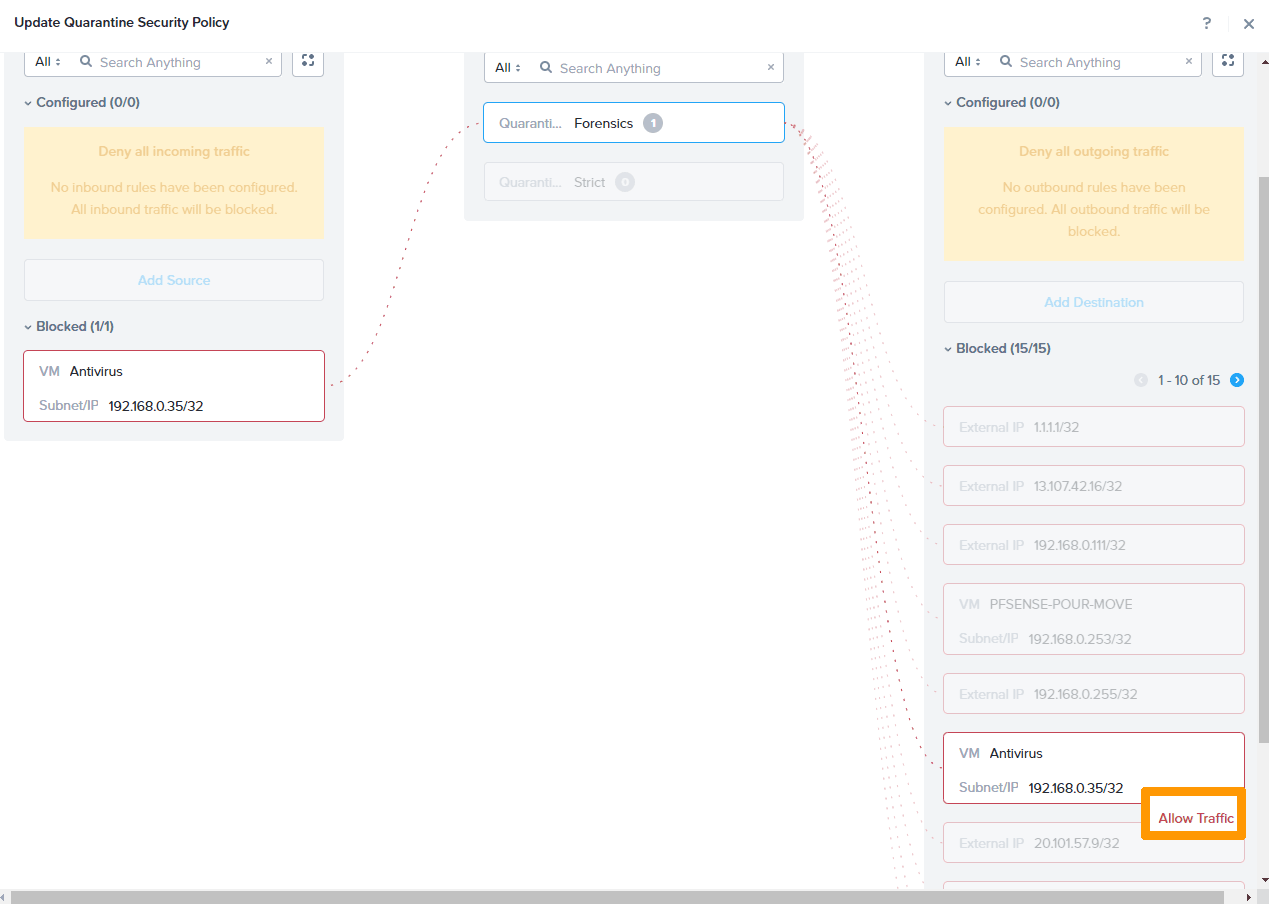
Move your mouse over an outgoing connection attempt and click Allow Traffic.
Select the checkbox to the left of the Source to select the outbound discovered traffic, then click Allow 1 Discovered Traffic to allow only the discovered traffic.
The authorized traffic is now visible via gray lines, while the blocked traffic is in red.
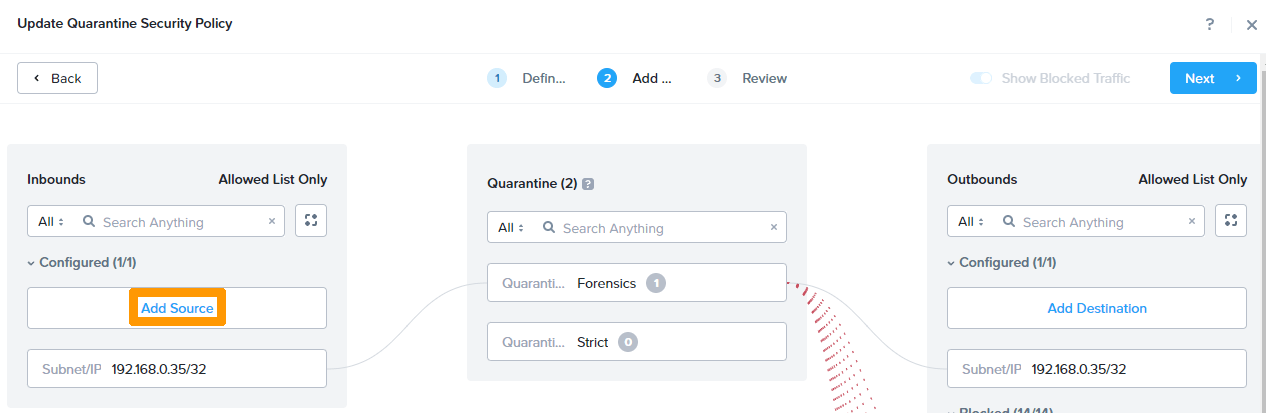
To create a rule manually without going through network discovery, left-click Add Source to allow an incoming connection to the quarantine.
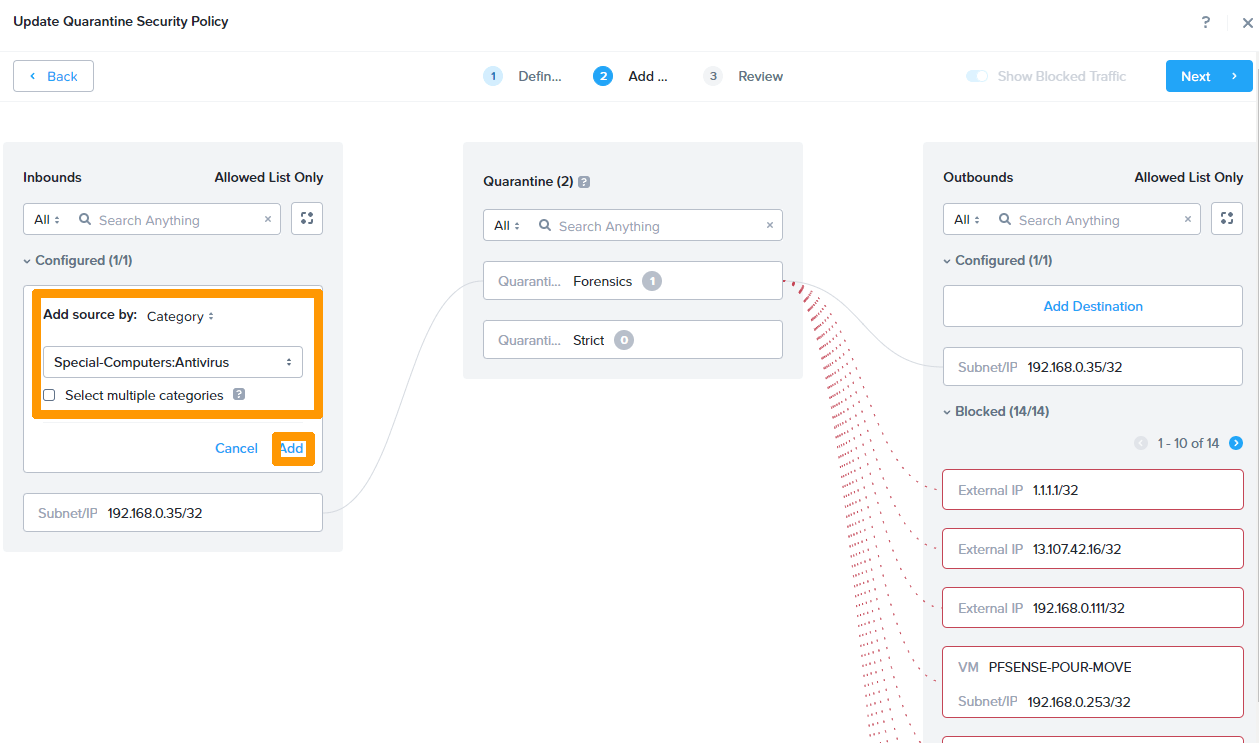
Enter the category name and its value in Add source by: Category, then click Add.
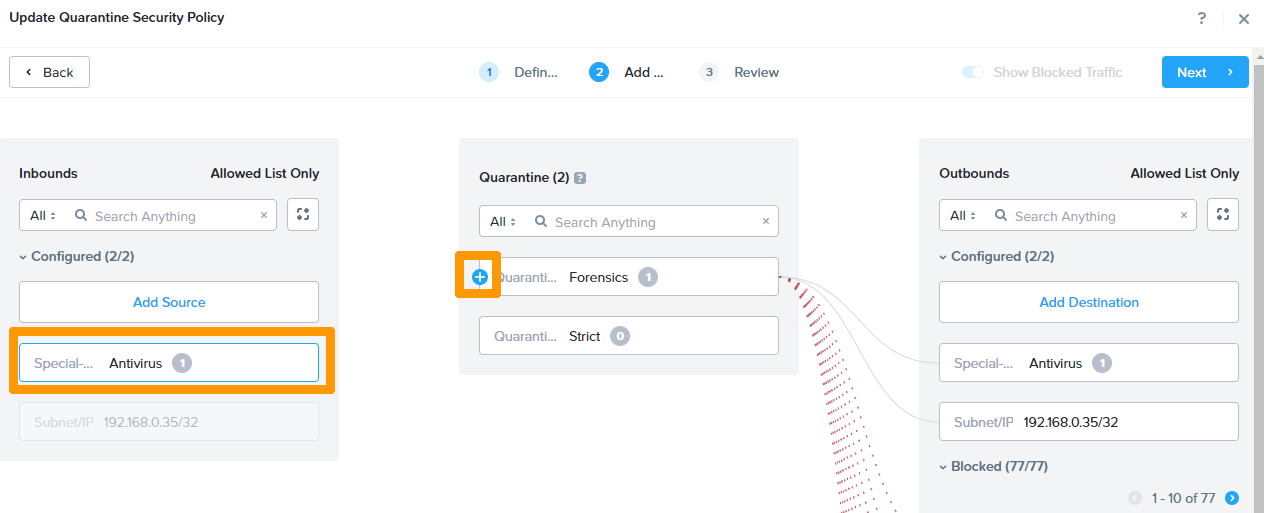
The source appears in Configured.
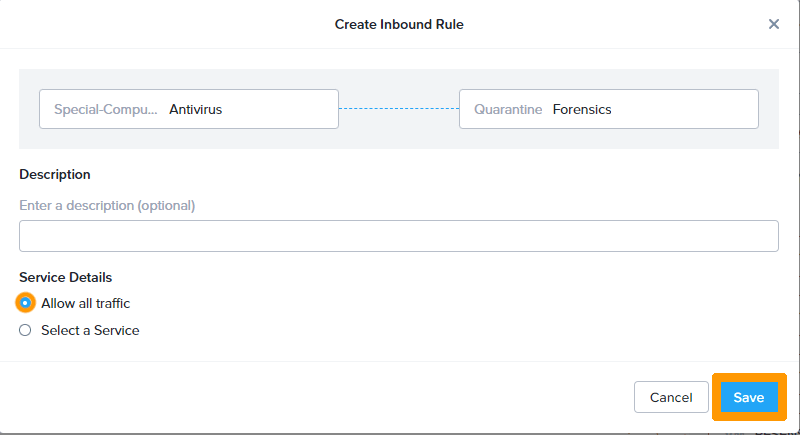
Click + to the left of Quarantine: Forensics.
Select Allow all traffic and click Save.
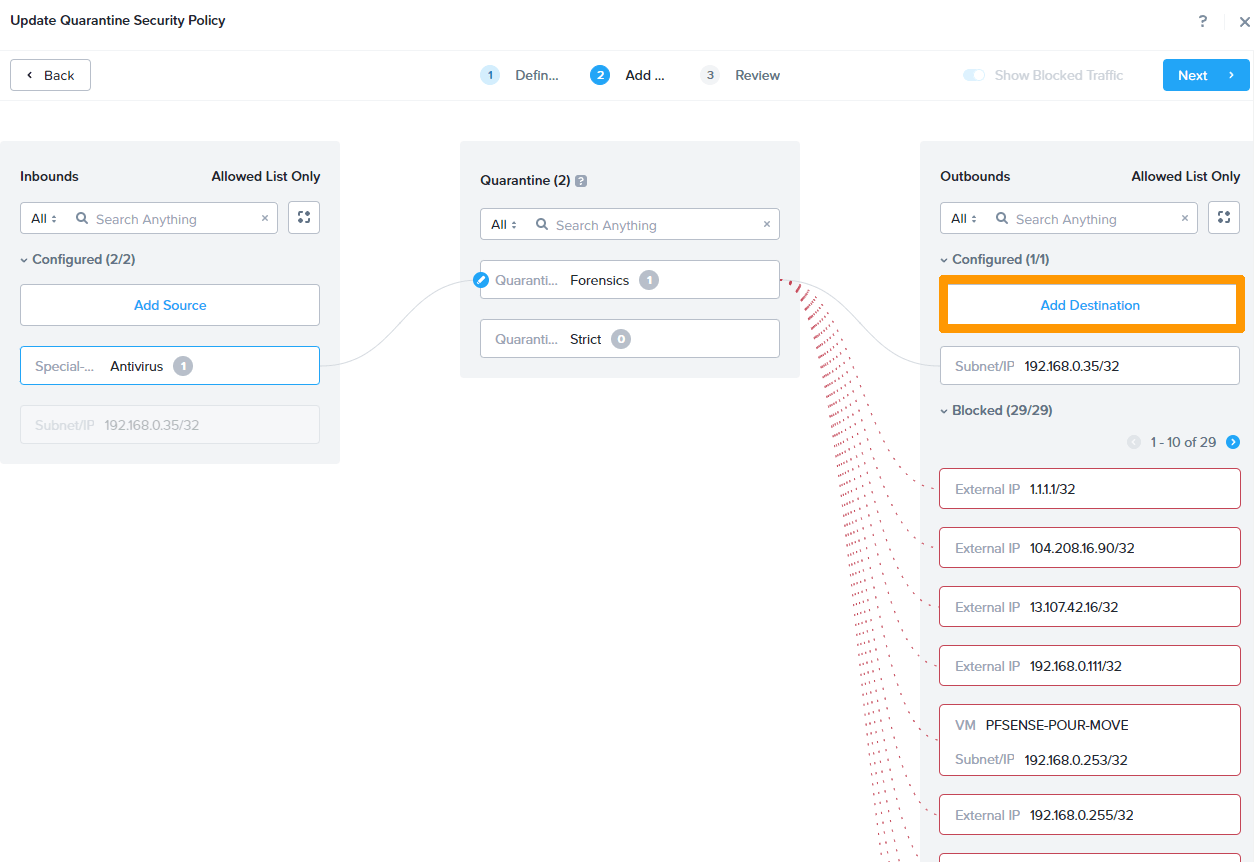
Right-click Add Destination to allow an outgoing rule from quarantine.
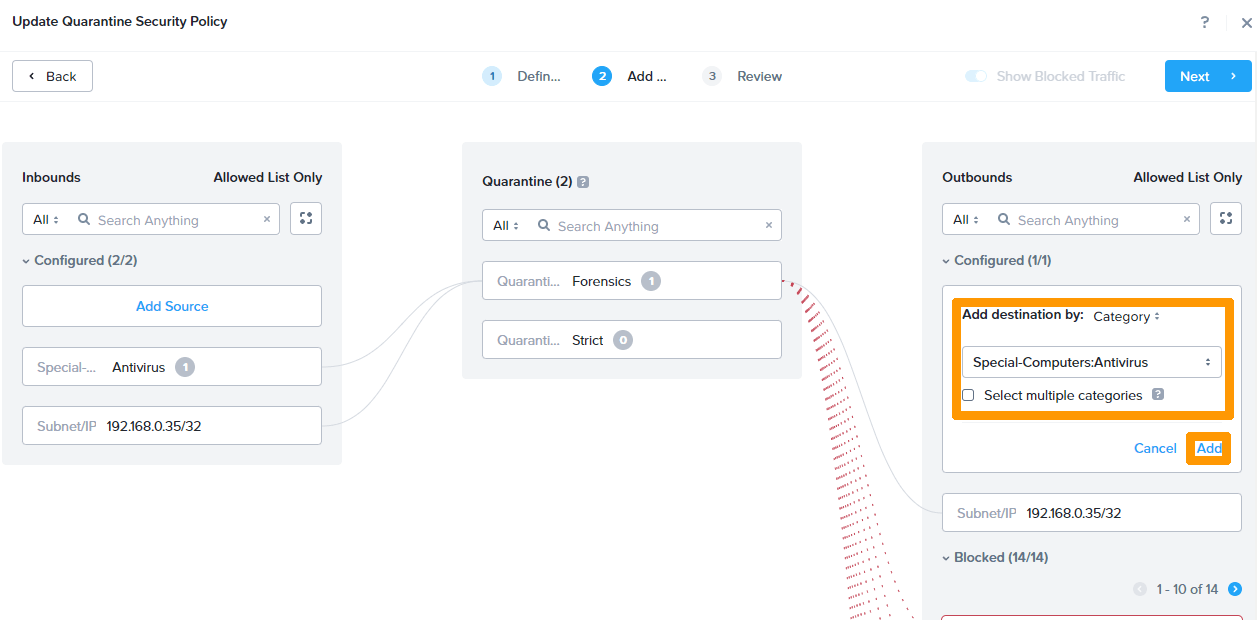
Enter the category name and its value in Add source by: Category, and then click Add.
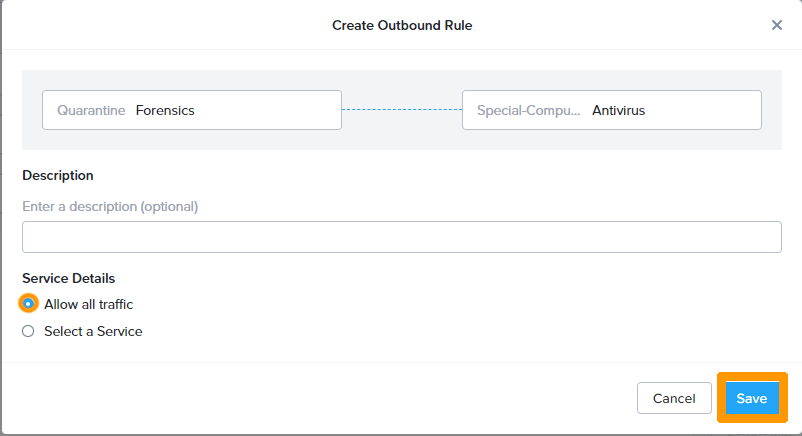
Click + to the right of Quarantine: Forensics.
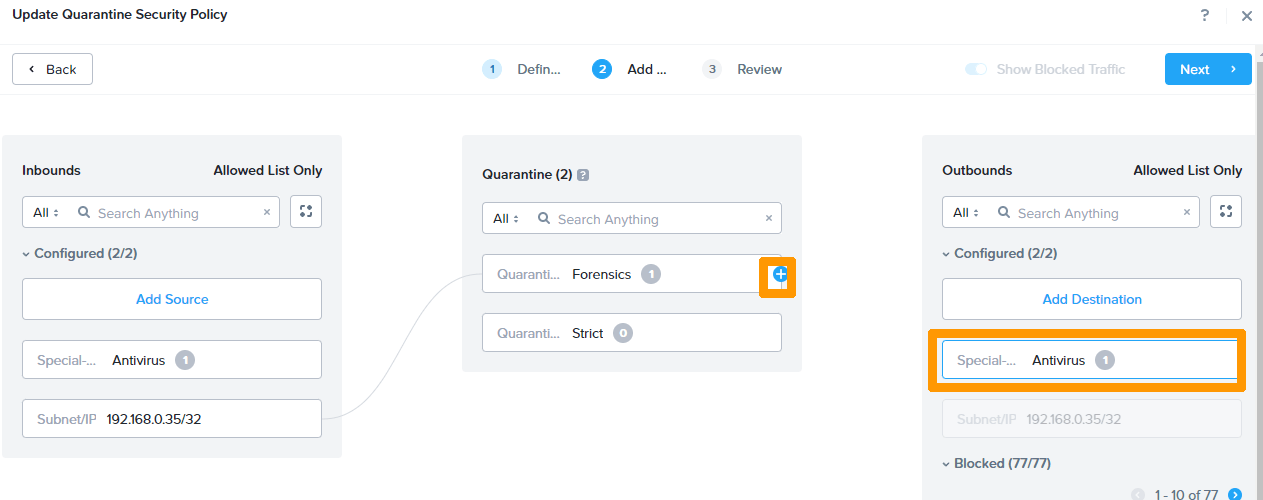
Allow all traffic and click Save.
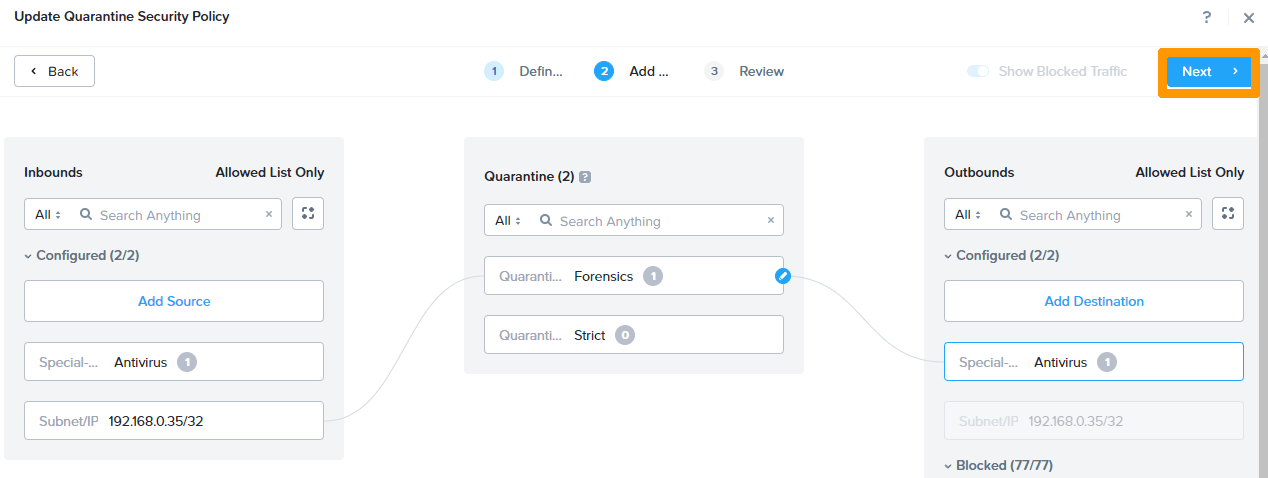
Click Next.
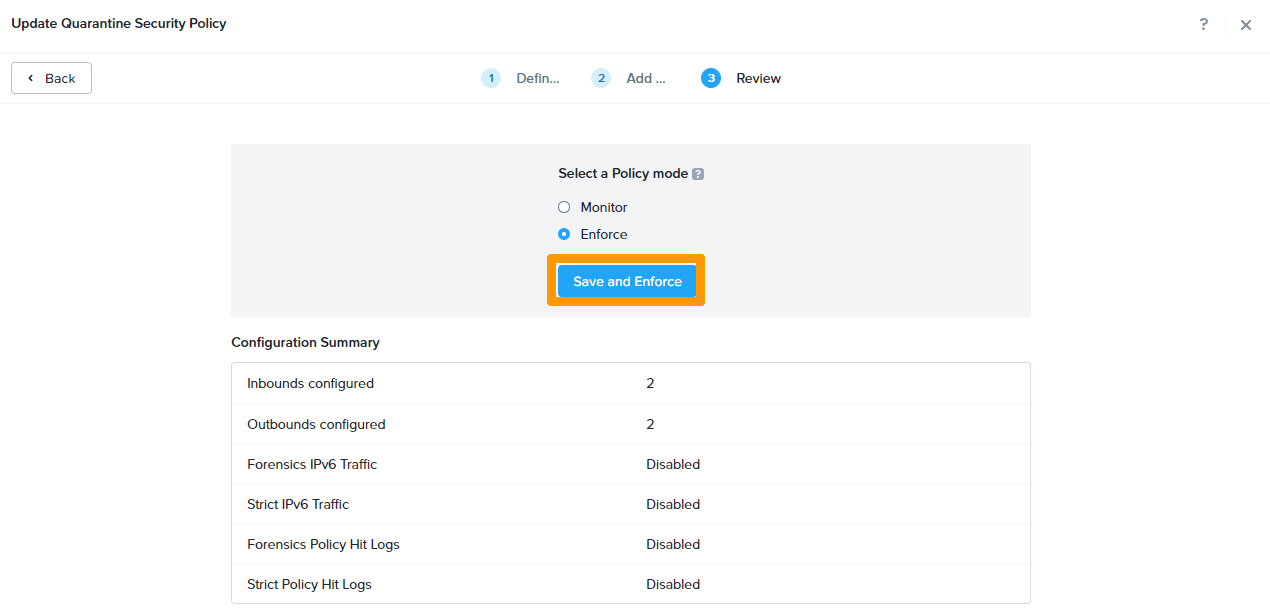
Click Save and Enforce to apply the quarantine rule changes.
Click Quarantine to view quarantine rule details.
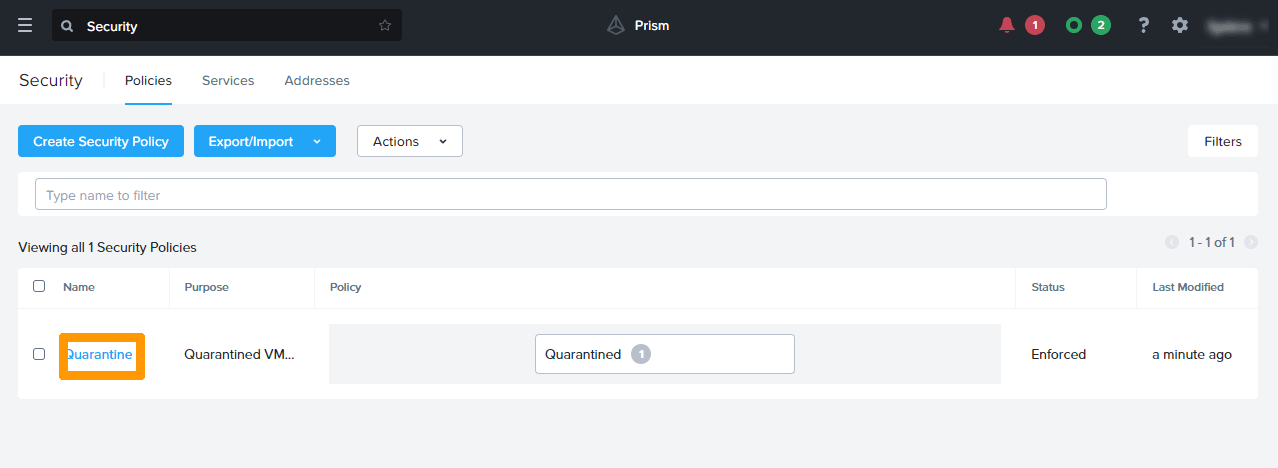
The rule status is now Enforced, and the Forensic mode has been customized.
A virtual machine in Strict mode will be completely isolated from the network, while in Forensic mode it will have access to the areas defined in the quarantine rule.
Creating an isolation rule
An isolation rule allows the blocking of network communications between two categories (virtual machines or subnets).
For more information about managing categories, see the Setting up categories section in this guide.
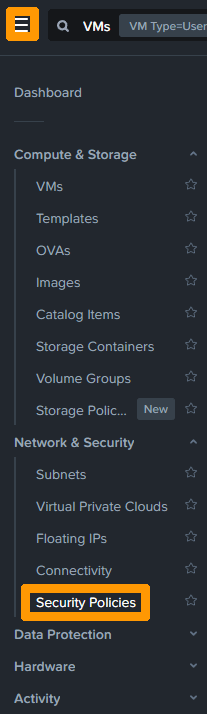
From the main menu, click the Network & Security submenu, then Securities Policies.
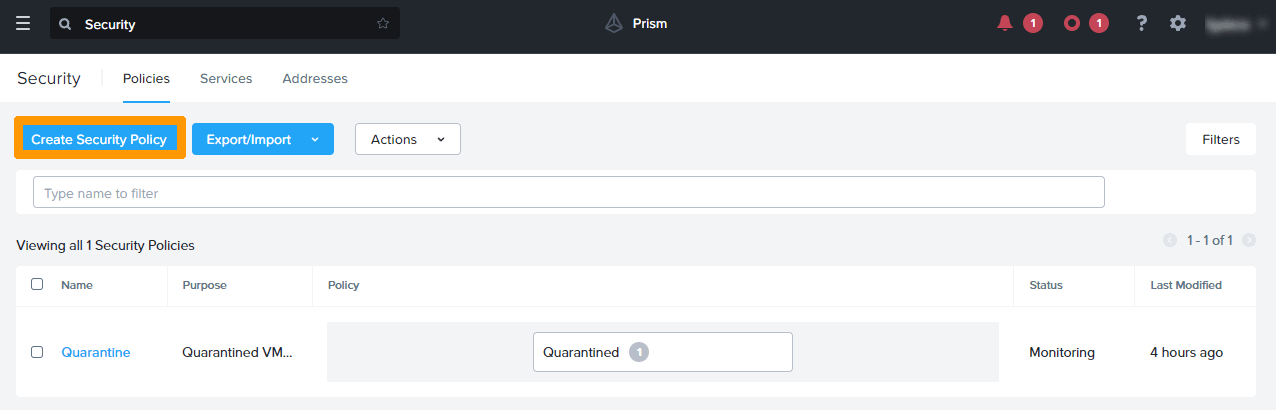
Click Create Security Policy.
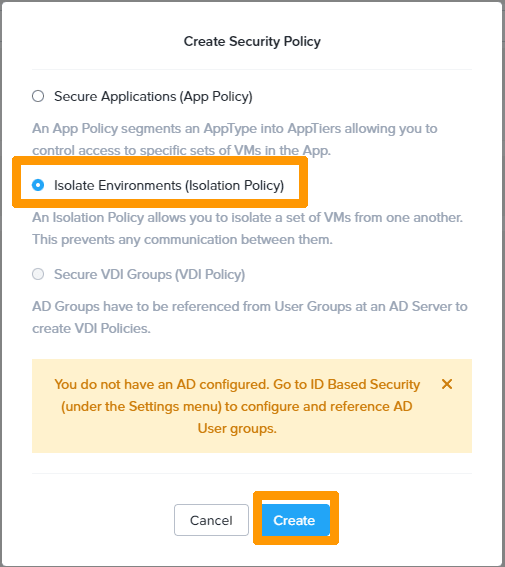
Select Isolation Environments (Isolation Policy) and click Create.
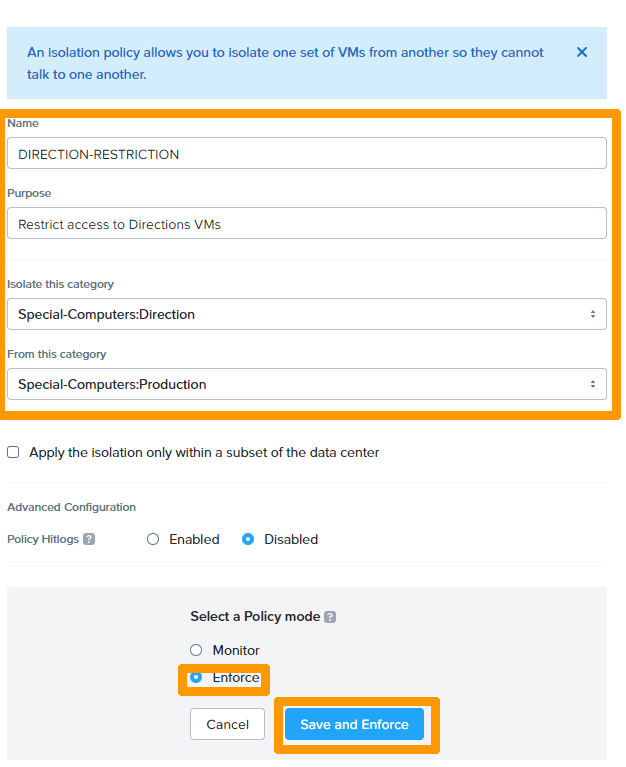
Type the rule name in Name and then add a comment in Purpose, choose a category in Isolate this category, followed by another category in From this category.
Select Enforce in Select a Policy mode, then click Save and Enforce.
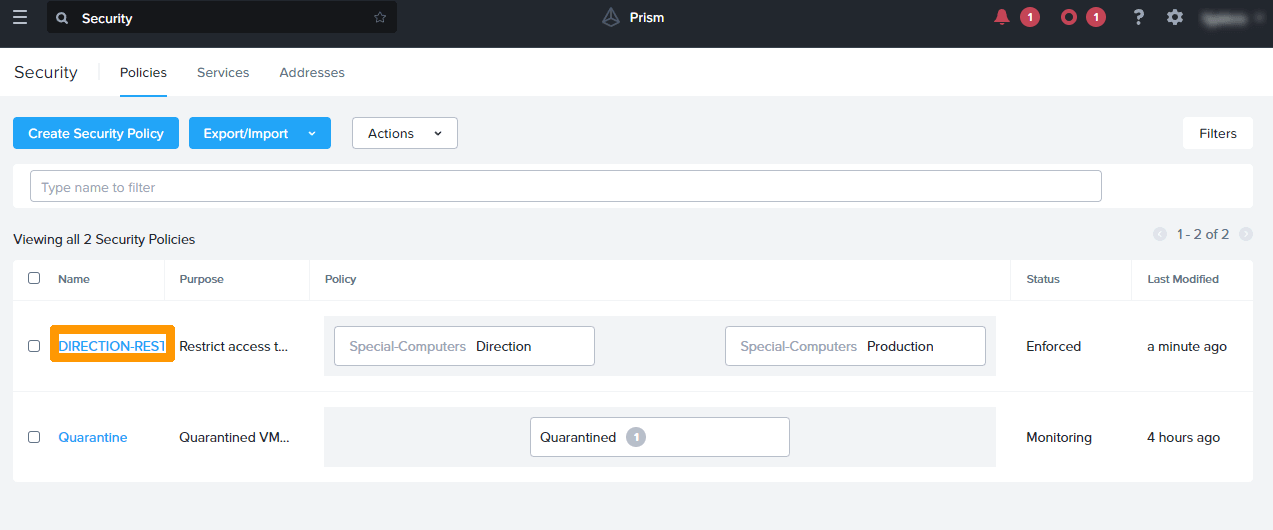
The rule is active in the list of security rules.
Click the rule's name below the Name column to view details.
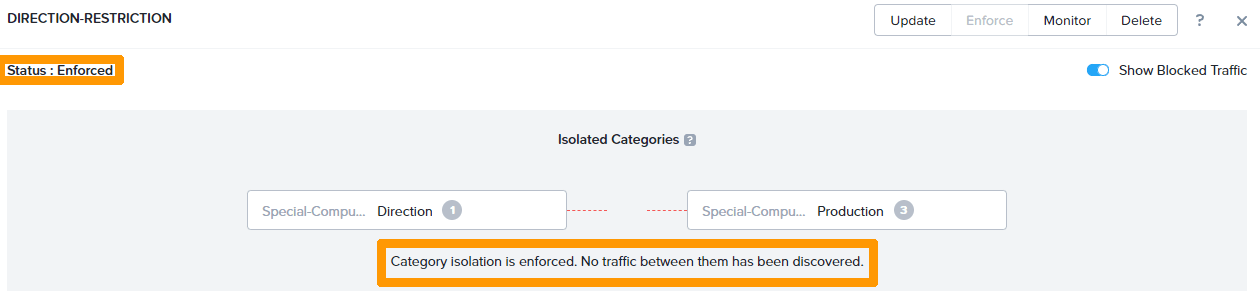
The status of the rule indicates Enforced, and you can see that no connection attempt between the two zones is detected, as this message indicates: No Traffic between them has been discovered.
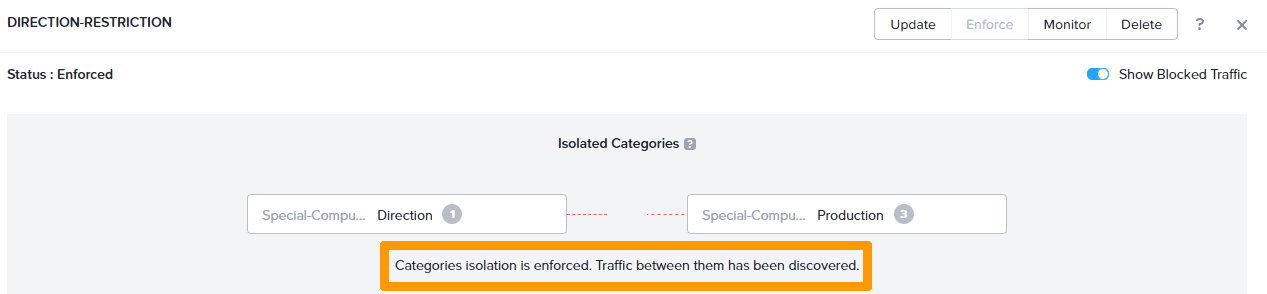
If a network connection attempt is detected between these two zones, the message changes to Traffic between them has been discovered.
Setting up an application rule
An application rule limits access to certain ports, protocols, or services for members of a category from another category.
This rule can only be used with a category named Applications that can be edited but not deleted.
For more information about managing categories, see the Setting up categories section in this guide.
From the main menu, click Security Policies in the Network & Security submenu.
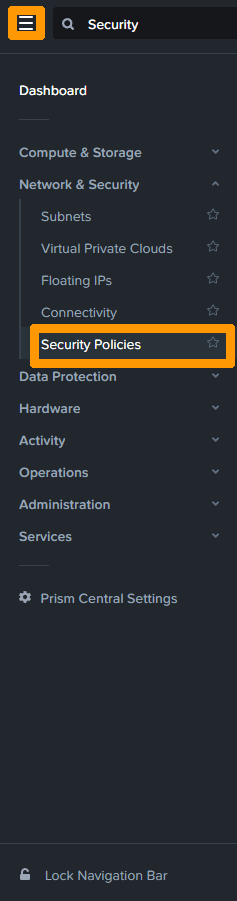
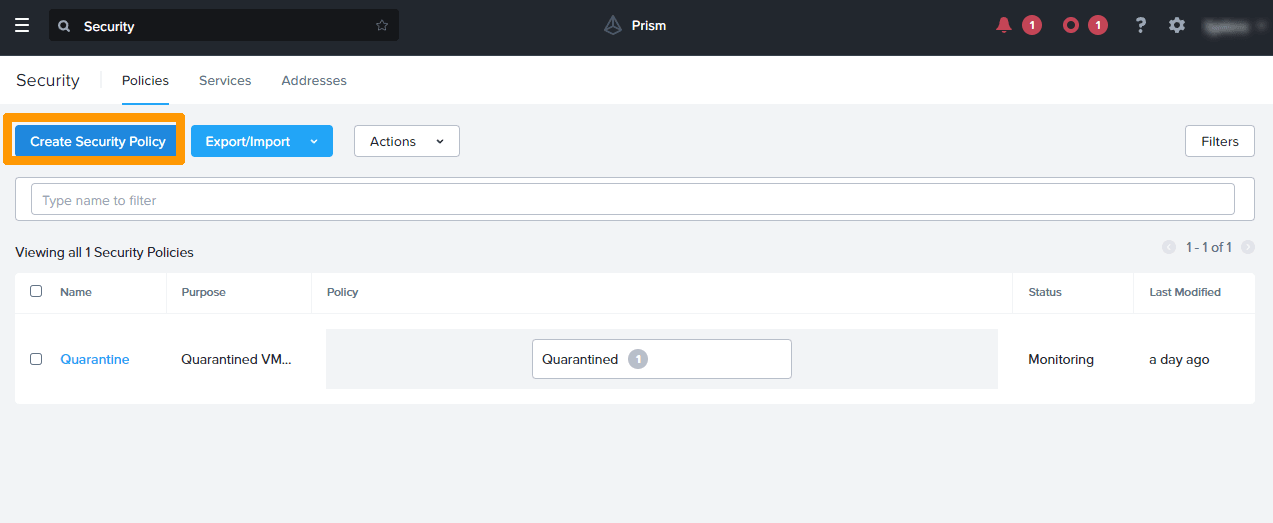
Click Create Security Policy.
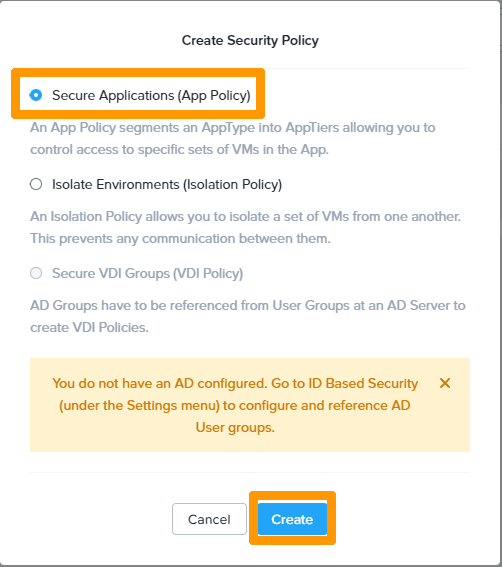
Select Secure Application (App Policy) and click Create.
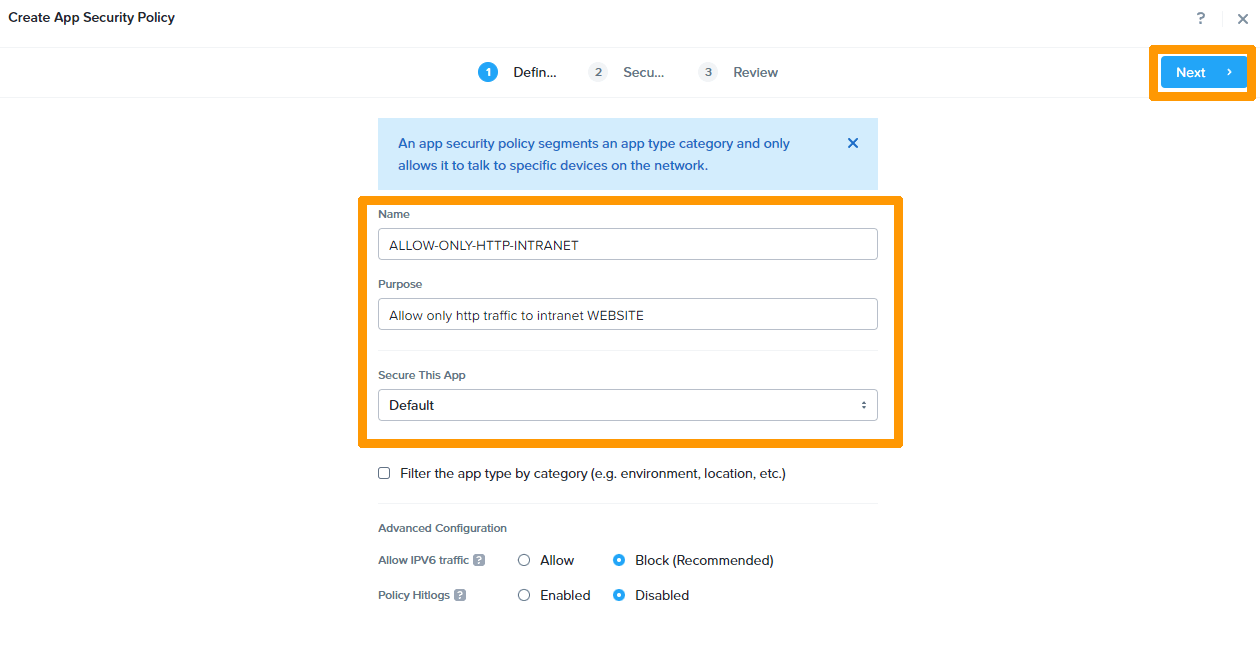
Enter the Name fields for the rule name, Purpose for comment, Secure this App by choosing an existing application category, and click Next.
Click Add Source on the left.
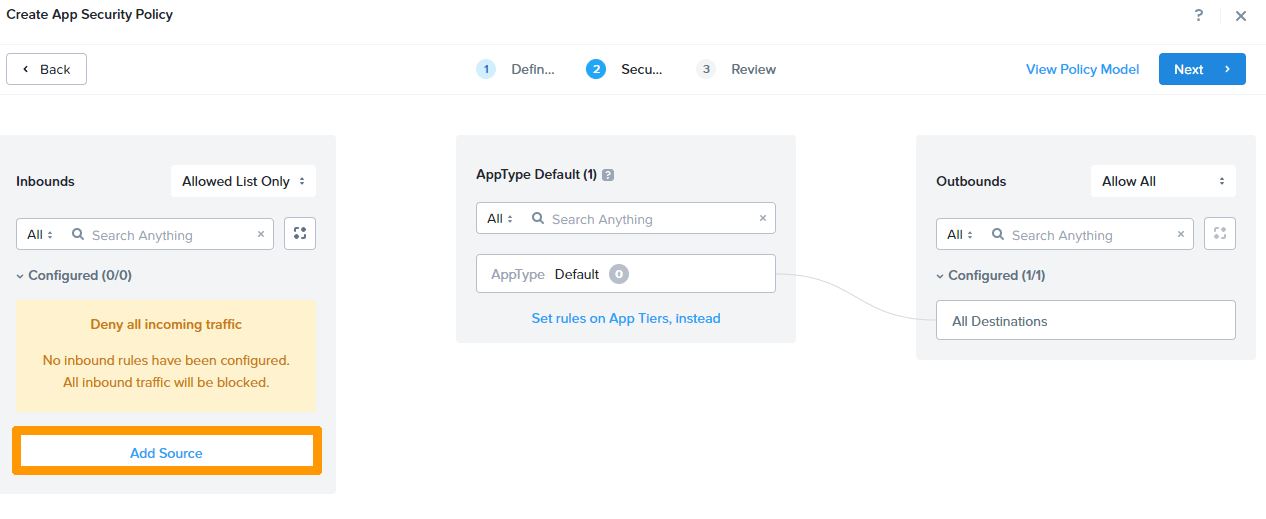
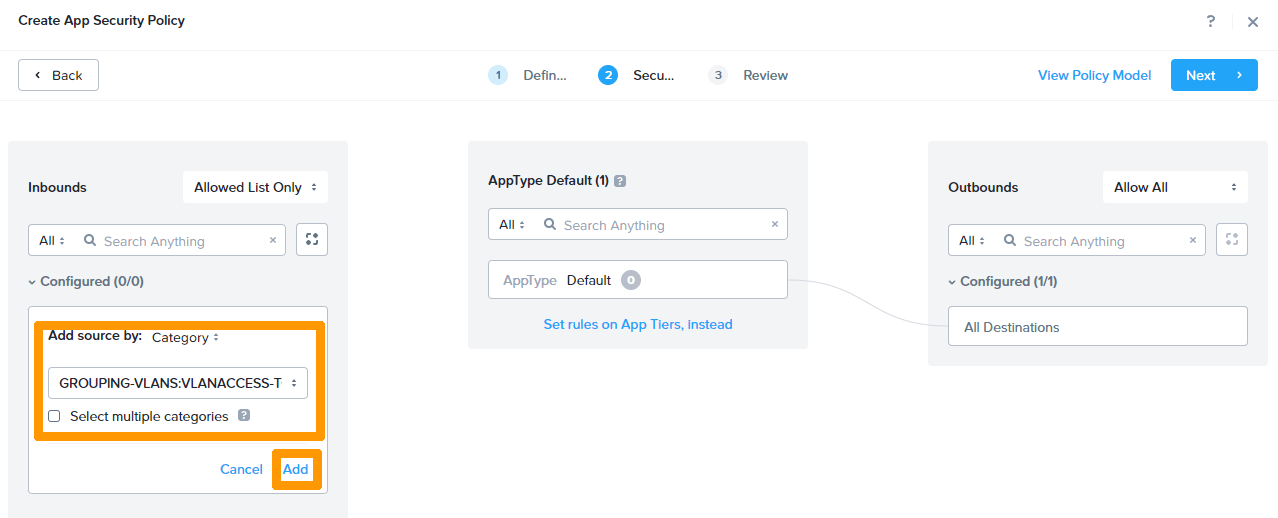
Choose the category for the VLAN and click Add.
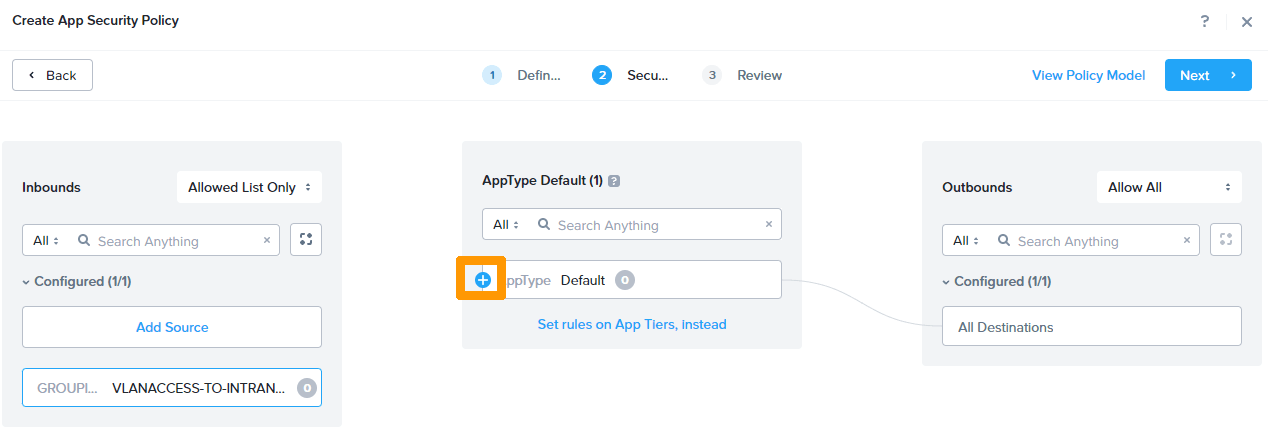
Click + to connect the application to the source.
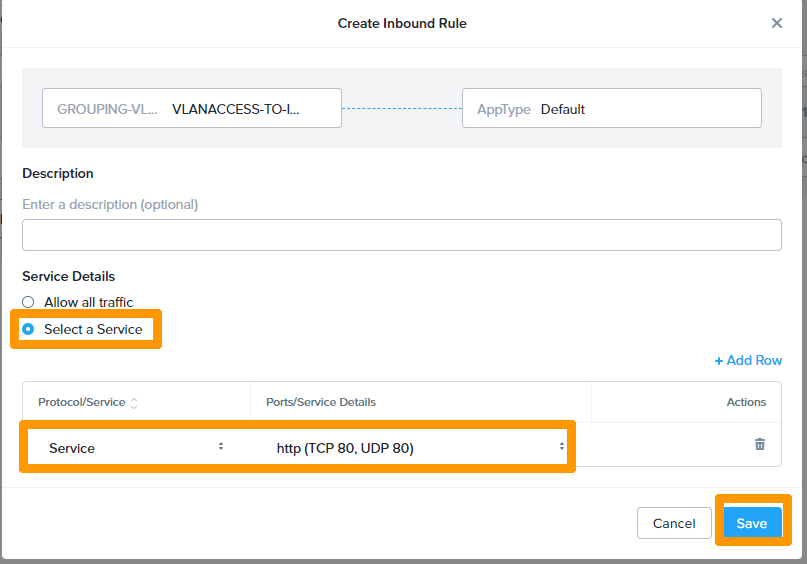
Select Select a Service, choose the category in Protocol/Service, search for the service name in Port/Service Details, and click Save.
Click Next.
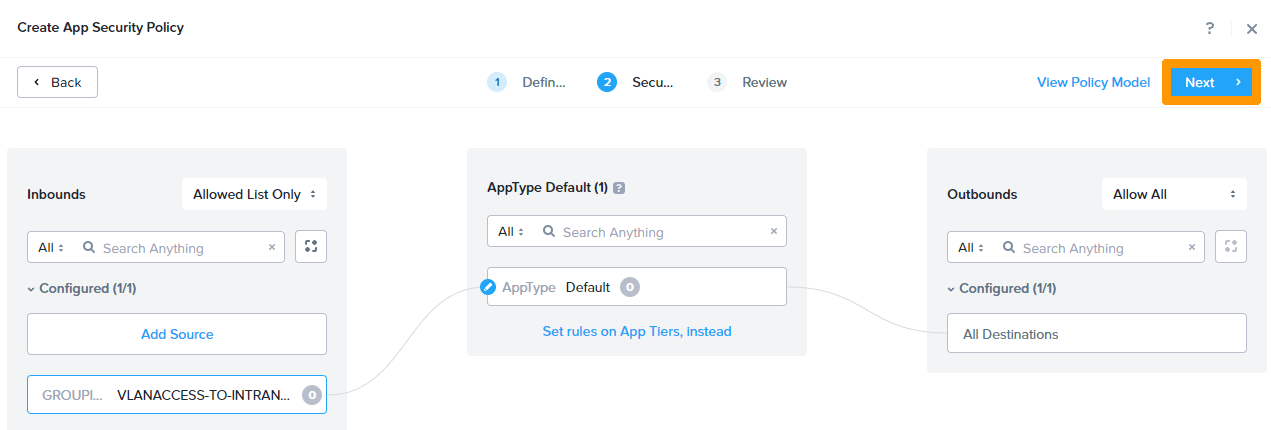
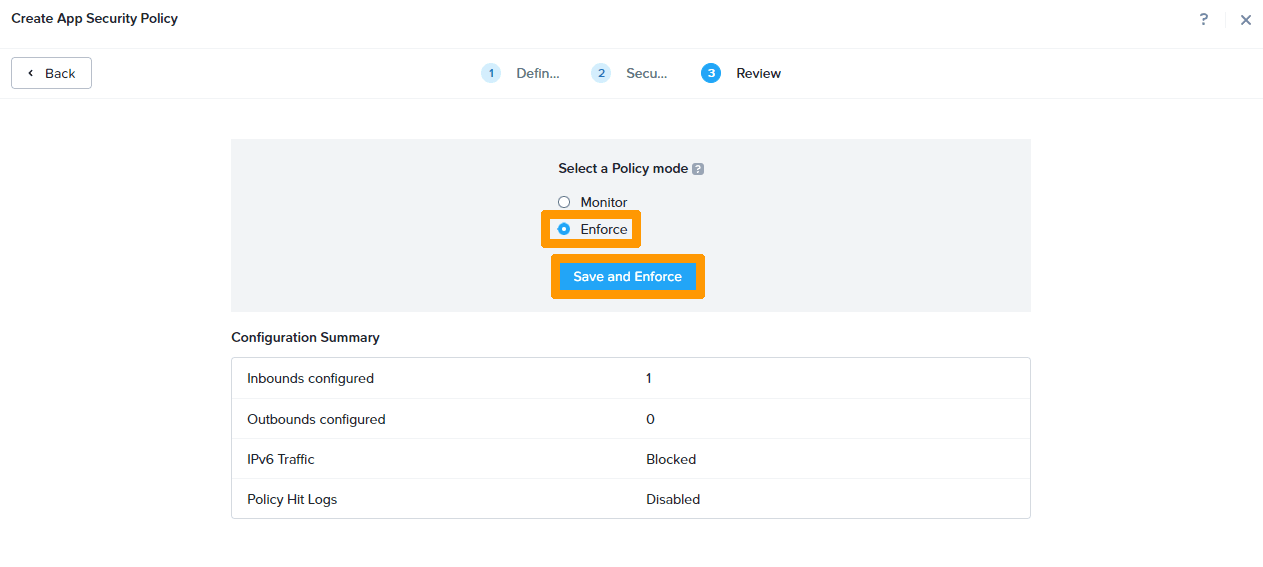
Select Enforce and click Save and Enforce to enable this rule.
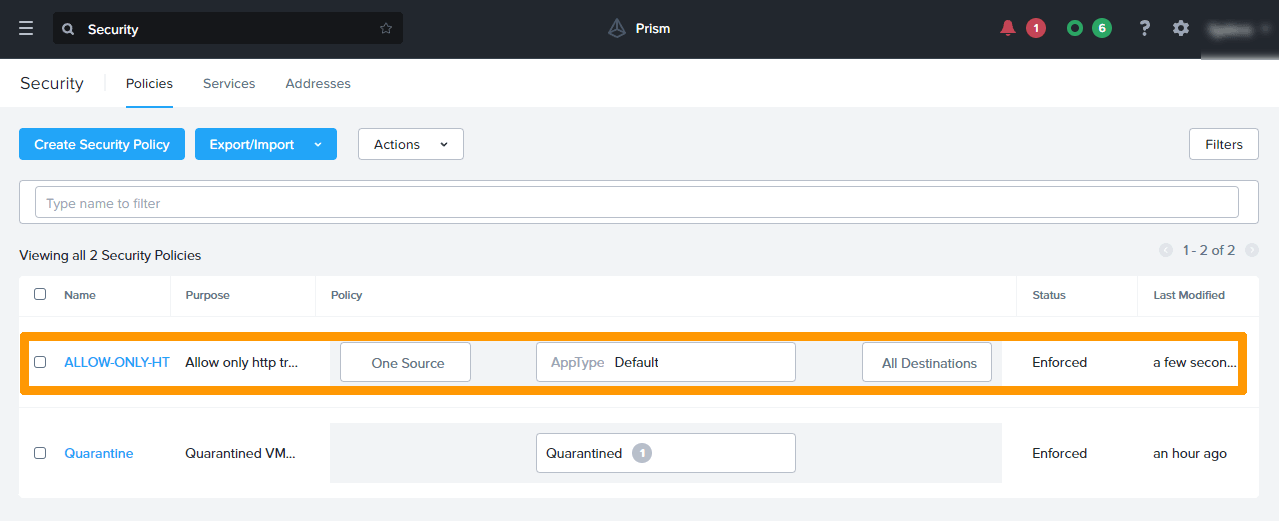
The rule you created is in the list of rules.
Go further
Some resources that may be helpful regarding Nutanix FLOW are:
- Nutanix Hyperconvergence
- Presentation of Nutanix FLOW
- Nutanix Flow security rules
- Categories in Nutanix
Browse all the Nutanix guides.
Browse the rest of the OVHcloud US documentation for guides on our other products and services.
Learn more about Nutanix on OVHcloud on the OVHcloud US website.