
Modify or resize an instance via the OVHcloud Control Panel
If your instance lacks resources due to increased activity or new needs, you can increase its resources in just a few clicks.
NOTE: Only upscaling is possible for classic models. In addition, this manipulation causes the instance to be shut down during the operation.
Requirements
- A Public Cloud instance in your OVHcloud account
OVHcloud Control Panel Access
- Direct link: Public Cloud Projects
- Navigation path:
Public Cloud> Select your project
Instructions
Click Instances in the left-hand menu.
Click the more options ⋮ button to the right of the instance and select Edit.
You can also access these functions by clicking the instance name and, on the next page, choosing Edit image → or Modify model →, as applicable.
On the next page, you can modify the image or the template.
Modifying the image
On the next page, scroll to the Image section and select your new operating system.
NOTE: B3/C3/R3 instances can use the Windows Operating system. To use this option with OpenStack CLI, you must select a flavor labeled with "win" (i.e., win-b3-8).
The Windows Server license billing is separate from the instance. On your invoice, you will therefore see two separate lines:
- A line for your instance consumption.
- A line for Windows license consumption calculated per vCPU.
Example: For a B3-16 instance with Windows Server (4 vCores and 16 GB of RAM):
- You will be billed based on the hourly cost of the B3-16 instance.
- Windows license will be billed hourly for 4 vCore.
For better readability, the total price per hour, including instance and license, is displayed directly on our Pricing page.
Once the selection has been made, click Modify image to confirm your choice.
Modifying the template
On the next page, scroll down to the Template section to select the model of your choice.
For classic models, you can switch to any flavor that has a similar or bigger disk. You can't switch to a model with a smaller disk.
Only Flexible instances can be upgraded and downgraded while maintaining a fixed disk size of 50GB.
If your disk is equal to or smaller than 50GB, you can switch to a Flexible instance.
NOTE: If you are editing a flex instance, you cannot revert to a classic instance via the OVHcloud Control Panel. For more information, see our How to revert a flex instance guide.
Once the selection has been made, click Modify template to confirm your choice.
Resizing a disk in Windows
When performing a resize for a Windows Instance, please note that the partition size is not automatically updated, so you will have to extend it using the Disk Manager:
-
Right-click on the
Startmenu and launch the disk manager by clicking onDisk Management: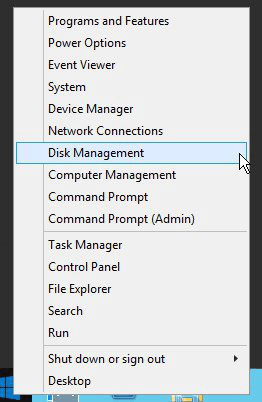
-
Right-click on the main partition, then click on
Extend Volume.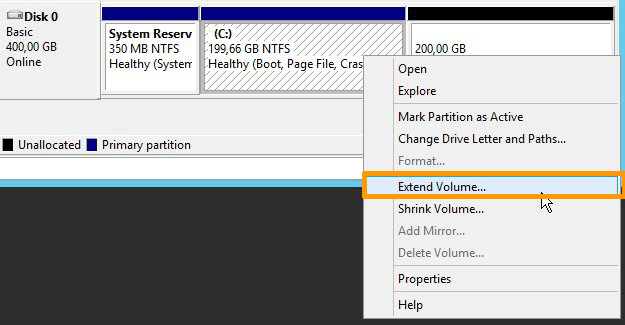
-
In the Extend Volume Wizard menu, click on
Nextto proceed. In the next tab, choose the disk resources to extend and click onNext.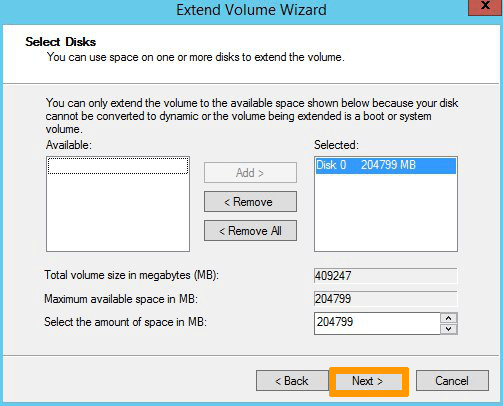
Confirm your choice on the next screen by clicking
Finish.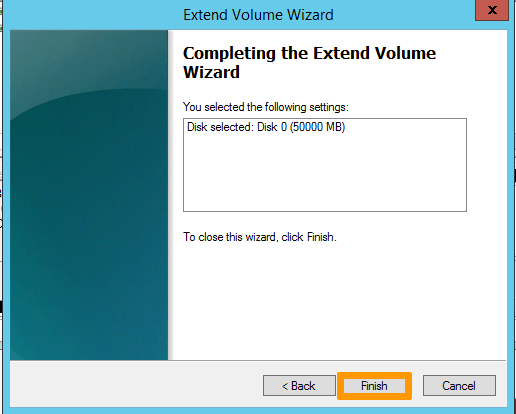
-
The new disk size will then be displayed in the disk manager.

Go further
Browse all the Compute guides.
Browse the rest of the OVHcloud US documentation for guides on our other products and services.
Learn more about Public Cloud Compute on the OVHcloud US website.